This is The Digital Story Podcast #697, July 23, 2019. Today's theme is "Protect Yourself from Smash and Grab." I'm Derrick Story.
Opening Monologue
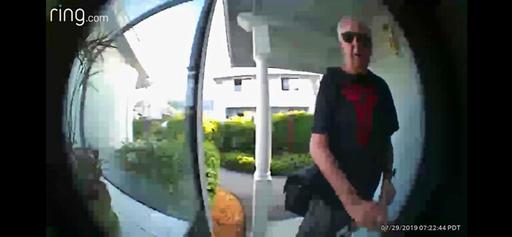
Photography gear can pack a lot of value into a compact, easy to carry bag. And for that reason, it's become a popular target for thieves looking to grab a big payday at your expense. Given that these rip-offs can happen in just the blink of an eye, what can you do to put the odds in your favor? I'll cover a few strategies in today's TDS Photography Podcast.
Protect Yourself from Smash and Grab

Here's a real life story that just happened:
"Hey Derrick. I'm going to buy the Ricoh GR III after all, but for a really crappy reason. On my way back from Bodega Bay I stopped in SF for gas. There was a bar & grille across the way, so I parked and had dinner. In that time, someone smashed a window and reached into the SUV's trunk and grabbed two bags. Not even a "bad" neighborhood, judging by appearances. Near Moscone Center."
"So...gone are my camera gear, memory cards, and laptop. As the great philosopher Mark Knopfler said, Sometimes you're the windshield, sometimes you're the big. C'est la vie! So the good news is that everything was insured (scheduled personal property on my homeowners policy). Hence, a new GR III. And an Olympus too, of course. Hey, I'm going to remember a good week with you and everybody, and forget the ugly event at the end."
A while later, John sent me this email.
Around 20 years ago a photographer I know was walking on the shore near Otter Cliffs in Acadia Nat'l Park. "It was level ground," he told me. He stepped on a rock and because of the sand on the sole of his hiking boot, he slipped. His expensive Nikon zoom lens and body crashed on the rock. Destroyed. Two days later, he had a check from his homeowners insurance company for the full amount.
He told me, "Get insurance."
I did.
Just last year, I met a photographer who was on a workshop on the coast of Massachusetts. She and her friends went to a seafood restaurant for dinner. When they walked back to their car, they found a smashed window and probably $10k of gear gone. The parking lot attended said he didn't see anything. Sadly, the photographer I spoke to didn't have the gear insured. That is tragic!
Here's what I'd recommend to any of your listeners: call the insurance agency where you bought renters or homeowners insurance. I'm talking about the local agent (not the insurance company). Call the agency and say, I have some camera gear I want to insure. Can you give me a quote, please?
They'll ask for the value of your gear (add it up), and give you a quote.
I have $3,000 worth of gear, and the coverage costs me $68 per year. Now there's a nice surprise: for some reason, items covered on scheduled personal property do NOT have a deductible. Amazing, right? That's how my friend got full replacement value for his smashed Nikon body + lens.
Hey, insurance is a boring subject, yes, but let's face it, bad luck happens!
Here's what I did:
For my personal gear, I have $15,000 insured via a rider to my homeowner's insurance with USAA. I set it up via my account on their website. It took me about 30 minutes. The cost is $194 per year, or $16.16 per month. And just like John said, there's no deductible.
Best Ways to Protect Your Gear
- Insure It - Because despite our best precautions, bad things do happen. You can insure your gear for a reasonable amount. And at the end of the day, this is your best safety net.
- Keep It Out of Sight - SUVs in particular provide lots of visibility into the vehicle. Keep not only your valuables out of sight, but everything else as well. Don't provide even the slightest visual temptation to break into your car.
- Keep It with You - Nimble photographers definitely have an advantage in this area. But if you do go into a restaurant or convenience store for even a short while, take your bag with you.
- Prepare for Risky Situations - When we were photographing the French Quarter at dusk, we hired an off-duty officer to accompany us. And even then, we kept our gear to a minimum and out of sight as much as possible.
- Lock It Up at Home - Once you've returned home, secure your equipment in a locking cabinet or safe. This level of protection doesn't ensure its safety, but it will slow down intruders. And sometimes that's enough to deter them.
It's sobering to contemplate that we have to even consider such measures when exposing our cameras to the world. But the truth is, we may lose it all if we don't. Take the proper measures so you can continue to enjoy you artistic pursuits with all of the gear that you've worked so hard to acquire.
Major CASE Act Copyright Legislation Passed by Senate Judiciary Committee
You can read the entire article here. Here are some of my favorite passages:
The CASE Act, a major piece of legislation that would introduce a small claims court for copyright infringement cases, has officially been passed by Senate Judiciary Committee, clearing the way for a full vote on the Senate floor.
This is a major step forward for the copyright legislation, which was introduced by a bi-partisan group of senators from Louisiana, North Carolina, Illinois and Hawaii. As of now, defending your copyrights means taking your case to federal court--a complicated and expensive proposition. If passed, the CASE Act would remedy this by establishing a small claims tribunal within the U.S. Copyright Office, making it much easier and cheaper to defend your copyrights in court.
The unappealable court would be staffed by three full-time "Copyright Claims Officers" appointed by the Librarian of Congress, who would be allowed to assign damages of up to $15,000 per infringed work, and up to $30,000 total.
Passing out of committee is a big step for the CASE Act, but the fight to establish a small claims court in the US Copyright Office is far from over. The bill will now go to the Senate floor for a full vote, while the House version continues to move through the House of Representatives.
Do You Have a Film Camera that Needs a Good Home?
Over the last year, I've received donations from TDS members who have film cameras that need a good home. What I do is inspect the items, repair and clean as I can, then list them in TheFilmCameraShop where I can find a good home for them. If you're interested in donating, please use the Contact Form on TheNimblePhotographer site. And thanks for you consideration!
Updates and Such
Inner Circle Members: A big thanks to those who support our podcast and our efforts! I will announce the winner of the Smartphone Photo Challenge this week. Stay tuned.
B&H and Amazon tiles on www.thedigitalstory. If you click on them first, you're helping to support this podcast. And speaking of supporting this show, and big thanks to our Patreon Inner Circle members:
And finally, be sure to visit our friends at Red River Paper for all of your inkjet supply needs.
See you next week!
More Ways to Participate
Want to share photos and talk with other members in our virtual camera club? Check out our Flickr Public Group. And from those images, I choose the TDS Member Photo of the Day.
Podcast Sponsors
Red River Paper - Keep up with the world of inkjet printing, and win free paper, by liking Red River Paper on Facebook.
Portfoliobox - Your PortfolioBox site is the best way to show off your best images.
The Nimbleosity Report
Do you want to keep up with the best content from The Digital Story and The Nimble Photographer? Sign up for The Nimbleosity Report, and receive highlights twice-a-month in a single page newsletter. Be a part of our community!
Want to Comment on this Post?
You can share your thoughts at the TDS Facebook page, where I'll post this story for discussion.