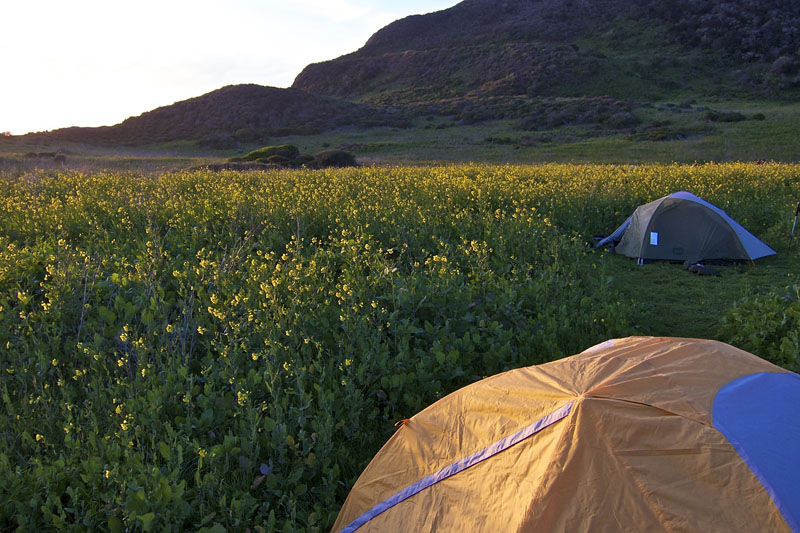
When you're working in the field for a day or a week, having dependable shelter improves the experience. Photographers need a place to relax for short breaks, work on images, store gear out of the elements, and if necessary, sleep. I've been testing the REI Half Dome 2 tent ($179), and it has become an essential part of my outdoor gear.

Photos by Derrick Story. Click on image to enlarge.
This is a tent that has stirred lots of discussion. It earned a Backpacker 2010 Editor's Choice Award for great value, yet many readers on REI's own site panned its construction for condensation, difficulty to set up, or for just not liking the new design in general -- none of which ever crossed my mind when using it in the field.
I can set up the Half Dome 2 in just a couple minutes. I think the design is terrific for creating shelter in a hurry. I use the tent in two modes: with and without rain cover. When the weather is nice, I prefer without rain cover and let the mesh separate me from the insects. When it's time to add the cover, open the top vents, then pull the rain cover sides out and stake them. By doing so, you increase ventilation, and create two additional storage spaces outside the main cabin of the tent, but still under the rain cover. If rain is in the forcast, you may want to close the top vents.

I also bring a half dozen clothes pins and a few colorful bandanas. I pin a bandana to each tie line on the side of the tent so other campers don't accidentally trip over it. The "patio" created by this configuration is great for keeping your boots out of the elements, yet not having to store them in the main cabin. The Half Done 2 has doors on both sides of the tent, so you can have a "back patio" and still keep the entrance clear.
The floor dimensions in the main cabin are 88" x 52" and very roomy for one, but a little tight for two guys. Since the tent weighs-in at 5 pounds, I usually prefer to carry it just for me, even on backpacking trips. This means I have plenty of room for my long sleeping bag, my pack, and various pieces of gear. There are also four interior side pockets for small items, and two top loft compartments that I use for LED lanterns. This makes it easy to continue working long after the sun goes down.
If you're looking for an affordable, relatively light, practical shelter for outdoor work, I would put the REI Half Dome 2 tent on my short list of considerations.
Previously in Outdoor Gear for Photographers
String Monopods
"The Great Outdoors" - Digital Photography Podcast 218
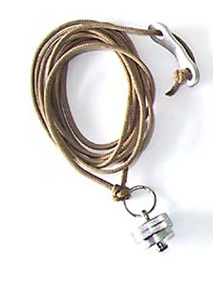
Portable Camera Stability
Sunset Portraits
New Series on Outdoor Gear for Photographers
 Follow me on Twitter
-