Recently in Photography

  Page 39 of 385 in Photography  

This is The Digital Story Podcast #741, June 2, 2020. Today's theme is "How to Interview and Record from Remote Locations." I'm Derrick Story.

Opening Monologue

I've talked a lot about preserving family memories from the past, but how about capturing what's going on right now? We may be physically separated from those we care about, but that doesn't mean that we can't capture their thoughts and feelings with video and sound. You can do it affordably and with excellent quality. And on today's TDS podcast, I'll show you how.

How to Interview and Record from Remote Locations

Some of the most important video that I have is of my late father talking about his life experiences. About a decade ago, I sat him down in front of a video camera and interviewed him. We were lucky. We were within driving distance of one another, so this was physically possible. And what he had to say was fascinating.

boys-online-1024.jpeg

Right now, our friends and family are experiencing things that future generations may appreciate. Imagine being able to hear what your Great Grandfather was thinking in the middle of the Great Depression? That wasn't possible then, but we can capture how others feel right now in the middle of this pandemic and social unrest. And we can do so remotely.

This podcast builds upon ideas and techniques that I've discussed in Digitizing Family Memories and in Call Recorder y Ecamm Software. You can record multitrack, picture in picture, or split screen video with audio. Then you can fine tune the content using Ecamm Movie Tools afterward.

If you want to see what this looks like, here's a picture-in-picture family discussion during shelter in place.

Basic Steps for Setting Up a Remote Interview

  • Make Sure Both Sides Can Videoconference
  • - In this workflow, both sides will need to be able to connect to Skype and communicate using audio and video.

  • Set Up Call Recorder Software on Your Computer - You can purchase the entire toolbox for $39, then install it on your computer and test it using Skype.
  • Keep the First Interview Relatively Short - Let the interviewee know ahead of time that you would like 2-3 interview sessions. Use the first session not only for content, but to evaluate the quality of the audio and video. Don't cover the most important topics in the first online meeting.
  • Keep the Limelight on the Person Being Interviewed
  • - Keep your interviewee front and center. You can be the embedded picture, or if you wish, side by side, but don't overshadow the person who is the star of the show.

  • Don't Be Afraid to Edit - There will be plenty of outtakes and dead air. Don't be afraid to trim as needed. Most of this will happen at the beginning of recording and at the end.

As I said earlier, it is important to preserve family memories from years ago. But I think it's also imperative that we hear from those we care about right now, and make that content available to future generations.

The Essential Steps to Impressive Video Conferencing

If you want to learn more about looking and sounding great for your next online interaction, then I think you'll very much enjoy my latest online workshop, The Essential Steps to Impressive Video Conferencing.

This 1-hour deep dive focuses on the 3 major areas of successful online interaction: Audio, Video, and Environment. During the course, I walk you through a variety of techniques that range from simple using gear that you already have, to improving your chops through a few inexpensive purchases.

The course is currently available for free to our Inner Circle Members on Patreon. Members, just go to our Patreon site, and all the information will be there. If you're not already an Inner Circle Member, you can join us for $5 a month.

The course is also available on our Nimble Photographer Workshop Page for $14.95.

I have tons of great tips and techniques waiting for you there. If you want to get serious about how you come across during online meetings, classes, interviews, and family interactions, then you definitely will want to watch this course.

Buy 3 M.Zuiko Lenses, Get an OM-D Body Free

This is a wild offer. Purchase these three lenses: 7-14mm f/2.8 PRO, 40-150mm f/2.8 PRO, and the 300mm f/4 PRO, and choose a Pro body: E-M1X, E-M1 Mark II, or E-M1 Mark III. You'll spend about $5,800 for the entire kit, but the savings range between $1,700 and $3,000 depending on which camera you choose.

You can learn more by visiting getolympus.com/freeomd. Offer valid June 1, 2020 through July 5, 2020. Available in the United States only. Customer must purchase all three lenses and one of the three OM-D bodies listed above at the same time in order to be eligible for the free camera body. All products must be purchased at full retail price.

I clicked on the Buy Now link, and it just took me over to a page to buy the camera, not the kit. So I would wait a day or so to see if they get this ironed out.

Digitizing Family Memories Course Now Available Online

Each of the four classes will outline a specific set of steps for you to accomplish. By the end of the course, you will have an organized digital archive of your most valuable family images.

You can sign up for the course by visiting the Workshops page on The Nimble Photographer. The course fee is a reasonable $39 (on sale right now). It includes the 4 class videos, class notes, and access to the class forums that are a part of each movie.

Updates and Such

Inner Circle Members: A big thanks to those who support our podcast and our efforts!

Due to the coronavirus pandemic, we've had to postpone our July photography workshop at Lassen Volcanic Park. We so still have on the schedule, however, our Eastern Sierra event in October.

How to Watch Photos for macOS Catalina and iPadOS - Learn everything you need to know about Photos for the Mac and iPad by checking out my latest course on LinkedIn Learning and on lynda.com. This course is perfect for Mac and iPad based photographers who shoot with iPhone, Mirrorless, and DSLR cameras. It covers both photography and movies. And if I say so myself, it's a lot of fun.

B&H and Amazon tiles on www.thedigitalstory. If you click on them first, you're helping to support this podcast. (The Digital Story is supported by its audience. When you purchase through links on our site, we may earn an affiliate commission.) And speaking of supporting this show, and big thanks to our Patreon Inner Circle members:

Affiliate Links - The links to some products in this podcast contain an affiliate code that credits The Digital Story for any purchases made from B&H Photo and Amazon via that click-through. Depending on the purchase, we may receive some financial compensation.

And finally, be sure to visit our friends at Red River Paper for all of your inkjet supply needs.

See you next week!

More Ways to Participate

Want to share photos and talk with other members in our virtual camera club? Check out our Flickr Public Group. And from those images, I choose the TDS Member Photo of the Day.

Podcast Sponsors

Red River Paper - Keep up with the world of inkjet printing, and win free paper, by liking Red River Paper on Facebook.

The Nimbleosity Report

Do you want to keep up with the best content from The Digital Story and The Nimble Photographer? Sign up for The Nimbleosity Report, and receive highlights twice-a-month in a single page newsletter. Be a part of our community!

Want to Comment on this Post?

You can share your thoughts at the TDS Facebook page, where I'll post this story for discussion.

It got to a point after 30 days of isolation, that I would pull out my camera bags just to revisit my gear. I'd dust off the lens, check the battery, then fire off a few frames in the direction of the cat.

Olympus-PEN-F-Indoors-1024.jpeg

I hadn't shot with the Olympus PEN-F for a while, and I wanted to put it to work. Not just for goofing around, but for something meaningful. I began to consider it for a task that I never really thought about before: video.

After all, it does have a mini-HDMI port, flip screen, and some decent controls. I did a little research on the camera for movie making and didn't find a lot. El Gato didn't even have Olympus cameras on their "approved" list for Cam Link. My curiosity was piqued.

One of the nice things about the PEN-F is its size. It would actually fit in the MeFOTO SideKick bracket that was designed for smartphones. This was a big win, because the SideKick is really easy to adjust and work with.

Also, the HDMI output is clean with the PEN-F. That means that I can send just the image it sees without any settings display or other distracting information. And the image isn't cropped either. I was able to stream 1080p at full frame. This is a really big deal, because now this camera can be used as a super high quality webcam.

Another win was the Olympus 17mm f/1.8 lens. It provides a "not too wide" 34mm field of view (so I don't have to clean every corner of the room behind me), but better yet, the snap-focus feature allows me to easily use it as a manual focus lens on the fly, which I much prefer for video work. Focus once and don't worry about it.

I reprogrammed exposure compensation for the ring around the shutter button, so it's really easy to add or subtract exposure but just reaching up and moving it. I'm fortunate because I already had an El Gato Cam Link interface before the pandemic hit. They are hard to find now, even the IOGEAR Interface is backordered.

My point is, however, that I never thought of the PEN-F as a video camera. For me, it was a wonderful still photography urban explorer companion. But I wasn't getting to shoot with it that way. And I probably won't yet for a while.

But now I'm using it practically every day for my indoor video work. And I love it all over again! It was the main camera for my upcoming release of The Essential Steps to Impressive Video Conferencing course, and continues to work daily at the studio for video conferencing.

Who knows what other things your favorite camera can do. I'm sure it has some hidden talents as well. Get it out of the bag, fire it up, and see what you discover.

There are product links in this article that contain affiliate tags. In some cases, depending on the product, The Digital Story may receive compensation if you purchase a product via one of those links. There is no additional cost to you.

You can share your thoughts at the TDS Facebook page, where I'll post this story for discussion.
This is The Digital Story Podcast #740, May 26, 2020. Today's theme is "5 Ways to Improve Your Videoconference Presence." I'm Derrick Story.
Opening Monologue

One way or another, you're going to find yourself sitting in front of a webcam. It could be for work, for family, for class or even for a job interview. But unlike a lot of other modern day situations we find ourselves in, no one has really told us how to do this. That is, until today. I hope you enjoy the show.

5 Ways to Improve Your Videoconference Presence

Needless to say, I've had some interesting online conversations over the last couple months. I have seen parts of people's houses that I really wasn't prepared for. And then, there's been the mix of interesting lighting and tin can audio.

videoconference-setup-1024.jpeg

So, I've decided to take the microphone by the horns and do two things for my contribution to the greater video conferencing world. First, I have some tips today that are easy to enable and that you can do right now. Then second, later this week, I'm releasing "The Essential Steps to Impressive Video Conferencing," a 1-hour movie that covers audio, video, and environment. I'll talk more about it later this show. But I'm going to mention now that it will be free to our Inner Circle Members who support this podcast on Patreon.

But for the moment, let's get to those 5 tips.

5 Tips

  • Get Thee to Ikea - Your conference call lighting should be diffused and from the front. A good rule of thumb is that the light shining on your face should be brighter than the background. Go to Ikea.com and search on diffused lighting. You have choices among a number of lamps that would make perfect light sources for your online persona. And if you have a north facing window, that will work as well. Just put it in front of you, not behind. And finally, think Daylight Balance for your bulbs. Tungsten bulbs will render you orange and fluorescent tubes will make you green. Whatever light source you ultimately settle on, try to get it as close to daylight balance as you can.
  • Darling You Look Marvelous! - Unfortunately, the built-in 720p webcam for many laptops and desktop isn't a flattering camera. Plus, you can't really adjust it. But, if you can get your hands on a a digital interface, such as Cam Link, then you can connect your wonderful mirrorless camera. The difference is striking. I'm using an Olympus PEN-F with 17mm f/1.8 lens. Oh, and don't forget to look into the lens when talking!
  • What the Hell Is that Behind You?! - We don't want to see your bed, your laundry, nor your aluminum recycling bin - too much information of the wrong kind. Just like in photography, the background is almost as important as the subject. Keep it clean and don't show us anything that we don't want to see.
  • Sound as Good as You Look - Audio can also be a challenge. Some built-in computer mics are quite decent, but others leave much to be desired. If you have a set of AirPods, those can improve your sound for both computer conferencing or while on the phone. For details on how to set them up, check out my article, How to Connect AirPods to Your Mac for Videoconferencing.
  • Bandwidth, Bandwidth, Bandwidth! - If you've been cheaping out on your Internet service, you an endangered of becoming the zebra at the back of the pack in the new world. Video conferencing relies on data packets flying back and forth in real time, and that requires at least 1.5 Mbps (Megabits per second for both directions (download and upload). You can check your bandwidth here.

You can watch a BTS video of me using my rig. I have a USB mic with the PEN-F. More to come on this topic in the next story.

The Essential Steps to Impressive Video Conferencing

If you want to learn more about looking and sounding great for your next online interaction, then I think you'll very much enjoy my latest online workshop, The Essential Steps to Impressive Video Conferencing.

This 1-hour deep dive focuses on the 3 major areas of successful online interaction: Audio, Video, and Environment. During the course, I walk you through a variety of techniques that range from simple using gear that you already have, to improving your chops through a few inexpensive purchases.

The course will be available free to our Inner Circle Members on Patreon on Sunday, May 31. Just go to our Patreon site, and all the information will be there. If you're not already an Inner Circle Member, you can join us for $5 a month.

I will also make the course available on June 2 at our Nimble Photographer Workshop Page for $14.95.

I have tons of great tips and techniques waiting for you there. If you want to get serious about how you come across during online meetings, classes, interviews, and family interactions, then you definitely will want to watch this course.

A Shout Out to Members Who Have Sent Film Cameras

It's been wonderful interacting with the recent contributors to TheFilmCameraShop. Here's a shout out to: Greg, Sergio, Bill, Tim, Nonnie, David, Paul, and Dave. All of you rock!

If you found a film camera that you're no longer using, our new Donation Kit makes it easy to pack and ship. Just visit the Contact Form on thenimblephotographer.com, click the box next to Donating a Film Camera, and let me know what you have. In your note, be sure to include your shipping address.

If it's a camera we can use for the shop, I'll send you a Donation Kit that includes a USPS Priority Mail shipping box and prepaid label. All you have to do is tape it up, insert the camera, and add the label. USPS will pick up your shipment from the front door of your house during their regular mail delivery. It's that simple!

Your donation help get analog gear in the hands of aspiring fine art photographers, and the proceeds help support this podcast.

Digitizing Family Memories Course Now Available Online

Each of the four classes will outline a specific set of steps for you to accomplish. By the end of the course, you will have an organized digital archive of your most valuable family images.

You can sign up for the course by visiting the Workshops page on The Nimble Photographer. The course fee is a reasonable $39 (on sale right now). It includes the 4 class videos, class notes, and access to the class forums that are a part of each movie.

Updates and Such

Inner Circle Members: A big thanks to those who support our podcast and our efforts!

Due to the coronavirus pandemic, we've had to postpone our July photography workshop at Lassen Volcanic Park. We so still have on the schedule, however, our Eastern Sierra event in October.

How to Watch Photos for macOS Catalina and iPadOS - Learn everything you need to know about Photos for the Mac and iPad by checking out my latest course on LinkedIn Learning and on lynda.com. This course is perfect for Mac and iPad based photographers who shoot with iPhone, Mirrorless, and DSLR cameras. It covers both photography and movies. And if I say so myself, it's a lot of fun.

B&H and Amazon tiles on www.thedigitalstory. If you click on them first, you're helping to support this podcast. (The Digital Story is supported by its audience. When you purchase through links on our site, we may earn an affiliate commission.) And speaking of supporting this show, and big thanks to our Patreon Inner Circle members:

Affiliate Links - The links to some products in this podcast contain an affiliate code that credits The Digital Story for any purchases made from B&H Photo and Amazon via that click-through. Depending on the purchase, we may receive some financial compensation.

And finally, be sure to visit our friends at Red River Paper for all of your inkjet supply needs.

See you next week!

More Ways to Participate

Want to share photos and talk with other members in our virtual camera club? Check out our Flickr Public Group. And from those images, I choose the TDS Member Photo of the Day.

Podcast Sponsors

Red River Paper - Keep up with the world of inkjet printing, and win free paper, by liking Red River Paper on Facebook.

The Nimbleosity Report

Do you want to keep up with the best content from The Digital Story and The Nimble Photographer? Sign up for The Nimbleosity Report, and receive highlights twice-a-month in a single page newsletter. Be a part of our community!

Want to Comment on this Post?

You can share your thoughts at the TDS Facebook page, where I'll post this story for discussion.

Apple's AirPods are handy for more than listening to your favorite podcast on your iPhone. They can be useful tools when connecting with others on your Mac via Zoom, Skype, and other video conferencing platforms.

airpods.jpg

When using your AirPods instead of the built-in mic on your computer, you can improve sound quality of your voice while at the same time providing more mobility for moving around. They can be particularly handy when you don't want to be constrained by headphone wires or don't want to mess with finding an audio interface for your computer to use a regular mic.

If this sounds appealing to you, here are some tips for configuring and getting the most from your AirPods.

Connecting to Your Mac

Start by putting the AirPods in your ears, then going to System Preferences > Bluetooth on your Mac. If you haven't done so already, check the box "Show Bluetooth in the menu bar." This will make things easier in everyday use.

Now click on the Bluetooth icon in the menu bar and tap on Connect for the AirPods. Your Mac should respond fairly quickly with the pairing. If there is a hangup, I would recommend going to the device that you last used the AirPods with, most likely your phone, and disconnecting from it. Then return to your Mac, and the pairing should go smoothly.

connect-airpods.jpeg Connecting AirPods to your Mac.

Once the pairing has been made, tap on the Option button and refer to the illustration below. Then click Done.

configure-airpods.jpeg Configure your AirPods like this.

You can test your configuration using a simple app such as Voice Memos that's included with your Mac. Then, before you use your AirPods on your next video conference call, be sure to check the settings for that platform to make sure they are the audio device being used. For example, here are the settings for Skype.

check-your-setting.jpg Checking the settings on Skype (or whatever platform that you are using).

Doubling Your Performance

One of the few downsides to using AirPods for video conferencing is their battery life. If you're on a particularly long call, you may hear the familiar battery warning beep. You can check the battery level by clicking on the Bluetooth icon in the menu bar.

But keep in mind that you only really need one AirPod at a time. So I recommend starting with one, using it for a while, then putting the other one in your other ear, remove the first AirPod and return it to the case for charging.

You can do this in realtime during the call without ever missing a beat. And unless you're working a telethon, you should have plenty of juice to complete the meeting, even a long one.

Once you're finished with the session, I would go back to the Bluetooth icon and Disconnect your AirPods from your Mac. This leaves them ready to connect to another device.

disconnect-airpods.jpeg Disconnecting your AirPods.

Final Thoughts

Wireless Bluetooth earbuds are incredibly handy devices for remote work and connecting with others online. They bypass the need for a separate audio interface, they are portable, and in most cases, they sound better than the built-in mic on you Mac.

Pair them up and take them for an online spin. I think you'll like what you hear.

There are product links in this article that contain affiliate tags. In some cases, depending on the product, The Digital Story may receive compensation if you purchase a product via one of those links. There is no additional cost to you.

You can share your thoughts at the TDS Facebook page, where I'll post this story for discussion.

This is The Digital Story Podcast #739, May 19, 2020. Today's theme is "New Capture One Pro, and More!." I'm Derrick Story.
Opening Monologue

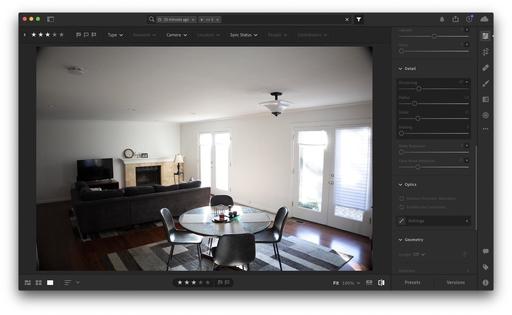
Capture One Pro continues to roll with its latest release that features new tools, RAW support (including E-M1 Mark III), lens profiles, and a discounted version for Nikon users. Plus, here's a way to put your skills to use to help small businesses in your community. All of this, and more, on today's TDS Photography Podcast.

New Capture One Pro 20.1

So much to cover with this pt.1 release of Capture One Pro 20. First of all, it's free for current licensed users of 20. I'll start with the new features, then get into RAW support, and wrap up with the new Nikon version of the app.

C1P20-BeforeAfter-Master.jpg

New Features!

  • Heal and Clone
  • Before/After feature - Two styles to choose from.
  • New activation and onboarding flow
  • Nikon profiles - The profiles available in Nikon Picture Controls are now replicated within Capture One for selected camera models. These profiles are available from the ICC Profile menu within Base Characteristics. They provide the same tone curve and color corrections known from the built-in Nikon JPG files as a starting point for your raw file. (compatible with RAW files from: D6, D5, D850, D810/D810A, D800, D780, D750, D610, Z7, Z6, D500, D7500, D5600, D5500, D3500, D3400, D3300, Z50).

New RAW Support

Canon 250D
Canon PowerShot G5 X Mark II
Canon PowerShot G7 X Mark III
Nikon P950
Leica M10 Monochrome
Olympus E-M1 Mark III
Phase One iXH-150
Zeiss ZX (which isn't even out yet, but has a B&H catalog page)

New Nikon Version

Get all the editing tools to you need to make your Nikon images look their best. And for selected camera models, apply built-in Nikon profiles that match the colors in your camera.

More than 75 Nikon cameras supported.

You can get Express for $99 a year via subscription or for $129 for perpetual license (compared to $278 for the Pro version that supports all cameras.) There are a few features omitted from Express, such as layers.

Improved Lightroom importer

New functionality in the Lightroom importer opens up for a better transition experience. It is now clearer what will happen and what you can expect when importing your Lightroom catalog into Capture One.

It is now possible to import offline images (Smart Previews in Lightroom) and have them automatically sync up once the original files become online again, for example when an external drive containing these images is reconnected. Files that failed to import will be compiled in a list to handle after the import is complete. This list will include files from unsupported cameras or file formats that are not supported in Capture One.

Learn Capture One Pro 20 in Just 2 Hours

You can master Capture One Pro 20 with my latest online class, Capture One Pro 20 Essential Training on LinkedIn Learning, or, if you're a lynda.com subscriber, you can watch it there as well.

Help Your Local Businesses with Photography and Social

Over the last two months, many shops and restaurants have been adapting to changes resulting from the pandemic. Part of the challenge, at least in my area, has been letting potential customers know they are open and how they are operating. I think this is something we can help with.

I was thinking that photographers and storytellers could serve as "ant scouts" to find these local establishments, photograph them, then share their stories on social media. By using the hashtag #open4pickup - people who follow us, or search via the hashtag could see the faces and places of these businesses who are adapting to these crazy circumstances.

We could also offer ideas to help keep everyone safe in the process, such as ordering ahead of time and paying with a credit card (including tip), wearing a face covering when picking up your purchase (even if you're staying in the car) and washing your hands throughly once your return home.

My personal plan is to research and visit a new local establishment once a week. I'll ask them if it's OK to take the picture and share it online. And I'm recording geotags at the same time using either my iPhone or my Fujifilm X100V, which also can record location. That way people can easily find the business when they see your post.

As I small business owner myself, I'm really pulling for the other shops and restaurants in my hometown. I'm hoping you will consider this idea as well - #open4pickup.

The New Donation Kit for Carefree Shipping of Found Film Cameras

We have more time around the house than ever. And you finally dove into that bedroom closet that's been begging for some organization.

If you found a film camera that you're no longer using, our new Donation Kit makes it easy to pack and ship. Just visit the Contact Form on thenimblephotographer.com, click the box next to Donating a Film Camera, and let me know what you have. In your note, be sure to include your shipping address.

If it's a camera we can use for the shop, I'll send you a Donation Kit that includes a USPS Priority Mail shipping box and prepaid label. All you have to do is tape it up, insert the camera, and add the label. USPS will pick up your shipment from the front door of your house during their regular mail delivery. It's that simple!

Your donation help get analog gear in the hands of aspiring fine art photographers, and the proceeds help support this podcast.

Digitizing Family Memories Course Now Available Online

Each of the four classes will outline a specific set of steps for you to accomplish. By the end of the course, you will have an organized digital archive of your most valuable family images.

You can sign up for the course by visiting the Workshops page on The Nimble Photographer. The course fee is a reasonable $39 (on sale right now). It includes the 4 class videos, class notes, and access to the class forums that are a part of each movie.

Updates and Such

Inner Circle Members: A big thanks to those who support our podcast and our efforts!

Due to the coronavirus pandemic, we've had to postpone our July photography workshop at Lassen Volcanic Park. We so still have on the schedule, however, our Eastern Sierra event in October.

How to Watch Photos for macOS Catalina and iPadOS - Learn everything you need to know about Photos for the Mac and iPad by checking out my latest course on LinkedIn Learning and on lynda.com. This course is perfect for Mac and iPad based photographers who shoot with iPhone, Mirrorless, and DSLR cameras. It covers both photography and movies. And if I say so myself, it's a lot of fun.

B&H and Amazon tiles on www.thedigitalstory. If you click on them first, you're helping to support this podcast. (The Digital Story is supported by its audience. When you purchase through links on our site, we may earn an affiliate commission.) And speaking of supporting this show, and big thanks to our Patreon Inner Circle members:

Affiliate Links - The links to some products in this podcast contain an affiliate code that credits The Digital Story for any purchases made from B&H Photo and Amazon via that click-through. Depending on the purchase, we may receive some financial compensation.

And finally, be sure to visit our friends at Red River Paper for all of your inkjet supply needs.

See you next week!

More Ways to Participate

Want to share photos and talk with other members in our virtual camera club? Check out our Flickr Public Group. And from those images, I choose the TDS Member Photo of the Day.

Podcast Sponsors

Red River Paper - Keep up with the world of inkjet printing, and win free paper, by liking Red River Paper on Facebook.

The Nimbleosity Report

Do you want to keep up with the best content from The Digital Story and The Nimble Photographer? Sign up for The Nimbleosity Report, and receive highlights twice-a-month in a single page newsletter. Be a part of our community!

Want to Comment on this Post?

You can share your thoughts at the TDS Facebook page, where I'll post this story for discussion.

Over the last two months, many shops and restaurants have been adapting to changes resulting from the pandemic. Part of the challenge, at least in my area, has been letting potential customers know they are open and how they are operating. I think this is something we can help with.

DSCF1596-Cibo-D-Story-1024.jpg Alanah was managing curbside pickup for CIBO in Santa Rosa, CA. They are serving their full menu daily. #open4pickup

I was thinking that photographers and storytellers could serve as "ant scouts" to find these local establishments, photograph them, then share their stories on social media. By using the hashtag #open4pickup - people who follow us, or search via the hashtag could see the faces and places of these businesses who are adapting to these crazy circumstances.

We could also offer ideas to help keep everyone safe in the process, such as ordering ahead of time and paying with a credit card (including tip), wearing a face covering when picking up your purchase (even if you're staying in the car) and washing your hands throughly once your return home.

My personal plan is to research and visit a new local establishment once a week. I'll ask them if it's OK to take the picture and share it online. And I'm recording geotags at the same time using either my iPhone or my Fujifilm X100V, which also can record location. That way people can easily find the business when they see your post.

As I small business owner myself, I'm really pulling for the other shops and restaurants in my hometown. I'm hoping you will consider this idea as well - #open4pickup.

You can share your thoughts at the TDS Facebook page, where I'll post this story for discussion.

This is The Digital Story Podcast #738, May 12, 2020. Today's theme is "Thriving in the New Normal." I'm Derrick Story.
Opening Monologue

A big part of our well being is the health of our artistic pursuits. Beyond finding ways to put food on the table and ensuring shelter overhead, the question lingers, "There's got to be more to life than this." Those of us who love photography know that it's changing. Big conferences and classes are going away. Physical workshops are being challenged. And even flying to a pretty place is looking pretty sketch these days. Welcome to the new normal. And here's how we're going to make it work to our advantage.

Thriving in the New Normal

Communication is a key to adjusting to changes in a relationship. If your wife has to leave for a long business trip, then figuring out how to maintain the connection should be part of the plan. It's easy when you can see each other daily. Distance makes things more difficult. Figure out a plan.

the-new-normal-1024.jpg

Many of us are feeling a distance between our art and our daily lives. In my case, I'm not spending time with other photographers, I'm not traveling, and I'm not being hired to take pictures. Your particular variables might be a bit different, but I bet you have many of the same feelings.

So, what do we do? Here are five ideas that I think will help us move forward the new normal as photographers.

Five Possible Ways to Thrive in Pandemic Life

  • More Self Assignments - Just because we don't have the physical freedom that we once enjoyed, that doesn't mean the we're confined creatively. We can explore how to stir those embers by creating self-assignments and seeing them through. If we're successful, we'll enjoy both the fruits of our efforts and a level of self-satisfaction for the accomplishment.
  • Branch Out into Different Types of Photography - When I was working with Skylum, over 80 percent of our customers focused on landscape photography. But there are so many other disciplines within the craft. For example: night photography, close up photography, microscope photography, still lives, and on and on.
  • Improve Post Processing Skills - This is an area that practically every photography can get better doing.
  • Explore Movie Making - Our cameras are fantastic video recording devices. But many photographers don't really explore their movie making capabilities.
  • Join Online Courses - If your embrace a new endeavor, then you probably want to learn more about the tools required to do it. For example, learning movie making might involve finally learning Final Cut X as well. Online courses are perfect for software attaining software knowledge.

I think the earlier that we accept that things have changed, and in some ways forever, the sooner we can start to move into the new spaces that will satisfy us creativity. And to be honest, I don't have time to sit around and hope that the things I miss return. Do you?

And when we can have some of those things back, whenever that is. I will be happy. But I will also bring a new set of skills to the table to augment the things I loved before. Who knows, I may even find a new favorite thing that I never acknowledged before.

This is truly a chance to grow. I say, let's start right now.

The New Donation Kit for Carefree Shipping of Found Film Cameras

We have more time around the house than ever. And you finally dove into that bedroom closet that's been begging for some organization.

If you found a film camera that you're no longer using, our new Donation Kit makes it easy to pack and ship. Just visit the Contact Form on thenimblephotographer.com, click the box next to Donating a Film Camera, and let me know what you have. In your note, be sure to include your shipping address.

If it's a camera we can use for the shop, I'll send you a Donation Kit that includes a USPS Priority Mail shipping box and prepaid label. All you have to do is tape it up, insert the camera, and add the label. USPS will pick up your shipment from the front door of your house during their regular mail delivery. It's that simple!

Your donation help get analog gear in the hands of aspiring fine art photographers, and the proceeds help support this podcast.

Adobe's 12th Annual 99U Creative Conference will be free and virtual this year

You can read the story on DP Review..

Adobe has announced its 12th Annual 99U Creative Conference, which is usually a paid, in-person event, will be hosted on Adobe Live for free as a virtual event this year amidst the ongoing COVID-19 pandemic.

Tickets for the annual event normally cost around $1,000, so being able to take in the event for free, in the comfort of your own home, is quite the discount. This year's event will take place on Wednesday June 17 and will feature a mix of keynotes, creative workshops and masterclasses throughout the day. The presentations will be available stream via Adobe Live or available on-demand shortly after completion of each event.

Digitizing Family Memories Course Now Available Online

Each of the four classes will outline a specific set of steps for you to accomplish. By the end of the course, you will have an organized digital archive of your most valuable family images.

You can sign up for the course by visiting the Workshops page on The Nimble Photographer. The course fee is a reasonable $45. It includes the 4 class videos, class notes, and access to the class forums that are a part of each movie.

Updates and Such

Inner Circle Members: A big thanks to those who support our podcast and our efforts!

How to Watch Photos for macOS Catalina and iPadOS - Learn everything you need to know about Photos for the Mac and iPad by checking out my latest course on LinkedIn Learning and on lynda.com. This course is perfect for Mac and iPad based photographers who shoot with iPhone, Mirrorless, and DSLR cameras. It covers both photography and movies. And if I say so myself, it's a lot of fun.

B&H and Amazon tiles on www.thedigitalstory. If you click on them first, you're helping to support this podcast. (The Digital Story is supported by its audience. When you purchase through links on our site, we may earn an affiliate commission.) And speaking of supporting this show, and big thanks to our Patreon Inner Circle members:

Affiliate Links - The links to some products in this podcast contain an affiliate code that credits The Digital Story for any purchases made from B&H Photo and Amazon via that click-through. Depending on the purchase, we may receive some financial compensation.

And finally, be sure to visit our friends at Red River Paper for all of your inkjet supply needs.

See you next week!

More Ways to Participate

Want to share photos and talk with other members in our virtual camera club? Check out our Flickr Public Group. And from those images, I choose the TDS Member Photo of the Day.

Podcast Sponsors

Red River Paper - Keep up with the world of inkjet printing, and win free paper, by liking Red River Paper on Facebook.

The Nimbleosity Report

Do you want to keep up with the best content from The Digital Story and The Nimble Photographer? Sign up for The Nimbleosity Report, and receive highlights twice-a-month in a single page newsletter. Be a part of our community!

Want to Comment on this Post?

You can share your thoughts at the TDS Facebook page, where I'll post this story for discussion.

In the latest movie from Digitizing Family Memories, I show viewers how to use their digital cameras to create high resolution files from slides and negatives.

DFM-Class-4-Digitizer-1024.jpg

Most hobbyist photographers have some sort of close-up lens, so that isn't a big challenge. The harder part, in my opinion, is the diffused light source. And I think the easiest way to go is with a LED edge light.

For my home setup, I'm using the FotodioX C-200RS FlapJack 7" LED Bi-Color Edge Light. It's easy to set up, has a wonderfully even light source, and I can even adjust the color temperature if necessary.

DFM-Class-4-Light.jpg

To help tame the light shining into the lens of the camera, I fashioned a slide holder out of black cardboard. I cut a square out of the center, placed the slide in the opening, and let the camera base the exposure solely on the illuminated film. Plus, it's easier on my eyes as well.

Slide-Mask-DFM-Class-4.jpg

The Flapjack has a built-in diffuser panel. So that eliminates a lot of the work. It also has a standard tripod socket, so you can mount it just about anywhere, for practically any configuration. And the results are terrific.

DIY-Scan-Digitizer-Scotland.jpg

Here's an un-retouched copy of a Kodachrome slide that I captured in Scotland in 1992. The LED light setup make the process easy. Just turn on the light, place the slide on the surface, and take the picture.

Not having to mess with electronic flash and cumbersome light boxes truly made the task at hand more enjoyable. If you're thinking about setting up your own digitizing station, I would consider a LED edge light for your illumination. It's a sweet way to go.

Digitizing Family Memories Online Course Now Available

Have you procrastinated long enough organizing that shoe box full of family snapshots, negatives, and slides? At first, the task of digitizing and cataloging all those analog shots can feel daunting. But I've designed an online course that will walk you step by step though a manageable process that is both efficient and fun.

And the best part is, you can start today! Digitizing Family Memories is available online now. It includes 4 30-minute instructional movies, class notes and schedule, and gives you access to a community of hobbyist photographers working on the same project.

Sign up today, and take control of those valuable memories.

There are product links in this article that contain affiliate tags. In some cases, depending on the product, The Digital Story may receive compensation if you purchase a product via one of those links. There is no additional cost to you.

You can share your thoughts at the TDS Facebook page, where I'll post this story for discussion.

This is The Digital Story Podcast #737, May 5, 2020. Today's theme is "Has ON1 Figured Out the Connected Experience?" I'm Derrick Story.

Opening Monologue

ON1 360 joins the ranks of Adobe and Apple for offering a connected desktop to mobile experience with tons of features and editing tools. On the surface, ON1 makes a very good argument. We'll dig a bit deeper on today's TDS podcast to determine if this is a service that you should seriously consider. I hope you enjoy the show.

Has On1 Figured Out the Connected Experience?

Starting this June, you can subscribe to a complete photo capture, management, editing, sharing system that works on macOS, Windows, iOS, and Android devices. It's called ON1 360, and there's much to unpack.

ON1-360.jpg

ON1 360 automatically keeps track of the photos you choose to access from any of your devices, including their metadata and where you want to store them. The desktop and mobile apps share the same processing engine, which enables non-destructive editing settings to remain in sync as well.

An Overview of the Features

  • All the Powerful Editing Features of Photo RAW - built-in effects, portrait retouching, and layers.
  • Choose Which Photos to Sync Between Devices - Somewhat similar to Lightroom Desktop where you can manage your Cloud storage needs by choosing which images are shared across devices. Regardless, your original files stay in their original locations.
  • Impressive Compression Option - store smaller files (4x smaller, high-quality) OR the full raw files and sync in multiple directions
  • One License for 5 Desktop and 5 Mobile Devices - This provides more flexibility than Adobe's plan that only allows for 2 desktop devices.
  • Flexible Pricing Plan You can buy a perpetual license for Photo RAW or rent it as a subscription option. The first offering lays out two plans, one for 20 GBs of Cloud storage, and the other for 1 TB of space. Pricing depends if you include renting the software or not.

ON1 pulls off this magic by creating a temporary version of the photo under-the-hood (similar to a compressed raw file) and storing in the Cloud. The photo maintains the tone and color of the original photo while using only about 25 percent of the Cloud storage space a typical raw photo uses. For those who demand the full raw file at all times and don't care about storage space, uploading and editing the raw photo is also an available option.

Your original photo files stay put, right where you keep them. Your original photos can live on any of your devices, including external hard drives and file servers. You can choose to upload copies of your original photos to ON1 360? as well, if you need to access the full, original file remotely.

How Much Does it Cost?

If you buy your own copy of Photo RAW for $50, then you can get the 200 GB plan for $60 a year, or 1 TB for $110 a year. Those plans include the mobile app. Preorder now, and you won't be billed again until July 2021. If you decide to rent Photo RAW, the 200 GB plan for $90 a year, or 1 TB for $180 a year.

If you decide to rent Photo RAW, the 200 GB plan for $90 a year, or 1 TB for $180 a year.

Who Is It For?

This could be appealing to photographers who don't have a Cloud-connected workflow and want one. Capture One Pro, Luminar, and DxO are great on the desktop, but they're not available on mobile devices. Also, artists who are not satisfied with their current situation, whether it be Creative Cloud or iCloud, may see ON1 as a better end-to-end solution.

The Bottom Line

If you're happy with your current workflow, I don't recommend the switch to ON1 360. But if you've wanted a connected photo experience and don't have one currently, I think it stacks up well against Creative Cloud and Photos for macOS.

The New Donation Kit for Carefree Shipping of Found Film Cameras

We have more time around the house than ever. And you finally dove into that bedroom closet that's been begging for some organization.

If you found a film camera that you're no longer using, our new Donation Kit makes it easy to pack and ship. Just visit the Contact Form on thenimblephotographer.com, click the box next to Donating a Film Camera, and let me know what you have. In your note, be sure to include your shipping address.

If it's a camera we can use for the shop, I'll send you a Donation Kit that includes a USPS Priority Mail shipping box and prepaid label. All you have to do is tape it up, insert the camera, and add the label. USPS will pick up your shipment from the front door of your house during their regular mail delivery. It's that simple!

Your donation help get analog gear in the hands of aspiring fine art photographers, and the proceeds help support this podcast.

New MacBook Pro 13" Looks Great for Photographers

Apple announced today their new 13" MacBook Pro, and it looks pretty darn good.

Highlights include: the Magic Keyboard with a redesigned scissor mechanism, a 13.3" Retina Display, immersive stereo speakers, and all-day battery life. The Touch Bar adapts to different apps to provide useful functions without having to navigate menus. It features a Retina-quality display and supports multi-touch input. The power button contains the Touch ID sensor, so you can quickly log into your MacBook Pro using your fingerprint. You can also use Touch ID to make purchases over the web, thanks to Apple Pay.

The model I like for $1,499 is powered by a 1.4 GHz 8th Gen Intel Core i5 Quad-Core processor that features a burst speed of up to 3.9 GHz, while 8GB of 2133 MHz LPDDR3 onboard RAM helps to ensure smooth multitasking and also allows the computer to quickly access frequently used files and programs. The system memory cannot be upgraded.

For long-term storage of your files, this MacBook Pro is equipped with a 512GB SSD. If you want to add external peripherals, 2 Thunderbolt 3 ports support bi-directional transfer speeds of up to 40 Gb/s, while also supporting 10 Gb/s USB 3.1 and device charging. Wi-Fi 5 (802.11ac) is built-in for wireless networking, and Bluetooth 5.0 technology will allow you to connect additional compatible peripherals. There is a FaceTime HD webcam.

You can preorder the 13" MacBook Pro today for $1,499.

Digitizing Family Memories Course Now Available Online

Each of the four classes in the course will outline a specific set of steps that you have one week to accomplish. Then, the next week, we build on that progress with new techniques and assignments. By the end of the four weeks, you will have an organized digital archive of your most valuable family images.

Patreon members can sign up for free on the Patreon site. I have a post there for you. All you have to do is comment that you want to join us. If you're not a Patreon member, you can sign up at the Inner Circle level for $5 a month and become instantly eligible for the course.

Non-Patreon members can also sign up for the course by visiting the Workshops page on The Nimble Photographer. The course fee is a reasonable $45.

Updates and Such

Inner Circle Members: A big thanks to those who support our podcast and our efforts!

How to Watch Photos for macOS Catalina and iPadOS - Learn everything you need to know about Photos for the Mac and iPad by checking out my latest course on LinkedIn Learning and on lynda.com. This course is perfect for Mac and iPad based photographers who shoot with iPhone, Mirrorless, and DSLR cameras. It covers both photography and movies. And if I say so myself, it's a lot of fun.

B&H and Amazon tiles on www.thedigitalstory. If you click on them first, you're helping to support this podcast. (The Digital Story is supported by its audience. When you purchase through links on our site, we may earn an affiliate commission.) And speaking of supporting this show, and big thanks to our Patreon Inner Circle members:

Affiliate Links - The links to some products in this podcast contain an affiliate code that credits The Digital Story for any purchases made from B&H Photo and Amazon via that click-through. Depending on the purchase, we may receive some financial compensation.

And finally, be sure to visit our friends at Red River Paper for all of your inkjet supply needs.

See you next week!

More Ways to Participate

Want to share photos and talk with other members in our virtual camera club? Check out our Flickr Public Group. And from those images, I choose the TDS Member Photo of the Day.

Podcast Sponsors

Red River Paper - Keep up with the world of inkjet printing, and win free paper, by liking Red River Paper on Facebook.

The Nimbleosity Report

Do you want to keep up with the best content from The Digital Story and The Nimble Photographer? Sign up for The Nimbleosity Report, and receive highlights twice-a-month in a single page newsletter. Be a part of our community!

Want to Comment on this Post?

You can share your thoughts at the TDS Facebook page, where I'll post this story for discussion.

External solid state drives were once relegated as travel companions. But now, thanks to their larger capacity and impressive speed, I find myself relying on them more for everyday work. Such has been the case with the Crucial 1TB X8 External USB 3.2 Gen 2 Type-C Solid-State Drive.

crucial-x8-1024.jpg

A recent example is how it's helped me with a Final Cut X project. I use the X8 during the production phase to house the library and assets for my Digitizing Family Memories video course.

The Crucial SSD relieves disk space from the iMac and is much faster than an external HDD (much faster!). I can blaze through the project with it, then copy the entire bundle to my RAID 1 afterward for archiving. I really noticed a positive difference during activities such as rendering the video out of Final Cut.

Plus, those who work with Final Cut know that it can be temperamental about hard drives used to store its assets. Of all my options, the Crucial X8 has been the most reliable as well. Like I said, these just aren't for travel anymore.

The Crucial X8 is a sleek, solid, handsome drive. It feels like a quality hardware device. It slips easily into my pocket or backpack for transport. And I don't have to baby it since there are no moving parts.

But its performance has been the star of the show. Who would have ever thought that with all the great movie-making hardware that I use, that a $165 pocket-sized SSD would steal the spotlight. And yet is has.

The Crucial 1TB X8 External Solid-State Drive is available now for $165. I highly recommend it.

There are product links in this article that contain affiliate tags. In some cases, depending on the product, The Digital Story may receive compensation if you purchase a product via one of those links. There is no additional cost to you.

You can share your thoughts at the TDS Facebook page, where I'll post this story for discussion.