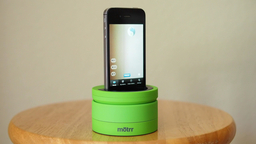
The potential for the Galileo robotic dock for iPhone is only limited by software developers' imaginations. Since Motrr released the SDK for the Galileo, six iOS apps tapping its capabilities have already appeared in the App Store, with another four in the works.
I'm currently using AirBeam - Live HD video surveillance and motion detection ($3.99) and DMD Panorama ($1.99) with my Kickstarter green Galileo. And I plan to test more in the near future.
Impressive 360 Degree Panoramas
With DMD Panorama, I simply inserted my iPhone 4S into the Galileo dock, launched the app, and tapped the Start button. Within a few seconds I had a precise, good looking panorama.
The only flaw in the final product was my fault, using auto exposure instead of locking the exposure down (this option is provided by the app). In the frame where DMD Panorama adjusted for the bright window light, there was some darkish spillover on to my feet in the next frame. You can see for yourself in this short video I made:
Overall, aside from my operator error, a very impressive result. I can't wait to test this device in the big city where I can take advantage of the interesting scenery all around me. The Galileo has a rechargeable battery inside, so I can use it just about anywhere. There's also mounting threads in the bottom of the unit, allowing me to attach it to any of my portable tripods.
Home Security with AirBeam
For my home security project, I inserted an older iPhone 3GS into Galileo and activated the camera function on the AirBeam app. Once enabled, I could monitor that location from anywhere that had Internet access.
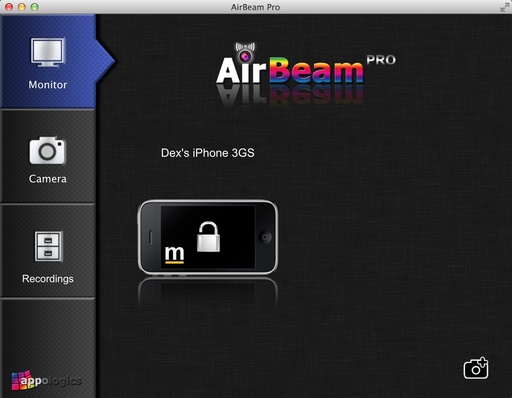
And because AirBeam is Galileo compatible, that remote monitoring includes 360 degree viewing options. Plus I can angle the camera up or down, all using the controls on my iPhone, iPad, or Mac. AirBeam transmits audio too. So even though I may be miles from my home, I can hear, as well as see, what's going on there.
For this use, I plugged the Galileo into a USB charger to keep both its battery and the cell inside the iPhone charged. This provides for unlimited, 24-hour viewing.
AirBeam has plenty of additional functionality too. I can turn on motion detection or video-record any activity the camera can see. It's an impressive demo for friends to pull up a remote location on my iPhone and give them a live, virtual tour.
Bottom Line
Galileo goes on sale this coming October for $149. I think it would be an amazing gift for an iPhone-geek friend. There are a few limitations, however. I have the dock version that works with the iPhone 3GS, 4, and 4S. At the moment, there isn't a Lightning connector version. Motrr did create a Bluetooth Galileo that works with all modern iPhones, including the iPhone 5. But I haven't tested it. So you may want to do some research before investing.
Even after I upgrade to the iPhone 5S, I'm keeping the 4S for a variety of tasks, including remote photography and panoramas with the Galileo. I'm really impressed with this device. It opens up a whole new world of iPhone imaging.
iPad for Digital Photographers
This is the kind of stuff I write about in iPad for Digital Photographers-- now available in print, Kindle, and iBooks format.
Want to Comment on this Post?
You can share your thoughts at the TDS Facebook page, where I'll post this story for discussion.