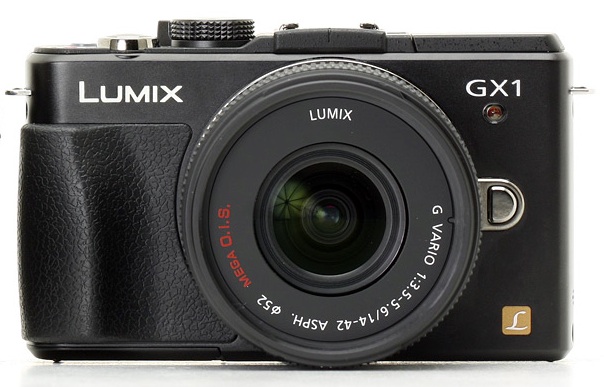
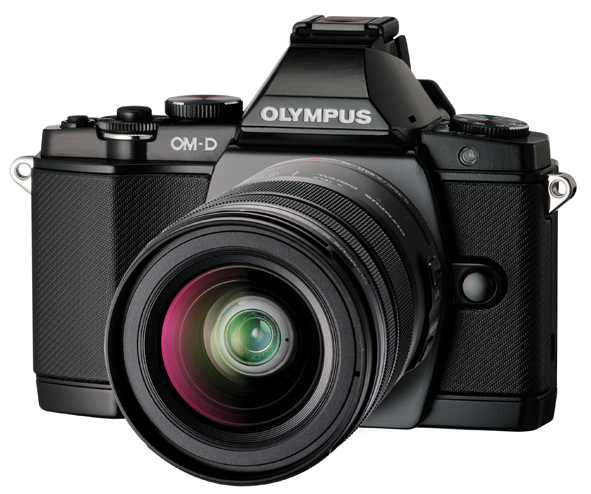
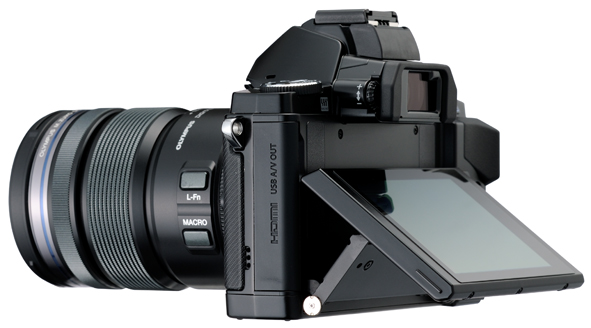
Recently in Photography

  Page 241 of 383 in Photography  

iPhone 4S Camera Pros and Cons

Apple's latest iPhone comes equipped with an overhauled camera that sports many useful features. Even though I give it an overall "thumbs up," I do have a few nits with this pocketable point and shoot. Here's my list of pros and cons.

iPhone 4S Camera

Pros

  • Operates more like a camera. Press Home button twice to reveal camera icon. This helps photographers respond quickly to photo opps. Volume button doubles as shutter release. Fast focusing and reasonable shutter lag. Overall, an enjoyable picture taking experience.
  • Increased resolution with 8 MP backside illuminated sensor. Improved dynamic range too. Movies now at full HD (1080p).
  • Improved 5-element f/2.4 lens.
  • Useful HDR option that helps photographers tame harsh, contrastly light.
  • Responsive AE/AF lock puts exposure and focus control in the hands of the shooter.
  • Close focusing allows iPhone to serve as a mini scanner to record information faster than typing.
  • Handy editing controls (rotate auto enhance, red eye removal, and cropping) allow for quick clean up while reviewing images. Cropping tool is non-destructive. You can return to a cropped image, choose crop again, and recrop a different way. (Thanks Erik Wessel-Berg for that tip.)
  • Excellent image quality for a mobile phone.

with_hdr_iphone_4s.jpg With HDR turned on, you can better tame harsh, contrasty light.

no_hdr_iphone_4s.jpg You really notice a difference in this type of light when HDR is turned off.

Cons

  • Lens is at the bottom of camera when using the volume button as the shutter release. Much better to have the lens closer to shutter button.
  • Lack of burst mode is puzzling given the horsepower this camera has under the hood.
  • White balance tends to be on the warm side, which is great for people pictures, but would like to have a simple control, such as "normal," "warmer," "cooler."

Bottom Line

Highly recommended mobile phone camera. The iPhone 4S takes good pictures, is fun to operate, and responds quickly. Take advantage of the increased resolution and use the cropping tool to tidy up your images before sharing them with others. I love the HDR option for taming contrasty days.

I've also published the podcast, "iPhone 4S Camera, Ready for Prime Time?", where I delve in to the specs and features of this device. I talk about how the ISO and shutter speeds work together, more on the HDR function, how to choose spot metering instead of pattern, and more.

Nimbleosity Rating: 4.5 (out of five possible)

More Nimble Photographer Articles

Review: Filterstorm Pro for the iPad

Revisiting a Wireless Workflow from Camera to iPad

Minimal Folio for iPad: Truly Useful Portfolio and Presentation App

Return of the Nimble Photographer

Nik Software Brings Its Magic to the iPad with Snapseed


The Digital Story on Facebook -- discussion, outstanding images from the TDS community, and inside information. Join our celebration of great photography!


Capturing the Action at Safari West

One of the events during the TDS Oct. Photography Workshop was a visit to Safari West for a morning of wildlife photography.

I Have My Eye on You "I've got my eye on you."

To maximize this experience, we had our own photographer-guide (Adrian) and our own safari vehicle to explore to 400 acre wilderness teaming with birds and African wildlife. After the shoot, we enjoyed a lunch in the beautiful outdoor environment before heading back to the studio to process our work. Since TDS Headquarters is only 20 minutes from Safari West, we keep our travel time to a minimum. This keeps the day focused on photography.

I Have Something to Say I have something to say... but I forgot what it was."

Once back at the studio, the photographers had 90 minutes to sort, edit, and prepare their work for the portfolio presentation on the big screen. I look forward to this show every day because the images are outstanding.

I'm planning to return to Safari West next year for the Action Photography Workshop in June 2012. If you've always wanted to try your hand at this, get your name on the reserve list. There's an easy-to-complete form on the Workshops page.


The Digital Story on Facebook -- discussion, outstanding images from the TDS community, and inside information. Join our celebration of great photography!


How to Make Flowing Water Beautiful

Flowing Water - Sierra

Water is one of my favorite photo subjects, in part because there are so many things you can do with it. Recently I photographed a mountain stream in the Eastern Sierra of California. For this image, I wanted the water soft and dreamlike.

Start with the camera mounted on a tripod to steady the shot. I prefer exposures around 2 seconds. At that interval, the water is softened, but not overly dreamy. To create this long exposure, I put the camera in Aperture Priority mode and stop the aperture down to f/16. I then add a polarizer to give me another 2 stops of density. If I'm working in early morning light, this will usually provide the shutter speed I'm looking for. One important tip, make sure you're not in Auto ISO. Set the camera manually to its lowest ISO setting. Then use the self-timer or a remote release to take the shot. You don't want to jar the camera when making the exposure.

These images can be real eye-catchers when showing off your landscape work.


Find great deals at the TDS Photography Store on Amazon.


On the Road with the Olympus PEN Mini

While packing for my Eastern Sierra trip, I put the Olympus PEN E-PM1in my camera bag along with a couple DSLR bodies. Why? Because I wanted something small and quick to document the moments of my adventure. The PEN Mini is perfect for that.

Eastern Sierra Sky

For example, while driving north in Highway 395 yesterday morning, I noticed this crazy sky. I pulled the Vanagon off to the side of the road, grabbed the Mini, and captured this shot. The camera is extremely responsive. (Here's an earlier post that covers some of my favorite specs.) And to be honest, it is truly enjoyable to work with. I left the 17mm f.2.8 pancake lens on the body making the entire package pocketable.

I've shot with PENs since their introduction. And I have to say that this little guy is my favorite to date. In my opinion, it embodies the true spirit of the original PEN: petite, capable, and ready to go on a moment's notice.


Find great deals at the TDS Photography Store on Amazon.


Bridgeport at Dusk

Bridgeport at Twilight

No, it's not HDR. I used a Cokin A 121 Neutral Grad filter on a Pentax K-5 with stock 18-55mm zoom. The Cokin filter helped me balance the sky and foreground. More on this technique once I return from the Eastern Sierra and am not working on an iPad in the woods :)

I recorded this on my way out the door to the Sierra to shoot fall color. On this short road trip I'll be testing a Pentax K-5 and an Olympus PEN Mini, and a few other goodies that you'll see in upcoming articles. I talk about these preparations in this show, plus the events of the past week, and still more stuff. So much to talk about. I hope you join me.

Listen to the Podcast

You can also download the podcast here (31 minutes). Or better yet, subscribe to the podcast in iTunes. You can support this podcast by purchasing the TDS iPhone App for only $2.99 from the Apple App Store.

Monthly Photo Assignment

Side Lighting is the Oct. 2011 Photo Assignment. You can read more about how to submit on our Member Participation page. Deadline for entry is Oct. 31, 2011.

TDS Nov. Aperture Workshop

I've organized an Aperture Workshop on Nov. 12th and 13th. Signups are in progress now. If you want a registration form, or just more information, drop me a line. BTW: We include a professional model shoot as part of this workshop. Just saying...

More Ways to Participate

Want to share photos and talk with other members in our virtual camera club? Check out our Flickr Public Group. And from those images, I choose the TDS Member Photo of the Day.

Podcast Sponsors

Red River Paper -- The $7.99 Sample Kit is back! And with free shipping.

Make Your Photos Sizzle with Color! -- SizzlPix is like High Definition TV for your photography.

Need a New Photo Bag? Check out the Lowepro Specialty Store on The Digital Story and use discount code LP20 to saven 20% at check out.


Technorati Tags:
, , , , ,


I'm a big fan of what Nik Silver Efex Pro 2can do for my B&W photography, so when I heard that they've just released Color Efex Pro 4 for color work, I wanted to give it a try.

Color Efex Pro 4 Project in Process Project in process with 4 filters active. Click on image for larger version. Photo by Derrick Story, shot in Kauai.

Essentially, this software provides a set of 55 customizable photo filters that you can combine in just about any imaginable way. When you build a set of filters that results in a look you want to repeat, save them as a recipie to apply to other shots.

As with Silver Efex Pro 2, there are plenty of sliders to tailor the intensity of highlights, shadows, contrast, color, etc. And, as you'd expect, control points are available to fine tune a specific area.

I combined four filters on this shot from Kauai to create a look I had always had in my mind for this image, but hadn't been able to achieve. My workflow went like this.

  • Make basic image adjustments in Aperture 3 to the master Raw file.
  • Choose Color Efex Pro 4 from the Photos > Edit with Plug-in menu.
  • Click on the Landscape filter grouping in the left column.
  • Choose a filter that looks appropriate and preview its options by clicking on the variations icon to the right of the filter name (see illustration).
  • Pick a variation I want, then tweak to taste.
  • Click the Add Filter icon in the right column to add another effect to the image (if you don't use Add Filter, then the next effect you choose replaces the previous one).
  • Repeat process until I've added the right amount of filters and adjusted them for the look I want.
  • Click on Save Recipe in the right column to save my settings. Give the recipe a name.
  • Click the Save button in the lower right corner to process the image and send the Tiff file back to Aperture,

Original Tree Image from Kauai Here's the original tree image in Aperture before working on it in Color Efex Pro. The shot is fine, but it doesn't have the Jurassic Park mood that I wanted.

Just like with any Edit plug-in in Aperture, you're adding another image to your library. I like to stack them together to keep things organized. Color Efex Pro 4 works with Adobe Lightroom and Photoshop also. So, regardless of your preferecne for image editing software, you can use these filters.

A few of the other features I like in Color Efex Pro 4 include a zooming tool, compare mode, choice of background shade, and history browser. There are two editions of the software available from the Nik site: Standard (26 filters) $99.95 or Complete (55 filters) for $199.95. Works great on both Macs and Windows machines. If you own a previous version, you can upgrade to the Compelte Edition for $99.95. And if you purchase Color Efex Pro 3.0 or the Complete Collection on or after August 7, 2011 you are eligible for a free upgrade to Color Efex Pro 4.

Bottom line: I was able to learn the software quickly by watching a couple videos on Nik's On Demand Video Training page, then put these effects to work on my images. The visual nature of the interface makes it easy to create the look you want. It's not for every image, in part because I don't want to fill up my Aperture library with large Tiff files. But for that special shot you want to get just right, Color Efex Pro 4 can get you there quickly.

More Aperture Tips and Techniques

My next Aperture Workshop is Nov, 12-13, 2011 in Santa Rosa, CA. Write me if you're interested in attending.

To learn more about Aperture 3, check out my Aperture 3 Essential Training on Lynda.com. Also, take a look at our Aperture 3 Learning Center. Tons of free content about how to get the most out of Aperture.


The Digital Story on Facebook -- discussion, outstanding images from the TDS community, and inside information. Join our celebration of great photography!


The new Olympus PEN E-PM1, known as the "Mini" is exactly that. It's smaller than what I used to call a compact camera, such as the Canon G11. Yet, the Mini sports a 3" LCD, shoots at 5 fps, has an AP2 accessory port, captures 1080p video with stereo sound, and records 12 MP Raw or Jpeg files. Plus, it accepts interchangeable lenses.

Olympus PEN E-PM1 with Swiss Army Knife Olympus PEN Mini, 17mm f/2.8 lens, with Swiss Army Knife

The focusing on the current PENs is wickedly fast. And to be honest with you, I don't mind the streamlined look with a minimum of dials and buttons. In part this works for me because Olympus improved the menu system. It's actually easy to use.

I'm going to be putting the PEN Mini through its paces over the coming weeks. I'll certainly have more to report. But for starters, I wanted to show you just how darn petite this beauty is.

Street price for the Olympus PEN Mini with 14-42mm zoom is $499 US.


Find great deals at the TDS Photography Store on Amazon.


One More Thing, Thanks Steve

If it hadn't been for Steve Jobs, you probably wouldn't be reading these words right now. Yes, I've always been a writer. But I've had many stretches where I had to do other things to pay the bills. Oddly enough, they all involved the Mac.

Steve Jobs, 2003

Steve Jobs, 2003

In the late 80s, I was hired as a graphic artist using PageMaker on a 9" screen. Along the way, I learned every nuance of deploying Macs in the workplace. My next gig, happily, was a writing job. But as part of the deal, I had to maintain a network of Macs for a communications dept. I didn't get that position because of my prose. It was because I was the best Mac person among the applicants.

Years later, when I walked in to O'Reilly Media (called O'Reilly & Associates in those days), I had a PowerBook 1400 under my arm. It was the only Mac laptop in the building. Shortly thereafter, over half the computers there were Macs, including the one used by Tim O'Reilly. This momentum allowed me to launch Mac DevCenter. My words had never seen such a large audience.

Things continued to improve. I started writing for Macworld Magazine, was on the faculty for Macworld Expo, and wrote my first book chapters for David Pogue in "iPhoto: The Missing Manual." Not long after, I was recording my words for lynda.com. My first title? "Aperture Essential Training." Every time Apple invented something new, my career surged forward.

I was working on my Mac when I got the news. Steve Jobs had passed away. I wasn't ready for that.

A fellow writer, Glenn Fleishman wrote, "I've never been this sad about the passing of someone I didn't know." I felt the same way.

The thing is, I have no idea what my life would have been without Steve Jobs. His insanely great company helped a teenage poet from Southern California make a living doing what he loves. And I'm not the only one.

When I look at my fortunate career, I only have one regret: I never got to thank the man who helped me so much. It's true, I didn't know Steve Jobs. But he changed my world.

iPhone 4S Camera

As I mentioned yesterday, Apple announced my next camera during their special event today. I had a good feeling that they were going to put some muscle into this upgrade. And in all honesty, they exceeded my expectations.

Let's start with the lens. The 4S has five optical elements with a maximum aperture of f/2.4. Glass is so important to picture quality, and I'm happy to see this type of attention paid to a "camera phone." Plus, having the wider aperture helps in low light situations.

They've also beefed up the infrared filter to help improve color. Then Apple added the A5 chip with an image signal processor that's fairly robust for a camera of this nature. The picture taking experience is also improved. You can now activate the camera directly from the Home button, and it is more responsive once you do, including less shutter lag. It might actually feel like a real camera. Use the volume button to trip the shutter if you wish.

The backside illuminated sensor now supports 8 megapixels of resolution. This gives you a bit more latitude for cropping, especially since you're working with a fixed lens that has a moderately wide 35mm focal length.

Other goodies include face detection, HDR, 1080p video (at 30 fps), and a nifty editing app for basic adjustments. And of course this all works with the 3rd party apps that have been delighting us to this point.

I'll write a full review of the iPhone 4S camera as soon as I get my hands on it. But based on the specs I see, I think it will be an excellent photographic tool.


Find great deals at the TDS Photography Store on Amazon.