It's amazing what you can build with a few pieces of PVC pipe and a handful of shower curtain hooks. This week I talk about assembling your own portrait studio. You can use this rig at home, at your local school, at a friend's house, or just about anywhere you can find a 10' x 12' space to set it up and work. During the show, I walk you through the entire parts list.
A Few of the Resources Mentioned in the Podcast
In addition to PVC pipe, a hack saw, shower curtain rings, a few C-clamps (the kind with orange handles from the hardware store), clothes pins, and gaffers tape, here are some resources to finish off your studio:
Listen to the Podcast
You can also download the podcast here (28 minutes). Or better yet, subscribe to the podcast in iTunes. You can support this podcast by purchasing the TDS iPhone App for only $2.99 from the Apple App Store.
About These Images
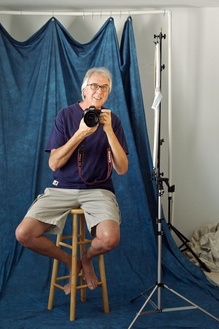
The top photo is a self portrait of me in my DIY studio. I'm shooting into the big mirrors that I have against the back wall. Models can use those to help them position themselves during the session. You can click on the photo to see the other details, such as the PVC pipe and backdrop.
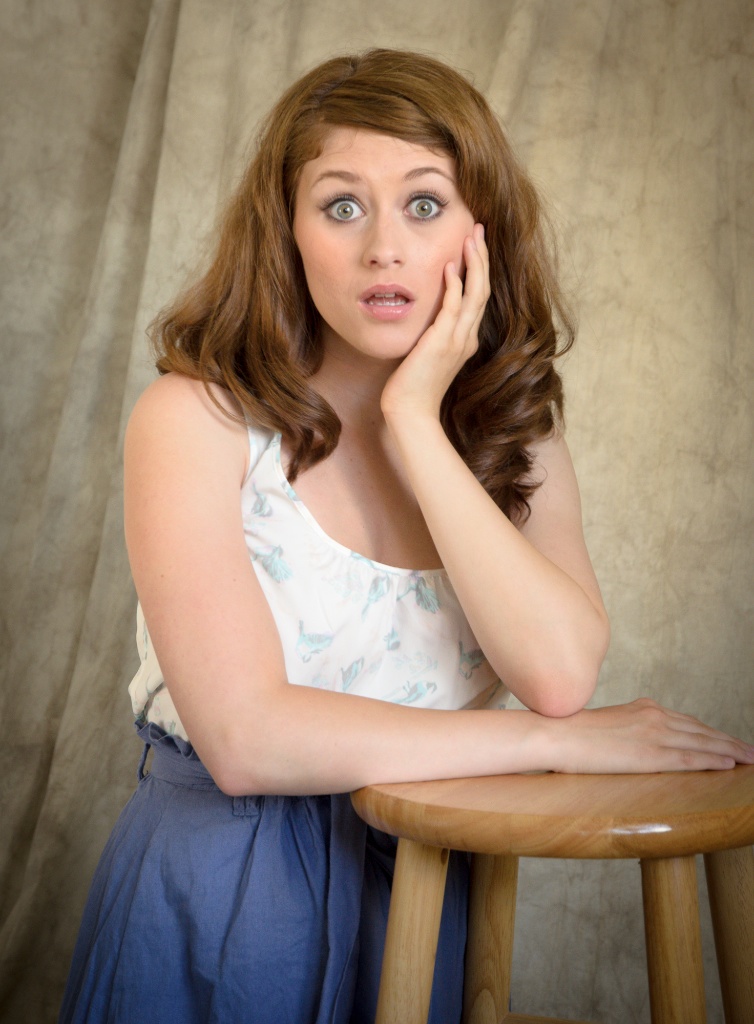
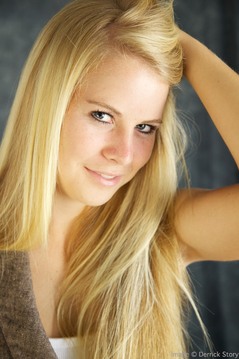
Second photo is a portrait captured in this studio. The main light is from the north facing window. Fill light is supplied by a Photoflex 5-in-1 32" reflector disc mounted with the holder attachment. No other lighting was used.
You can see more images from the photo shoot on the TDS Flickr page. Photos by Derrick Story.
Monthly Photo Assignment
Reflection is the August 2011 Photo Assignment. You can read more about how to submit on our Member Participation page. Deadline for entry is August 30, 2011.
TDS Nov. Aperture Workshop
I've an Aperture Workshop on Nov. 12th and 13th. If you want your name on the reserve list, or just more information, drop me a line. BTW: We include a professional model shoot as part of this workshop. Just saying...
More Ways to Participate
Want to share photos and talk with other members in our virtual camera club? Check out our Flickr Public Group. And from those images, I choose the TDS Member Photo of the Day.
Podcast Sponsors
Red River Paper -- The $7.99 Sample Kit is back! And with free shipping.
Make Your Photos Sizzle with Color! -- SizzlPix is like High Definition TV for your photography.
Need a New Photo Bag? Check out the Lowepro Specialty Store on The Digital Story and use discount code LP20 to saven 20% at check out.
Technorati Tags:
digital photography,
podcast,
technique,
Technology,
The Digital Story,
tips