This is The Digital Story Podcast #815, Nov. 2, 2021. Today's theme is "Preparing for an Inclement Photo Shoot." I'm Derrick Story.
Opening Monologue
In just a few days I leave for the Oregon Coast to co-lead a weeklong workshop. There are preparations on many fronts including travel route, photo gear, and apparel. As part of that process, I've noted that the long range weather forecast predicts plenty of precipitation. This definitely has an impact on my packing, and today I'm going to discuss how I prepare for a wet-weather photo shoot. I hope you enjoy the show.
Tune-In Via Your Favorite Podcast App!

Apple Podcasts -- Spotify Podcasts -- Stitcher
Podbean Podcasts -- Podbay FM -- Tune In
Preparing for an Inclement Photo Shoot
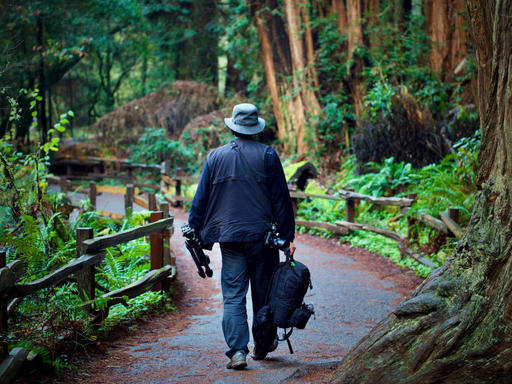
When I first started thinking about this workshop, I was leaning toward an entirely different backpack full of gear. But now that I see that rain is in the forecast, I've rethought all of my initial plans. Here are my priorities now.
Scale Back - Bad weather makes me want to travel even lighter than in good conditions. I want fewer moving parts a and smaller bag. As a result I'm taking much less.
Weather Resistant is King for the Backpack - Everything has to be able to take the rain. I'm starting with the relatively compact Lowepro ProTactic BP 350 AW that is weather resistant to begin with, plus has a built-in rain cover if conditions worsen. There is fast access on both sides and top so I don't have to open the entire bag to retrieve a camera or lens. So I can grab one thing and everything else stays dry.
Going with my Toughest Camera - My best bad weather camera is the Pentax KP with a handful of weather resistant lenses. I don't like working with rain covers and prefer just to have the camera in my hands, even in the rain. Pentax cameras are amazingly tough and reliable, as are their WR lenses. I put protection filters on everything so I can wipe them off quickly and often.
Absorbent Cloths and Big Microfibers - One of the most important things I learned shooting in Iceland was that you need extra cloths to wipe down your gear. Everything gets soaked fairly fast, so backups are required over the course of the day.
Appropriate Clothing - Start from the bottom up with shoes that provide great footing and are water friendly. I'll be sporting a pair of Merrell Men's CHOPROCK Sieve Water Shoes that have Vibram MegaGrip rubber outsoles with water-friendly mesh and woven uppers. Working upwards with rain repellant pants and layered uppers with an Eddie Bauer rain jacket with hood and ventilated sleeves.
Pack an Extra Baseball Cap - I wear one cap so that the hood doesn't go down over my eyes, then a second baseball cap in my bag to put over my camera when it's sitting on the tripod. Of all the covers I've tested over the years, a simple baseball cap is easiest to use.
Start a Week Ahead of Time - Over the course of time, you'll continue to remember little things that you want to add to your bag, such as a small first aid kit, rubber bands, headlight (with night-vision red), for example. Allow yourself the time to remember these.
Trekking Sticks to Help Maintain Balance - You want to feel confident to explore areas where great images may be waiting for you. In addition to proper shoes, I recommend a trekking stick that will help you maintain balance and can serve as a monopod if you get one with a camera mount. A nice one, for example, is the Cascade Mountain Tech Trekking Pole - Carbon Fiber Monopod Walking or Hiking Stick with Accessories Mount and Adjustable Quick Locks for $39.
One of my favorite sayings is: "There's no such thing as bad weather, only unsuitable clothing," by Alfred Wainwright. So true for photographers! Starting getting your gear together and get out there in the rain to make some wonderful images.
Fujifilm Instax Link Wide Printer
Live life WIDE The exciting INSTAX LINK WIDE Smartphone Printer has landed. Creating the largest prints in the INSTAX product line-up, this wide-format Smartphone Printer is overflowing with 'must-have' features to make sure nothing is lost.
Connect your Smartphone to the printer wirelessly via Bluetooth, and you're able to add text to your photos, resize, apply a filter, play with the contrast - the options are endless. Swipe up on your Smartphone photo and print. Select your image preference. You can choose between two image color modes - INSTAX-Rich mode for rich colors and INSTAX-Natural mode for a natural image quality.
Personalize your photo and choose from over 30 editable templates to create greeting cards, invitations and much more. Apply a QR code to your photo to link to a URL, hear sounds you recorded and view secret messages and locations - just by scanning the QR code with your Smartphone. And that's not all! Be creative with the Sketch, edit & print feature to import text and sketches as you customize your photos. With the Collage Print feature, add multiple images together to create fun collages. Also, choose from over 1,600 "stickers" in the app to apply to your photo! Available in Ash White and Mocha Gray. Live life Wide
Note: The Link Wide printer is also compatible with Fujifilm's X-S10 mirrorless camera from last year, allowing you to print directly without a phone. Of course, you can print photos taken with other cameras by uploading them to your phone and then to the Instax Link app.
The Fujifilm Instax Link Wide Printer that prints 3"x5" photos is available now for $149.
Nikon and the Z9 Are the Photo Industry's Comeback Story of the Decade
You can read the entire article on PetaPixel.com.
When the Sony Alpha 1 was announced, I remember being really impressed but not surprised. Sony had been the brand to beat and had been continuously pushing the envelope. What Sony did was impressive, but not shocking. The Nikon Z9 has shocked me.
Nikon, the company that had been in third place behind Sony and Canon in the full-frame mirrorless market (and it wasn't a close third place), has not only caught back up but has outright passed them technologically by a considerable margin. My expectations for the Z9 were to at least compete, to just bring Nikon back up to par. That would have been good enough.
But the Z9 reads like a camera where "good enough" was not good enough. No, Nikon wanted to send a statement with the Z9 and that message has been received.
It's hard to fathom how Nikon did this, given how slow it was to shift from DSLRs to mirrorless all while Sony was dedicating huge resources to developing its own expectation-shattering cameras. It felt like Sony was driving an F1 and Nikon a Honda Civic, and Sony got to have a head start as well. That kind of gap is monumentally difficult to make up ground on, let alone surpass, and yet here we are.
Nikon and the Z9 are without question the comeback story of the decade in the camera industry. There is a new top dog, and for Nikon, it's a return to a seat that the company has not occupied for some time. Canon and Sony will see what Nikon has done and have to work just that much harder. Sony won't just sit idly by as Nikon surpasses them, and neither will Canon. The race is back on, and I could not be more excited.
Virtual Camera Club News
Inner Circle Members: A big thanks to those who support our podcast and our efforts!
My Writing on Medium.com: I now have 46 published articles on Medium.com. And if you haven't visited the site, and enjoy good writing on a variety of topics, I suggest that you may want to take a look. You can just go to the home page and enter "Derrick Story" in the search field. And if you like what you read, then follow me!
The New Donation Kit for Carefree Shipping of Found Film Cameras - If you've discovered a film camera that's no longer being used, our new Donation Kit makes it easy to pack and ship. Just visit the Contact Form on thenimblephotographer.com, click the box next to Donating a Film Camera, and let me know what you have. In your note, be sure to include your shipping address.
Affiliate Links - The links to some products in this podcast contain an affiliate code that credits The Digital Story for any purchases made from B&H Photo and Amazon via that click-through. Depending on the purchase, we may receive some financial compensation.
Red River Paper - And finally, be sure to visit our friends at Red River Paper for all of your inkjet supply needs.
See you next week!
Product Links and Comments
There are product links in this article that contain affiliate tags. In some cases, depending on the product, The Digital Story may receive compensation if you purchase a product via one of those links. There is no additional cost to you.
You can share your thoughts at the TDS Facebook page, where I'll post this story for discussion.