Recently in Photography

  Page 40 of 385 in Photography  

This is The Digital Story Podcast #736, April 28, 2020. Today's theme is "Prime Time - Break Out the Fast Glass." I'm Derrick Story.

Opening Monologue

As we explore spaces in our home environment that we forgot even existed, who knows what photo opportunities that we will uncover. And what better way to capture them to their full extent, then by breaking out our fastest primes to document the shadowy corners of our lives. This week I talk about 5 prime lenses that have become important tools in my new normal.

Prime Time - Break Out the Fast Glass

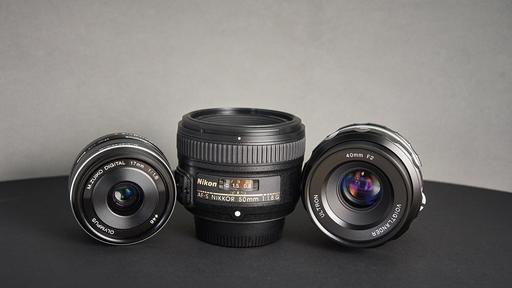
Zooms are great when you're on the go, but primes are perfect for backyard and interior exploration. Here are the 5 primes that have been keeping me out of trouble during our ongoing Shelter-in-Place.

Olympus 75mm f/1.8

  • Olympus M.Zuiko Digital ED 75mm f/1.8 lens on an E-M1 Mark II. Some say this is the sexiest lens that Olympus has ever designed.
  • Pentax-A SMC 50mm f/1.4 on a black Pentax Program Plus. Possibly the most beautiful coatings I've ever seen on an optic.
  • Pentax SMC 50mm f/1.4

  • Voigtlander Ultron 40mm f/2 SL IIS Aspherical Lens for Nikon F on a Nikon D610. The best of both worlds: silky-smooth manual focusing and outstanding design with click-stop aperture ring, but also has the Nikon chip so it records metadata and works on practically every Nikon F-mount camera.
  • Voigtlander 40mm f/2.0

  • Kamlan 50mm F/1.1 II for M4/3 on an Olympus PEN-F. Lovely bokeh and softer contrast make this a wonderful portrait lens for MFT photographers.
  • Kamlan 50mm f/1.1

  • Panasonic Leica DG Summilux 25mm f/1.4 II ASPH. Lens on an Olympus OM-D E-M5 Mark II. This was the first premium prime lens that I bought for Micro Four Thirds, and I use is practically every day. It's compact, sharp, and contrasty. I even use it for movie making.

P4271137.jpg

Exploring your home base with your favorite prime can transform the world that you've grown tired of looking at into a completely fresh look. Try it. Get out a prime, and re-explore your home universe. I bet you'll come up with something new.

The New Donation Kit for Carefree Shipping of Found Film Cameras

We have more time around the house than ever. And you finally dove into that bedroom closet that's been begging for some organization.

If you found a film camera that you're no longer using, our new Donation Kit makes it easy to pack and ship. Just visit the Contact Form on thenimblephotographer.com, click the box next to Donating a Film Camera, and let me know what you have. In your note, be sure to include your shipping address.

If it's a camera we can use for the shop, I'll send you a Donation Kit that includes a USPS Priority Mail shipping box and prepaid label. All you have to do is tape it up, insert the camera, and add the label. USPS will pick up your shipment from the front door of your house during their regular mail delivery. It's that simple!

Your donation help get analog gear in the hands of aspiring fine art photographers, and the proceeds help support this podcast.

Digitizing Family Memories Course Now Available Online

Each of the four classes in the course will outline a specific set of steps that you have one week to accomplish. Then, the next week, we build on that progress with new techniques and assignments. By the end of the four weeks, you will have an organized digital archive of your most valuable family images.

Patreon members can sign up for free on the Patreon site. I have a post there for you. All you have to do is comment that you want to join us. If you're not a Patreon member, you can sign up at the Inner Circle level for $5 a month and become instantly eligible for the course.

Non-Patreon members can also sign up for the course by visiting the Workshops page on The Nimble Photographer. The course fee is a reasonable $45.

Updates and Such

Inner Circle Members: A big thanks to those who support our podcast and our efforts!

How to Watch Photos for macOS Catalina and iPadOS - Learn everything you need to know about Photos for the Mac and iPad by checking out my latest course on LinkedIn Learning and on lynda.com. This course is perfect for Mac and iPad based photographers who shoot with iPhone, Mirrorless, and DSLR cameras. It covers both photography and movies. And if I say so myself, it's a lot of fun.

B&H and Amazon tiles on www.thedigitalstory. If you click on them first, you're helping to support this podcast. (The Digital Story is supported by its audience. When you purchase through links on our site, we may earn an affiliate commission.) And speaking of supporting this show, and big thanks to our Patreon Inner Circle members:

Affiliate Links - The links to some products in this podcast contain an affiliate code that credits The Digital Story for any purchases made from B&H Photo and Amazon via that click-through. Depending on the purchase, we may receive some financial compensation.

And finally, be sure to visit our friends at Red River Paper for all of your inkjet supply needs.

See you next week!

More Ways to Participate

Want to share photos and talk with other members in our virtual camera club? Check out our Flickr Public Group. And from those images, I choose the TDS Member Photo of the Day.

Podcast Sponsors

Red River Paper - Keep up with the world of inkjet printing, and win free paper, by liking Red River Paper on Facebook.

The Nimbleosity Report

Do you want to keep up with the best content from The Digital Story and The Nimble Photographer? Sign up for The Nimbleosity Report, and receive highlights twice-a-month in a single page newsletter. Be a part of our community!

Want to Comment on this Post?

You can share your thoughts at the TDS Facebook page, where I'll post this story for discussion.

The current installment of Digitizing Family Memories covers different techniques for scanning snapshots to help you archive inherited photos.

FastFoto-001.jpg

The 30-minute episode covers techniques for digitizing with a smartphone (don't rule this out, the software is really cool!), flatbed scanner (you probably already have one on your multi-functional printer), and the Epson FastFoto for bulk jobs.

002-Flatbed.jpg

Next week's installment covers digitizing slides and negatives, followed by organizing all of this work in your favorite photo management software. You can jump in anytime by signing up for Digitizing Family Memories. You'll receive the current classes right away so you can get to work. And the upcoming classes will be sent to you weekly. Here's a quick video BTS overview by the course instructor, Derrick Story.

Do you have shoeboxes of old family prints that you would to take control of? If so, this online course can help you get started in the right direction.

You can share your thoughts at the TDS Facebook page, where I'll post this story for discussion.

As photographers, much of our image publishing is via the Web, which usually means that we reduce the size of the original image before posting.

In Capture One Pro, as we simultaneously export and reduce size (sample down), we can also compensate for any loss of detail that happens as we prepare the file for publishing. In the export dialog box we can go to the Adjustments tab and set up Output Sharpening. Here's a look at that process.

Applying sharpening while exporting a photo from Capture One Pro 20 Essential Training by Derrick Story

I like that there are options for both screen and print. For example, if I know I'm going to print this image on matte paper, the output settings would be much different than those for gloss, or for a Web page for that matter.

If you're curious about how easy output sharpening can be in Capture One Pro, watch the movie at the top of this article. It's a solid introduction to this pro feature.

C1P-Output-Sharpening.jpg

It's from my latest online class, Capture One Pro 20 Essential Training on LinkedIn Learning, or, if you're a lynda.com subscriber, you can watch it there as well.

If you don't have Capture One Pro yet, you can download the 30-day free trial (Mac/Win). No credit card is required, and it's a fully functioning version.

Some applications have some form of output sharpening, but very few provide the control that's available to you in Capture One Pro.

You can share your thoughts at the TDS Facebook page, where I'll post this story for discussion.

This is The Digital Story Podcast #735, April 21, 2020. Today's theme is "LUTs, RAW Power 3, and More." I'm Derrick Story.

Opening Monologue

LUTs may sound like some kind of technical mumbo-jumbo, but they are quite useful, and they allow us to easily add creative color effects to our images. Today, I'll do my best to demystify LUTs and encourage you to give them a try. Plus, we're going to look at RAW Power 3, the robust $39 image application that can tap your entire iCloud library of images. All of that and more on today's TDS Photography Podcast. I hope you enjoy the show.

Color Grading with LUTs

Focusing on color can help photographers communicate style and emotion. This approach is often referred to as color grading. You may have wondered how this differs from color correction, which is more of a technical adjustment. A tungsten bulb, for example, will produce a color shift in our images that's warmer than what we're accustomed to seeing with our eyes. Often we want to adjust that hue, cooling it off a bit so that it appears more natural. That's a correction.

ClassicChromeLUT-1600.jpg

Color grading, on the other hand, leans toward the artistic. The photographer may add or enhance oranges and teals to create a mood similar to what one would experience in the movies. Exact reality isn't the goal. It's more about a creative look that elicits a feeling.

The Power of LUTs

Lookup Tables sound like a technical adjustment. And indeed there is plenty of color science at work under the hood. They are used to precisely shift colors from one spot to another. But those shifts can be stored in a container, such as a .cube file, that can used to color grade an image.

So even though LUTs are precise color science, their recipes can be wonderfully artistic.

Tips for Effective Color Grading with LUTs

Creating a separate adjustment layer for your color grading provides lots of flexibility. The base layer is used for basic adjustments and the other tools that you need to establish a good range of tones. The adjustment layer contains the LUT Mapping, HSL, and other creative filters. You can then use the blend modes and the opacity slider for precise control over the grading.

Applications that support LUTs include: Lightroom Classic, Capture One Pro, Luminar, and RAW Power 3.

Your viewers may not realize the techniques that you used to create the enticing color schemes in your images. What they will notice is your style and creativity. And using LUTs can contribute greatly to that pursuit.

RAW Power 3 Brings Star Ratings, LUTs, and More to Photos Users

Gentlemen Coders has released RAW Power 3.0 for macOS and iOS. It's a comprehensive update with much to unpack over the coming weeks, but the focus today is how it brings Star Ratings to Photos for both the Mac and iOS versions of the app.

The rating system is easy to use, and is ingenious in its design. If you're running macOS Catalina, the RAW Power app allows you to use your Photos library in real time. This even works if you have the Photos app open. Within RAW Power you can tap all the powerful tools to enhance your images and have those improvements saved directly to your iCloud Photos library. But now, you can also rate and tag those pictures, and they too will be saved to iCloud and acknowledged in the Photos apps.

RAW Power creates Star Rating Albums that are displayed both in RAW Power, and in the Photos app. RAW Power uses Aperture style keyboard shortcuts for the ratings allowing you to move quickly through the images. What's really cool, even if you're running Photos on macOS Mojave, which doesn't allow the library sharing as in Catalina, the Star Rating Albums still appear in the app if they were added in RAW Power running on a Catalina machine using the same Photos library. The overall approach is both clever and works great.

This update, over a year in the making, includes tons of other stuff as well. Here's a brief overview.

RAW Power 3.0 for Mac and iOS creates the first real option for serious photographers in the Apple ecosystem. RAW Power 3.0 is now the first and only third-party app to include full support for Apple Photos libraries on Mac and iOS, allowing photographers to rate and edit their images anywhere and any time. New features introduced today include flexible storage options, synchronized ratings and flagging for Photo libraries, support for Files.app on iOS, advanced auto enhance, LUT support and one-tap integration with the popular Halide camera app on iOS. RAW Power 3.0, developed by Nik Bhatt, a former Apple engineer who led the iPhoto and Aperture teams, is available for download today on the Mac and iOS App Stores.

The new RAW Power app for iOS introduces the much-requested ability to manage photos either in Photos or in Files.app. Now, photographers can easily work on their collections of images in either or both environments and switch seamlessly between them. Users can import images from an SD card into RAW Power using the Files app. Additionally, the new Copy to RAW Power Share Extension makes it easy to import images from other apps into the Files storage for RAW Power.

RAW Power 3 also supports LUTs. It has a great collection built in, including 7 of the Fuji film simulations, which look very good to my eye. I also had good success importing .cube files that appeared in My LUTs. Very nice!

RAW Power 3.0 runs on macOS Catalina and Mojave and is available for $39.99 or as a free upgrade for existing users of RAW Power for Mac 2.0. (It does not support the iCloud Library sharing on Mojave, however.) RAW Power for iOS 3.0 is available for $9.99 or as a free upgrade for current RAW Power for iOS customers. RAW Power for iOS 3.0 runs on iOS 12 and 13, but does not support iPhone 5s, 6 or 6 Plus, or iPad mini 3 or earlier.

Digitizing Family Memories Course Now Available Online

Each of the four classes in the course will outline a specific set of steps that you have one week to accomplish. Then, the next week, we build on that progress with new techniques and assignments. By the end of the four weeks, you will have an organized digital archive of your most valuable family images.

Patreon members can sign up for free on the Patreon site. I have a post there for you. All you have to do is comment that you want to join us. If you're not a Patreon member, you can sign up at the Inner Circle level for $5 a month and become instantly eligible for the course.

Non-Patreon members can also sign up for the course by visiting the Workshops page on The Nimble Photographer. The course fee is a reasonable $45.

Updates and Such

Inner Circle Members: A big thanks to those who support our podcast and our efforts!

How to Watch Photos for macOS Catalina and iPadOS - Learn everything you need to know about Photos for the Mac and iPad by checking out my latest course on LinkedIn Learning and on lynda.com. This course is perfect for Mac and iPad based photographers who shoot with iPhone, Mirrorless, and DSLR cameras. It covers both photography and movies. And if I say so myself, it's a lot of fun.

B&H and Amazon tiles on www.thedigitalstory. If you click on them first, you're helping to support this podcast. (The Digital Story is supported by its audience. When you purchase through links on our site, we may earn an affiliate commission.) And speaking of supporting this show, and big thanks to our Patreon Inner Circle members:

Affiliate Links - The links to some products in this podcast contain an affiliate code that credits The Digital Story for any purchases made from B&H Photo and Amazon via that click-through. Depending on the purchase, we may receive some financial compensation.

And finally, be sure to visit our friends at Red River Paper for all of your inkjet supply needs.

See you next week!

More Ways to Participate

Want to share photos and talk with other members in our virtual camera club? Check out our Flickr Public Group. And from those images, I choose the TDS Member Photo of the Day.

Podcast Sponsors

Red River Paper - Keep up with the world of inkjet printing, and win free paper, by liking Red River Paper on Facebook.

The Nimbleosity Report

Do you want to keep up with the best content from The Digital Story and The Nimble Photographer? Sign up for The Nimbleosity Report, and receive highlights twice-a-month in a single page newsletter. Be a part of our community!

Want to Comment on this Post?

You can share your thoughts at the TDS Facebook page, where I'll post this story for discussion.

I wanted a place to dock my iPhone X while working in my home office. It's all part of my changing work life where I'm setting up new areas to get things done. I decided to try the PITAKA Wireless Charging Stand Dock because of its versatility. And after a few weeks of use, I feel like I made a good decision.

P4181227.jpg

The stand itself is actually a holder for the wireless charger. It's a clever design where the charger slips into the stand, then via a magnetic strip that you attach to your case, the phone snaps in place. The clever part is, that you can take the charger with you when away from home and need some extra juice on the road.

P4181232.jpg Wireless charger removed from the stand, yet still attached to the phone.

You can use your existing case, as I did, using the adhesive magnetic strip that's included in the kit. Pitaka includes templates for current smartphones so you can place it in exactly the right spot. It's slim, good looking, and hasn't changed the comfort of my current case, nor has it impeded the use of other wireless chargers.

P4181231.jpg Included magnetic strip to attach your phone to the charger.

When it comes to actually charging my phone, it takes about as long as my Samsung wireless pad, which is longer than plugging the phone directly into the wall. But it hasn't been a problem, because I just click my iPhone on to the stand when I sit at the computer, and click it off when I leave. Over the course of the day, my iPhone X has remained nicely juiced up.

You can also buy custom cases from Pitka that have the magnetic strip embedded in them. They look quite nice, and the reviews have been solid. So if you're in the mood for a new case, they might be worth a look.

But the setup included in the box will get you started as is. I like having the stand to make it easier to check the phone when I'm working at the computer. Having the removable charging unit is a nice touch for those days in the future when I can travel again. And overall, the design is quite good.

It's easy to recommend the PITAKA Wireless Charging Stand Dock for $79. Who knows, someday I may even buy one of their cases as well.

There are product links in this article that contain affiliate tags. In some cases, depending on the product, The Digital Story may receive compensation if you purchase a product via one of those links. There is no additional cost to you.

You can share your thoughts at the TDS Facebook page, where I'll post this story for discussion.
Gentlemen Coders has released RAW Power 3.0 for macOS and iOS. It's a comprehensive update with much to unpack over the coming weeks, but the focus today is how it brings Star Ratings to Photos for both the Mac and iOS versions of the app.

star-ratings-photos.jpg Photos displaying the rating albums created by RAW Power.

The rating system is easy to use, and is ingenious in its design. If you're running macOS Catalina, the RAW Power app allows you to use your Photos library in real time. This even works if you have the Photos app open. Within RAW Power you can tap all the powerful tools to enhance your images and have those improvements saved directly to your iCloud Photos library. But now, you can also rate and tag those pictures, and they too will be saved to iCloud and acknowledged in the Photos apps.

RAW-Power-3-Photos.jpg RAW Power 3 tapping my Photos library.

RAW Power creates Star Rating Albums that are displayed both in RAW Power, and in the Photos app. RAW Power uses Aperture style keyboard shortcuts for the ratings allowing you to move quickly through the images. What's really cool, even if you're running Photos on macOS Mojave, which doesn't allow the library sharing as in Catalina, the Star Rating Albums still appear in the app if they were added in RAW Power running on a Catalina machine using the same Photos library. The overall approach is both clever and works great.

This update, over a year in the making, includes tons of other stuff as well. Here's a brief overview.

RAW Power 3.0 for Mac and iOS creates the first real option for serious photographers in the Apple ecosystem. RAW Power 3.0 is now the first and only third-party app to include full support for Apple Photos libraries on Mac and iOS, allowing photographers to rate and edit their images anywhere and any time. New features introduced today include flexible storage options, synchronized ratings and flagging for Photo libraries, support for Files.app on iOS, advanced auto enhance, LUT support and one-tap integration with the popular Halide camera app on iOS. RAW Power 3.0, developed by Nik Bhatt, a former Apple engineer who led the iPhoto and Aperture teams, is available for download today on the Mac and iOS App Stores.

Choose-Photos.jpg macOS Catalina photographers can choose the Photos Library from within RAW Power 3. Or they can use the file browser.

The new RAW Power app for iOS introduces the much-requested ability to manage photos either in Photos or in Files.app. Now, photographers can easily work on their collections of images in either or both environments and switch seamlessly between them. Users can import images from an SD card into RAW Power using the Files app. Additionally, the new Copy to RAW Power Share Extension makes it easy to import images from other apps into the Files storage for RAW Power.

I'll be covering more of the features in upcoming posts. But after my initial testing on both macOS and iOS, I can comfortably say that this elevates the Photos/iCloud environment to a high level for serious photographers.

RAW Power 3.0 runs on macOS Catalina and Mojave and is available for $39.99 or as a free upgrade for existing users of RAW Power for Mac 2.0. (It does not support the iCloud Library sharing on Mojave, however.) RAW Power for iOS 3.0 is available for $9.99 or as a free upgrade for current RAW Power for iOS customers. RAW Power for iOS 3.0 runs on iOS 12 and 13, but does not support iPhone 5s, 6 or 6 Plus, or iPad mini 3 or earlier.

You can share your thoughts at the TDS Facebook page, where I'll post this story for discussion.
This is The Digital Story Podcast #734, April 14, 2020. Today's theme is "Project Productive - Digitize Family Memories." I'm Derrick Story.

Opening Monologue

Most of us have at least another month indoors. So I've designed a 4-week online course that I think most photographers will find extremely satisfying - finally getting to those shoeboxes of family photos that need to be organized, digitized, and cataloged. We are going to embrace Shelter in Place in a most productive way. I hope you enjoy today's show.

Project Productive - Digitize Family Memories

By now, we've accomplished many of the "low hanging fruit" projects. We've organized our camera gear, caught up on paperwork, and maybe even have cleaned a closet or two.

IMG_1518.jpg

But the 800-pound gorilla that's lurking beneath many of our beds is that box of slides and snapshots that we've been meaning to tackle. Why haven't we done so yet? To be honest, the project can feel overwhelming. There are so many aspects to it, it's hard to know where to begin.

Well, now you have a starting point: my Digitizing Family Memories online course that begins Monday, April 20. And the best news is - if you're an Inner Circle Member, the class is absolutely free.

What We're Going to Do

First of all, you'll have structure. Each class will outline a specific set of steps that you have one week to accomplish. Then, the next week, we build on that progress with new techniques and assignments. By the end of the four weeks, you will have an organized digital archive of your most valuable family images.

The approach is to break the project into smaller parts. Everything we do will be easy to understand and implement. When it comes to digitize, you'll learn techniques that are as simple as using the camera on your smartphone, or as sophisticated as tapping a dedicated film scanner.

I will show you techniques that will help you research, organize, digitize, add metadata, and catalog. We'll also discuss retouching and mending damaged photos.

Every Monday during the class, I will post an instructive video on Vimeo for you to watch. You can watch it whenever you wish, but don't let too much time go by, because there are assignments associated with it. There will also be handouts that you receive via email. And you can comment or ask questions via the comments section on Vimeo.

Patreon members can sign up for free on the Patreon site. I have a post there for you. All you have to do is comment that you want to join us. If you're not a Patreon member, you can sign up at the Inner Circle level for $5 a month and become instantly eligible for the course.

Non-Patreon members can also sign up for the course by visiting the Workshops page on The Nimble Photographer. The course fee is a reasonable $45.

Start preparing now. The first step is to find a dedicated work area where you can leave the project spread out on a table for the duration of the course. You don't want to waste time setting up and breaking down each time you want to work on an assignment. That's the kind of stuff that discourages us from working on these things in the first place.

Next, begin your search for family snapshots, slides, and negatives. You don't have to do anything with them yet, just find as much as you can, and put it on your worktable. If you want, you can start enjoying some of the pictures and reminiscing, but don't begin the project until you've watched the first installment of the course.

I hope you can join us for this online workshop. I think you will find it extremely rewarding!

Do You Have a Film Camera that Needs a Good Home?

Over the last year, I've received donations from TDS members who have film cameras that need a good home. What I do is inspect the items, repair and clean as I can, then list them in TheFilmCameraShop where I can find a good home for them. If you're interested in donating, please use the Contact Form on TheNimblePhotographer site. And thanks for you consideration!

LaCie 8TB 2big 2-Bay USB 3.1 Type-C RAID Review

Photographers interested in enterprise-caliber backup storage, housed in handsome easy to use hardware, should definitely take a look at the LaCie 8TB 2big 2-Bay USB 3.1 Type-C RAID Array. It looks great sitting next to your desktop computer, is surprisingly quiet, and is a joy to use.

Inside the stylish enclosure are two Seagate IronWolf Pro NAS 4 TB hard drives. They are easily accessible through the front of the enclosure via the spring-opening doors. The 7200 rpm SATA 3 drives are hot-swappable, although I haven't had the guts to try that yet. I've powered down the unit the examine the internals. But the documentation says hot-swappable works just fine. (OK, I'm a chicken, I admit it). And after a month of testing with a RAID 1 configuration, I am very pleased with their performance.

The LaCie 2big works great for both Mac and Windows computers right out of the box. Just plug it in and go. But most will want to configure the unit for their particular workflow, and for that, LaCie provides the excellent Toolkit software to format the drives and choose the RAID configuration that you want.

The first option is RAID 0, which provides the best performance and gives you 8 TBs of storage. The two hard drives work together to ensure the fastest data transfer possible.

The second option, RAID 1, is what I'm using. In this scenario, the drives mirror one another to provide an extra level of protection from drive failure. If one goes down, all of your content is still available on the other. The downside to RAID 1 is that your total storage is 4 TBs, and performance is a bit slower than with RAID 0.

And finally, if you're a willy-nilly kind of guy or gal, there's the JBOD option, short for just a bunch of disks. Two drives appear on your desktop with 4 TBs available for each. All of this is configured with Segate Toolkit.

In all honesty, the 2big checks all the boxes for me. I have an enterprise RAID device that looks like industrial artwork sitting on my desk. I can feel like a smart system admin when all I'm really doing is just checking a couple boxes in the easy to use Toolkit app. And the read/write performance has been similar to a standalone HDD. What more could I ask for?

You can purchase the LaCie 8TB 2big for $451. There's also a 4 TB version for $349, and a 16 TB option for $649. At the moment, I'm quite happy with my 8 TB model. And I highly recommend the 2big to photographers and videographers who want reliable enterprise backup enclosed in a handsome hunk of hardware.

Update for the TDS 2020 Photography Workshop Season

Those of you on the registration list for the Humboldt Redwoods Workshop, I'm looking to reschedule the event, and I have a note in your inbox to discuss this.

If you have questions about Humboldt or the other workshops, feel free to drop me a line using the Contact Form on www.thenimblephotographer.com.

The summer and fall workshops are looking less tentative at the moment. If you're interested in either, jump over to our 2020 Workshops Signup Page and place a $100 deposit to secure your place. Only participants on the Reserve List who have placed a deposit will be eligible to register for a workshop. If you have questions or need more information, fill out the "Send Me Info!" request form. I'll get back to you asap.

  • Lassen Volcanic Park Photo Workshop - July 16-18, 2020 - 2 Seats Remaining -- We'll convene at a spacious cabin at Lake Almanor that serves as our HQ. From there we explore the stunning Lassen landscape, peaceful shores of Lake Almanor, and the magnificent mountain night skies. This hands-on photo workshop is limited to 8 participants and is a wonderful blending of experience, camaraderie, and artistry. Limited to just 8 participants, you can reserve your spot and learn more about this event here.
  • The Eastern Sierra Photography Workshop - Oct. 1-3, 2020 - 2 Seats Remaining - Our event is headquartered at the Silver Maple Inn in Bridgeport, CA - gateway to Bodie, Mono Lake, and June Lake. We'll take advantage of the magical morning light to photograph some of the most unique landscape in North America. We'll photograph the sparkling night skies of the Sierra and explore rustic urban environments. Limited to just 9 participants, you can reserve your spot and learn more about this event here.

Updates and Such

Inner Circle Members: A big thanks to those who support our podcast and our efforts!

How to Watch Photos for macOS Catalina and iPadOS - Learn everything you need to know about Photos for the Mac and iPad by checking out my latest course on LinkedIn Learning and on lynda.com. This course is perfect for Mac and iPad based photographers who shoot with iPhone, Mirrorless, and DSLR cameras. It covers both photography and movies. And if I say so myself, it's a lot of fun.

B&H and Amazon tiles on www.thedigitalstory. If you click on them first, you're helping to support this podcast. (The Digital Story is supported by its audience. When you purchase through links on our site, we may earn an affiliate commission.) And speaking of supporting this show, and big thanks to our Patreon Inner Circle members:

Affiliate Links - The links to some products in this podcast contain an affiliate code that credits The Digital Story for any purchases made from B&H Photo and Amazon via that click-through. Depending on the purchase, we may receive some financial compensation.

And finally, be sure to visit our friends at Red River Paper for all of your inkjet supply needs.

See you next week!

More Ways to Participate

Want to share photos and talk with other members in our virtual camera club? Check out our Flickr Public Group. And from those images, I choose the TDS Member Photo of the Day.

Podcast Sponsors

Red River Paper - Keep up with the world of inkjet printing, and win free paper, by liking Red River Paper on Facebook.

The Nimbleosity Report

Do you want to keep up with the best content from The Digital Story and The Nimble Photographer? Sign up for The Nimbleosity Report, and receive highlights twice-a-month in a single page newsletter. Be a part of our community!

Want to Comment on this Post?

You can share your thoughts at the TDS Facebook page, where I'll post this story for discussion.

Practically every person has a shoebox of family snapshots, trays of slides, or sheets of negatives generated by shutterbugs in the family tree. We've all made proclamations that someday we're going to get organized and digitize those precious images. But we never seem to get around to it.

family-snapshots.jpg

Now it the time! And I can walk you through the process. Join me for a 4-week online course that begins on April 20, 2020. Every Monday for 4 weeks I'll publish an informative, hands-on training video (with an open comment sections for questions) that covers DIY techniques for digitizing, organizing, adding metadata, and safely backing up this content.

Watch the tutorial on Monday, work on the assignments during the week, post your comments, then watch the next chapter the following Monday. By the end of the course, you will have made great strides toward archiving those precious family memories.

P3013549.jpg

Course Requirements and Suggestions

You will need an Internet connection to download or stream the tutorials. You can watch them on a computer, tablet, or smartphone.

For the techniques themselves, you will need some sort of device to digitize the pictures. I will cover techniques for using your smartphone, a digital camera, flatbed scanner, or if you have one available, a film scanner. So yes, it can be as simple as your smartphone or as sophisticated as a film scanner.

For the organizing techniques, we recommend photo software such as Lightroom, Photos for macOS, Luminar 4, Capture One Pro, or OnOne. Any of these will work for getting your digitized pictures in shape.

We also recommend some way to back up your precious memories. We'll cover external hard drives, cloud services, and more.

Chances are good that you have everything you need already to get started. You may want to purchase additional items as your watch the techniques class. We'll leave those decisions to you.

How to Signup!

Simply visit the Course Description and Signup Page and click on the Purchase button. The 4-week course is $45.

For members of the TDS Inner Circle, the course is free. There will be a notice on our Patreon page for Inner Circle Members to sign up. If you're not an Inner Circle Member, you can become one instantly and waive the $45 course tuition (by pledging $5 or more a month).

You can share your thoughts at the TDS Facebook page, where I'll post this story for discussion.
Photographers interested in enterprise-caliber backup storage, housed in handsome easy to use hardware, should definitely take a look at the LaCie 8TB 2big 2-Bay USB 3.1 Type-C RAID Array. It looks great sitting next to your desktop computer, is surprisingly quiet, and is a joy to use.

P4091094-LinkedIn-01_05.jpg

Inside the stylish enclosure are two Seagate IronWolf Pro NAS 4 TB hard drives. They are easily accessible through the front of the enclosure via the spring-opening doors. The 7200 rpm SATA 3 drives are hot-swappable, although I haven't had the guts to try that yet. I've powered down the unit the examine the internals. But the documentation says hot-swappable works just fine. (OK, I'm a chicken, I admit it). And after a month of testing with a RAID 1 configuration, I am very pleased with their performance.

P4091090-LinkedIn-01_05.jpg

The LaCie 2big works great for both Mac and Windows computers right out of the box. Just plug it in and go. But most will want to configure the unit for their particular workflow, and for that, LaCie provides the excellent Toolkit software to format the drives and choose the RAID configuration that you want.

The first option is RAID 0, which provides the best performance and gives you 8 TBs of storage. The two hard drives work together to ensure the fastest data transfer possible.

The second option, RAID 1, is what I'm using. In this scenario, the drives mirror one another to provide an extra level of protection from drive failure. If one goes down, all of your content is still available on the other. The downside to RAID 1 is that your total storage is 4 TBs, and performance is a bit slower than with RAID 0.

And finally, if you're a willy-nilly kind of guy or gal, there's the JBOD option, short for just a bunch of disks. Two drives appear on your desktop with 4 TBs available for each. All of this is configured with Segate Toolkit.

2Big-Status-1024.jpg

In all honesty, the 2big checks all the boxes for me. I have an enterprise RAID device that looks like industrial artwork sitting on my desk. I can feel like a smart system admin when all I'm really doing is just checking a couple boxes in the easy to use Toolkit app. And the read/write performance has been similar to a standalone HDD. What more could I ask for?

You can purchase the LaCie 8TB 2big for $451. There's also a 4 TB version for $349, and a 16 TB option for $649. At the moment, I'm quite happy with my 8 TB model. And I highly recommend the 2big to photographers and videographers who want reliable enterprise backup enclosed in a handsome hunk of hardware.

P4091089-LinkedIn-01_05.jpg

You can share your thoughts at the TDS Facebook page, where I'll post this story for discussion.
Affiliate links are used in this article that could benefit TheDigitalStory. There is no extra cost of you.

This is The Digital Story Podcast #733, April 7, 2020. Today's theme is "Flashback! Tom Hogarty Talks Lightroom 3 at PPE 2009." I'm Derrick Story.

Opening Monologue

Jacob Javits Center has been the home for Photo Plus Expo as long as I can remember. It's a convention center filled with fond memories for me. Right now, it's serving as a makeshift hospital for COVID-19 patients. But a decade ago, I interviewed Tom Hogarty there talking about the Public Beta for Lightroom 3. It's an interesting conversation for many reasons, and it's the feature story for today's TDS Photography Podcast. I hope you enjoy the show.

Flashback! Tom Hogarty Talks Lightroom 3 at PPE 2009

In October of 2009, I sat down in New York with Tom at a table in the dining area of Javits. Tom Hogarty is the senior director of product management for all things photography at Adobe. We hadn't scheduled the interview. But I saw him at the show and asked if he'd chat with me about the Lightroom 3 Pubic Beta. He cheerfully agreed.

New-York-Skyline-1024.jpg

2009 was quite a time in the world of photography. Headliners at the event were the Canon 1D Mark IV and the Nikon D3S. Lightroom and Aperture were battling it out on the software front. And I was working in the Lowepro booth.

Adobe was very excited about the upcoming release of Lightroom 3. And I think you can hear that in Tom's voice as we talk. So sit back and enjoy this slice of life from New York, 2009.

Do You Have a Film Camera that Needs a Good Home?

Over the last year, I've received donations from TDS members who have film cameras that need a good home. What I do is inspect the items, repair and clean as I can, then list them in TheFilmCameraShop where I can find a good home for them. If you're interested in donating, please use the Contact Form on TheNimblePhotographer site. And thanks for you consideration!

Kenny Rogers: The Photographer

You can read the entire story (and see the pictures) on Fstoppers.

If you have an ear for music or you're tuned into pop culture, you're likely aware that Kenny Rogers passed away last week. Did you know that he was also an avid photographer? Did you know that Rogers was inducted into the International Photography Hall of Fame and Museum?

Rogers studied photography with the likes of George Hurrell, Yousuf Karsh (one of the most highly regarded portrait photographers of all time, just in case you're looking for credentials), and John Sexton (a lauded landscape photographer who was once Ansel Adams' assistant, if you're still looking for credentials).

A quote from Rogers: "I think art, if you're capable of one art, you understand - you know, the difference between a snapshot and a photograph is where you take it from. A snapshot of the Golden Gate Bridge is wonderful, but if you're a photographer you get down on the side and you find a way to give it some lines, and some movement, and that's the difference."

Update for the TDS 2020 Photography Workshop Season

Those of you on the registration list for the Humboldt Redwoods Workshop, I touched base with the Redwood Riverwalk Hotel, the site of our HQ. The good news is that they're still open. But only guests within Humboldt County can currently stay there.

I'm going to check in with them again later this month to get the latest information. I will send out an update note to everyone on the registration list this week with my basic game plan and the options you'll have. So keep an eye out for that note.

If you have questions about Humboldt or the other workshops, feel free to drop me a line using the Contact Form on www.thenimblephotographer.com.

The summer and fall workshops are looking less tentative at the moment. If you're interested in either, jump over to our 2020 Workshops Signup Page and place a $100 deposit to secure your place. Only participants on the Reserve List who have placed a deposit will be eligible to register for a workshop. If you have questions or need more information, fill out the "Send Me Info!" request form. I'll get back to you asap.

  • Humboldt Redwoods and Coast Workshop - May 12-14, 2020 - 0 Seats Remaining -- Our home base for this experience is in the hospitable town of Fortuna that's on the banks of the Eel River. From there we explore the magnificent redwood groves of Humboldt County and the rugged coastline of Northern California. This workshop explores three distinct ecosystems in a satisfying 3-day event. Limited to just 9 participants, you can reserve your spot and learn more about this event here.
  • Lassen Volcanic Park Photo Workshop - July 16-18, 2020 - 2 Seats Remaining -- We'll convene at a spacious cabin at Lake Almanor that serves as our HQ. From there we explore the stunning Lassen landscape, peaceful shores of Lake Almanor, and the magnificent mountain night skies. This hands-on photo workshop is limited to 8 participants and is a wonderful blending of experience, camaraderie, and artistry. Limited to just 8 participants, you can reserve your spot and learn more about this event here.
  • The Eastern Sierra Photography Workshop - Oct. 1-3, 2020 - 2 Seats Remaining - Our event is headquartered at the Silver Maple Inn in Bridgeport, CA - gateway to Bodie, Mono Lake, and June Lake. We'll take advantage of the magical morning light to photograph some of the most unique landscape in North America. We'll photograph the sparkling night skies of the Sierra and explore rustic urban environments. Limited to just 9 participants, you can reserve your spot and learn more about this event here.

Updates and Such

Inner Circle Members: A big thanks to those who support our podcast and our efforts!

How to Watch Photos for macOS Catalina and iPadOS - Learn everything you need to know about Photos for the Mac and iPad by checking out my latest course on LinkedIn Learning and on lynda.com. This course is perfect for Mac and iPad based photographers who shoot with iPhone, Mirrorless, and DSLR cameras. It covers both photography and movies. And if I say so myself, it's a lot of fun.

B&H and Amazon tiles on www.thedigitalstory. If you click on them first, you're helping to support this podcast. (The Digital Story is supported by its audience. When you purchase through links on our site, we may earn an affiliate commission.) And speaking of supporting this show, and big thanks to our Patreon Inner Circle members:

Affiliate Links - The links to some products in this podcast contain an affiliate code that credits The Digital Story for any purchases made from B&H Photo and Amazon via that click-through. Depending on the purchase, we may receive some financial compensation.

And finally, be sure to visit our friends at Red River Paper for all of your inkjet supply needs.

See you next week!

More Ways to Participate

Want to share photos and talk with other members in our virtual camera club? Check out our Flickr Public Group. And from those images, I choose the TDS Member Photo of the Day.

Podcast Sponsors

Red River Paper - Keep up with the world of inkjet printing, and win free paper, by liking Red River Paper on Facebook.

The Nimbleosity Report

Do you want to keep up with the best content from The Digital Story and The Nimble Photographer? Sign up for The Nimbleosity Report, and receive highlights twice-a-month in a single page newsletter. Be a part of our community!

Want to Comment on this Post?

You can share your thoughts at the TDS Facebook page, where I'll post this story for discussion.