Recently in Photography

  Page 134 of 385 in Photography  

Good news for those who prefer to work in Adobe Camera Raw. The latest release includes many of the same features as Lightroom CC, including the slick HDR and Panorama Merge.

selecting-frames-hdr.jpg

To test this, I selected two RAW files in Bridge and opened them in ACR. (This is the same two RAW file technique that I cover in my free eBook, Rocky Nook's Guide to HDR and Panoramas with Photo Merge in Lightroom CC.) With both files selected in ACR, I right-clicked on a thumbnail and chose Merge to HDR.

From this point, the process is very similar to Lightroom CC. A preview is generated, you choose a few basic settings, then click the Merge button. ACR processes the image and places a new DNG file in the same folder as the source photos. From there you can process the photograph as you normally would. In my case I used a graduated screen to add a bit more drama to the sky.

adding-grad-screen.jpg

Since this is a RAW process from start to finish, you can generate high quality output, and stay within your normal workflow... regardless if that's Lightroom or Adobe Camera Raw.

Free Guide to Adobe HDR and Panoramas

Check out my free eBook, Rocky Nook's Guide to HDR and Panoramas with Photo Merge in Lightroom CC that shows you how to create beautiful HDRs and panoramas with the latest Adobe technologies.

Want to Comment on this Post?

You can share your thoughts at the TDS Facebook page, where I'll post this story for discussion.
vsco-free-00.jpg

As if getting Lightroom 6 wasn't good enough, now VSCO has created a Film Pack with presets for TRI-X and Kodak Gold 100, and is offering it for free.

After you download VSCO Film 00, use their setup guide to install the presets in Lightroom 6, 5, or 4. VSCO's approach uses custom camera profiles that complement the film presets to fine tune the tone and color balance of your photos. The result is an impressive film emulation that is integrated into the Lightroom workflow. There's no round-tripping or being forced to wander outside the Develop module to use these tools.

vsco-presets-film-0.jpg

For example, here's 0-TRI-X+2 applied to a photo I captured in Paris with an Olympus OM-D E-M10 and the 14-42mm EZ zoom. When I installed the VSCO Film Pack, I selected only the cameras I typically use (Olympus, Canon, and Fujifilm) plus the Standard Presets. There might be a temptation to install all of the profiles, but they will occupy space in your left-side Presets column (although they can be collapsed by camera make).

Applying a preset is a simple process. Open the image in the Develop module and navigate to the VSCO presets on the left. The presets are designed to work with RAW files. You can use them with Jpegs, but it's a bit of a workaround, as VSCO explains here.

When I apply the TRI-X presets, for example, I notice the most activity in the Tone Curve, Grain, and B&W bricks on the right side of the Lightroom Develop module. I can continue to adjust the image, if I wish, using the other sliders.

The results are quite good. And I have to say, working with this free Film Pack does stir my interest in their other products.

Want to Comment on this Post?

You can share your thoughts at the TDS Facebook page, where I'll post this story for discussion.

Free eBook on Lightroom CC HDR Merge

One of the things that I've been doing over the last couple months is learning the ins and outs of Adobe's new Photo Merge that was incorporated into Lightroom CC. And I'm glad I did, because it's fascinating.

Essentially what Adobe created was an all-RAW workflow for HDRs and panoramas. You start with RAW files and end up with a highly editable DNG that you finish off in the Develop module. It's smart, and it works.

And what's even more interesting, is that it works with just two RAW files exposed at -2.0 EV and +2.0 EV. That's all you need. I programmed a function button on my OM-D to quickly capture these sequences, then all I have to do is process in Lightroom CC with all my other files.

hdr-pdf-cover.jpg

After weeks of testing, I wrote an eBook titled, Rocky Nook's Guide to HDR and Panoramas with Photo Merge in Lightroom CC. In this free guide (yes, free!), I cover the entire workflow for both HDRs and panoramas using your camera and Lightroom CC's editing tools. I think this guide will be very handy for anyone who loves this type of photography, and especially those who want a fast start to learning Lightroom's new star features.

There are plenty of other interesting new tools in Lightroom CC, such as the super handy filter brush. But having a built-in RAW workflow for both HDR and panoramas is pretty exciting stuff.

You can download the eBook here.

This week on The Digital Story Photography Podcast: Lightroom 6 (and CC) Ready for Primetime, Panasonic 20mm f/1.7 V2 Hands On, OM-D E-M5 Mark II Firmware Update Makes for a Faster Start - All of this and more on today's show with Derrick Story.

Weekly Update - "Apple buys camera-technology company LinX" - The acquisition would indicate that Apple is planning to do more of the imaging hardware development in-house. Currently the iPhone range uses image sensors supplied by Sony. An implementation of the LinX technology in future iPhone generations could not only mean improved image quality but also a whole new range of features. (Source: DP Review)

In other news... "NY State Police lock down campus for suspicious package that contained developing supplies" - After a full lockdown of the campus and immediate evacuation of the building containing the suspicious package, it was discovered via an X-ray machine that the package was nothing more than an abandoned container filled with supplies used for photographic development." (Source: Imaging-Resource.com)

And finally... "Olympus OM-D E-M5 Mark II Firmware Update 1.1" - Various fixes include: Audio can be faded out of movie files created with My Clips editing. Speed at which information is displayed when the camera is turned on has been improved. The issue of noise appearing in images captured while shooting with High Res Shot has been corrected. (Source The Photography Blog.)

Story #1 - "Lightroom CC Debuts" - Creative Cloud customers now have a brand new version to work with. The box version (Lightroom 6) is available too, but at a price. Highlights include:

  • New Photo Merge for both HDR and panoramas.
  • Facial recognition.
  • Advanced video slideshows.
  • Filter Brush: Precisely control which parts of your image are affected by the Graduated or Radial filters. Now you can use a brush to edit the filter's mask, adding or subtracting filter effects wherever you want.
  • Increased performance using GPU support (Mac OS X 10.9 or 10.10 only).
  • New camera profiles including: Canon 5Ds, Nikon D5500 and 7200, Olympus E-M5 Mark II and SH-2, Lumix GF-7, Fujifilm X-A2 and XQ2, and Samsung NX500.
  • Lots of new lens profiles.

Requires Mac OS X v10.8, 10.9, or 10.10 or Microsoft® Windows 7 with Service Pack 1, Windows 8, or Windows 8.1.

I have an eBook titled, "HDR and Panoramas with Photo Merge in Lightroom CC" that's published by Rocky Nook and that's available at this URL for the price of an email address.

e-m10-w-pana-20mm-web.jpg


Story #2 - "Hands on with the Panasonic 20mm f/1.7 II. This gem weighs in at only 3 ounces and measures 2.48" x 1.00". Its fast aperture and natural 40mm effective focal length make it a wonderful street shooter. More about it in today's second story.

Story #3 - From the Screening Room - Photo Restoration Techniques: Damaged Black-and-White Images with Neil Rhodes.

You can watch Neil in action by visiting the TDS Screening Room at lynda.com. While you're there, you can start your 7 day free trial to watch all of Neil's movies, plus every other title in the library (including over 20 by yours truly).

Virtual Camera Club News

News from SizzlPix: For April, We'll make it easy to delight your friends and relatives with SizzlPix of your or their favorite photographs with a Digital Story exclusive! Take a 20 percent discount; 25 percent on 2 or more shipped together. Just put "TDS April" in the comments space on the SizzlPix.com ordering page.

Thanks to everyone who recently reviewed the TDS Podcast in iTunes!

BTW: If you're ordering through B&H or Amazon, please click on the respective ad tile under the Products header in the box half way down the 2nd column on thedigitalstory.com. That helps support the site.

Download the Show

In addition to subscribing in iTunes, you can also download the podcast file here (34 minutes). You can support this podcast by purchasing the TDS iPhone App for only $2.99 from the Apple App Store.

More Ways to Participate

Want to share photos and talk with other members in our virtual camera club? Check out our Flickr Public Group. And from those images, I choose the TDS Member Photo of the Day.

Podcast Sponsors

lynda.com - Learn lighting, portraiture, Photoshop skills, and more from expert-taught videos at lynda.com/thedigitalstory.

Red River Paper -- Keep up with the world of inkjet printing, and win free paper, by liking Red River Paper on Facebook.

SizzlPix! - High resolution output for your photography. You've never seen your imagery look so good. SizzlPix.com. SizzlPix! now is qualified for PayPal "Bill Me Later," No payments, No interest for up to 6 months, which means, have your SizzlPix! now, and pay nothing until May!

Want to Comment on this Post?

You can share your thoughts at the TDS Facebook page, where I'll post this story for discussion.
Street Shooting Inside Oracle Arena

There are interesting shots wherever people congregate. I packed an Olympus OM-D E-M10 with a Panasonic 20mm F/1.7 II ASPH lens, set the ISO to 800 and the aperture wide open, then explored the venue before gametime.

Staffer at Oracle Arena Staffer at Oracle Arena. Photos by Derrick Story.

The confined space kept people close together and generated a kind of human energy, that for me, comes across in the images. Plus, the anticipation of the first NBA playoff game of the season for the front-running Warriors definitely served as a booster.

Fan with Foam Finger Fan with Foam Finger

The Panasonic 20mm is a terrific street shooting lens for micro four thirds cameras. It has a natural field of view, is very fast, and it doesn't attract attention to itself, especially on the petite E-M10.

Young Fan Young Fan

Everyone around me knew I was taking pictures. Although I worked quickly and composed on the tilting LCD screen. I think it's less intrusive to photograph people that way than to hold the camera up to my face and direct it at theirs.

Rally Cap Young Girl with Knit Warriors Cap

Once the game started, I switched to the Olympus 45mm f/1.8 for crowd portraits and action on the court. Again, wide open, but this time at ISO 1600 to compensate for the lower light levels.

Vendor Vendor in the Aisles

I organized the images in Aperture 3.6 and processed the B&W in Nik's Sliver Efex Pro 2.


Nimble Photographer Logo

The OM-D E-M10 with the Panasonic 20mm f/1.7 has a high Nimbleosity Rating. What does that mean? You can learn about Nimbleosity and more by visiting TheNimblePhotographer.com.

Want to Comment on this Post?

You can share your thoughts at the TDS Facebook page, where I'll post this story for discussion.

Neck Strap vs Wrist Strap

olympus-leather-strap.jpg

My history with camera straps goes all the way back to those skinny leather "neck cutters" that were standard issue with our film cameras. You can imagine my joy when Canon and others developed the wider, softer fabric models that were more comfortable and were included with their SLRs.


This Olympus E-Z Adjustable Camera Neck Strap runs $15 and is a handsome, lightweight solution for street shooters who like to keep their hands free.


But over the years, I tired of long, tangly straps all together and experimented with shorter wrist models. These were even more practical with lighter digital cameras such as the micro four thirds that I often shoot with today.

Unfortunately, they weren't perfect either. If your camera is bound to one hand, then you really only have the other free. And suddenly I was looking for a place to set the camera down when I needed both hands to work on something.

What I've finally discovered, after all of these years, is that camera straps are like camera bags, and it's unlikely that just one is going to be perfect in every situation. Why this took me so long to figure out, I don't know.


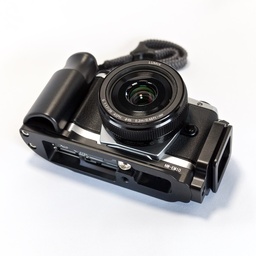
I use a Gariz Leather XS-WB1 camera hand strap on the OM-D E-M5 Mark II, which is the camera most likely to end up on a tripod.

I carry two cameras in my everyday bag. My street shooter, a black Olympus OM-D E-M10, is configured with a neck strap that allows me to keep my hands free and the camera ready for a quick shot when opportunity presents itself. I can carry the E-M10 a variety of ways, including hiding it beneath my jacket when necessary. Hands are always free.

My other camera, the OM-D E-M5 Mark II sports a wrist strap. That's because it's most likely to end up on a tripod for a 40MP high rez image, an HDR, or panoramas. The wrist strap stays out of the way and doesn't get tangled up with the other gear. Plus, there are times I just don't want the long, dangly neck strap to deal with.

And there are dozens of other solutions, many of which you probably use, or may have tried. Regardless of which particular type of strap you like, chances are good that it works better in some situations than others. So, when it's all said and done, the likely solution is that two straps are better than one.

Want to Comment on this Post?

You can share your thoughts at the TDS Facebook page, where I'll post this story for discussion.

canon-xc10-back.jpg

Many of the latest cameras provide functionality for both stills and video capture. And some, such as the new Canon XC10 4K Professional Camcorder, attempt to create one tool that works for many jobs.

But when you really pour over the specs and design, all cameras are better at one thing, regardless of their versatility. The XC10 is a perfect example. It is a camcorder first and a still capture device secondly.

Another example is the new Olympus OM-D E-M5 Mark II. When I first met with Olympus about this camera, the emphasis was on its video capabilities. But in my view, they were shoring up that capacity, not making a video camera. The E-M5 Mark II excels at still photography. But now, thanks to its improvements, it is better at video.

panasonic-gh4.jpg The Panasonic DMC-GH4 comes close to being equally adept at both video and stills. But since my focus is on photography, I can go with a smaller camera, such as the OM-D E-M10, that's better suited to my need for traveling as light as possible.

I bring this up because it's easy to get confused when considering new purchases. The temptation is to have a camera that does everything. We're lucky to have such options, but in the end, think about your individual strengths, and purchase a tool that matches them.

My strength is nimble photography. I like to be out in the world shooting stills. So I have to make sure I have a device that's perfectly suited for travel. That's why I love micro four thirds.

Shooting video, indoor portrait photography, and product work are secondary tasks. Yes, I have tools to help me accomplish those jobs, but they tend to be older and aren't updated as often. My new cameras are those that feed my strengths.

You've probably already thought about all of this. But if not recently, it's a good exercise to consider what type of artist you truly are now, then make sure you have the right tools to feed your creativity.


Nimble Photographer Logo

My micro four thirds cameras have a high Nimbleosity Rating. What does that mean? You can learn about Nimbleosity and more by visiting TheNimblePhotographer.com.

Want to Comment on this Post?

You can share your thoughts at the TDS Facebook page, where I'll post this story for discussion.
This week on The Digital Story Photography Podcast: LinkedIn Buys lynda, Is the Canon XC10 the Camera of the Future?, Snapseed 2.0 - All of this and more on today's show with Derrick Story.

Weekly Update - "Snapseed hits version 2.0 with new tools, filters and more" - The latest update adds a new way to view your edits with Stacks. Stacks allow you to see a list of filters that you've applied to an image that can be re-edited or copied over to another image. Snapseed 2.0 also includes new filters, brush and spot repair tools, and more. Available now for iOS and Android. (Source: iMore)

In other news... "Review: Photos for OS X is faster than iPhoto, but less powerful than Aperture" Photos for OS X is now official with the release of Mac OS X 10.10.3. On the same day (last Wednesday), Jeff Carlson publishes a review for Macworld Magazine stating, "Photos is a big step up for iPhoto users, with better speed and editing tools. Power users of Aperture will probably want to stay with Aperture or switch to another pro-level app like Lightroom." (Source: Macworld Magazine)

And finally... "Olympus Price Reduction on the OM-D E-M10 Premium Kit" - This kit that includes an E-M10 made from special high quality materials, 14-42mm EZ Zoom, and special edition leather neck strap and lens cap. Was available only in the UK, and for about $1,300 US, is now available for $875. And it's gorgeous! Go to http://www.getolympus.com/us/en/digitalcameras/omd/e-m10.html to learn more.

Story #1 - "lynda.com to join LinkedIn" - As part of the announcement, authors (such as myself) were sent an official FAQ about the deal. Here's what lynda has to say about this giant acquisition.

canon--xc1-front.jpg

Story #2 - "Opinion: Why the Canon XC10 is a big deal" by Dale Baskin of DP Review. Dale writes, "The XC10 represents an important step on the path to convergence between the still and video imaging worlds, though it's important to recognize that it's an early step. Canon tends to be very deliberate in its product development and has smartly aimed this camera at a category of users (such as media) for whom the combination of features, specs, and physical size make a lot of sense. It may not be the camera that enthusiast stills photographers are looking for, but it might be the best example yet of a 'convergence' product that facilitates both still photography and video with equal emphasis on both."

Basic feature highlights: "12MP stills from a 1-inch sensor won't set the enthusiast photographic market aflame, but 5-axis image stabilization (a digital effect in HD video capture mode only), a maximum ISO sensitivity of 20,000 and a built-in, optically stabilized 24-240mm equivalent zoom (27-273mm for movies) should appeal greatly to multimedia professionals who increasingly need to focus on both stills and video capture."

Story #3 - From the Screening Room - iPhone and iPad Photography with iOS 8 with Seán Duggan. If the iPhone or iPad are your primary image capture devices when you're on the go, Sean can help you get the most out of them.

You can watch Sean in action by visiting the TDS Screening Room at lynda.com. While you're there, you can start your 7 day free trial to watch all of Sean's movies, plus every other title in the library (including over 20 by yours truly).

Virtual Camera Club News

News from SizzlPix: For April, We'll make it easy to delight your friends and relatives with SizzlPix of your or their favorite photographs with a Digital Story exclusive! Take a 20 percent discount; 25 percent on 2 or more shipped together. Just put "TDS April" in the comments space on the SizzlPix.com ordering page.

Thanks to everyone who recently reviewed the TDS Podcast in iTunes!

BTW: If you're ordering through B&H or Amazon, please click on the respective ad tile under the Products header in the box half way down the 2nd column on thedigitalstory.com. That helps support the site.

Download the Show

In addition to subscribing in iTunes, you can also download the podcast file here (26 minutes). You can support this podcast by purchasing the TDS iPhone App for only $2.99 from the Apple App Store.

More Ways to Participate

Want to share photos and talk with other members in our virtual camera club? Check out our Flickr Public Group. And from those images, I choose the TDS Member Photo of the Day.

Podcast Sponsors

lynda.com - Learn lighting, portraiture, Photoshop skills, and more from expert-taught videos at lynda.com/thedigitalstory.

Red River Paper -- Keep up with the world of inkjet printing, and win free paper, by liking Red River Paper on Facebook.

SizzlPix! - High resolution output for your photography. You've never seen your imagery look so good. SizzlPix.com. SizzlPix! now is qualified for PayPal "Bill Me Later," No payments, No interest for up to 6 months, which means, have your SizzlPix! now, and pay nothing until May!

Want to Comment on this Post?

You can share your thoughts at the TDS Facebook page, where I'll post this story for discussion.
after-drobo-upgrade.jpg

My Drobo 5D was on the edge. It was nearly out of space.


Here's the configuration after the upgrade with four 3 TB drives, one 1 TB HD, and the SSD chip.


My first Drobo setup featured two 3 TB hard drives and three 1 TB drives. And they held me nicely for a number of months. But recent checks of the Drobo Dashboard made me realize that it was time to upgrade a couple of those HDs. So I purchased a pair of Toshiba 3TB 7200 RPM SATA drives and began the nerve-wracking swapping process. (Nerve wracking only because when I tried this with my first Drobo, it wouldn't accept the upgrade. My hope was that things would be better with the 5D.)

The good news was, not only was I able to successfully add more space, but I was increasing speed too. The new Toshiba drives spin at 7200 RPM, replacing the slower 5400 RPM Segate Barracudas.

capacity-before-upgrade.jpg This is what my Drobo Dashboard looked like before the upgrade. Just a few more RAW files, and I would begin to see the yellow warning message.

The process was fairly simple. I shut down the Drobo, ejected the first 1 TB hard drive, replaced it with a 3 TB Toshiba, then rebooted. The Drobo formatted the new drive for me, then went about its business of adding it to the fold. Seven hours later, all the lights were green, and I was ready to go.

I did a little testing and was pleased with how it responded. So I went for round 2. Once again I shut down the Drobo, replaced a 1 TB drive with a 3 TB Toshiba, and waited another 7 hours for the process to run its course. This is what I was greeted with when I reopened the Drobo Dashboard.

capacity-after-upgrade.jpg Here's the capacity chart after the 6 TB upgrade.

I tested the new units by opening a large Aperture library that I store on the Drobo. Everything worked great. Browsing was fast, zooming was smooth, and image editing was performed without a hitch.

When you look at the Drobo capacity pie chart, you'll see that there's 9 TBs of available storage, even though I have 13 TBs of hardware in there. The other 4 TBs are used as part of Drobo's backup system. That's how you're protected if a drive goes bad. You won't lose any data. This same system allows you to upgrade the drive bays, as I've explained in this article.

The Drobo 5D can hold a maximum of 32 TBs of storage. For now, I'm happy with the four 3 TB drives and the lone 1 TB Seagate. I'll probably upgrade that bay with a 5 TB 7200 drive once the prices drop a bit more.

In the meantime, I'm back to backing up my Aperture and Lightroom libraries. In fact, with all of this additional storage space, I should go out and shoot a few more pictures.

Want to Comment on this Post?

You can share your thoughts at the TDS Facebook page, where I'll post this story for discussion.
aperture-photos-libraries.jpg

You can open your current Aperture or iPhoto libraries in Photos for OS X. The command to do so isn't part of the Photos for OS X menu system. Rather, you close the Photos app, then relaunch holding down the Option key. By doing so, you can switch to a new library or convert an existing iPhoto or Aperture library.

Photos will create its own version of the library, leaving the original Aperture or iPhoto library intact (as shown above). Keep in mind that the converted Photos library is different than your Photos System Library that's located in your Pictures folder. The System Library is the default Library that also communicates with iCloud services and allows you to share images across devices.

The Converted Library might be best considered a special project that's its own container. You can switch back and forth between the System Library and the Converted Library by relaunching Photos for OS X while holding down the Option key.

Option-Open.jpg Launching Photos with the Option key pressed presents you with a dialog box similar to this.

If you want to test this feature, I recommend that you use a small library that will allow you to practice the ins and outs of this procedure without processing gigabytes of information. There is no easy way to merge the Converted Library with the existing System Library. There's an advanced technique that's really a workaround, but I haven't tested it enough to write about at this time.

However, if you want to practice converting an iPhoto or Aperture Library, here are the steps.

  • Quit Photos for OS X and make sure Aperture and iPhoto are closed too.
  • Hold down the Option key and relaunch the Photos application.
  • Look for the Library you want to convert in the Choose Library dialog box.
  • Click on the Library you want to convert, then click on the Choose Library button.
  • Photos for OS X will prepare the converted library for you and place the container in the same directory as the original library.

Aperture Tips and Techniques

To learn more about Aperture, check out my Aperture 3.3 Essential Training (2012) on lynda.com. Also, take a look at our Aperture 3 Learning Center. Tons of free content about how to get the most out of Aperture.


Want to Comment on this Post?

You can share your thoughts at the TDS Facebook page, where I'll post this story for discussion.