Recently in Photography

  Page 162 of 385 in Photography  

hackxtack-camera.jpg

File this one under "Why Didn't I Think of That."

A new Kickstarter called HACKxTACK aims to prevent misplaced lens caps by combining a "clip anywhere" home base with a handsomely machined metal strip that you adhere to the front of the cap. The result is secure storage while you get the shot.

Thinking ahead, this could be a terrific gift for the shutterbug in your life that you could easily stash away now. Regardless, you can learn more about HACKxTACK on their Kickstarter page.

Want to Comment on this Post?

You can share your thoughts at the TDS Facebook page, where I'll post this story for discussion.
You can't always shoot in perfect light. But if you have a camera that captures infrared, any time of day is good.

I carry my Fujifilm X20 set in RAW+JPEG, with the B&W Film Simulation mode enabled. When I attach the Hoya R72 filter (to assist with IR capture), the JPEG is B&W infrared and the RAW is color infrared.

Aside from creating a look that is very different than typical photography, you can shoot any time of day.

Just something to keep in your back pocket.

carousel-iphone.png

The announcement of Carousel by Dropbox presents a new and interesting option for viewing your complete photo history stored on a Mac, iOS, and Android devices. If you're already a Dropbox user, this new capability is particularly intriguing.

What Carousel does is create a more practical interface for viewing and sharing Dropbox-stored images. It creates a chronological stream of thumbnails that you can browse by swiping up and down on the iPhone screen, or by swiping left and right on the timeline scale at the bottom of the interface. This sounds simple, but it actually works very well.

Photos are presented as collections with location and date as their title. Up to eleven thumbnails from the collection are initially displayed. If there are more pictures in that collection, a number is shown that you can tap on to reveal the remaining photos.

When you first log in to Carousel with your Dropbox account information, the app integrates all the photos it can find in your existing Dropbox account with those currently in the iPhone's Camera Roll. Additionally, if you're using Dropbox to automatically archive your iPhoto library, those images become part of your Carousel as well.

In a short period of time, the bulk of your photo history is available on the iPhone with very little effort on your behalf. Moving forward, the Carousel is automatically updating itself via these sources.

From that point, you can easily view your collection, or share via email, Twitter, and Facebook, or open in an app for editing. Images that you want to retain, but don't want visible in the scrolling Carousel, can be hidden from the stream and viewed only through an option in the Settings menu.

Using Carousel will require ample storage on your Dropbox account, but frees up space on your mobile device. If you have available space on Dropbox, this is a solution worth considering. Of course, you can always purchase more if necessary.

Currently, Carousel is not compatible with the iPad, and is an iPhone and Android app only. I'll keep you posted as this service evolves.


Nimble Photographer Logo

Carousel has a high Nimbleosity Rating. What does that mean? You can learn about Nimbleosity and more by visiting TheNimblePhotographer.com.

Want to Comment on this Post?

You can share your thoughts at the TDS Facebook page, where I'll post this story for discussion.
Folded Foldio Studio

We take a lot of pictures with our smartphones. But product photography? Yes you can, and I'll prove it.

This quest started when I learned about Foldio through a Kickstarter initiative. I ponied up $45 (Kickstarter early adopter price) and received a foldable, portable studio, two LED light strips, and four sweep backdrops. I can fold up the studio, lights, two batteries and one backdrop and fit it in an 11" x 11" carry bag. And with this little studio, I can take some pretty good shots.

Foldio Studio in Action The Foldio studio in action. One LED light strip on top, and another at the base.

Foldio will fit in any messenger bag that can accommodate a laptop. I can set it up in minutes thanks to the magnets that click everything into place. I have one LED light strip adhered to the inside top of the studio, and the other is free floating so I can position it as needed.

For the images captured with my iPhone, I use Camera+ ($1.99) because it has an effective exposure compensation slider that makes it easy to compensate for the bright white background. Without exposure compensation, your phone will underexpose both the subject and white backdrop. (My kit also included a black, gray, and green backdrop. Exposure will change with each of them.)

Because the LED lights are color balanced, you can use auto white balance on your phone or camera, and the rendering should be pretty accurate.

I photographed two different products with the Foldio. One item was shot with the iPhone 5S and Camera+. The other item was photographed with a Pentax K-5 and 50mm f/1.8 lens. Can you tell which is which below?

product-shot-in-foldio.jpg Product shot #1 captured in the Foldio using the two LED light strips.

product-shot-2-in-foldio-studio Product shot #2 captured in the Foldio using the two LED light strips.

If you really want to know right now, you can download one of the images and look at the EXIF data. Otherwise, I'll post the answer tomorrow on the TDS Facebook page.

The point is, you can create some lovely product shots with very simple tools. The folks at Foldio will open their store soon. You can get on their mailing list and be notified once they're selling kits. It's a nifty setup that's fun, easy to use, and produces good results.


Nimble Photographer Logo

The Foldio has a high Nimbleosity Rating. What does that mean? You can learn about Nimbleosity and more by visiting TheNimblePhotographer.com.

Want to Comment on this Post?

You can share your thoughts at the TDS Facebook page, where I'll post this story for discussion.
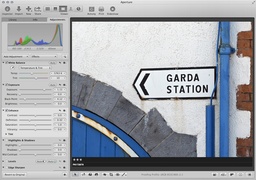
Lightroom 5.4 is required to sync with Mobile Lightroom on the iPad. But there's a lot more to this release than that.

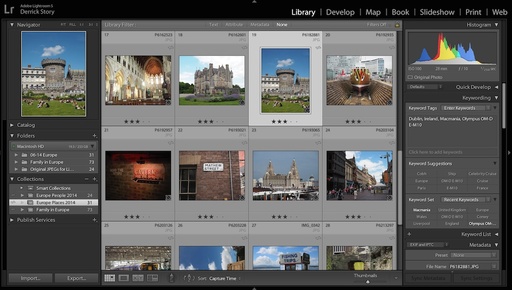
For starters, the update adds Raw support for 18 new cameras, including the Olympus OM-D E-M10, Canon PowerShot G1 X Mark II, Fujifilm X-T1, Nikon D4S, and the Samsung NX30... just a name a few. For those of us shooting with the E-M10, Lightroom 5.4 is the first mainstream photo management app to support this camera.

Lightroom 5.4 with the OM-D E-M10 Olympus E-M10 Raw files decoded in Lightroom 5.4.

But there's more. Fujifilm shooters will appreciate the new Camera Matching Color Profiles (PROVIA/STANDARD, Velvia/VIVID, ASTIA/SOFT, MONOCHROME, etc.) for basically all of their current releases. Being able to apply these profiles in post is a nice convenience.

There's also a bucket full of new lens profiles, such as the Canon EF 200-400mm f/4 L IS USM, Sigma 24-105mm f/4 DG OS HSM, GoPro Hero3+ Black Edition, Zeiss Otus 1.4/55 ZF.2, and even the Apple 5c. Again, just to name a few.

Add in the bug fixes, and this is a major release of Lightroom from Adobe. Practically something for everyone.


Join me on my Instagram site as I explore the world of mobile photography. And now Instagram features 15-second movies too.

Want to Comment on this Post?

You can share your thoughts at the TDS Facebook page, where I'll post this story for discussion.
This week on The Digital Story photography podcast: ISO Wars; Microsoft Makes the iPad; Lowepro Pro Roller x200 Winner; Eye-Fi Mobi goes desktop with Receiver; and Upcoming speaking engagements - All of this and more on today's show with Derrick Story.

Story #1 - The Weekly Update: The top story this week is the Sony announces Alpha 7S full-frame mirrorless. The alpha 7 has extreme ISO performance, up to 409,600. Sony limited resolution to 12 MPs on the full frame sensor in favor of low light performance. Interesting how the ISO war seems to be replacing the Resolution war. The camera is also a video beast, with 8-bit 4:2:2 4k video over HDMI at up to 30p, without the need for line skipping or pixel binning. (Source: DP Review)

sigma-50mm-f1pt4-art.jpg

In other news, Sigma's 50m f/1.4 DG HSM Art lens seems to be the real deal, topping Canon and Nikon in its first serious review (Source: PetaPixel).

And finally, SLRGear posted a helpful review of the Pentax 70mm f/2.4 Limited DA HD, a compact, relatively fast portrait lens that performed well in the lab.

Story #2 - The Lowepro Pro Roller x200 Giveaway winner is Mark Castleman of Westminster, CO. We've already shipped the microfiber clothes to the other 25 winners. Thanks to everyone who participated!

Story #3 - From the Screening Room - Office for iPad First Look with Jess Stratton. This week we focus our attention on mobile computing. Now that Microsoft has brought Office to iOS, how does it work? This overview will bring you up to speed.

You can watch Jess in action by visiting the TDS Screening Room at lynda.com/thedigitalstory. While you're there, you can start your 7 day free trial to watch other mobile computing titles, plus every other topic in the library.

Story #4 - The Nimbleosity Report - The Eye-Fi Mobi Desktop Receiver Adds New Possibilities. If you have an Eye-Fi Mobi card, this beta software may breath new life in to it.

Story #5 - Upcoming Speaking Engagements: Will present for SMOG (So Cal) on April 12, DVMUG on April 16, and the Chico Mac Users Group on April 17.

Virtual Camera Club News

Workshop News: I've sent out invites to the Reserve List for the Fall Color with Safari West Workshop, October 24-26, 2014. You can learn about them both, plus request a reservation form by visiting the TDS Workshops Page and using the "Send Me Info" box.

Photo Assignment for April 2014 is "Flower Power".

If you haven't done so already, please post a review for The Digital Story Podcast in iTunes.

BTW: If you're ordering through B&H or Amazon, please click on the respective ad tile under the Products header in the box half way down the 2nd column on thedigitalstory.com. That helps support the site.

Listen to the Podcast

In addition to subscribing in iTunes, you can also download the podcast file here (32 minutes). You can support this podcast by purchasing the TDS iPhone App for only $2.99 from the Apple App Store.

More Ways to Participate

Want to share photos and talk with other members in our virtual camera club? Check out our Flickr Public Group. And from those images, I choose the TDS Member Photo of the Day.

Podcast Sponsors

lynda.com - Learn lighting, portraiture, Photoshop skills, and more from expert-taught videos at lynda.com/thedigitalstory.

Red River Paper -- Keep up with the world of inkjet printing, and win free paper, by liking Red River Paper on Facebook.

SizzlPix! - High resolution output for your photography. You've never seen your imagery look so good. SizzlPix.com. SizzlPix! now is qualified for PayPal "Bill Me Later," No payments, No interest for up to 6 months, which means, have your SizzlPix! now, and pay nothing until August!

Want to Comment on this Post?

You can share your thoughts at the TDS Facebook page, where I'll post this story for discussion.
Lightroom Mobile for iPad

Lightroom is now available for the iPad.

You can download the app from the iTunes Store for free, upgrade your existing desktop version of Lightroom to 5.4, then share Collections across devices... for 30 days. After that, you'll need a Creative Cloud account to maintain functionality.

lightroom-mobile-ipad.jpg Lightroom on the iPad.

On first impression, the tools and user interface for Lightroom Mobile seem useful and well thought out. There are a number of editing tools and filters. And when synced with desktop Lightroom, you have lots of flexibility when on the go. Pocketlint has published a good article about the specifics.

lightroom-5pt4.jpg Synced file in Lightroom 5.4 for the Mac.

Since Creative Cloud for Photographers is still on sale for $9.99 a month, this mobile version of Lightroom might be just the thing to encourage current fence-sitters to make the jump.

I follow up after a bit more testing.

Want to Comment on this Post?

You can share your thoughts at the TDS Facebook page, where I'll post this story for discussion.
eye-fi-mobi-receiver.jpg

The Eye-Fi Mobi is already one of my favorite WiFi-enabled memory cards. With the recent addition of Desktop Receiver, it's become even more interesting.

Versions of the beta software are available for both Mac and Windows platforms. When enabled, you computer goes into "listening mode," on the lookout for images available from the Mobi card. If you take a picture, the file is transferred to a folder.

In my tests with the Fujifilm X20 compact, which doesn't have built-in WiFi, the process worked smoothly. I shot Raw+Jpeg. The Jpegs were copied to my Mac and the Raws remained intact in the camera.

One thing to keep in mind about the beta software: if you also use the Mobi card to send images to your mobile device, be sure to exit the software on your computer first. My experience was that the iPad couldn't recognize the Mobi when Desktop Receiver was active.

You can download the beta software for free from the Eye-Fi Labs site. There's also a handy FAQ there that handles the most common questions.

For me, this capability will be handy for blogging. I can shoot a subject and have it appear immediately on my computer for posting. What about you? If you have an Eye-Fi Mobi, give this software a spin and see where it takes you.


Join me on my Instagram site as I explore the world of mobile photography. And now Instagram features 15-second movies too.

Want to Comment on this Post?

You can share your thoughts at the TDS Facebook page, where I'll post this story for discussion.

fujifilm-x20-bw-mode.jpg

I carry the Fujifilm X-20 compact in my camera bag, set to RAW+Jpeg with the Film Simulation mode on B&W with yellow filter. Why?

By doing so, I'm always set to shoot B&W. The monochrome images look great on the LCD when I frame the shot, and while reviewing the images too. I use the X-20 for this because Fujifilm really has film simulation down to a science.

As a safety net, I'm capturing Raw too. When I import the images into Aperture, I enable Raw+Jpeg Pairs (in the import dialog box), then select: "Both (Separate Originals)." By doing so, I get all of those wonderful monochrome Jpegs plus the master Raw files. I tend to separate them into their respective albums.

I typically use the B&Ws going forward. But if I need those Raw files, it's good to have 'em.

Aperture Tips and Techniques

To learn more about Aperture, check out my Aperture 3.3 Essential Training (2012) on lynda.com. Also, take a look at our Aperture 3 Learning Center. Tons of free content about how to get the most out of Aperture.


The Digital Story on Facebook -- discussion, outstanding images from the TDS community, and inside information. Join our celebration of great photography!


olympus-14-42-pancake-zoom.jpg

Very few lenses give us everything we want. And the clever Olympus 14-42mm f3.5-5.6 EZ zoom ($349) is no exception.

On the plus side you get a very compact, handsome power zoom that's quiet with auto-on and an accessory auto lens cap. The optic focuses quickly and accurately. It's the perfect choice for quick-draw candids. What you give up is some edge sharpness with a dash of color fringing on contrasty lines.

My definitive test for this zoom was photographing a landscape under ideal conditions, with favorable camera settings. The image below was recorded mid-morning after a storm. I used the "Low ISO" setting on the Olympus OM-D E-M10 and captured in both RAW and Jpeg Fine. (You can download the full size version on Flickr and study the image yourself.)

Petaluma Countryside

I used a mid-range focal length (21mm) on the 14-42mm zoom at f/5.6, 1/640th of a second. I processed the RAW file in Olympus Viewer 3 and the Jpeg in Aperture 3.5. (This version is from the RAW file.)

During RAW processing I removed the slight color fringing on the white fence (had to magnify to even see it) in Olympus Viewer. I also made a few tonal adjustments.

processing-raw-olympus-viewer3.jpg

I then made a 13" x 19" print on Red River Paper UltraPro Gloss 2.0 with the Epson R2000. I like to make prints when evaluating lenses. To me, it feels like the "real world" test.

The image looked good through all phases of production on the computer. I had to magnify to see the flaws, notably the color fringing on the white fence. I did detect the sharpness falloff on the edges when viewing the image on my MacBook Pro Retina Display. But it was easier for me to draw my final conclusions by studying the 13" x 19" print.

The Bottom Line

The Olympus 14-42mm f3.5-5.6 EZ zoom is the standard lens that I keep mounted on the Olympus OM-D E-M10. It reacts quickly when I power up the camera, so it's well-suited for grabbing a quick shot. The quiet power zoom is easy to use and helpful for video recording.

But when it's time for more serious landscape work or architecture, I recommend switching to one of the excellent primes by Olympus or Panasonic. Even at f/5.6 on the 14-42mm, the edges are not as sharp as the center. And the color fringing, which can be removed in post, still appears on hard edges in bright areas.

The Olympus 14-42mm EZ zoom is a marvel of engineering: compact, quiet, with lots of features. It will help you capture images that you may have otherwise missed with a more traditional optic. But when it's time for the best edge-to-edge sharpness, switch to a prime.


Nimble Photographer Logo

The 14-42mm has a high Nimbleosity Rating. What does that mean? You can learn about Nimbleosity and more by visiting TheNimblePhotographer.com.

Want to Comment on this Post?

You can share your thoughts at the TDS Facebook page, where I'll post this story for discussion.