Recently in Photography

  Page 81 of 381 in Photography  

Creatures of the Night

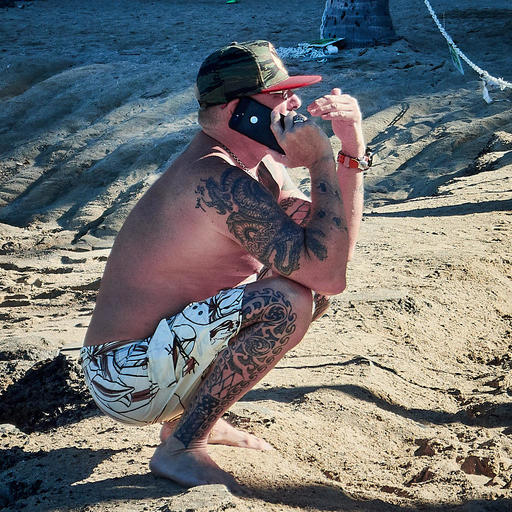
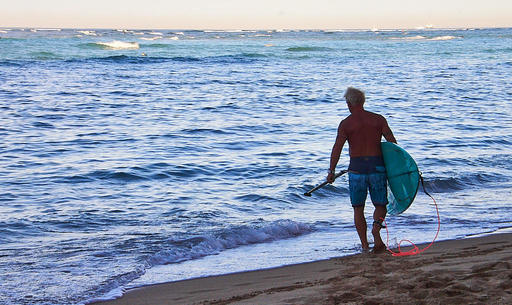
The Santa Monica Metro Station connects travelers to the greater Los Angeles area. It's an attractive, well-lit area that's perfect for night photography. So I mounted my Olympus 17mm f/1.8 and went searching for those who commute after dark.

Between-Cars.jpg A peek between cars. Olympus OM-D E-M10 Mark II, 17mm f/1.8 lens at f/4, ISO 2500, 1/15th. (Out of camera image.) Photo by Derrick Story.

Getting-a-Ticket.jpg Getting a Ticket - Olympus OM-D E-M10 Mark II, 17mm f/1.8 lens at f/4, ISO 2500, 1/40th. (Out of camera image.) Photo by Derrick Story.

It's a great way to get an evening walk, and the images provide a completely different look than daytime travel photography.

You can share your thoughts at the TDS Facebook page, where I'll post this story for discussion.

This is The Digital Story Podcast #599, August 29, 2017. Today's theme is "5 Scenarios When Analog Makes More Sense." I'm Derrick Story.

Opening Monologue

I've been reading a lot about the Nikon D850 and what an impressive 45MP, $3,300 machine it is. I've also been following the Fuji GFX story and how the market is responding to the 51MP, $6,500 digital medium format body. The numbers made me a little dizzy. And it got me thinking about more affordable alternatives for creative photography. And that's the subject for today's show.

5 Scenarios When Analog Makes More Sense

7350_32A-TFP091.jpg

I had coffee the other day with a customer who had purchase a Contax RTS from TheFilmCameraShop. He was in town via a road trip, and it was easier to hand over the camera rather than ship it. Kyle is a professional travel and landscape photographer. And it was fascinating to listen to the direction he's taking today.

He shoots Sony mirrorless most of the time. But he has collection of Zeiss lenses with the Contax mount that he's adapted to his digital body. "I can't describe how good these lenses are and how utterly affordable."

He was preaching to the choir. And his story is my first example of when analog makes more sense.

  • Great Glass, Affordably - One of the best zoom lenses ever made is the Zeiss 35-70mm f/3.4 in the Contax mount. Pop Photo commented in their testing of it that every focal length performed like a prime lens. I bought one in pristine condition for $289. I can mount it on any mirrorless camera.
  • Medium Format at a Fraction of the Price - You can buy a Hasselblad 500C with Zeiss 80mm lens and back for about $900. That's about 1/10 the cost of a digital medium format kit. Since most of us only need medium format for special assignments, this is a wonderful alternative.
  • Archive for the Ages - Properly handled film has a very long life expectancy and is device independent.
  • Improving Your Skill as a Photographer - It's amazing the motivation that sets in the moment you get your processed images back from the lab, and they are all over the map exposure wise. Shooting digital RAWs has made most of us lazy at capture. There is no better (and unforgiving) way to sharpen up our skills than by shooting a monthly roll of film.
  • The Cameras Themselves - Many of the analog cameras I shoot with are my favorites. And because of this, I want to shoot more often with them. And as a result, I have more images at my disposal than ever before. I shoot digital at work. But analog gets me off the couch in my free time.
  • Using the Intervalometer for Cascable 3 "kas-ka-ball"

    One of my favorite features in Cascable's Shutter Robot is the Intervalometer Module. It's both powerful and flexible, and perfect for taking full control of your time-lapse sequences. The Intervalometer is a PRO feature.

    Start by setting the Interval, which can be as short as 1 second or as long as 59 minutes, 59 seconds. Then set the Stop parameter. You have three options: manually, after a fixed number of shots, or after a fixed amount to time. Once those are set, tap the Engage button, then the shutter release to begin the sequence.

    Cascable is available to get started with for free from the iOS App Store. Cascable's Pro features come with a free trial when subscribing from $2 per month, or can also be unlocked with a one-time $29.99 purchase.

    We have a tile on all the pages of The Digital Story that takes you directly to the TDS landing page on the Cascable site.

    You Don't Always Have to Take the Shot

    The story about my younger brother getting to steer the ship during an important family event.

    A Look at Our First The Nimble Classroom

    It was all systems go last Saturday for our first The Nimble Classroom focusing on Capture One Pro Catalog Management. Here's how it went.

    Here are the upcoming sessions.

    • September 9, Expert Editing, Capture One Pro
    • September 23, Luminar Pro Techniques
    • October 7, Photos 3 for macOS SOLD OUT
    • November 4, Photos 3 for macOS

    You can learn more about them and sign up for your favorites by visiting The Nimble Classroom online.

    Updates and Such

    Big thanks to all of our Patreon members!

    B&H and Amazon tiles on www.thedigitalstory. If you click on them first, you're helping to support this podcast. And speaking of supporting this show, and big thanks to our Patreon Inner Circle members.

    And finally, be sure to visit our friends at Red River Paper for all of your inkjet supply needs.

    Texas-based Red River Paper recently announced a new fine art paper, Palo Duro Etching. The new paper is a 100 percent cotton rag paper and is free of optical brightener additives. The paper is designed to offer warm white tones, deep blacks and a subtle texture to accurately recreate traditional darkroom fine art prints.

    See you next week!

    More Ways to Participate

    Want to share photos and talk with other members in our virtual camera club? Check out our Flickr Public Group. And from those images, I choose the TDS Member Photo of the Day.

    Podcast Sponsors

    Cascable - Cascable is the best tool available for working with your camera in the field.

    Red River Paper - Keep up with the world of inkjet printing, and win free paper, by liking Red River Paper on Facebook.

    The Nimbleosity Report

    Do you want to keep up with the best content from The Digital Story and The Nimble Photographer? Sign up for The Nimbleosity Report, and receive highlights twice-a-month in a single page newsletter. Be a part of our community!

    Want to Comment on this Post?

    You can share your thoughts at the TDS Facebook page, where I'll post this story for discussion.
As we rev up for the next iPhone super cycle (10 year anniversary and all), it's sounding like the top of the line handset will tip the scales at $1,000. That's more than what I would spend on a new Pentax KP or OM-D E-M5 Mark II (and the OM-D comes with a free $400 lens). Both are serious tools that I use in my photography business.

iPhone-Black.jpg

Based on Apple's track record, we're also pretty sure that we're going to have to purchase the top of the line model to get the best camera. In a very real sense, many mobile photographers have to look at this investment as photography gear. And as such, it should be pitted against the other cameras and lenses we're considering.

The waters get muddied a bit by the fact that we typically buy our smartphones on payment plans rather than splashing a big charge on to our credit cards. It makes the purchase easy, and therefore the investment might not be accounted for properly.

I'm thinking about all of this because I have an iPhone 6S that will be paid off in September. It's a great handset with a very capable camera. Typically I upgrade my phone every two years.

But I think I need to look at this in a more businesslike matter. If I spend a $1,000 on a new iPhone, that should be accounted for that in my budget (spanning two years). What else do I need? How will the iPhone purchase impact those other items?

The days of getting a semi-free phone with our carrier plan are over. The next iPhone will be a substantial investment, and it should be viewed as such for photographers on a budget.

You can share your thoughts at the TDS Facebook page, where I'll post this story for discussion.

As we're getting closer to the release of Apple's macOS High Sierra, some diehard Aperture users are wondering if the latest operating system will support their favorite photo management app. The answer appears to be yes.

Aperture-Yes.jpg

As of beta version 6 of High Sierra, users are reporting good performance. The only nagging issue seems to be full screen mode. And one tester, Henrik Lorenzen, commented that he was able to fix that glitch with a clean install.

This is important not only for photographers who want to keep using Aperture full time, but also for those who have extensive Aperture archives and want to be able to tap them as needed (myself included). It's a relief knowing that I can plug my everyday laptop into the Drobo and open a library from 2014.

On a related front, the Mac Observer is reporting on other compatible pro apps stating that Final Cut Pro X 10.3.4, Motion 5.3.2, Compressor 4.3.2, Logic Pro X 10.3.1, and MainStage 3.3 (or later) all will be compatible with High Sierra. If you're running earlier versions of any of these apps, don't upgrade your OS until you get things sorted out.

You can share your thoughts at the TDS Facebook page, where I'll post this story for discussion.

Pentax-KP-D-Story-web.jpg

There are two factors that allow photographers to be more fluid in their equipment choices. The first is a thriving online marketplace that enables us to easily sell gear. And the second is that digital cameras have a longer shelf life now that their technology is stabilizing.

In my mind, these two factors give us the freedom to choose the gear that we really want instead of locking ourselves in to brands that are viewed as safe. To make this point, I'll tell you a story from yesterday.

I was working a commercial shoot for one of my favorite clients. They also hired a videographer whom I've worked with in the past, and who I like. Later in the shoot he noticed my Pentax KP with Pentax HD 20-40mm zoom and asked,

"When did you stop shooting Canon?"

"A while back," I answered. "I wanted something different."

"Well, don't invest too heavily in that system," he said. "All they care about these days is panorama devices."

"I like this camera, though." I said. "I really enjoy shooting with it."

Pentax-KP-kit.jpg

For me, the KP works great. I have a large inventory of Pentax lenses from their SLR days that work great on the digital body. In fact, one of the key optics from yesterday's shoot was the Pentax-FA 35mm f/2.0 lens that I had bought on the used market for my ZX-5n. It's a wonderful prime that I use digitally as much as with film.

In objective terms, the KP has sensor-based image stabilization, 24MPs, a great metering system, DNG RAW files, compact weather-resistant body, articulated LCD with live view, WiFi, and a lens library that goes back to the early 1980s. It works great for me. In fact I love it.

I know that Pentax is having its financial challenges. Olympus did a few years ago as well, and it didn't faze me a bit. My favorite camera in the world is the PEN-F. That was in development during their roughest of times. It's true, I don't know if either Pentax or Olympus is going to be here next year. For that matter, I don't know if I'm going to be around either. That's not how I base my decisions. For now, I'm assuming yes on all fronts.

P3033851-gear-kp-back-LCD-4way.jpg

If all of this love changes for me, then I can sell the gear online, and make new decisions. Because the technology for digital cameras has stabilized, I can sell a body that is 3 or 4 years old and get a decent return on my investment. And lenses fare even better.

So I'm not locked in to either Olympus or Pentax. And I'm loving my photography these days because I'm shooting with cameras that I want to use, not ones that are viewed as "safe."

During yesterday's assignment, I used the Pentax HD 20-40mm zoom, Pentax-FA 35mm f/2.0, Pentax-DA 70mm f/2.4, and the Sigma 10-20mm f/3.5, got great images and had a blast.

(BTW: I processed them in Capture One Pro, not Lightroom. Again, I don't care. I like C1.)

As an independent businessman, one of my mantras is: "do not make fear-based decisions." If I don't want to shoot with Canon, it doesn't matter how safe that company is. I want tools that excite me and energize my photography. And that's how I'm going to make my purchasing decisions.

More Articles About the Pentax KP

Pentax KP Review - Part One - Top Deck - An overview of the Mode dial, Function dial, and other controls on the top panel of the camera.

Pentax KP Review - Part Two - The Back Panel - An overview of back panel controls and the menu system for the Pentax KP.

Pentax KP Review - Part Three - Image Quality - A hands-on look at how the camera performs with Pentax Limited Edition optics.

Pentax KP Review - The Final Verdict (Did I make a mistake switching from Canon to Pentax?)

You can share your thoughts at the TDS Facebook page, where I'll post this story for discussion.

This is The Digital Story Podcast #598, August 22, 2017. Today's theme is "Tales from the Solar Eclipse" I'm Derrick Story.

Opening Monologue

Like so many photographers in the U.S., I had been preparing for weeks to ensure my readiness for the August 21 Solar Eclipse of 2017. And judging by the images I saw on Instagram and throughout social media, many were happy with their results. So I thought that I'd dedicate this show to my preparations, and the event itself. After all, we get to do it all again in 7 years!

Tales from the Solar Eclipse

IMG_4430-Solar-Eclipse.jpg

Here's how I prepared for the big event, the equipment I used, and how it all turned out.

Using Cascable 3 "kas-ka-ball" to Photograph the Solar Eclipse

I connected my Olympus OM-D E-M10 Mark II to my iPhone and used Cascable to control the camera during the eclipse. This was the safest way to view the event.

  • Turn on your camera and enable WiFi Then launch the Cascable app on your iPhone. It will automatically find your camera's WiFi connection.
  • In Cascable, turn on the Histogram, Zebra Stripes (Pro), and Grid. Tap on the green Histogram icon on the bottom toolbar. (When you're in live view mode the histogram appears on the screen above the image.
  • Go to Camera Settings (green camera back icon) and set the Exposure Mode to P, White Balance to Auto, and Drive Mode to Single.
  • View the scene on the iPhone. Check the image, look for zebra stripes, and most importantly, study the live histogram.
  • Tap on the Exposure Compensation icon and adjust the exposure using the histogram and the live view of the scene. The live histogram makes this process very easy.
  • When everything looks good, take the picture.

If you haven't used Zebra Stripes before, keep in mind that many scenes have some spectral highlights. So you're not necessarily trying to eliminate the stripes all together.

The Olympus O.I. app doesn't have the live histogram (free) nor the zebra stripes (Pro) capability.

Cascable is available to get started with for free from the iOS App Store. Cascable's Pro features come with a free trial when subscribing from $2 per month, or can also be unlocked with a one-time $29.99 purchase.

We have a tile on all the pages of The Digital Story that takes you directly to the TDS landing page on the Cascable site.

A Look at Our First The Nimble Classroom

It was all systems go last Saturday for our first The Nimble Classroom focusing on Capture One Pro Catalog Management. Here's how it went.

Here are the upcoming sessions.

  • September 9, Expert Editing, Capture One Pro
  • September 23, Luminar Pro Techniques
  • October 7, Photos 3 for macOS SOLD OUT
  • November 4, Photos 3 for macOS

You can learn more about them and sign up for your favorites by visiting The Nimble Classroom online.

Updates and Such

Big thanks to all of our Patreon members!

We still have one spot open for the Autumn in Wine Country Photography Workshop this coming Oct. 26, 27, and 28.

B&H and Amazon tiles on www.thedigitalstory. If you click on them first, you're helping to support this podcast. And speaking of supporting this show, and big thanks to our Patreon Inner Circle members.

And finally, be sure to visit our friends at Red River Paper for all of your inkjet supply needs.

Texas-based Red River Paper recently announced a new fine art paper, Palo Duro Etching. The new paper is a 100 percent cotton rag paper and is free of optical brightener additives. The paper is designed to offer warm white tones, deep blacks and a subtle texture to accurately recreate traditional darkroom fine art prints.

See you next week!

More Ways to Participate

Want to share photos and talk with other members in our virtual camera club? Check out our Flickr Public Group. And from those images, I choose the TDS Member Photo of the Day.

Podcast Sponsors

Cascable - Cascable is the best tool available for working with your camera in the field.

Red River Paper - Keep up with the world of inkjet printing, and win free paper, by liking Red River Paper on Facebook.

The Nimbleosity Report

Do you want to keep up with the best content from The Digital Story and The Nimble Photographer? Sign up for The Nimbleosity Report, and receive highlights twice-a-month in a single page newsletter. Be a part of our community!

Want to Comment on this Post?

You can share your thoughts at the TDS Facebook page, where I'll post this story for discussion.
There are a variety of adjustments that you can apply to your images when you import them into Capture One Pro. These could be as simple as adding a contrast boost for studio images captured under flat light, or as fun as converting color images to black and white.

In addition to the visual adjustments you can make while the photos are importing into your catalog, you can add metadata as well, such as your copyright, contact info, and descriptions. I walk you through the steps in this video.

Keep in mind that any adjustments that you apply on import can be further tweaked, or removed, while editing in Capture One Pro. C1 is totally non-destructive. What is nice about this technique is that you can save yourself post processing time on images that have been captured under similar lighting conditions.

c1-import.png

Master Capture One Pro

Want more? Consider our upcoming C1 Expert Editing Nimble Class on September 9. Class is limited to 6, and you can participate from the comfort of your home.

And don't forget about my Capture One Pro 10 Essential Training that will quickly get you up to speed with this pro level imaging application.

Then drill down into mastering the editing tools with Capture One Pro 10: Retouching and get supremely organized with Advanced Capture One Pro: Catalog Management.

You can share your thoughts at the TDS Facebook page, where I'll post this story for discussion.
The September release of Aurora HDR 2018 goes beyond adding a Windows version to the family. Macphun has created a cross-platform ecosystem for your fine art images.

aurora-hdr-2018-graphic.jpg

Two things make this work so well for photographers. First, the files created with either version - Mac or Windows - will be compatible on the other platform. Second, the product key can be shared with both versions. So it's very easy to integrate Aurora HDR 2018 into a mixed platform environment.

Other highlights include:

  • Lens Correction Tool - The new Lens correction filter easily fixes all kinds of lens distortion, from barrel to pincushion, to chromatic aberration and vignetting.
  • New User Interface - Redesigned from scratch, the modern and responsive user interface brings a powerful, yet joyful experience to HDR photo editing.
  • Speed Improvements - Up to 4x improvement in RAW image processing, and up to 200% faster merging and masking performance means that Aurora HDR 2018 is dramatically faster than the last version.
  • Total HDR editing experience with the most complete set of tools available. Fast, powerful RAW processing engine.
  • Tone-mapping algorithm to achieve both realistic and dramatic HDR images.
  • Over 70 presets that give photos an amazing HDR look in just one click.
  • Luminosity masking that automatically makes advanced selections within HDR images based on the Zone System.
  • Unique layer system that supports blend modes, custom textures and using original exposures as source images.
  • Image Radiance, brushes, masks, lighting, vignettes and much more help users achieve their artistic vision.
  • Highly versatile batch processing.
  • Works as a standalone app, or a plug-in to Photoshop and Lightroom.

Aurora HDR 2018 will be availabe for pre-order on September 12, and released on September 28. You can be notified when preordering begins, which you might want to consider because of the discounts.

Current users of Aurora HDR may upgrade at a special pre-order price of $49, while new users can purchase Aurora HDR 2018 at a special pre-order price of $89. A collection of bonuses will also be included with every purchase. Mixed-computer households can share the same product key for Mac and PC that can be activated on 5 devices.

You can share your thoughts at the TDS Facebook page, where I'll post this story for discussion.
When you buy the budget kit for the DJI Spark, you don't get anything by way of accessories. But after a few weeks of use, it's clear that you might want to pony up a few more dollars to protect your existing investment. Here are three things that I highly recommend.

Protect the Lens and Gimbal

gimbal-cover.png

I'm fascinated with the robotic eye known as the gimbal with camera lens. It's exposed, however, during transport, and I was becoming increasingly uncomfortable with the situation. I don't like to baby my gear, but I do like to protect it.

My friend, Mike Boening, turned me on to the Bestmaple Camera Front 3D Sensor System Screen Cover for DJI SPARK for $9.99. I've seen a few other brands for even cheaper, but the Bestmaple is the one that I've personally tested.

It fits snugly over the gimbal and IR sensor, and it protects both components. All you have to do is remember to take it off before flight.

Nimble Case for Your Spark and Gimbal

polar-pro-case.png

I think of the Spark as a second camera, so I carry it in my everyday bag. But to save space, I wanted a case for it that was as svelt as possible, yet protected the aircraft. I learned about the PolarPro Soft Case for $24.99 and ordered it directly from PolarPro.

They did a great job of handing the purchase, and a few days later I had the molded soft case that fit perfectly in my camera bag, yet protected the Spark. It even has room for an extra battery and the charger.

The PolarPro case is well designed, and it's the perfect solution for nimble pilots.

Yes, You Do Need an Extra Battery

I got by just fine with the single battery that came with the Spark, at least for the first few weeks. But as I became more comfortable flying, I want longer sessions in the air. Fortunately, the official DJI Spark Intelligent Battery is an affordable $49. Having a second fuel cell has extended the usefulness of the aircraft. And it fits perfectly in the PolarPro case.

Total investment for all three of these accessories is less than $100. And for me, they have been worth every penny.

More About the DJI Spark

DJI Spark: The Nimble Drone.

New DJI Spark Firmware.

Exporting a Single Frame from Video

You can share your thoughts at the TDS Facebook page, where I'll post this story for discussion.
This is The Digital Story Podcast #597, August 15, 2017. Today's theme is "I've Got Shotgun!" I'm Derrick Story.

Opening Monologue

In my mind, road trips are a two-person activity. One needs to focus on driving, while the other serves as navigator. And with the current mapping technology, sudden route changes to avoid traffic jams are a great benefit if you have someone to monitor the situation. These days, that person would be me. And the side benefit to acting as navigator is that you also enjoy tremendous photography opportunities. And we're going to explore those on today's show.

I've Got Shotgun!

For those of you unfamiliar with "riding shotgun," the term was coined durning stagecoach days when the person seated to the right of the driver was assigned the task of protecting the entire crew, with shotgun in hand, as they traversed the trails of the west.

When I was a teenager, we didn't have to worry much about bandits pulling us over in Southern California, but riding shotgun was definitely the preferred seat because you weren't stuck in the back of the car.

I-5-Twilight-2048-web.jpg

Today, I'm still seated on the right side, but now with an iPhone in hand navigating the complicated California freeway system as we travel up and down the state. My skills as a navigator have earned me that position. And the side benefits of the job are unlimited photo opportunities. If you too can take advantage of this situation, here are a few things to help you maximize your opportunity.

  • Prepare your camera kit for front seat travel. Keep the bag small and gear accessible. Remove any protection filters from lenses that you might use. Be sure that the flash is off.
  • Keep the windows clean. If shooting through the windshield, then position the camera as close to the glass as possible, and be aware of possible reflections in the scene. Roll down the side window when possible (but this depends greatly on the views of others along for the ride.) Your polarizer can come in handy as well.
  • Experiment with techniques that you normally don't have time for. Test art filters, monochrome, film emulations, and more.
  • Be ready for sunrise and twilight.
  • Use motion to your advantage. Practice the "near and far" rule for shooting out the side window.

My last tip is not to judge while you're shooting. You'll have plenty of time later to evaluate what works, and what doesn't. The magic of shotgun photography is to let go so you can capture that wildly unique shot that you never anticipated, but dearly love.

How to Test Your Solar Eclipse Glasses

Time Magazine published a helpful article about fake solar eclipse glasses with some advice that I want to pass along to you.

It's not enough today to just look for the ISO certification, as many vendors have started printing glasses with ISO certifications -- even if the glasses do not meet industry standards, experts warned, so your best bet is to only buy from trusted vendors.

If eclipse glasses were purchased from an unauthorized dealer online, experts suggest conducting an at-home test. When you look through the lenses, the AAS said, you should not be able to see anything except for the sun or anything else significantly bright, like a halogen light bulb or a bright-white LED flashlight. All such sources of light should look dim through real eclipse glasses. The glasses also should not have any tears or scratches on them.

You need to wear the glasses during the partial solar eclipse, when the sun is partly blocked by the moon, but can take them off for the brief totality phase, in which the sun's light is entirely blocked for up to 2 minutes and 40 seconds.

The solar eclipse is coming to North America on Monday, August 21, 2017.

Using Cascable 3 "kas-ka-ball" as a Remote Control for Your Camera

This week I want to cover how I set up my Olympus PEN-F for remote control with my iPhone. Here are the steps.

  • Turn on your camera and enable WiFi Then launch the Cascable app on your iPhone. It will automatically find your camera's WiFi connection.
  • In Cascable, turn on the Histogram, Zebra Stripes (Pro), and Grid. Tap on the green Histogram icon on the bottom toolbar. (When you're in live view mode the histogram appears on the screen above the image.
  • Go to Camera Settings (green camera back icon) and set the Exposure Mode to P, White Balance to Auto, and Drive Mode to Single.
  • View the scene on the iPhone. Check the image, look for zebra stripes, and most importantly, study the live histogram.
  • Tap on the Exposure Compensation icon and adjust the exposure using the histogram and the live view of the scene. The live histogram makes this process very easy.
  • When everything looks good, take the picture.

If you haven't used Zebra Stripes before, keep in mind that many scenes have some spectral highlights. So you're not necessarily trying to eliminate the stripes all together.

The Olympus O.I. app doesn't have the live histogram (free) nor the zebra stripes (Pro) capability.

Cascable is available to get started with for free from the iOS App Store. Cascable's Pro features come with a free trial when subscribing from $2 per month, or can also be unlocked with a one-time $29.99 purchase.

We have a tile on all the pages of The Digital Story that takes you directly to the TDS landing page on the Cascable site.

New Subjects Added to The Nimble Classroom

I've trying to figure out a way to bring more personalized training to photographer without them having to travel. It's one thing to get on a plane to photograph wine country or the French Quarter, but not quite as alluring to sit in a classroom for two days.

As a result, I've designed a new approach called, The Nimble Classroom. And now there are four courses for the Summer Session of The Nimble Classroom.

  • August 19, Catalog Management, Capture One Pro
  • September 9, Expert Editing, Capture One Pro
  • September 23, Luminar Pro Techniques
  • October 7, Photos 3 for macOS

You can learn more about them and sign up for your favorites by visiting The Nimble Classroom online.

Updates and Such

Big thanks to all of our Patreon members!

We still have one spot open for the Autumn in Wine Country Photography Workshop this coming Oct. 26, 27, and 28.

B&H and Amazon tiles on www.thedigitalstory. If you click on them first, you're helping to support this podcast. And speaking of supporting this show, and big thanks to our Patreon Inner Circle members.

And finally, be sure to visit our friends at Red River Paper for all of your inkjet supply needs.

Texas-based Red River Paper recently announced a new fine art paper, Palo Duro Etching. The new paper is a 100 percent cotton rag paper and is free of optical brightener additives. The paper is designed to offer warm white tones, deep blacks and a subtle texture to accurately recreate traditional darkroom fine art prints.

See you next week!

More Ways to Participate

Want to share photos and talk with other members in our virtual camera club? Check out our Flickr Public Group. And from those images, I choose the TDS Member Photo of the Day.

Podcast Sponsors

Cascable - Cascable is the best tool available for working with your camera in the field.

Red River Paper - Keep up with the world of inkjet printing, and win free paper, by liking Red River Paper on Facebook.

The Nimbleosity Report

Do you want to keep up with the best content from The Digital Story and The Nimble Photographer? Sign up for The Nimbleosity Report, and receive highlights twice-a-month in a single page newsletter. Be a part of our community!

Want to Comment on this Post?

You can share your thoughts at the TDS Facebook page, where I'll post this story for discussion.