This is The Digital Story Podcast #790, May 11, 2021. Today's theme is "Supercharge Your Editing App." I'm Derrick Story.
Opening Monologue
One of the reasons we don't move from an existing photo management app, such as Lightroom, to another is because we have so much time invested in it. Changing horses doesn't make sense. But what if we could breathe new life into our existing workflow without having to relocate a single file? That sounds more palatable. And it's the first story in today's TDS Photography Podcast. I hope you enjoy the show.
Tune-In Via Your Favorite Podcast App!

Apple Podcasts -- Spotify Podcasts -- Stitcher
Podbean Podcasts -- Podbay FM -- Tune In
Supercharge Your Editing App
Most of us are familiar with plugins. Over the years I've covered quite a few including RAW Power, Luminar, and Pixelmator. I had always wanted to include ON1 in that list, but my tests had hit bumps in the road. But now with ON1 Effects 2021, I can say that it's been a great ride.

Can Use it with and for Practically Everything
Regardless of what your base app is - Lightroom, Photoshop, Capture One Pro, Photos for macOS, PaintShop Pro, or Affinity Photo - Effects can add creativity and capability to your existing workflow.
It includes tools for masking and retouching. There are tons of presets included, and you can create your own as well. My favorite part are the Filters. There are some truly interesting and creative ones including B&W, Glow, Grunge, Dynamic Contrast, Channel Mixer, Skin Retouching, Sun Flare, and many, many more.
Powerful, but Easy to Use Printing too
One of the delightful surprises I discovered while testing Effects was its well thought out printing module. This is something that I've been disappointed with time and time again with other applications. Not this time.
The Effects print module is easy to use, but provides the options that most photographers are looking for. And the very cool thing about it, is that you can use the print module while in plugin mode. In the case of Photos, I went to Edit, chose Effects, then set up my print job within the plugin. It worked great.
And if you load your manufacturer's print driver instead of using AirPrint, you'll have even more options in the Setup dialog.
This is very nice.
Downloading a Free Trial or Purchasing ON1 Effects 2021
You can try ON1 Effects 2021 free for 14 days. If you decide to purchase, you can buy for $69.95. Save 15% off that price by using coupon code: THEDIGITALSTORY.
Bottom Line
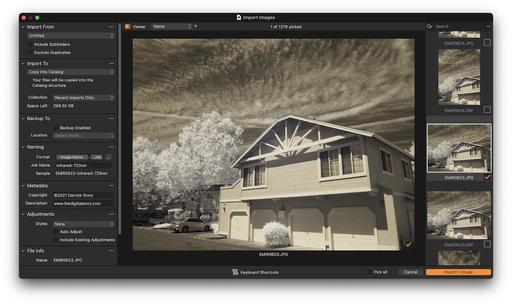
I started using ON1 Effects for my infrared photography because of its excellent Channel Mixer, LUTs, and presets. But I've discovered that it's useful for all of my photography. It's a robust tool for both my Photos and Capture One Pro workflows. And it's a great way to get the most out of my iPhone shots as well.
Next MacBook Air Powered by M2, To Come in Multiple Colors: Report
You can read the entire article on Petapixel.
If a new rumor is to be believed, Apple wasn't done using color with its new M1 iMac series: the design aesthetic is coming to the next MacBook Air as well.
Famed Apple leaker Jon Prosser, who has a pretty decent track record, has released a set of new renders that he says is indicative of MacBook Air designs he was shown from his own source at the company.
As reported by Digital Trends, the renders feature several notable changes to the current MacBook Air design. The most obvious change is that the computer will supposedly be available in one of seven colors: Silver, Blue. Yellow, Orange. Pink, Purple, and Green. Not coincidently, those are the same colors that Apple's newly-announced M1 iMacs are available in.
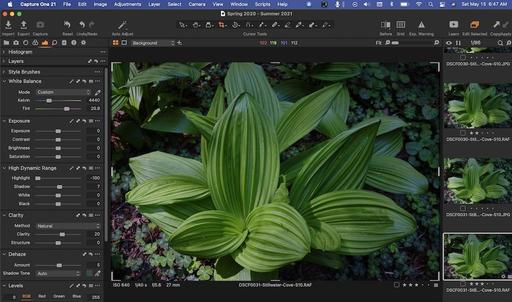
New Release: Capture One Pro 21 Essential Training
Capture One Pro is a complete digital photo management and editing application for professional photographers and serious enthusiasts. Photographers who appreciate outstanding RAW processing, expert color control, and logical organization should consider Capture One Pro for its comprehensive feature set. In this course, professional photographer and instructor Derrick Story helps you learn the basics quickly, then takes you deeper into the application to master its finer points. For seasoned users, Derrick also covers all the new features in version 21, including Speed Edit, the Dehaze slider, and Style Brushes that allow you to enhance specific areas of a photo. To wrap up, he shares tips and techniques that can help you ensure your workflow is as efficient as possible.
You can check it out now by visiting LinkedIn Learning.
The New Donation Kit for Carefree Shipping of Found Film Cameras
We have more time around the house than ever. And you finally dove into that bedroom closet that's been begging for some organization.
If you found a film camera that you're no longer using, our new Donation Kit makes it easy to pack and ship. Just visit the Contact Form on thenimblephotographer.com, click the box next to Donating a Film Camera, and let me know what you have. In your note, be sure to include your shipping address.
If it's a camera we can use for the shop, I'll send you a Donation Kit that includes a USPS Priority Mail shipping box and prepaid label. All you have to do is tape it up, insert the camera, and add the label. USPS will pick up your shipment from the front door of your house during their regular mail delivery. It's that simple!
Your donation help get analog gear in the hands of aspiring fine art photographers, and the proceeds help support this podcast.
Virtual Camera Club News
Photos for macOS Big Sur and iPhone Essential Training
This course was just released on LinkedIn Learning and lynda.com. It shows you how to leverage both the latest iPhone technology with Photos software, on both your Mac and mobile devices.
"With the free Photos for macOS software from Apple, you can manage, enhance, and share photos in a variety of ways. In this course, photographer, author, and educator Derrick Story takes you on a detailed exploration of Photos for macOS. Derrick starts with a quick-start introduction to taking pictures on your phone, then editing them with Photos and sharing them. He walks you through how to use the options available to you when you're recording video. Derrick also covers several advanced iPhone camera techniques, such as switching among cameras, controlling the flash, working with ProRAW, and more. He covers each step of the process to edit pictures in Photos for macOS, then does the same for editing videos. Derrick offers some useful tips to enhance your experience using Photos, then concludes with resources to help you learn more."
Inner Circle Members: A big thanks to those who support our podcast and our efforts! (And welcome to our new members.)
My Writing on Medium.com: I now have more than 25 published articles on Medium.com. And if you haven't visited the site, and enjoy good writing on a variety of topics, I suggest that you may want to take a look. You can just go to the home page and enter "Derrick Story" in the search field. And if you like what you read, then follow me!
EV Explorers for Those Who Are Interested in Electric Cars: I've created a new group on DerrickStoryOnline titled EV Explorers. The tagline for this group is: "Bringing Curiosity and Nimbleosity to the World of Electric Vehicle Transportation." Here we can share information, tips, discoveries and more about using electric vehicles for our photography adventures. If you want to join this group, click on this link for an invite. We're going to keep this as a private group for now, but you are invited to join us.
Affiliate Links - The links to some products in this podcast contain an affiliate code that credits The Digital Story for any purchases made from B&H Photo and Amazon via that click-through. Depending on the purchase, we may receive some financial compensation.
And finally, be sure to visit our friends at Red River Paper for all of your inkjet supply needs.
See you next week!
Product Links and Comments
There are product links in this article that contain affiliate tags. In some cases, depending on the product, The Digital Story may receive compensation if you purchase a product via one of those links. There is no additional cost to you.
You can share your thoughts at the TDS Facebook page, where I'll post this story for discussion.