Recently in Photography

  Page 284 of 386 in Photography  

The Olympus ED 14-150mm f/4.0-5.6 micro Four Thirds Lens ($600) is a compact zoom that provides an effective focal length of 28mm to 300mm (on micro four thirds, you double the numbers) for Olympus PEN cameras. And after shooting with this lens for nearly a month, my opinion is: if you own an E-P2 or E-PL1 camera, you need to get this zoom. E-P1 owners might be tempted too, even though they don't have the electronic viewfinder option that I think is necessary for this zoom. More on that later.

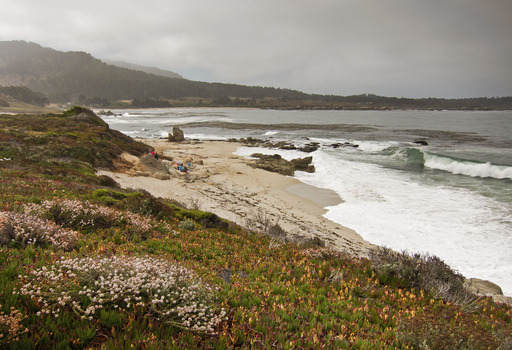
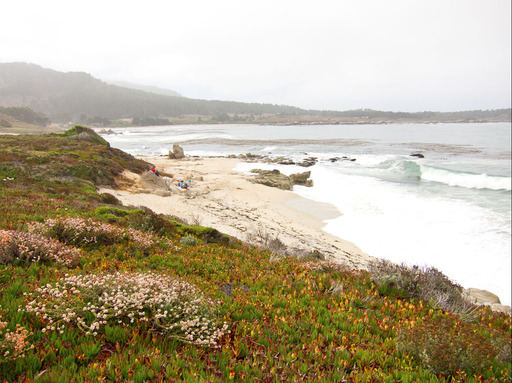
Beach Wood Beach wood shot at 25mm (50mm equivalent) on Olympus 14-150mm lens mounted on an E-PL1 body. Picture processed normally in Aperture 3 with exposure, color, and output sharpening. Click to enlarge image.

Many PEN owners are making due with the 14-45mm kit lens (er, I mean the 14-42mm zoom) that they originally purchased with the camera. It's a good enough lens, for sure, but it does not have the reach or the focusing speed of the 14-150mm. And in terms of light gathering ability, the 14-42mm is f/3.5-5.6, while the 14-150mm is f/4-5.6. So you gain a lot with the newer zoom and give up hardly nothing.

Lens Performance in the Lab

There's a good lab test of the lens over at SLR Gear.com, and they conclude that: "For what it offers, the Olympus 14-150mm Æ’/4-5.6 is a very good lens, not the sharpest we've tested but certainly very good for a superzoom. It's marred by some high chromatic aberration at certain focal lengths, but for the wide range of focal lengths the lens offers, it's probably a small price to pay for the all-in-one versatility." In the field however, I found very few flaws that annoyed me. And I think that's sometimes the difference between a lab test and real life shooting.

Lens Performance in the Field

I've posted the results from one of my field tests on the TDS Flickr site. I treated these images like a do any real world test in that I made exposure adjustments, added output sharpening, etc. to make the image look the way I want. My question always is: "Will this lens let me create the type of images I want using my normal workflow?" The answer in this case is "Yes."

Most Important Observations

Here's what jumped out at me while shooting with with Olympus 14-150mm zoom:

  • The in-camera stabilization of the E-PL1 allowed me to shoot handheld at 300mm (150mm on the lens) and get sharp images. I think this is a big deal for travel photographers, photo journalists, and enthusiasts.
  • There was some slight vignetting at the longer focal lengths. I was not using a lens hood or protection filter.
  • Sharpness was excellent at all focal lengths with the lens stopped down to the midrange apertures. Sharpness was good at the extreme apertures.
  • This is not a lens I would recommend for Panasonic shooters (unfortunately), because it needs image stabilization, and for Olympus, that is built into the camera, not the lens. IS on Olympus cameras was terrific.
  • Color fidelity was excellent, chromatic flaws were minor. I was able to create some color fringing in high-contrast scenes at the extreme ends of the zoom range.
  • This is a terrific lens for shooting video. You can zoom while recording too.
  • Close up performance was good for this type of all-in-one lens. I have a few samples on the TDS Flickr site.
  • I highly recommend that you get the Olympus VF-2 Electronic Viewfinder ($250) for working in extreme lighting conditions. I think it is too difficult to accurately compose with the 14-150mm lens with just the LCD screen on the back of the camera.

Pros

  • Light, compact, quality zoom lens that has an effective focal length of 28-300mm.
  • Focusing is fast and sure.
  • Can be the only zoom lens that most enthusiasts ever need on their PENs.

Cons

  • Realistically, you also need the VF-2 Electronic Viewfinder to get the most out of this zoom. So total price becomes $600+$250=$850 if you don't already have the viewfinder.
  • E-P1 owners can't enjoy the full pleasure of this lens without the electronic viewfinder that isn't available for their camera.

Bottom Line

If you love shooting with your Olympus PEN camera, you're going to want this lens. It is all you need for most situations.


twitter.jpg Follow me on Twitter

-

Ever wonder which focus point your camera used on a particular shot? (Especially a photo where you thought the focus should be somewhere else.) In this short video I demonstrate how Aperture 3 can show you what your camera was thinking when it recorded a particular image. This works with most DSLRs that capture the focus metadata and save it. Take a look. It's handy.

More Aperture Tips and Techniques

To learn more about Aperture 3, check out my Aperture 3 Essential Training on Lynda.com. Also, take a look at our Aperture 3 Learning Center. Tons of free content about how to get the most out of Aperture.


twitter.jpg Follow me on Twitter


Just a Little Fireworks Fun

Between Canada Day celebrations and upcoming Fourth of July, fireworks are in the air. I thought it would be fun to share some of our favorite pyro photos to keep everyone in the festive spirit.

So I've asked folks to post shots on the Lowepro Facebook Fan page so all can enjoy. Got a good one to show off?

Beijing Fireworks Captured this image during the opening ceremonies of the Beijing Olympics in 2008. That hint of a structure you see is the Bird's Nest. Click for larger version.

If you want to capture great images during 4th of July celebrations, be sure to check out the article, It's That Time Again: How to Shoot Fireworks.


twitter.jpg Follow me on Twitter

-

This is the first major update for Photoshop CS5 that includes a number of bug fixes for both Mac and Windows users. You can review the details and download the software using the link above.

If you simply want to install the update, just launch Photoshop CS5, go to Help > Updates and run the Adobe Updater program. It will take it from there, as shown below.

CS5 Update Window


twitter.jpg Follow me on Twitter

Can you feel the heat from these smokin' photos? The assignment for May 2010 was "Fire." Check out this intense collection of images from members of the TDS virtual camera club. Once again, it's going to be tough to choose the SizzlPix Pick of the Month from this effort.

Michael DeBuhr for the Fire Photo Assignment

The July 2010 assignment is "Torn." Start working on your contribution now. Details can be found on the Member Participation page. You can now submit photo assignment pictures up to 800 pixels in the widest direction.

Please follow the instructions carefully for labeling the subject line of the email for your submission. It's easy to lose these in the pile of mail if not labeled correctly. For example, the subject line for next month's assignment should be: "Photo Assignment: July 2010." Also, if you can, please don't strip out the metadata. And feel free to add any IPTC data you wish (These fields in particular: Caption, Credit, Copyright, Byline), I use that for the caption info.


Photo by Michael DeBuhr. (Click on it to see enlarged version.) You can read more about how Michael captured this shot, plus see all of the other great images on the May 2010 Gallery page.


Good luck with your July assignment, and congratulations to all of the fine contributors for May. It's a great collection of images.


twitter.jpg Follow me on Twitter

-


Now Available! The Digital Photography Companion. The official guide for The Digital Story Virtual Camera Club.

  • 25 handy and informative tables for quick reference.
  • Metadata listings for every photo in the book
  • Dedicated chapter on making printing easy.
  • Photo management software guide.
  • Many, many inside tips gleaned from years of experience.
  • Comprehensive (214 pages), yet fits easily in camera bag.

Technorati Tags: , ,

Tips for Existing Light Portraits

Spontaneous portraits often have more character when captured using existing light. And since today's DSLRs perform so well at higher ISOs, this option is more practical than ever. Here are a few tips to keep in mind when shooting existing light portraits.

Existing Light Tips Image captured during the June TDS Photography Workshop in Sonoma County, CA. Click on image for larger version.

  • Keep a prime lens in your camera bag. Having a 50mm f/1.8, for example, lets you gather more of the light that's in the room. You can shoot "wide open" and keep your ISO setting lower, such as 400 instead of 1600. Plus, these lenses do a great job of softening the background.
  • Pay attention to color temperature. Chances are you're going to have artificial light sources influencing the color (and skin tones) of your shot. Even if it's a natural light portrait from window light, that is often bluish and not the best for most skin tones. Learn how to adjust your white balance for the best capture possible.
  • Shoot Raw. You have many more options available after the session if you shoot Raw. Color balance, for example, can be tweaked without compromising the quality of the image.
  • Pay attention to shadow areas. Our eyes often "fill in" shadow areas better than our cameras do. Learn to recognize deep shadows. Often you can improve the situation by moving your subject slightly to the left or right.

Existing light portraits can be very expressive. These tips will help you get the best image possible when on location.


twitter.jpg Follow me on Twitter

-


People kept asking me during my first TDS Photography Workshop, "What do you think? What do you think? Do you like it? Are you going to keep conducting these workshops?" The answer is, "Yes! Absolutely Yes."

The inaugural TDS Photography Workshop took place on June 25-27, with a half dozen photographers gathering in Santa Rosa, CA to improve their skills, go behind the scenes at locations such a wineries, eat good food, and yes, sample some local wine too.

"Best photo workshop I have been on," writes Oliver Gunasekara, one of the participants. "Great amount of practical knowledge from a pro who knows how to teach."

In this podcast I review the highlights, tell stories from the weekend, and try to give you a feel for this experience that is now part of the TDS virtual camera club.

The next TDS Photography Workshop will be Oct. 16-18, 2010. You can place your name on the reserve list now.

Listen to the Podcast

You can also download the podcast here (28 minutes). Or better yet, subscribe to the podcast in iTunes. You can support this podcast by purchasing the TDS iPhone App from the Apple App Store.

Monthly Photo Assignment

Float is the June 2010 Photo Assignment. You can read more about how to submit on our Member Participation page. Deadline for entry is June 30, 2010.

JD Felton was the "SizzlPix Pick of the Month" for Photo Assignment 50. Who will be the winner for Photo Assignment 51? The prize is an 11"x14" SizzlPix of the winning photograph.

More Ways to Participate

Want to share photos and talk with other members in our virtual camera club? Check out our Flickr Public Group. It's a blast!


twitter.jpg Follow me on Twitter

-


Podcast Sponsors

Red River Paper -- Try the $7.99 Sample Kit.

Make Your Photos Sizzle with Color! -- SizzlPix is like High Definition TV for your photography.


Technorati Tags: , , , , ,

Dragonfly in Flight

During our afternoon shoot at the TDS Photography Workshop in Sonoma County, a curious Dragonfly became interested in me. He would buzz by, hover for just a second, dash off, then come back for another look.

Dragonfly During TDS Workshop Dragonfly captured with a 70-200 mm f/2.8 Canon Zoom with 1.4X tele extender. Click on image for larger version.

I added the 1.4X tele extender to my Canon 70-200mm f/2.8 zoom (on a 5D Mark II) and did my best to photograph the speedy Dragonfly. The afternoon light was strong and reflective, so I added a polarizer to cut down on glare. I do, however like the water reflections and boca in the background.

Speaking of the Workshop, we had a great day yesterday, combining classroom work with a model shoot and landscape photography at a vineyard. More on that later.


twitter.jpg Follow me on Twitter

-


On Friday night, at the debut of the TDS Photography Workshop, I'm introducing the Lowepro Bag Grab. It's simple, but fun. I pile up a heap of Lowepro bags, as shown below, then each workshop participant puts their name in hat. I draw a name, and that person gets to take any Lowepro bag in the heap. I draw a second name, and on down the line until every participant has picked a bag. I have extra gear so there's a good variety and plenty of options for everyone.

Lowepro Bag Grab

It's all just part of the fun on orientation night. Tomorrow, class starts, and we venture out into wine country for some shooting... and tasting.


twitter.jpg Follow me on Twitter

-


Have you ever wanted to photograph California Wine Country in the Fall? If so, save these dates on your calendar: October 16-18, 2010. The second Digital Story Photography Workshop will feature two half-day classroom training sessions at the Digital Story Headquarters in Santa Rosa, CA, plus two location shoots. Class size is limited to 8 people on a first-come, first-served basis. Registration fee for the workshop is $495, and it includes lots of goodies, such as delicious lunches and a very nice Lowepro camera bag.

You can put your name on the reserve list by sending me email with the Subject Line: "Fall TDS Workshop 2010," and in the body include your name, email address, phone number, and state where you live. Contact information can be found in the Member Participation section of the site.

TDS Workshops, Sonoma County

I'll have more to report about TDS workshops soon, including some video from this week's event in Sonoma County. TDS members on are their way right now for the workshop this weekend. Stay tuned!