This is The Digital Story Podcast #610, Nov. 21, 2017. Today's theme is "The Conservation Movement Needs a Champion." I'm Derrick Story.
Opening Monologue
I've been thinking about my time at WildSpeak ever since I returned from Washington D.C. Through all the talks and powerful images, something had been missing. At first, I couldn't put my finger on it. Then today, I figured it out. Conservation needs a champion. It needs a modern day Roosevelt, or Ghandi, or some powerful figure that can get broader attention. And the reason why I feel that way is the subject of today's TDS Podcast.
The Conservation Movement Needs a Champion
Outside the Embassy of India in Washington D.C. is the Mahatma Gandhi Memorial. It pictures him on the move with the inscription, "My life is my message."

I thought about how one person can represent, and even effect change for millions of people. And how I wish Mr. Gandhi was here today so I could talk to him about the health of our planet.
The problem that surfaced in my mind and heart after two days of WildSpeak wasn't the inspiration or education. Once again, I learned so much. One of my favorite talks was "Long Distance Migrants" by photographer and naturalist Gerrit Vyn. These birds that traverse our globe illustrate how interconnected we all are. And how if we damage one area it affects the entire planet.
The problem for me after two days in Washington D.C. was that I didn't see a path forward. I see a cause without a dynamic leader. And until we have our Gandhi, progress is going to be difficult.
You may be thinking, "What about Al Gore?" No disrespect to Mr. Gore, but he has been too much of a polarizing figure. What we need is someone who can reach the other half of the aisle.
Here's an example of what I'm talking about. In 1981, President Ronald Regan nominated C. Everett Koop to be our Surgeon General, an office that we typically don't hear much about. And to boot, a conservative physician nominated by a conservative president.
Soon thereafter in his Report of the Surgeon General, it was reported that nicotine has an addictiveness similar to that of heroin or cocaine. Koop's report was somewhat unexpected, especially by those who expected him to maintain the status quo in regard to his office's position on tobacco products.
During his tenure, in 1984, Congress passed legislation providing for new, rotated health warning labels on cigarette packs and required advertising to include the labels. Those labels remain unchanged today.
Koop issued a challenge to Americans in 1984 to "create a smoke-free society in the United States by the year 2000." As Surgeon General, he released eight reports on the health consequences of tobacco use, including the first report on the health consequences of involuntary tobacco smoke exposure. During Koop's tenure as Surgeon General, smoking rates in the United States declined significantly from 38 percent to 27 percent. (From Wikipedia.)
That's real change. One person essentially turned the tide on cigarette smoking in America. One person can do the same for conservation. We need to find that person so he or she can get to work.
How Did My Packing Go?
Here's a follow up report on my preparations for the Washington D.C. trip. As it turned out, the unexpected star was my inflatable neck pillow. I'll explain in this segment of today's show.
Fantastic Black Friday Sale for Audioblocks
I'm going to take a slight detour this week and talk about the fantastic Black Friday Preview Sale going on for Audioblocks. Get unlimited downloads from over 100,000 royalty-free music tracks, loops, and sound effects on Audioblocks - only $49 for your first year. That's $100 off the normal price.
To give you an idea of this value, I recently paid $69 for just one royalty free audio track. So I'm definitely taking advantage of this offer.
All you have to do is go to Videoblocks.com and click on the "I want unlimited audio" button. This is a great deal.
New Benefit for TDS Inner Circle Members
Speaking of video:
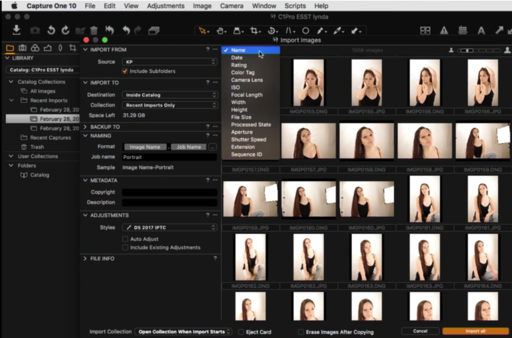
Starting in December 2017, I have a great new benefit for TDS Inner Circle Members: Nimble Software Series. Each month I will post two training videos for our Inner Circle Members, covering Capture One Pro, Lightroom, Luminar, Photos for mac OS and more. Each video will run between 10 to 30 minutes, and will show you specific techniques for improving your images.
To become an Inner Circle Member, simple pledge $5 or more a month through the TDS Patreon program. Existing Inner Circle members are automatically enrolled in the Nimble Software Series, and receive their first two movies on Friday, December 1, 2017.
We have more benefits coming in 2018 for our Inner Circle Members. Join today and become part of the TDS Elite.
Updates and Such
Big thanks to all of our Patreon members!
B&H and Amazon tiles on www.thedigitalstory. If you click on them first, you're helping to support this podcast. And speaking of supporting this show, and big thanks to our Patreon Inner Circle members.
And finally, be sure to visit our friends at Red River Paper for all of your inkjet supply needs.
Texas-based Red River Paper recently announced a new fine art paper, Palo Duro Etching. The new paper is a 100 percent cotton rag paper and is free of optical brightener additives. The paper is designed to offer warm white tones, deep blacks and a subtle texture to accurately recreate traditional darkroom fine art prints.
See you next week!
More Ways to Participate
Want to share photos and talk with other members in our virtual camera club? Check out our Flickr Public Group. And from those images, I choose the TDS Member Photo of the Day.
Podcast Sponsors
Videoblocks - Go to videoblocks.com/digitalstory to get all the stock video, audio, and images that you can imagine for just $149. Save on millions of studio-quality clips, tracks, and graphics.
Red River Paper - Keep up with the world of inkjet printing, and win free paper, by liking Red River Paper on Facebook.
The Nimbleosity Report
Do you want to keep up with the best content from The Digital Story and The Nimble Photographer? Sign up for The Nimbleosity Report, and receive highlights twice-a-month in a single page newsletter. Be a part of our community!
Want to Comment on this Post?
You can share your thoughts at the TDS Facebook page, where I'll post this story for discussion.