This is The Digital Story Podcast #629, April 3, 2018. Today's theme is "Leica in Paradise." I'm Derrick Story.
Opening Monologue
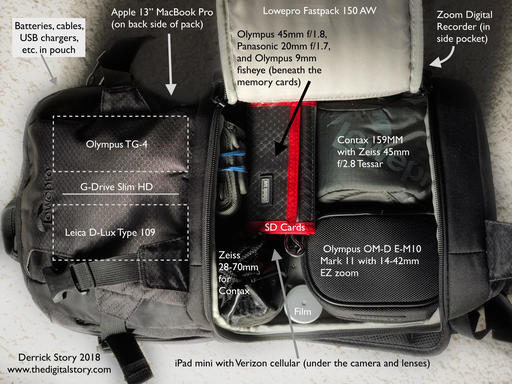
Exploring an island in the middle of the Pacific Ocean is definitely a place where I want to travel light. It's warm. It's humid. And flip-flops and board shorts are the apparel of the day. Feels like a good challenge for the Micro Four Thirds Leica D-LUX. And in this show, I'm going to tell you how it fared.
Leica in Paradise
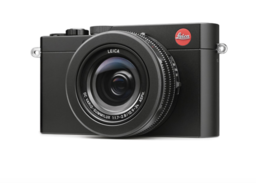
I've become quite fond of the Micro Four Thirds sensor used in my interchangeable lens Olympus cameras. And I've been curious about its implementation in the Leica D-LUX Type 109 that pairs it with a DC Vario-Summilux f/1.7-2.8 zoom lens.
It's interesting that a camera released at the beginning of 2015 is still shipping as is, and has not been discounted. And in fact, Leica has just announced the D-LUX (Typ 109) Digital Camera Explorer Kit for $1,195 that includes a 49"-long red COOPH Leica Rope Strap and an auto lens cap. It also comes packaged in a beautiful box that comes in a sleeve depicting one of the four seasons. (Keep in mind that you can get
This might be a good time to mention that the twin brother Panasonic LUMIX LX100 with the same lens is currently on sale for $597.
Basic specs include:
- 12.8MP 4/3" MOS Sensor
- 3.1x Zoom, f/1.7-2.8 Leica Lens 24-75mm (35mm Equivalent)
- 2,764k-Dot Electronic Viewfinder
- 3.0" 920k-Dot LCD Monitor
- UHD 4K Video at 30p, Full HD at 60p
- Built-In Wi-Fi Connectivity with NFC
- ISO 25600 and Up to 40 fps Shooting
- Optical Image Stabilization
- CF D Flash Included
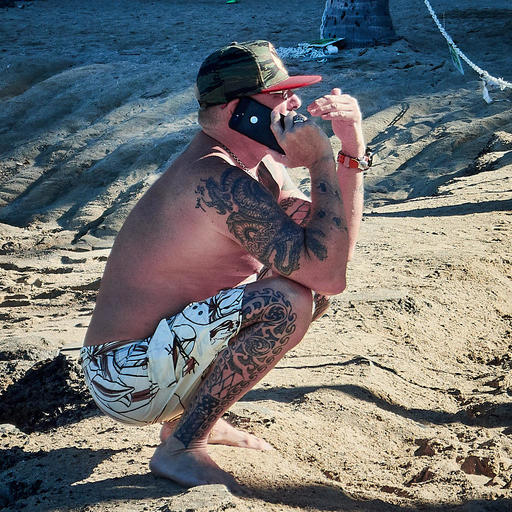
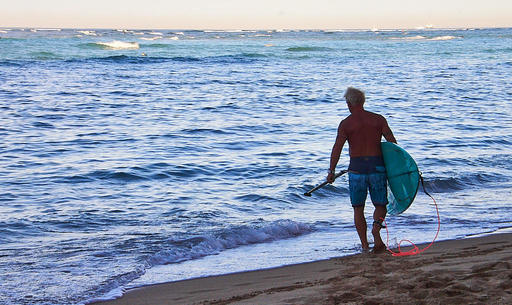
The overall package is quite compact. And most other options that provide such a bright zoom are more bulky. So I thought to myself, "Could this be the right camera for a family vacation when dad is a serious photographer?" To answer that question, I packed the Leica for a spring break in Honolulu. As it turns out, it was a good call. I explain in the first segment of today's show.

In addition to the image above, you can view an album of images captured with the Leica here.
Apple Pencil lag test: New iPad vs. iPad Pro
Macworld reports that: Put simply, I barely notice any difference between the two while using most Pencil-compatible apps. If anything, the Apple Pencil feels as though it delivers slightly smoother performance in the Notes Plus app on the new 9.7-inch iPad compared to the older Pro. (I also put a brand-new nib on my older Apple Pencil for a more even comparison.)
In apps such as Notability, Apple's Notes, and Procreate, though, the writing experience feels remarkably similar. I'd even go so far as to say that there's no difference at all, but I'll wait until I've conducted more "scientific" tests for the full review before making that kind of judgment.
As a person who frequently writes on his iPad Pro as though it were a legal pad, I see little difference in casual practice. And for those of you who've always wanted to buy an iPad Pro just for the Apple Pencil but were scared away by the price, that should be very, very good news indeed.
The new iPad starts at $329 (32GB/WiFi Only) and the Apple Pencil is $99. For a 128GB model with cellular + WiFi, the iPad price climbs to $559.
The Apple Photos Book for Photographers, 2nd Edition
The Apple Photos Book for Photographers, 2nd Ed is now available on Amazon. If you purchase the book, send me proof, and I'll send you a link to my movie, "How to Organize Like a Pro in Photos." This offer is good until April 15, 2018. Use the Contact Form on The Nimble Photographer site. Also, feel free to post a review on Amazon once you've read the book. They're helpful to potential buyers.
Do You Have a Film Camera that Needs a Good Home?
Over the last year, I've received donations from TDS members who have film cameras that need a good home. What I do is inspect the items, repair and clean as I can, then list them in TheFilmCameraShop where I can find a good home for them. If you're interested in donating, please use the Contact Form on TheNimblePhotographer site. And thanks for you consideration!
Dates Announced for the Burney Falls and Lassen Volcanic National Park Workshop
We have our cabin reservations secured for Sept. 27-29, 2018 for the Burney Falls and Lassen Volcanic National Park Workshop. Here's more about it.
Aerial Photography Workshop Update
Public registration is now open for the Sonoma Country Hot Air Balloon and Drone Photography Workshop, June 8-10, 2018. We're combining two very fun aerial activities into one workshop. Be sure to get on the Reserve List for this one!
Come Join me at the Skylum Photography Public Group
I'm now moderating the Skylum Photography Public Group, and I would love to have interested members from our audience join me there.
Updates and Such
You can become a member of our Inner Circle by clicking on this link or by clicking on the Patreon tile that's on every page of The Digital Story.
B&H and Amazon tiles on www.thedigitalstory. If you click on them first, you're helping to support this podcast. And speaking of supporting this show, and big thanks to our Patreon Inner Circle members:
And finally, be sure to visit our friends at Red River Paper for all of your inkjet supply needs.
See you next week!
More Ways to Participate
Want to share photos and talk with other members in our virtual camera club? Check out our Flickr Public Group. And from those images, I choose the TDS Member Photo of the Day.
Podcast Sponsors
Red River Paper - Keep up with the world of inkjet printing, and win free paper, by liking Red River Paper on Facebook.
The Nimbleosity Report
Do you want to keep up with the best content from The Digital Story and The Nimble Photographer? Sign up for The Nimbleosity Report, and receive highlights twice-a-month in a single page newsletter. Be a part of our community!
Want to Comment on this Post?
You can share your thoughts at the TDS Facebook page, where I'll post this story for discussion.
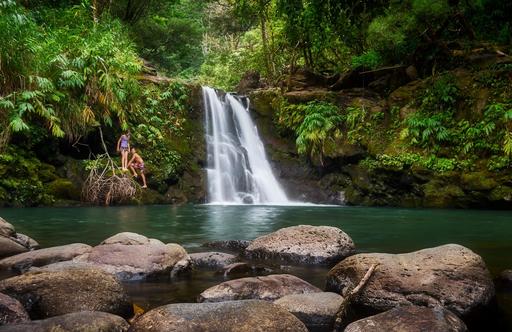 "Playing in the Falls, Maui" - Olympus OM-D E-M10 II with a Panasonic 20mm f/1.7. 1 second exposure with a polarizer filter. Image by Derrick Story.