"The photo was taken in Lower Antelope Canyon (Utah) and shows the detail of Navajo sandstone," writes Chris Cornelis. "Wind and water have carved out beautiful shapes with amazing texture."
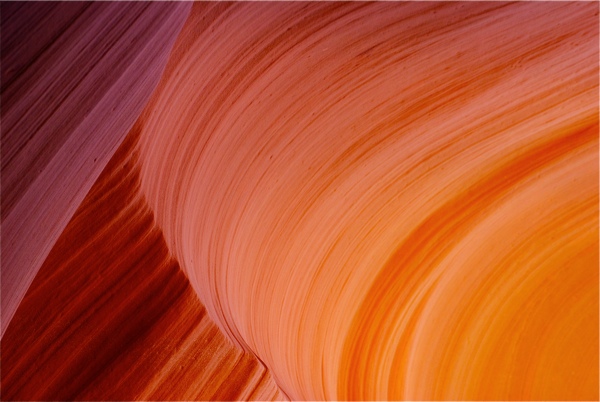 "Lower Antelope Canyon" (Utah) by Chris Cornelis
"When I entered the canyon I was overwhelmed. I started taking photos like crazy, resulting in a lot of mediocre photos and a couple of pretty good ones. I like this one a lot because it captures the essence of what makes the canyon so beautiful (color, shape, texture), and at the same time, it's a very simple image."
This is our 208th Grab Shot! Wow. If you want to review the collection that began back in 2006, go to our Grab Shots page.
If you have a candid you'd like to share, take a look at our Submissions page, then send us your Grab Shot. We'll try to get it published for you on The Digital Story.
And you can view more images from our virtual camera club in the Member Photo Gallery.
The Digital Story Podcast App is the best way to stream or download weekly TDS podcast episodes. No more syncing your iPhone, iPod Touch, iPad, or even your Android phone just to get a podcast. And the best part is, The Digital Story Podcast App is your way to help support this show. Download it today!