Recently in Photography

  Page 75 of 384 in Photography  

When riding my Cannondale Bad Boy bike, I want to remove as many barriers as possible to my stopping and capturing a photo. I've learned over the years that having a camera tucked away in a backpack or on the rack reduces the number of images. To solve that problem, I configured a DIY bike holster for the front handlebars.

Bike-Holster-Front-1024.jpg

Most of us have one of these top loaders stashed in the closet. Simply shorten the strap to its minimum length and wrap it around the handlebars as shown below. Don't interfere with any of the braking or shifting cables.

Bike-Holster-top-1024.jpg

The weight of the camera does a good job of keeping the holster in the down position. But for added security, I ran 3 carabiners through the back loop. This is mainly for riding without a camera in the bag so it doesn't flop around.

Now, when I see a photo opp, it's easy to pull out the camera and shoot. If I make a stop at a retail location, I can easily take the holster with me. Most of the time, however, I just pull the camera out and leave the bag open on the handlebars. And yes, as a result of this rig, I'm shooting more on my riding errands.

You can share your thoughts at the TDS Facebook page, where I'll post this story for discussion.

This is The Digital Story Podcast #622, Feb. 13, 2018. Today's theme is "A Personal Photo Essay." I'm Derrick Story.

Opening Monologue

Some of the most interesting photo essays that I've seen over the years are those where the photographer is allowed inside someone's life in their home. It's fascinating to peer behind the curtain of their life, and think about how it compares to mine. But what if we told our own story, from our personal point of view? I talk about this project that anyone can do, with any camera, on this week's photography podcast.

A Personal Photo Essay

This all started one afternoon when I was writing in the main room of my studio. The winter light was streaming in from the big window facing south, and it illumined a work table where I had some of my things.

Studio-Light-1024.jpg

As I looked at the scene, I thought, this one picture says a lot about my interests. There were a pair of red headphones hanging on the chair, a B&W print on the table, a Contax film camera, pens in a fake lens cup, and a Kodak scanner that I'll be reviewing soon.

Wouldn't it be fun to do a photo essay on a day in my life here? I would take pictures of the kitchen (where I spend too much time), Dibs, Studio A, Studio B, my washer that doesn't fit quite right in the laundry room, backdrops hung over the balcony rail upstairs, and on and on.

Imagine someone finding this photo essay years later? They would learn so much about me. And even on a practical level, many of these images would be helpful for insurance claims if something bad happened here in the near future.

So here are five tips that I have to help encourage you to endeavor your own personal photo essay.

  • Look for scenes that really represent you - Your clothes hanging in the closet, your workroom, the car outside.
  • Tidy, but don't over organize. Since it's a photo essay, we do want the images to look good. But don't over organize losing the soul and personality of the scene.
  • Keep it to 36 exposures. I think 36 is a magic number here. It's a roll of 35mm film, a nice length for a slideshow, enough to tell the story, not so many that it becomes boring.
  • Write captions for the shots. Images do say a lot, but a few additional words say even more.
  • Finish the project. Build a slideshow, create a gallery that's saved as PDF, etc. Part of the beauty of this project is that it can be shared, discovered, and viewed.

New! TheFilmCameraProject on Instagram

I've started a new Instagram feed just for film camera lovers. It's called TheFilmCameraProject, and it's for those who appreciate the beauty of analog SLRs.

And to celebrate the launch, I'm giving away one Pentax SLR and lens to one lucky follower of TheFilmCameraProject. All you have to do is follow the feed by Feb. 28, 2018. I'll then do a random drawing and announce the winner on the March 6 podcast. Join in the fun, and get to admire some really beautiful camera along the way.

LRTimelapse 5 Is Here With Many Improvements and Additional Features

As reported on F-Stoppers,

LRTimelapse is without a doubt the best piece of software to manage extreme day-to-night and night-to-day transition when capturing a time-lapse sequence. This flicker remover program changed the industry for good and a new version with many improvements has just been announcement by its creator. Here is what you need to know about it.

LRTimelapse 5 is a big upgrade from version 4 but the workflow remains similar. The first thing you'll notice on LRT5 is the polished user interface. The buttons and icons look nicer and the interface is completely scalable for high-resolution monitors. Seasoned LRTimelapse users won't be lost but everything is better and faster thanks to the optimization and improved use of multithreading platforms. The program can now handle up to 32 threads.

The San Francisco Street Photography Workshop Update

Reservation forms have been sent to Reserve List members. If you signed up on the Reserve List, but didn't receive an invite, please email me.

San Francisco Street Photography - April 26-28, 2018 - We'll work entirely on location in San Francisco. Our hotel in picturesque Union Square will serve as our headquarters during the event. No rental car will be necessary. We'll explore the City's hidden treasures and capture them through our lenses. As always, we're adding new shooting locations again this year, including twilight assignments. This is San Francisco like you've never seen it before. And as a bonus, Olympus Visionary Mike Boening will be joining the teaching staff and leading sessions on street shooting and night photography. Two instructors, three days, and all for just $695. (That's right, it's 3 full days in one of the most photogenic cities in the U.S.)

Updates and Such

I now have the dates for the Sonoma Country Hot Air Balloon and Drone Photography Workshop, June 8-10, 2018. We're combining two very fun aerial activities into one workshop. Be sure to get on the Reserve List for this one!

The latest training videos posted for our Inner Circle members are processing aerial photographs in Luminar and using Lightroom for time-lapse photography.

You can become a member of our Inner Circle by clicking on this link or by clicking on the Patreon tile that's on every page of The Digital Story.

B&H and Amazon tiles on www.thedigitalstory. If you click on them first, you're helping to support this podcast. And speaking of supporting this show, and big thanks to our Patreon Inner Circle members:

And finally, be sure to visit our friends at Red River Paper for all of your inkjet supply needs.

See you next week!

More Ways to Participate

Want to share photos and talk with other members in our virtual camera club? Check out our Flickr Public Group. And from those images, I choose the TDS Member Photo of the Day.

Podcast Sponsors

Videoblocks - Go to videoblocks.com/digitalstory to get all the stock video, audio, and images that you can imagine for just $149. Save on millions of studio-quality clips, tracks, and graphics.

Red River Paper - Keep up with the world of inkjet printing, and win free paper, by liking Red River Paper on Facebook.

The Nimbleosity Report

Do you want to keep up with the best content from The Digital Story and The Nimble Photographer? Sign up for The Nimbleosity Report, and receive highlights twice-a-month in a single page newsletter. Be a part of our community!

Want to Comment on this Post?

You can share your thoughts at the TDS Facebook page, where I'll post this story for discussion.
I've been fairly resourceful over the years with my aging handsets. They've served as loaners for my boys when their devices went south. I've traveled abroad with 3-year-old iPhones and got by just fine. But I still have one or two that I haven't been able to find encore careers for. A company called manything may change that.

old-iphones-1024.jpg

I learned about them through an article on Digital Camera World titled, This app will turn your old phone or tablet into a home security camera. Essentially, the way it works, is that you can use a device as old as an iPhone 3GS or Sansung Galaxy S3 and repurpose it as a home security camera.

Features include live streaming, motion alerts, remote control, and clever motion detection. You can even configure your setup to turn on the lights if something is moving around in the house (might not be great for pet owners...).

They have a few different plans, including a free one that enables one device with live streaming, motion alerts, and detection zones. Other plans that include more cameras and cloud storage for video range from $6 a month to $20 a month. All in all, the costs seem reasonable for the services offered.

I'm going to give the free plan a spin. I have a spare iPhone that would make a perfect security camera. I'll let you know how it turns out.

You can share your thoughts at the TDS Facebook page, where I'll post this story for discussion.

Spots, blemishes, and scratches are easily fixed using the Retouch Tool in Photos for macOS. Because it's so easy to use, some downplay its power. Watch this video to see what Retouch is great at, and the corrections that may require a different approach.

Eliminate flaws with Retouch from Photos for macOS High Sierra Essential Training by Derrick Story

And for those pesky jobs that are a bit challenging for Photos' Retouch Tool, you can still remain in your workflow by using the Erase Tool and Clone & Stamp in the Luminar Editing Extension that comes bundled with the standalone application.

retouch-tool.png The Retouch Tool in Photos for macOS can handle most jobs. But if your need more, add Luminar to your workflow.

Regardless of which approach you take, these tools are very powerful and non-destructive.

New Photos for macOS High Sierra Training!

Is it time for you to learn the ins and outs of the latest version of Photos? Take a look at Photos for macOS High Sierra Essential Training on LinkedIn Learning, or on lynda.com. Maximize your iPhone photography and complement the work you do with your mirrorless cameras as well. You'll love your cameras even more...

You can share your thoughts at the TDS Facebook page, where I'll post this story for discussion.

This is The Digital Story Podcast #621, Feb. 6, 2018. Today's theme is "Using Lightroom for Time-Lapse Photography" I'm Derrick Story.

Opening Monologue

One of the joys of mirrorless photography is that the cameras typically have an extensive feature set, including an interval timer for time-lapse photography. But, once we've captured the frames, what's an easy way to render the movie? Did you know that Lightroom can handle it? It can, and I explain how in today's TDS photography podcast.

Using Lightroom for Time-Lapse Photography

On my Olympus cameras, if I go to the bottom of Camera Menu 1, I can set up an interval program to capture thousands of frames over a period of time. Also, using the Cascable app's Shutter Robot, I can also set up a time-lapse program. And after a few hours, I have thousands of images on my memory card.

Timelapse-Lightroom 1024.jpg

But then what? I wanted to find an easy way to render an HD movie from those pictures, have the ability to manage and edit the frames, use software that worked on both platforms, and didn't cost me anything more than what I've already invested in my gear. The solution that surfaced: Lightroom Classic CC.

The only missing ingredient is a set of templates that you can download for free via an article on the Adobe blog titled, To the fast lane of time-lapse with Photoshop Lightroom.

Once you have the templates installed in the Slideshow module, you can take all those frames you've captured and convert them into an HD movie.

If you want to see the time lapse that I created, you can watch it here.

I've also published a 16-minute video tutorial for our Inner Circle Members that walks you through all the steps. After watching that, you'll be ready to create your own time-lapse movie with Lightroom.

New! TheFilmCameraProject on Instagram

I've started a new Instagram feed just for film camera lovers. It's called TheFilmCameraProject, and it's for those who appreciate the beauty of analog SLRs.

And to celebrate the launch, I'm giving away one Pentax SLR and lens to one lucky follower of TheFilmCameraProject. All you have to do is follow the feed by Feb. 28, 2018. I'll then do a random drawing and announce the winner on the March 6 podcast. Join in the fun, and get to admire some really beautiful camera along the way.

Layers in Capture One Pro 11

We have our first Nimble Class this coming Saturday, Layers in Capture One Pro 11.

The headline new feature in Capture One Pro 11 is the redesigned layers area for localized editing. In this classroom, Derrick Story shows you best practices for working with layers in Capture One Pro 11. Class participants may submit their unique questions before class, allowing Derrick to incorporate that content into his teaching. And there will be live Q&A sessions throughout the course.

The San Francisco Street Photography Workshop Update

Reservation forms have been sent to Reserve List members. If you signed up on the Reserve List, but didn't receive an invite, please email me.

San Francisco Street Photography - April 26-28, 2018 - We'll work entirely on location in San Francisco. Our hotel in picturesque Union Square will serve as our headquarters during the event. No rental car will be necessary. We'll explore the City's hidden treasures and capture them through our lenses. As always, we're adding new shooting locations again this year, including twilight assignments. This is San Francisco like you've never seen it before. And as a bonus, Olympus Visionary Mike Boening will be joining the teaching staff and leading sessions on street shooting and night photography. Two instructors, three days, and all for just $695. (That's right, it's 3 full days in one of the most photogenic cities in the U.S.)

Updates and Such

I now have the dates for the Sonoma Country Hot Air Balloon and Drone Photography Workshop, June 8-10, 2018. We're combining two very fun aerial activities into one workshop. Be sure to get on the Reserve List for this one!

The latest training videos posted for our Inner Circle members are processing aerial photographs in Luminar and using Lightroom for time-lapse photography.

You can become a member of our Inner Circle by clicking on this link or by clicking on the Patreon tile that's on every page of The Digital Story.

B&H and Amazon tiles on www.thedigitalstory. If you click on them first, you're helping to support this podcast. And speaking of supporting this show, and big thanks to our Patreon Inner Circle members:

And finally, be sure to visit our friends at Red River Paper for all of your inkjet supply needs.

See you next week!

More Ways to Participate

Want to share photos and talk with other members in our virtual camera club? Check out our Flickr Public Group. And from those images, I choose the TDS Member Photo of the Day.

Podcast Sponsors

Videoblocks - Go to videoblocks.com/digitalstory to get all the stock video, audio, and images that you can imagine for just $149. Save on millions of studio-quality clips, tracks, and graphics.

Red River Paper - Keep up with the world of inkjet printing, and win free paper, by liking Red River Paper on Facebook.

The Nimbleosity Report

Do you want to keep up with the best content from The Digital Story and The Nimble Photographer? Sign up for The Nimbleosity Report, and receive highlights twice-a-month in a single page newsletter. Be a part of our community!

Want to Comment on this Post?

You can share your thoughts at the TDS Facebook page, where I'll post this story for discussion.

Cropped Lenses on Full Frame Cameras

There are a lot of rules in photography that we just follow. Yes, they are based on some technical merit, but maybe we're overlooking creative possibilities by blindly adhering to them. For example, the notion that one should never use a cropped lens on a full frame camera. Have you looked in to this for your brand?

9501_03-TFP124-whole-foods.jpg "Shopping Day" - Pentax DA 20-40mm zoom at 20mm on a Pentax Program Plus body, Fuji Superia 400 film. Photo by Derrick Story.

I have this lens that I just absolutely love - the Pentax DA 20-40mm zoom. It's my go-to optic for my Pentax KP DSLR with a cropped sensor.

P1185687-pentax-ZX5n-whole-foods.jpg

I also do a lot of film work with Pentax SLRs. Why can't I use some of my favorite DA optics for those cameras as well? Why should I have to pay big bucks to get a full frame 20mm optic when I already have one? I did some checking online and learned that it won't damage my cameras or my optics. (Canon shooters, I don't think you can do this: EF vs EF-S. Do your research.)

So I mounted the Pentax DA 20-40mm zoom on my film SLRs and started shooting. And the results are terrific.

The only downside, as you already know, is some vignetting. It's more pronounced in some pictures than others, depending on focal length, aperture, and lighting. There are times when I actually like the effect, and others where I have to downplay it in software. In the case of the "Shopping Day" photo, I like it.

The bottom line is, now I have my entire lens arsenal available for all of my cameras. And depending on the brand you shoot, you too may have more options than you realize.

But please: Do your research first (I did). Not all brands have the same lens compatibility that Pentax does. Be sure that you are not going to damage your equipment. Safety first, right? But if there isn't a physical reason why you shouldn't put a cropped lens on a full frame body, then why not experiment?

If you have any experiences with your brand that you'd like to share, please post a comment on our TDS Facebook page where I'll have this story.

Moonset Over Santa Rosa

I had a special treat this morning for my predawn walk - an eclipse shining over Santa Rosa. I had my Olympus PEN-F with the wonderful Olympus 45mm f/1.2 PRO lens that enabled me to capture a number of images handheld, wide open.

Moon Over Santa Rosa "Moonset Over Santa Rosa" - Photo by Derrick Story

The exposure was 1/15th at f/1.2 with an ISO of 1600. In my rush to capture this moonscape, I had my file format set to Jpeg instead of RAW, something that I did not realize until I uploaded the files to the computer.

"Hey, where are the RAWs? Oh Snap!"

Fortunately, the Jpegs are pretty good on the PEN-F. And my manual exposure setting was accurate. So no real harm done. Just goes to show that photography at 6am does have its challenges.

Moon-Over-Home.jpg

You can share your thoughts at the TDS Facebook page, where I'll post this story for discussion.

This is The Digital Story Podcast #620, Jan. 30, 2018. Today's theme is "Camera or Computer?" I'm Derrick Story.

Opening Monologue

Digital photography is this murky mix of technology and art. We see a picture, press the shutter, and record it. Then what? Unless we're using a smartphone, something else needs to happen. And that something is firing up a computer to complete our image. Since it's a noteworthy part of the process, why do we treat it like tires on a car? I explore that in today's TDS podcast.

Camera or Computer?

iMac-1024-V2.jpg

If I were to give you $1,000 right now and say that you could spend it on either a new camera, or a new computer, which are you likely to choose? My informal research has led me to the belief that you would choose a camera or a lens.

Why is this? I have five theories why when it comes to camera or computer, we choose camera.

  • Theory #1 - Computers suck.
  • Theory #2 - They are more utilitarian than cameras.
  • Theory #3 - Computers are messy.
  • Theory #4 - Computers are not as much fun.
  • Theory #1 - If we could live without computers we would. But we would never give up our cameras..

One of the reasons why we feel this way, however, is that we tend to hang on to old hardware while constantly adding new software. If we stayed a bit more current, our experience should be better, and in the end we'd be more efficient and happy. Maybe.

A Review of the Olympus Super Fan Weekend in San Francisco

This past Friday, I spent a day with the Olympus community for their Super Fan Event in San Francisco. Here's what I learned.

The San Francisco Street Photography Workshop

San Francisco Street Photography - April 26-28, 2018 - We'll work entirely on location in San Francisco. Our hotel in picturesque Union Square will serve as our headquarters during the event. No rental car will be necessary. We'll explore the City's hidden treasures and capture them through our lenses. As always, we're adding new shooting locations again this year, including twilight assignments. This is San Francisco like you've never seen it before. And as a bonus, Olympus Visionary Mike Boening will be joining the teaching staff and leading sessions on street shooting and night photography. Two instructors, three days, and all for just $695. (That's right, it's 3 full days in one of the most photogenic cities in the U.S.)

The 2018 Nimble Classroom Series

The 2018 Nimble Classroom Series begins in February. Here are the first three sessions:

  • Layers in Capture One Pro 11 - Feb. 10
  • BUILD YOUR DIGITAL DARKROOM WITH PHOTOS - MARCH 10
  • Digital Asset Mgmt with Luminar - April 21

You can sign up right now for each of these and reserve your spot. Only 6 participants per class.

Updates and Such

Three new training videos are now posted for our Patreon Inner Circle Members:

  • Tips for Importing Images into Photos for macOS
  • Using Gradient Masks in Luminar
  • Working with Light Adjustments in Capture One Pro

You can become a member of our Inner Circle by clicking on this link or by clicking on the Patreon tile that's on every page of The Digital Story.

B&H and Amazon tiles on www.thedigitalstory. If you click on them first, you're helping to support this podcast. And speaking of supporting this show, and big thanks to our Patreon Inner Circle members:

And finally, be sure to visit our friends at Red River Paper for all of your inkjet supply needs.

See you next week!

More Ways to Participate

Want to share photos and talk with other members in our virtual camera club? Check out our Flickr Public Group. And from those images, I choose the TDS Member Photo of the Day.

Podcast Sponsors

Videoblocks - Go to videoblocks.com/digitalstory to get all the stock video, audio, and images that you can imagine for just $149. Save on millions of studio-quality clips, tracks, and graphics.

Red River Paper - Keep up with the world of inkjet printing, and win free paper, by liking Red River Paper on Facebook.

The Nimbleosity Report

Do you want to keep up with the best content from The Digital Story and The Nimble Photographer? Sign up for The Nimbleosity Report, and receive highlights twice-a-month in a single page newsletter. Be a part of our community!

Want to Comment on this Post?

You can share your thoughts at the TDS Facebook page, where I'll post this story for discussion.

Olympus Super Fan Event, San Francisco

How many times have you gone to a movie or tried a restaurant because a friend suggested it? Personal recommendations are powerful. We know that, and so does Olympus. And this past weekend they wanted to acknowledge the efforts of some of their super fans in North America. I was there to cover the event.

One of the stops during super fan weekend was Muir Woods, just north of San Francisco. Photos by Derrick Story.

In terms of participants, it was an interesting mingling of Olympus Visionaries (top photographers who embrace the brand), Olympus marketing and technical staff, and a dozen super fans from throughout the country. They were all brought together in San Francisco for briefings, exchange of ideas, and making images with Olympus gear.

One of the first things that I noticed while working with these photographers was just how knowledgable they were about micro four thirds photography. They understood how to set up their cameras to make beautiful images. I learned a number of tips from them.

These are enthusiasts who organize user groups, build followings online, take on assignments, and sometimes even have freelance businesses on the side. Essentially, when they're not at their day jobs, they live and breath photography.

Olympus realizes how important these customers are to their community. And I think they've learned a lot over the years conducting their "experientials" for the press. Now, they're designing similar events for the influencers who promote their brand and products at the grassroots level.

Riding the Golden Gate Ferry from Sausalito to San Francisco. Photos by Derrick Story.

The exchange of ideas that flow over the course the day are invaluable to everyone involved. Olympus staff have a chance to hear directly from customers while they work together in the field. The super fans get to test new gear, ask questions, and learn more about the company.

These experientials are a substantial investment by Olympus. But they help the company stay in touch with its users while at the same time acknowledging their efforts.

OlympusSFEvent-Jan-2018.jpg Olympus staff and super fans returning from a day of micro four thirds photography in the bay area. Photo by Derrick Story.

If you want to get more involved, visit the Inspiration pages on the Olympus site and check out the photo contests and upcoming events. The hashtag for this super fan event is #CapturingSanFrancisco (if you want to see more). Use the hashtag #getolympus when posting photos online captured with Olympus gear. Follow Olympus on Twitter and Facebook. They also have a terrific Instagram feed.

You can share your thoughts at the TDS Facebook page, where I'll post this story for discussion.

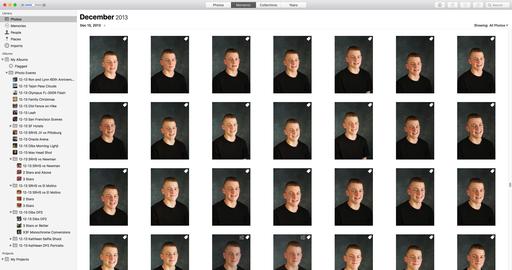
Photos for macOS High Sierra has many functions that might surprise enthusiast photographers who underestimate its power. One of my favorite timesavers is Copy and Paste Adjustments. Here's a video that shows how to use it.

Copy and paste adjustments from Photos for macOS High Sierra Essential Training by Derrick Story

This function is particularly helpful when you have a series of images captured under similar lighting conditions. Edit the first photo in the sequence, copy the adjustments (Image > Copy Adjustments) then navigate to the next shot to paste them (Image > Paste Adjustments).

copy-adjustments.png

I find it helpful to turn on thumbnails (View > Show Thumbnails) so I can navigate from one shot to the next while remaining in Edit mode. You don't have to click the Done button until you've finished with the entire batch.

Using Copy and Paste Adjustments is a great way to speed up your workflow. Give it a try.

New Photos for macOS High Sierra Training!

Is it time for you to learn the ins and outs of the latest version of Photos? Take a look at Photos for macOS High Sierra Essential Training on LinkedIn Learning, or on lynda.com. Maximize your iPhone photography and complement the work you do with your mirrorless cameras as well. You'll love your cameras even more...

You can share your thoughts at the TDS Facebook page, where I'll post this story for discussion.