Recently in Photography

  Page 14 of 384 in Photography  

This is The Digital Story Podcast #858, August 30, 2022. Today's theme is "So, Which Filter for What?." I'm Derrick Story.

Opening Monologue

You'd think that as smart as our current cameras are, they would eliminate the need for adding filters to the front of our lenses. And to some degree, many of our glass versions have been replaced by digital settings. But not all of them! In today's show I will cover when to use which filter for what, whether it be glass or digital. I hope you enjoy the show.

Digital Photography Podcast 858

Tune-In Via Your Favorite Podcast App!


podcast-icon.jpeg

Apple Podcasts -- Spotify Podcasts -- Stitcher

Podbean Podcasts -- Podbay FM -- Tune In

So, Which Filter for What?

Filters-1024.jpeg

We'll start with glass filters today, then move into a handful of digital replacements that many of us have available on our mirrorless cameras.

Protection Filters: Yes or No?

Protection filters are a broad class of types that include pure glass, UV coated, and mild color coating often referred to as Skylight.

Many photographers, myself included, feel more comfortable with a high quality protection filter in front of my expensive pro lenses. I like them because they are much easier to clean in the field using practically any soft cloth from a microfiber to a T-shirt.

The key here is to use a multi-coated, optical glass filter that doesn't compromise image quality.

Polarizers and NDs

A circular 2-stop polarizer is the one mandatory filter in my camera bag. They help reduce glare, saturate colors, and slow down shutter speeds.

A neutral density filter does not have the same polarizing effect, but can be purchased in varying densities to slow down shutter speeds for artistic photography.

Many cameras now include a digital ND Filter setting in the menu system. This is something that you want to look for, because Digital NDs are easier to use and always with you. I prefer this to the glass versions, although you can get more extreme effect with the tradition screw-in type.

Filters for B&W Photography

You can better manage tonal rendering at capture if you understand how digital B&W filters work. Look for them in your camera settings.

Cameras that I use by Fujifilm and Olympus allow me to apply digital versions of: yellow, orange, red, and green filters. These settings simulate filtering the light as a physical glass filter would, changing the camera's response to the scene.

  • Yellow Filter - The most versatile of B&W filters. It darkens the sky a bit, sometimes helping clouds "pop" just a bit more, while at the same time lightening greens a little.
  • Orange Filter - More dramatic effects on landscape than yellow with darker skies and snappier rendering of plants and flowers.
  • Red Filter - Boldly darkens skies and brings clouds forward, plus cuts haze and adds contrast. Red filters are good for robust architecture compositions.
  • Green Filter - Helps to lighten up foliage that sometimes can go very dark in non-filtered B&W photography. The effect varies, but worth a look with lots of green in a scene.

The luxury of having these digital filters and previewing their effects in your electronic viewfinder has a wonderful impact on your compositions while standing there before a scene.

Filters for Infrared Photography

Because I have a modified infrared camera, there are six basic filters that I use to create a variety of effects. And even if you don't have a modified camera you can still shoot infrared, but in a more narrow wavelength.

  • 550nm Filter - For modified cameras. Allow in the most visible light color in this set. Good choice for those who like intense infrared color shots.
  • 590nm Filter - For modified cameras. A pleasing balance of visible light and IR color. The most versatile color filter in the set. Good choice for those who like lots of options for their infrared color shots.
  • 665nm Filter - For modified cameras. Less visible light than the other color options in this set. I like it for cool tones and white foliage for color work. Good choice for those who like a bit more constrained color palette for their infrared color shots.
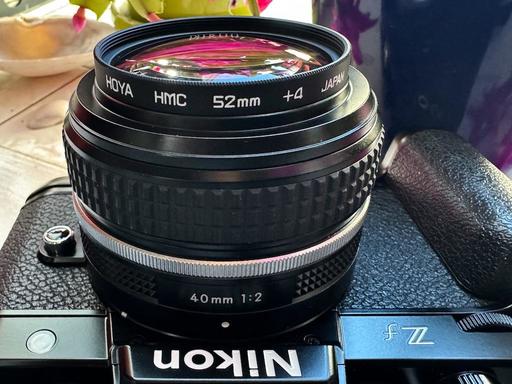
  • 720nm Filter - For modified and unmodified cameras. Mostly used for B&W infrared, but the 720 does let in a little color if you want it. You can use it on both modified and unmodified cameras. Good choice for those just starting out with IR photography. A popular version of this is the Hoya R72 Infrared Filter.
  • 850nm Filter - For modified cameras. Hard core B&W infrared. Can be very dramatic and pleasing. Good choice for those who like crunchy B&W IR.

For more information about infrared filters, their use, and to purchase them, visit Kolari Vision web site.

Final Thoughts

There are plenty of other filters out there, such as graduated neutral density, pro mist, softeners, and more. But getting your head around these will provide you with a great foundation. Then you can take it from here.

Viltrox representative reports Canon told the company 'to stop selling all RF mount products'

You can read the entire article on DP Review.

Two weeks ago, DPReview forum member Stig Nygaard made a post in the Canon EOS R Talk forum inquiring why the product page and all accompanying information surrounding Viltrox's AF 85mm F1.8 lens for RF mount cameras was no longer available.

Over the following days, various forum members speculated the reason all mention of the product was removed, with many coming to the same conclusion - that Canon must've told Viltrox to cease selling the product or face some kind of legal consequence. As it turns out, that appears to be exactly what happened, according to a Viltrox representative.

Assuming the information from the representative is true, it's still unclear why Canon would issue such a warning. Past reports have suggested Samyang received a similar notice from Canon after announcing its 14mm F2.8 and 85mm F1.4 AF RF-mount lenses. It's unclear whether third-party lens manufacturers using electronic connections with Canon's RF-mount alone is the issue or whether it's the code, reverse-engineered or otherwise, enabling AF that's causing the issue.

What is clear is that unless Canon reverses course and starts licensing its AF protocol technology to third-party manufacturers, it appears as though any third-party lenses with native RF-mount AF support won't be making it to market.

Interestingly, the Viltrox AF 85mm F1.8 RF II Lens for Canon RF is still available to purchase from B&H Photo for $399, although it's not clear how much longer you'll be able to purchase it.

Tell a Friend

I was thinking the other day about how people love to tell me about their favorite podcasts, which I appreciate!

Then, I started thinking, we should be telling our friends about The Digital Story podcast. It's available on every service that's commonly used: Apple Podcasts, Google Play, Amazon, Spotify, and on and on.

If each or our regular listeners told just one friend about this podcast and encouraged them to listen, those should be substantial numbers.

So let's try it! Tell a friend about the TDS Photography Podcast.

When and where to watch the Fujifilm X Summit on September 8 2022!

You can read the entire article on Digital Camera World.

Fujifilm's X Summit events are the thing to watch if you want to find out firsthand about the company's latest product launches. Luckily, the X Summit is usually a global livestream event that can be watched live around the world - wherever you are online!

We already know that the next Fujifilm X Summit will take place on September 8 2022 at 2pm Eastern Daylight Time (EDT)/ 6pm (GMT), in New York. The link for the live stream isn't up yet, but it usually gets added to the Fujifilm X Series YouTube channel (opens in new tab) close to the event day.

The X system has seen some fantastics flagship APS-C cameras since its launch 10 years ago, and the best Fujifilm cameras (opens in new tab) offer specs to suit many types of photographers. With that in mind, where do we think Fujifilm will go next, and what do we know ahead of the Fujifilm X Summit (opens in new tab) on September 8?

What we can't say - because we just don't know - is what the camera will be called. One guess is just simply the Fujifilm X-H2, or, the Fujifilm X-H2R (with the R standing for resolution). We've written more about what we think the Fujifilm X-H2R could hold (opens in new tab), including a high-resolution 40MP version that's said to be in development.

We'll be adding the livestream link to this page as soon as it goes up, so keep checking back to this page for the latest updates. We'll also be blogging live from the next Fujifilm X Summit on 8 September - follow us then, too!

Virtual Camera Club News

Inner Circle Members: A big thanks to those who support our podcast and our efforts! We are having a blast at our new Inner Circle hangout, the private group I've set up at DerrickStoryOnline. We'd love it if you join us. You can become an Inner Circle Member by signing up at our Patreon site. You will automatically be added to the new hangout.

My Writing on Medium.com: I now have 51 published articles on Medium.com. And if you haven't visited the site, and enjoy good writing on a variety of topics, I suggest that you may want to take a look. You can just go to the home page and enter "Derrick Story" in the search field. And if you like what you read, then follow me!

The New Donation Kit for Carefree Shipping of Found Film Cameras - If you've discovered a film camera that's no longer being used, our new Donation Kit makes it easy to pack and ship. Just visit the Contact Form on thenimblephotographer.com, click the box next to Donating a Film Camera, and let me know what you have. In your note, be sure to include your shipping address.

Affiliate Links - The links to some products in this podcast contain an affiliate code that credits The Digital Story for any purchases made from B&H Photo and Amazon via that click-through. Depending on the purchase, we may receive some financial compensation.

Red River Paper - And finally, be sure to visit our friends at Red River Paper for all of your inkjet supply needs.

See you next week!

You can share your thoughts at the TDS Facebook page, where I'll post this story for discussion.
This is The Digital Story Podcast #857, August 23, 2022. Today's theme is "Slideshows from the Past." I'm Derrick Story.

Opening Monologue

Of all the eye-popping revelations from the dawn of the digital age, multimedia slideshows burned on to an optical disk were one of the most alluring marvels. The ability to assemble digital images, transitions, and music via DVD made us feel like Hollywood talent. But, 20 years later, how do those creations hold up? And do you even know where they are stored. A look back at our digital roots on today's TDS Photography Podcast.

Digital Photography Podcast 857

Tune-In Via Your Favorite Podcast App!


podcast-icon.jpeg

Apple Podcasts -- Spotify Podcasts -- Stitcher

Podbean Podcasts -- Podbay FM -- Tune In

Slideshows from the Past

IMG_1728.jpeg

I reached the pinnacle of my self-produced DVDs in 2002 with the title, Still in Motion.

The disc featured a dozen slideshows divided into categories including: Feature Presentations, Technology Conferences, Weddings, and more.

Most of the images were captured with a Canon G2, processed on a Apple PowerBook G4, and authored using iDVD software. During my studio reorganizing project, I came across the work, and took a coffee break in front of the computer watching the various presentations. During this viewing, five things came to mind.

DVDs are Remarkably Robust - I don't know how much longer I should push my luck with these originals, but they still play great 20 years later. DVDs were a great invention.

I Had a High Tolerance for Image Noise - I was captivated by my Canon G-Series digital cameras. They were far more affordable and portable than their DSLR counterparts. But as soon as the light went below ISO 400, they were noisy buggers. That didn't seem to deter me from shooting in all lighting conditions with them.

The Secret Sauce was Music - It was fun to revisit many of those images, like shots of Jeff Bezos when he still had some hair. But the aspect that made every slideshow enjoyable was the music that went with them. And boy did it sound good via DVD.

The Story Trumps Technology - After a few moments, I forgot about the technical aspects of the images and became entranced by the story they were telling me.

Age Does, and Doesn't Matter - It does matter in the sense of seeing people I know 20 years in the past. Things and people have changed so much in two decades, that these presentations truly feel historical.

Age doesn't matter in the sense of picture quality and production. As I mentioned earlier, I acknowledged the time and tools used to create the pictures, then moved on to the stories themselves.

Final Thoughts

Watching Still in Motion got me wondering, "Are we obsessing about the right things today? Are we putting features and image quality above storytelling and longevity?"

I don't think anyone ever watched a Ken Burns movie with a top of mind thought, "I wished the pictures had a bit more dynamic range."

I think a good exercise is to revisit some of your slideshows from the past, and think about the ones you liked better than others. Maybe there are clues there to help you better understand the work you are creating today.

Canon G9 Review - Vintage Digital

Since we're talking about projects created with vintage digital cameras, I thought I would fire up one of mine and see how it compares to today's compact. I chose the 2007 Canon PowerShot G9. First let me read from what DP Review published in their report in October 2007.

DP Review's Observations (circa 2007)

Until the arrival of the G7 last September the majority of observers had written off Canon's 'prosumer' G range, presuming that the arrival of affordable digital SLRs had effectively killed the market for high-end compacts such as this. Barely a year later the G7 has been replaced by the G9, a relatively minor update that increases the pixel count from 10MP to 12MP and the screen size from 2.5 to 3.0 inches and - more importantly given the outcry caused by its omission from the G7 - the return of raw shooting capabilities. Other minor tweaks include a better grip and the addition of wireless flash capabilities. Everything else; the 6x stabilized zoom, flash hot shoe, classic all-metal design and solid build, expansive feature set and extensive manual control system is carried over from the G7.

  • 12.1 Megapixels (1/1.7" sensor) with RAW mode for maximum image control
  • 6x optical zoom lens (35mm-210mm) with optical Image Stabilizer and SR coating
  • DIGIC III and iSAPS for lightning fast response, superb image quality and advanced Noise Reduction
  • Face Detection AF/AE/FE and Red-Eye Correction in playback
  • 3.0" high-resolution, PureColor LCD II with extra wide viewing angle
  • ISO 1600 and Auto ISO Shift
  • Compact body with dedicated ISO and Multi Control dials
  • 25 shooting modes including full manual control and 2 custom settings
  • Extra telephoto reach with Digital Tele-Converter and Safety Zoom
  • Hot shoe support for Canon Speedlite flashes and optional lens accessories

DP Review Conclusion: IQ-wise the G9 is about as good as it gets in a compact camera (at low ISO - once you get to ISO 400 the gap between most decent cameras is very narrow), and physically it puts virtually everything else to shame. But inside, at the heart of the image capture system, sits the same (or an almost identical) sensor you'll find in a Casio, Canon or Sony point and shoot camera, in all it's 12 megapixel glory. When I mentioned giving Canon credit for listening to feedback on the G7 (and boy was there a lot of feedback) I don't remember anyone crying out for even more megapixels. Whatever drove Canon's top brass to look at the G7 and decide 'I know what it needs! More Pixels!' it certainly wasn't consumer demand.

Derrick's Test Drive

First of all, in terms of size, controls, quality of build - this camera is every bit as fine as something you could buy today. If fires up quickly, has snappy response, and plenty of control. And 12 MPs is nothing to sneeze at.

It accepted a 32 GB SD card no problem, and its RAW files can be read by all of my software. At low ISO, the images looked absolutely fantastic and were very editable.

What's lacking compared to today's cameras is high ISO performance (anything above 400 with the G9 is noisy),WiFi, Bluetooth, and close focusing. But honestly, its performance exceeded my expectations for a 15 year old digital camera.

For fun, I shot some B&W at ISO 800 to see how they would look. The monotone was good, but the ISO 800 noise just wasn't pretty. So I would have to tone that down in post.

All in all, however, I had a blast with the Canon G9. I have 3 batteries, a compact charger, and a lovely soft case for it. I think I'm going to leave it out and do some more experimenting.

PS: You can read my original review of the Canon G9 here Oct. 2007.

Tell a Friend

I was thinking the other day about how people love to tell me about their favorite podcasts, which I appreciate!

Then, I started thinking, we should be telling our friends about The Digital Story podcast. It's available on every service that's commonly used: Apple Podcasts, Google Play, Amazon, Spotify, and on and on.

If each or our regular listeners told just one friend about this podcast and encouraged them to listen, those should be substantial numbers.

So let's try it! Tell a friend about the TDS Photography Podcast.

Best Cameras Under $300

You can read the entire article on Amateur Photographer.

The main features to consider when looking for a camera under £300/$300 are the ISO range, burst mode capability and video quality. If you're going to be shooting a lot in low light, a larger ISO range will be desirable. If video is a requirement, then check the maximum video recording output. If you want to capture action, then you'll need a camera with a higher burst mode feature. You may need to compromise when shopping on a budget so try to prioritise just one or two features to ensure you can find a camera that ticks both your budget and your needs.

  • Fujifilm X-T10
  • Canon EOS 6D
  • Olympus OM-D E-M5 Mark II
  • Sony A6000
  • Nikon D600
  • Canon EOS 5D Mark II
  • Olympus OM-D E-M10 Mark III
  • Pentax K-5 Mark II

Virtual Camera Club News

Inner Circle Members: A big thanks to those who support our podcast and our efforts! We are having a blast at our new Inner Circle hangout, the private group I've set up at DerrickStoryOnline. We'd love it if you join us. You can become an Inner Circle Member by signing up at our Patreon site. You will automatically be added to the new hangout.

My Writing on Medium.com: I now have 51 published articles on Medium.com. And if you haven't visited the site, and enjoy good writing on a variety of topics, I suggest that you may want to take a look. You can just go to the home page and enter "Derrick Story" in the search field. And if you like what you read, then follow me!

The New Donation Kit for Carefree Shipping of Found Film Cameras - If you've discovered a film camera that's no longer being used, our new Donation Kit makes it easy to pack and ship. Just visit the Contact Form on thenimblephotographer.com, click the box next to Donating a Film Camera, and let me know what you have. In your note, be sure to include your shipping address.

Affiliate Links - The links to some products in this podcast contain an affiliate code that credits The Digital Story for any purchases made from B&H Photo and Amazon via that click-through. Depending on the purchase, we may receive some financial compensation.

Red River Paper - And finally, be sure to visit our friends at Red River Paper for all of your inkjet supply needs.

See you next week!

You can share your thoughts at the TDS Facebook page, where I'll post this story for discussion.

This is The Digital Story Podcast #856, August 16, 2022. Today's theme is "Mastering Your Autofocus." I'm Derrick Story.

Opening Monologue

Like many other advanced features on our cameras, we often take autofocus for granted. These days, it works that well. But it's also quite customizable. And it's worth taking a few minutes to wander through the camera's AF menu to tailor its performance to our preferred way of shooting. We'll take a closer look on today's TDS Photography Podcast.

Digital Photography Podcast 856

Tune-In Via Your Favorite Podcast App!


podcast-icon.jpeg

Apple Podcasts -- Spotify Podcasts -- Stitcher

Podbean Podcasts -- Podbay FM -- Tune In

Mastering Your Autofocus

IMG_1812.jpeg

As our cameras have improved, so has my trust in their AF systems. I wasn't that long ago that I relied on S-AF for all of my work. I had been burned by mis-focused shots in the past, and I couldn't afford for that to ever happen on the job.

But things have changed. And I thought it would be worth a review of the common AF settings that are available to us so we can put this wonderful technology to work for us.

Single Frame Autofocus S-AF - Still the most reliable way to autofocus a camera. Place the target square on your subject, press the shutter button halfway to lock in the focus, compose, and shoot.

A variation on this technique is to Back Button Focus. This allows you to focus independently of the shutter button by pressing the AF button on the back of the camera. On an OM-1 for example, go to Menu > AF 1 > AF by half-pressing(button symbol)> S-AF> No.

Continuous Autofocus C-AF - Every camera is a bit different in its implementation, but generally speaking, once you indicate what you want in focus, the camera will continuously focus and refocus for you. I've been using this a lot for my event shooting with the OM-1, almost always in burst mode. It's a great way to capture moving action.

A variation on this is Tracking Autofocus. This usually narrows the continuous autofocusing to a specific subject. Where it goes, so does the camera's AF sensor, literally "tracking" it across the frame or coming toward you. Canons and Nikons do this particularly well. Canon calls it Servo. Olympus lists it as C-AF+TR.

Face and Eye Detection Autofocus - This works well when you only have one or two subjects. The camera identifies their face and/or eyes, and automatically focuses on them. This had improved a lot over the years with things like "right eye" or "left eye" AF.

A neat trick is to set this up with back button focus to quickly enable it and have the shutter button use sensor focusing.

Subject Detection - Now we're getting into some sweet computational photography. In this mode, the camera will look for the subjects that you've indicated, and focus on them.

With my OM-1, the options are: Cars and Motorcycles, Airplanes and helicopters, trains and locomotives, birds, and mammals such as dogs and cats. This works remarkable well.

Manual Focus - You take over the focusing chores and use the focusing ring on your lens.

Another area that I've increased trust is the number of focusing points that I have active. I used to use a single point for all of my AF work. But now I've gone to a cross pattern that incorporates multiple AF points, and I position it in the frame using the jog stick. This protects me when there is slight subject movements right at the moment of exposure.

Final Thoughts

I'm trusting my camera's focusing decisions much more than I used to. I'm still a little hesitant with face detection in crowded conditions, but I do use Continuous, Cross Sensor, and Subject Detection regularly. And the results have been very good.

Fujifilm confirms X Summit event in New York City on September 8

You can read the entire article on DP Review.

Fujifilm has confirmed its next X Summit event will take place in New York City on September 8, 2022. Fujifilm hasn't shared any details about what all we can expect from the event, but we do know we'll be getting our first glimpse of Fujifilm's X-H2 camera.

After announcing its new X-H2S mirrorless camera at its X Summit event back in May 2022, Fujifilm teased the X-Trans CMOS 5HR, a 40MP CMOS sensor it said would be used inside the company's forthcoming X-H2 camera system. Fujifilm didn't further elaborate on what else we could expect from the sensor and the X-H2 it will be inside, but the tagline for the X-Trans CMOS 5HR is '40MP, beyond the format boundaries.' Compared to the 'stacked layer, ultra fast motion capture' tagline used for the X-Trans CMOST 5HS sensor used inside the X-H2S, it's clear the 5HR - and the X-H2 as a whole - will likely focus on resolution and image quality above all else.

It's unclear if any further announcements will be made beyond Fujifilm's new X-Trans CMOS 5HR sensor and X-H2 camera, but considering Fujifilm's current lens roadmap shows its new XF 56mm F1.2 and XF 30mm F2.8 Macro lens still due for 2022 launches, it's likely we'll see some additional details about these optics.

Whatever the case is, we'll be here providing the latest updates as they're announced. In the meantime, mark your calendar for 6pm UTC for September 8, 2022.

For anybody based in or near New York, Fujifilm is holding one of its 'Fujikina' events in the city on September 10th. This will include demonstrations and talks by a series of photographers and filmmakers, as well as a chance to get your hands on some of the company's latest gear. This is the first time Fujifilm has held such an event outside Japan.

Tell a Friend

I was thinking the other day about how people love to tell me about their favorite podcasts, which I appreciate!

Then, I started thinking, we should be telling our friends about The Digital Story podcast. It's available on every service that's commonly used: Apple Podcasts, Google Play, Amazon, Spotify, and on and on.

If each or our regular listeners told just one friend about this podcast and encouraged them to listen, those should be substantial numbers.

So let's try it! Tell a friend about the TDS Photography Podcast.

Not Using Auto ISO? You're Missing Out

You can read the entire article on FStoppers.

Auto ISO is one of those features that I ignored for a long time, considering it not much more than a gimmick. It wasn't until recently that I decided to try auto ISO, and I quickly realized that I was missing out on a valuable and practical feature.

As the name suggests, in auto ISO mode, the camera will pick the correct ISO value for the scene being metered. Initially, the idea of letting my camera pick the ISO value seemed not only silly to me, but also like a genuinely bad idea, since I was afraid of winding up with grainy images if the camera chose a very high ISO. I was also firmly entrenched in a film shooter's mentality, since I grew up in an era when using ISO 800 film was pushing the boundaries of grain and typically only used as a last resort. Obviously, the world changed a long time ago, but as many of us know, old habits die hard, especially for us photographers!

The beauty of using auto ISO is in the customization possible. The camera doesn't simply pick any appropriate ISO for your exposure, but gives you a number of other options to ensure you don't wind up with extremely grainy or blurry photos. In this article and video, I explain how these features work using a Canon EOS camera, but the basics will work with any camera that has auto ISO, although the customization levels will vary by brand.

Once you've set your camera to auto ISO, you can tell the camera the lowest and highest ISO it is allowed to use using the "Auto Range" menu. At first, I thought of the auto range as a high-ISO cap, leaving the low ISO at 100 and setting the high cap at around 3200, which I felt was the most grain I would want to see in my images. I quickly realized that this was not the best way to use the feature and now fine-tune it a bit more based on the specific shooting conditions and not just on acceptable grain levels.

By far, the most common way I use auto ISO is when shooting in aperture priority. In this mode, the camera picks the shutter speed and ISO, and I just dial in the aperture that I want. As a portrait photographer, selecting a wide aperture is almost always my main concern, and with two small children, I find this to be one of my favorite ways to shoot. I love not having to worry about the camera picking a shutter speed that is too slow for fast-moving kids or an ISO setting that's so high my images are too grainy. By dialing in my auto ISO settings, I am able to retain creative control in situations where I don't have a ton of time to fiddle with settings, in other words, any situation where kids are involved! I have found myself using Aauto ISO with aperture priority more and more when I leave my studio and work in natural light, whether it's taking some snaps of the kids or a concert in a dimly lit venue.

Virtual Camera Club News

Have you been unsubscribed? A number of listeners have let me know that they were unceremoniously unsubscribed from the show. If that happens to you, just go back to the app and click on subscribe.

Inner Circle Members: A big thanks to those who support our podcast and our efforts! We are having a blast at our new Inner Circle hangout, the private group I've set up at DerrickStoryOnline. We'd love it if you join us. You can become an Inner Circle Member by signing up at our Patreon site. You will automatically be added to the new hangout.

My Writing on Medium.com: I now have 51 published articles on Medium.com. And if you haven't visited the site, and enjoy good writing on a variety of topics, I suggest that you may want to take a look. You can just go to the home page and enter "Derrick Story" in the search field. And if you like what you read, then follow me!

The New Donation Kit for Carefree Shipping of Found Film Cameras - If you've discovered a film camera that's no longer being used, our new Donation Kit makes it easy to pack and ship. Just visit the Contact Form on thenimblephotographer.com, click the box next to Donating a Film Camera, and let me know what you have. In your note, be sure to include your shipping address.

Affiliate Links - The links to some products in this podcast contain an affiliate code that credits The Digital Story for any purchases made from B&H Photo and Amazon via that click-through. Depending on the purchase, we may receive some financial compensation.

Red River Paper - And finally, be sure to visit our friends at Red River Paper for all of your inkjet supply needs.

See you next week!

You can share your thoughts at the TDS Facebook page, where I'll post this story for discussion.

The typical approach for most photographers is to take a color photo and convert it to black & white while editing. I recently published a podcast talking about my favorite software for doing that. But actually shooting in B&W with your mirrorless camera has a few advantages, and it's really enjoyable.

P7091843.jpeg Captured in Monochrome 2 mode with an Olympus PEN-F. Photo by Derrick Story.

Let's start with the benefits, then I'll share some of my favorite settings.

Why Shoot in B&W?

The components of a successful B&W photograph are often a bit different than their color counterparts. Line and tone become very important in monochrome, and composing an image in your electronic viewfinder in B&W mode helps you see the best combination of elements.

Additionally, the cameras that I use by Fujifilm and Olympus allow you to apply digital versions of traditional B&W filters: yellow, orange, red, and green. These settings simulate filtering the light as a physical glass filter would, changing the camera's response to the scene.

  • Yellow Filter - The most versatile of B&W filters. It darkens the sky a bit, sometimes helping clouds "pop" just a bit more, while at the same time lightening greens a little.
  • Orange Filter - More dramatic effects on landscape than yellow with darker skies and snappier rendering of plants and flowers.
  • Red Filter - Boldly darkens skies and brings clouds forward, plus cuts haze and adds contrast. Red filters are good for robust architecture compositions.
  • Green Filter - Helps to lighten up foliage that sometimes can go very dark in non-filtered B&W photography. The effect varies, but worth a look with lots of green in a scene.

The luxury of having these digital filters and previewing their effects in your electronic viewfinder has a wonderful impact on your compositions while standing there before a scene.

Capturing in RAW+Jpeg

Most cameras apply the B&W effects to their Jpegs, leaving all of your color options available with RAWS. So if you shoot in RAW+Jpeg, then you can view the world in monochrome and come home with lovely B&W Jpegs, but still have your full-information RAW files available for any type of processing, color or B&W. I highly recommend RAW+Jpeg for B&W work.

Setting Up Your Camera for B&W

For Fujifilm cameras, tap the Film Simulations menu. I would start with Monochrome+Yellow, Dynamic range: 100, Sharpness: +1, Highlight tone: +1, and Shadow tone: 0. Many Fuji cameras include their wonderful Acros film simulation as well, which is even bolder than the straight monochrome. So be sure to look at Acros+Yellow (or even Red) too.

For Olympus mirrorless, I recommend setting Custom Picture mode to monochrome. (This is the same menu where you can set Portrait, Vivid, etc.) This alone will render good B&W, but if you have an OM-1, EM-1 II, EM-X, PEN-F, and some others, you can also add a filter (Yellow, Red, etc.) and set Sharpness along with a few other tweaks.

Once you find a combination that you like, I suggest saving them as a Custom Setting (C1, C2, etc.) so that you can easily go back to them when you're in a B&W photography mood. I've found that I shoot B&W more often when I set up the Custom Settings. It's so easy to change gears.

Final Thoughts

Black & white photography is a great option for midday work and other harsh conditions that might make color work difficult. Personally, I prefer urban settings over landscape for monochrome, but there are many great opportunities that will present themselves once you start viewing the world in B&W through your electronic viewfinder.

You can share your thoughts at the TDS Facebook page, where I'll post this story for discussion.

This is The Digital Story Podcast #855, August 9, 2022. Today's theme is "Comeback Kid - Camera Industry May Have Weathered the Storm." I'm Derrick Story.

Opening Monologue

What started with the invasion of the smartphones was compounded by the pandemic, supply chain shortages, bad weather, and an expensive shift to mirrorless technology. But it appears that the camera industry catering to enthusiasts and pros are seeing the future cast in a more optimistic light. And regardless of which brand your prefer, this is good news. More detail on today's TDS Photography Podcast. I hope you enjoy the show.

Digital Photography Podcast 855

Tune-In Via Your Favorite Podcast App!


podcast-icon.jpeg

Apple Podcasts -- Spotify Podcasts -- Stitcher

Podbean Podcasts -- Podbay FM -- Tune In

Comeback Kid - Camera Industry May Have Weathered the Storm

Nikon-Z5-1024.jpeg

Recent news has had a promising ring to it regarding the camera industry. And the stories are adding up to sunnier days. I thought I'd take you on a stroll down memory card lane and show you a few sites that might just make you smile.

Canon Says the Camera Market Is Looking Up, Shares Plan for DSLRs - FStoppers.

It's no secret that the smartphone has decimated the camera industry for the past decade, but according to Canon, the market may have finally bottomed out, and there might now be reason to look up. It turns out even DSLRs aren't dead just yet.

"Going forward, we expect the professional and advanced amateur segment to expand further and that products will become more highly developed. Accordingly, we expect the overall market to grow from now on."

Furthermore, Canon says they will continue to supply DSLRs as long as demand exists.

Nikon's Q1 results show Imaging Products profits up 48% YoY, revenue nearly matching pre-pandemic results - DPReview.

Nikon has announced the financial results for the first quarter (Q1) of its 2023 fiscal year (FY2023), revealing increased revenue and operating year-over-year (YoY) in nearly every segment, including its Imagine Products Business.

Nikon's presentation materials show the revenue and operating profit of its Imaging Products Business was 61.2B yen and 13.6B yen, respectively, for Q1 FY2023. That's an increase of 22.4% and 47.8%, respectively, compared to Q1 FY2022. Isolated, that's an impressive increase, but Nikon hasn't necessarily had the best couple of years throughout the pandemic, so how does it compare to Nikon's pre-pandemic numbers? Turns out, fairly well.

Financial results aren't necessarily a crystal ball into the future, but Nikon appears to have weathered the brutal economic conditions of the past few years and has set its Imaging Products Business for a sustainable future, even if it's only a fraction of what it was in the peak CaNikon days.

Sigma says its full-frame Foveon X3 sensor 'should be' ready 'sometime this year' - DPReview.

In a recent video interview, published to YouTube, Sigma Corporation CEO, Kazuto Yamaki, confirmed the company is working on a full-frame Foveon sensor that 'should' make its debut - at least in prototype form - by the end of the year.

The 17-minute interview covers an array of topics, including Sigma's strategy throughout the pandemic, its plans to continue supporting DSLR users and other topics. One of the more interesting tidbits, however, comes around the eight-minute mark, wherein the host asks Mr. Yamaki if there's any update on the company's three-layer Foveon sensor.

In response, Mr. Yamaki says 'We are still working on it [...] and are working on the prototype of the three-layer X3 sensor [...] that should be available sometime this year.' He goes on to say 'the Foveon X3 sensor is not a very versatile sensor,' specifically pointing out its low-light performance, 'but if there is a good amount of light, that camera can create very beautiful and impressive photos.'

Panasonic and Leica to Launch Jointly-Developed Mirrorless Camera - Petapixel.

The report comes courtesy of Nikkei, which has found evidence that shows that the manufacture of all small digital cameras has basically ceased across the board. As part of that report, the publication spoke with Panasonic which confirmed that not only has it ceased production of Lumix-branded compact cameras, but that it would also be focusing on the high-end of the market which includes leveraging its partnership with Leica to produce a co-developed mirrorless camera next year.

It is not clear how this new camera will fit in with Panasonic or Leica's current full-frame offerings. The two companies both produce mirrorless L-mount cameras that exist in that high-end space, and whether or not the co-developed camera will replace both lines or be in addition to them was not revealed.

Our Wishlist for the New OM System OM5 - The Phoblographer.

The OM System OM1 broke away from the Olympus name to deliver a list of innovative features in a small package. That list, which includes quad pixel autofocus, IP53 rated weather-sealing, and 50 fps speed, may be exactly what the Micro Four Thirds system needs to remain relevant in an industry now teaming with full frame bodies. But if the OM1 is the company's flagship, what's next for the former-Olympus mid-range bodies?

Early reports suggest that an OM5 is coming in the fall. These reports call for the OM5 to have the same sensor and battery as the OM1, but with a 15 fps burst speed. OM Digital Solutions (OMDS) has not commented on those reports and, as such, those details remain speculation. But, if I could pick and choose what a successor to the Olympus E-M5 Mark III looks like, there are a handful of features I would love to see: a mix of OM1 and E-M5 Mark III features in a smaller, more affordable body.

Final Thoughts

In addition to the stories I've already mentioned, lots more great stuff happening with Fujifilm, Tamron, and others. I feel like mirrorless has been the technology the camera industry needed to spur excitement and sales. And I'm looking forward to a strong second half of 2022 and a wonderful start to 2023.

Peak Design Collabs with Huckberry in Limited Edition Travel Backpack

You can read the entire article on Petapixel.

The backpack shares a lot in common with the original Travel Backpack with one major notable exception: the exterior. The collaboration backpack is available in one color -- a yellow called "coyote" -- and is made from what the two brands describe as premium DWR-coated X-Pac material, which is supposedly extremely durable and waterproof.

X-Pac is a lightweight fabric that is made with several layers that are laminated together into one sheet: nylon fabric, polyester mesh (called X-ply, hence the X-Pac name), and a waterproof film. As described by the manufacturer Dimension-Polyant, the resulting material is designed to be both rugged and comes from a business aimed at sustainability.

The use of X-Pac means that the exterior of the Peak Design and Huckberry collaboration bag is waterproof -- not water resistant. While the bag cannot be submerged and stay totally dry on the inside (the water-resistant zippers have a limit to how much water they prevent from seeping through), the bag will often not require the typical rain cover other backpacks need for a majority of wet weather scenarios.

Like the original, the collaboration backpack has dedicated laptop and tablet sleeves, has padded shoulder straps that pack away, grab handles at multiple locations on the bag, and fits under an airline seat or in the overhead compartment. It is also built sustainably with a carbon-neutral, Fair Trade Certified manufacturing process.

The Huckberry and Peak Design X-Pac Travel Backpack is available directly from Huckberry (limited one per person) for $260, which is $30 more than the standard $230 30L Travel Backpack.

Tell a Friend

I was thinking the other day about how people love to tell me about their favorite podcasts, which I appreciate!

Then, I started thinking, we should be telling our friends about The Digital Story podcast. It's available on every service that's commonly used: Apple Podcasts, Google Play, Amazon, Spotify, and on and on.

If each or our regular listeners told just one friend about this podcast and encouraged them to listen, those should be substantial numbers.

So let's try it! Tell a friend about the TDS Photography Podcast.

THE BEST INSTANT CAMERAS YOU CAN BUY RIGHT NOW

You can read the entire article on The Verge.

Even with the ability to take excellent photos with our phones and instantly share them across the world, there's something magical about the old-school instant camera. With just a click of a button, you can capture a moment in a photo that you can see and touch almost immediately. Images captured by an instant camera aren't as pristine or perfect as modern digital cameras, but their soft images and imperfections are often a big part of the allure.

Yet not all instant cameras are the same, and some of them are better suited for different needs and budgets. That's why we tested some of the most popular instant cameras on the market from brands like Fujifilm, Polaroid, and Kodak.

All of the models featured in our best instant camera guide here are enjoyable to use, but each offers a different set of features at a different price point. As a result, some are more appropriate for a child or the budding photographer, while others are more advanced and provide added creative control (for a price). When it comes down to it, though, we consider print quality, ease of use, and affordability to be the hallmarks of a quality shooter. That's why we picked Fujifilm's Instax Mini 11 as the best instant camera for most people, as it ticks all three boxes wonderfully.

If you're looking for more creative control or features like filters, however, the Instax Mini Evo is our choice, one that boasts great image quality and allows you to choose which photos you'd like to print. Other instant cameras, like Polaroid's Now Plus and Kodak's Mini Retro 3, also offer a variety of advanced creative modes for those who desire more.

Other cameras on the list include: FUJIFILM'S INSTAX MINI 11, INSTAX MINI EVO, KODAK MINI SHOT 3 RETRO, POLAROID NOW PLUS, and the POLAROID GO.

Virtual Camera Club News

Have you been unsubscribed? A number of listeners have let me know that they were unceremoniously unsubscribed from the show. If that happens to you, just go back to the app and click on subscribe.

Inner Circle Members: A big thanks to those who support our podcast and our efforts! We are having a blast at our new Inner Circle hangout, the private group I've set up at DerrickStoryOnline. We'd love it if you join us. You can become an Inner Circle Member by signing up at our Patreon site. You will automatically be added to the new hangout.

My Writing on Medium.com: I now have 51 published articles on Medium.com. And if you haven't visited the site, and enjoy good writing on a variety of topics, I suggest that you may want to take a look. You can just go to the home page and enter "Derrick Story" in the search field. And if you like what you read, then follow me!

The New Donation Kit for Carefree Shipping of Found Film Cameras - If you've discovered a film camera that's no longer being used, our new Donation Kit makes it easy to pack and ship. Just visit the Contact Form on thenimblephotographer.com, click the box next to Donating a Film Camera, and let me know what you have. In your note, be sure to include your shipping address.

Affiliate Links - The links to some products in this podcast contain an affiliate code that credits The Digital Story for any purchases made from B&H Photo and Amazon via that click-through. Depending on the purchase, we may receive some financial compensation.

Red River Paper - And finally, be sure to visit our friends at Red River Paper for all of your inkjet supply needs.

See you next week!

You can share your thoughts at the TDS Facebook page, where I'll post this story for discussion.

This is The Digital Story Podcast #854, August 2, 2022. Today's theme is "One Half 'Somewhat Satisfied' with Their Backup System." I'm Derrick Story.

Opening Monologue

One thing has led to another, and our ongoing conversation about Peakto has led to a bigger discussion about backup strategy in general. So I presented a poll to our Inner Circle Members, and I'm going to share those results, and some tips, on today's TDS Photography Podcast. I hope you enjoy the show.

Digital Photography Podcast 854

Tune-In Via Your Favorite Podcast App!


podcast-icon.jpeg

Apple Podcasts -- Spotify Podcasts -- Stitcher

Podbean Podcasts -- Podbay FM -- Tune In

One Half "Somewhat Satisfied" with Their Backup System

IMG_1682.jpeg

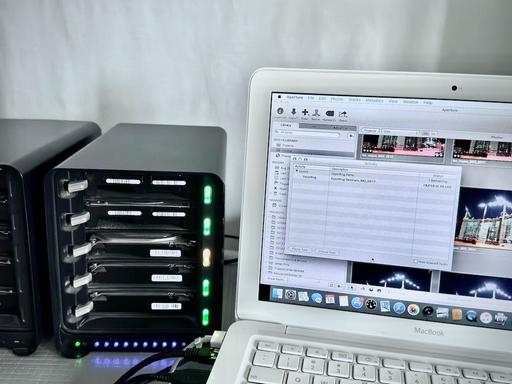
In a recent poll of our Inner Circle Members, 54% of the respondents said, "My backup system is a work in progress, but I am more satisfied than not with it." And to add to that, another 28% noted that, "I have a great backup system and am perfectly satisfied with the safety of my data." That means that a whopping 82% of those respondents believe they data is in good shape. I think that's great.

So I thought you might be interested in some of their comments as you're thinking about your own data protection. Let's see what they have to say.

----------------------------------

"I have a Drobo 5N, Drobo 5N2 and a Qnap. all have 16 TB with "hot" spare and data redundancy. I keep all 3 in sync. With the news I'm hearing on Drobo I'm glad I put the Qnap into the mix." Richard.

----------------------------------

"I have a system where I use very large 3.5" drives in the 16TB range plugged into a "toaster" interface that serves as central backup to all my smaller 2.5" drives. I have duplicated that setup at work so that I have a backup in case of fire. I rely on carbon copy to make the backups. One critical part is to ensure the health of the drives and that the files are copied without errors. I lost a few files due to bit rot. That's always heartbreaking. I am still looking into potentially having a sinology system instead of my toaster ... not completely convinced yet." Arnaud.

----------------------------------

Windows guy here. I have an external RAID drive connected to my desktop that has my photos as well as my Lightroom Classic backups folder. I sync my external drive to a Synology 4-disc unit as well as to my Backblaze account. I have another external drive that syncs photos from my wife's desktop via the network. That way, all of our images are on drives local to my desktop and I only need the one Backblaze account. Backblaze doesn't backup network drives.

A word about Backblaze. A couple of years ago, for reasons I cannot explain other than really dumb user error, my wife lost about six months worth of photos from several years earlier. I just happened to be looking for something else when I noticed that the folders were missing (we both use dates to organize our images). I was able to locate the missing files on the BB web interface, but it was too much to easily recover via the web. Fortunately, they have the option where they'll send you an external hard drive with the files you need. You simply need to copy the files over and ship back the drive. No extra cost.

Well worth the $70 per year. Henry

----------------------------------

"My MacBook Pro's internal SSD is 1TB. I have a 2TB Thunderbolt 3 SSD always plugged in that holds my Lightroom catalogs, any Final Cut Projects, and (what I call) "On the Road Imports."

When plugged in at home, I have (2) Drobos. One in Thunderbolt2 the newer one is TB3. As a side note the TB2 Drobo failed a year or 2 ago, but the problem was the power supply block. I found a suitable replacement on Amazon." Larry.

----------------------------------

Also windows. Currently running multiple external drives and multiple internal drives. I have all my images from many years on an internal drive and my images from the current year on an internal SSD. These are backed up onto two external drives using Backvp 2. This scans any folders I select and everything is backed up on the external drives.

I know I'm missing the 3 in 1-2-3.

I also keep running out of room on my internal 1TB SSD.

As I keep learning and increasing my library, I have changed how I store my photos over the years. I never really tagged them, because I didn't have "that many" to worry about. Now as I shoot more and am putting more thought into my photography, I'm doing a better job of tagging and storing my photos.

I'm looking to get a Synology in the near future so I can stop all this nonsense of having to keep moving libraries from one drive to another. Jeff.

----------------------------------

I use Apple Photos. An iMac has a full copy of all files. I use Carbon Copy Cloner to copy the Photos library to a specific folder on a local Synology device. I also have a second Synology at a friend's home in another state. The Synology's are set to sync those specific folders automatically. A little pricy to begin with, but I'm not paying monthly charges to an online company. Steve H.

----------------------------------

I use a DROBO 5D with 5 8TB drives set up as a RAID 1, everything including iOS Time Machine backed up with Backblaze, Dropbox for 2TB of important files and iCloud backup for Photos. Since DROBO uses a proprietary software system, I am concerned about future support with newer versions of Mac iOS. I've looked at OSW DAS RAID, Synology NAS RAID and Sandisk G-Drives. None of them seem to have the same flexibility of DROBO. SSD drives seem to be the future but for large amounts of storage, prices are still too high for managing large amounts of storage.

It will be nice to know the path forward with software upgrades and support.

----------------------------------

To put a bow on some of these thoughts. A lot of people are using Drobo, myself included, and seem to be having relatively good experiences with them. But in general, Drobo users are nervous about the future.

There were numerous references to Snylogy. These are network-enabled multi-drive systems. A very popular unit is the Synology DiskStation DS920+ 4-Bay NAS Enclosure for $549 (drives not included).

  • 4 x 3.5/2.5" Bays | 2 x M.2 2280 Slots
  • 2.0 GHz Intel Celeron J4125 Quad-Core 4GB DDR4 RAM
  • 2 x Gigabit Ethernet Ports
  • 2 x USB 3.0 Type-A | 1 x eSATA
  • RAID 0, 1, 5, 6, 10, Hybrid, Basic, JBOD
  • Sequential Reads up to 225.99 MB/s
  • Sequential Writes up to 225.9 MB/s
  • AES-NI Hardware Encryption Engine
  • Synology DiskStation Manager OS

Another popular system is the QNAP TR-004-44W-US 12TB 4-Bay USB 3.2 Gen 1 Type-C RAID 5 Array (4 x 4TB) for $649 (drives included).

  • 4 x 4TB 3.5" SATA III Hard Drives
  • 4 x 3.5" / 2.5" Drive Bays
  • USB 3.2 Gen 1 Type-C Host Interface
  • Supports RAID 0, 1, 5, 10, JBOD & Single
  • Pre-Configured for RAID 5
  • Hardware Controller
  • 120mm Smart Fan
  • Windows, Mac, and Linux Compatible

And then of course there is some Cloud backup involved, such as Backblaze.

Roll this all up, and that's where many of our Inner Circle Members are right now. I hope you found this useful.

Update on Peakto

I had some correspondence with the Peakto folks that I want to share, especially in regard to the Capture One previews.

Capture One uses an 'obscure' format to store the High Resolution thumbnails. As a result we cannot decode it and we are limited to the small resolution images (we understand how it is built but without C1 engineers involvement we cannot exploit it). Changing the Preview settings in C1 will have no effect. We are trying to convince C1 to help us decode those formats (via a plugin so they can keep their recipe secret) and we now have good contacts with them. Until now, all our demands were rejected. But I am hopeful that we can find a solution.

I'd like, also, to give you a short update on we are currently working on:

  • Dramatic improvements on performance when ingesting, especially when dealing with files and folders.
  • A free to download trial version (weighting only 120Mb).
  • Smart re-ingest (super fast, to ensure perfect sync).
  • Smart albums and complex queries.
  • Annotation within Peakto.
  • A map tool.
  • Peakto Pricing

    Peakto is available three ways:

    • $9.99 Monthly with Zero Risk 7 day free trial.
    • $99 Yearly per seat with 15 day free trial.
    • $189 One time per seat with 30 day Money back guarantee.

    5 Learnable Skills That Every Professional Photographer Must Have

    You can read the entire article on FStoppers.com.

    As photographers, we often are bogged down in what gear to buy, what lens to choose, what has better specs, and so on. To everyone's satisfaction or disappointment, these things will only make a marginal difference in most cases. As a photographer, you need to have more skills than gear. I am here to tell you the five most important ones.

    Skills you need to have as a photographer might seem like the old list of being able to expose, compose, and remove people from a landscape photo in Photoshop. While there is no denying that these are all valid things you need to do as a photographer, they are very basic, and in order to really gain a competitive advantage and set yourself apart, you need to have more transferrable skills that are not industry-specific. This list is of skills you need to hone repeatedly in order to master photography.

    • Learning and Unlearning Fast - One of the beautiful things about having an art career is that there are new things coming out every day. Being able to keep an open mind and unlearn old ways of doing things will certainly help you be a much better photographer.
    • Productivity - In an industry where keeping with trends is a method of staying afloat, productivity is key. You need, really need, to hit deadlines on time. No one will wait for you to make it perfect. Done is better than perfect in this case.
    • Marketing - There is no way you can be a successful business owner if you can't market your product to customers.
    • Business and Accounting - Keeping it to business talk, you need to possess the ability to run a business. This starts from the knowledge of how to register it, how to issue invoices, how to file taxes, and do other paperwork.
    • Style - Style is something that can be counted as a skill for me, as it involves a long process of learning, developing, and ultimately being formed and perfected to automation.

    Tell a Friend

    I was thinking the other day about how people love to tell me about their favorite podcasts, which I appreciate!

    Then, I started thinking, we should be telling our friends about The Digital Story podcast. It's available on every service that's commonly used: Apple Podcasts, Google Play, Amazon, Spotify, and on and on.

    If each or our regular listeners told just one friend about this podcast and encouraged them to listen, those should be substantial numbers.

    So let's try it! Tell a friend about the TDS Photography Podcast.

    Virtual Camera Club News

    Have you been unsubscribed? A number of listeners have let me know that they were unceremoniously unsubscribed from the show. If that happens to you, just go back to the app and click on subscribe.

    Inner Circle Members: A big thanks to those who support our podcast and our efforts! We are having a blast at our new Inner Circle hangout, the private group I've set up at DerrickStoryOnline. We'd love it if you join us. You can become an Inner Circle Member by signing up at our Patreon site. You will automatically be added to the new hangout.

    My Writing on Medium.com: I now have 51 published articles on Medium.com. And if you haven't visited the site, and enjoy good writing on a variety of topics, I suggest that you may want to take a look. You can just go to the home page and enter "Derrick Story" in the search field. And if you like what you read, then follow me!

    The New Donation Kit for Carefree Shipping of Found Film Cameras - If you've discovered a film camera that's no longer being used, our new Donation Kit makes it easy to pack and ship. Just visit the Contact Form on thenimblephotographer.com, click the box next to Donating a Film Camera, and let me know what you have. In your note, be sure to include your shipping address.

    Affiliate Links - The links to some products in this podcast contain an affiliate code that credits The Digital Story for any purchases made from B&H Photo and Amazon via that click-through. Depending on the purchase, we may receive some financial compensation.

    Red River Paper - And finally, be sure to visit our friends at Red River Paper for all of your inkjet supply needs.

    See you next week!

    You can share your thoughts at the TDS Facebook page, where I'll post this story for discussion.

When we think of Nik Collection, we tend to focus on the suite of eight plugins featuring Silver Efex Pro and others. But as part of the bargain, we also get the essential version of PhotoLab 5 that's quite powerful. And one of the cameras it supports is the OM System OM-1.

dxo-photolab-5-1024.jpg

That means that you have access to some great DxO technologies that are a wonderful fit for Micro Four Thirds photography, including DxO Denoising (High Quality Setting), DxO Smart Lighting, color rendering based on camera profile, and more. Plus there's access to an entire toolbox of adjustments that you would expect with any top drawer image processor.

In terms of other supported cameras, there are a few exceptions between the Essential and Elite version of PhotoLab 5. One of them, unfortunately for me, is the Fujifilm X100V (Elite version only). But the rest of my gear is supported in the Essential version, including the OM-1. You can check supported cameras here.

I think many photographers overlook PhotoLab 5 and how it can help them improve their images. And they may not even give the bundled version a try when updating their Nik Collection.

I say take a handful of your RAW files and open them in PhotoLab. You may be delightfully surprised at what you can do with them.

Product Links and Comments

There are product links in this article that contain affiliate tags (for the OM-1 camera, but not Nik Collection). In some cases, depending on the product, The Digital Story may receive compensation if you purchase a product via one of those links. There is no additional cost to you.

You can share your thoughts at the TDS Facebook page, where I'll post this story for discussion.

This is The Digital Story Podcast #853, July 26, 2022. Today's theme is "The Best Software for B&W Photography." I'm Derrick Story.

Opening Monologue

As we prepare for our upcoming B&W Photography Workshop, I've been having a lot of fun revisiting some of my favorite software. And the one thing that really jumps out at me is: there is black and white, and then there is BLACK & WHITE! So the first story of this week's show is dedicated to apps that help you create masterful monochromes that dazzle. I hope you enjoy the show.

Digital Photography Podcast 853

Tune-In Via Your Favorite Podcast App!


podcast-icon.jpeg

Apple Podcasts -- Spotify Podcasts -- Stitcher

Podbean Podcasts -- Podbay FM -- Tune In

The Best Software for B&W Photography

SilverEfex3-1024.jpg

I think B&W imagery lives somewhere in our DNA. There's just something about it that draws our attention.

We have many options for monochromes in the digital age. We can use the built-in effects in our cameras. These can be particularly sweet if you shoot Fuji or if you have an Olympus PEN-F.

In any software app, we can totally desaturate an image to create a monochrome. Most apps have a dedicated B&W adjustment panel that does an admirable job. Lightroom, Capture One, and Photos for macOS are all capable of producing excellent monochromes.

But one of the aspects of this type of photography is its ability to withstand "pushing the creative envelope." This tradition goes all the way back to the film days when we would alter the processing recipes to stretch Tri-X from its native ISO 400, to 800 and beyond.

And that's when we step beyond Lightroom presets and Capture One Styles into the uncharted waters of specialized plugins. Let's take a closer look at a few of these.

Nik Software Silver Efex Pro 3 Mac/Windows

I like using Silver Efex Pro 3 DxO PhotoLab 5 that comes bundled with the entire Nik software package. I can point PhotoLab to a folder of images, take care of my basic edits first, then launch the Silver Efex plugin from within PhotoLab.

This plugin also works well with Lightroom Classic and Photoshop. So if Lightroom is your everyday asset manager, you're in great shape with Silver Efex.

Silver Efex is such a fun app to work within. On the left side of the interface you have a column that features 64 magical presets. In all honesty, these are so good that you could pick your favorite for an image, click on it, and be done.

If you want to keep playing, however, on the right side you can tap a cornucopia of adjustment tools that are designed for B&W photography. I particularly like the Film Types panel that has some of my favorite emulsions from the analog days.

You can also use their Control Points technology for selective adjustments, and then use DxO Clear View for a finishing touch. It's really sweet.

If you come up with a magic formula that you like, you can save it as your own custom preset.

The entire Nik Collection, including DxO PhotoLab 5 is $149. There are usually discount codes online that can bring it down to $129.

ON1 Effects 2022 - Mac/Windows

I originally fell in love with ON1 Effects for my infrared photography. But it has a lot of muscle for straight B&W work as well.

Again, I tend to start with the B&W presets on the left side of the interface, the fine tune with the Black & White adjustment panel on the right side. In addition to the usual tonal sliders, I really like the Film Grain panel where I can choose from all the popular analog emulsions, then apply Amount and Size.

I also like the Opacity slider for each panel that allows me to add just a hint of color to my B&W conversions, almost like toning.

There are lots of other great effects to choose from that complement your B&W work, such as Vignette, Vintage, Lens Blur, Photo Filter, LUTs, Dynamic Contrast and more.

Unlike Silver Efex, you can buy ON1 Effects 2022 by itself for $69. It's wonderful for a variety of uses, and it works as a plugin with Photoshop, Lightroom Classic, Capture One Pro, and Photos for macOS.

Final Thoughts

Both of these apps will help you elevate your B&W work to the Wow Level. And they are fun to experiment with as well.

Become a Medium Member and Support Independent Writers

The articles that I publish on Medium.com are an important part of our overall ecosystem. That work introduces new members to our community and what we're doing here.

If you enjoy the vast array of great writing on Medium, including the photography articles, consider becoming a member to support me and the other writers there.

Please use this link to do so.

Update on Peakto

There was an update this week that brought us up to version 1.0.2 that smoothed the normal rough edges.

I now have all of my Aperture libraries loaded, spanning images from 2000 to 2014. The performance is particularly good with Aperture catalogs.

I also have Capture One catalogs from 2015 to present in Peakto. The previews from C1P don't look quite as good as those from Aperture, so I am going to check my preview settings on the catalogs themselves to see if I can improve that situation.

Currently Peakto is digesting 897,730 items using 42.26 GBs. Performance remains strong.

Peakto is available three ways:

  • $9.99 Monthly with Zero Risk 7 day free trial.
  • $99 Yearly per seat with 15 day free trial.
  • $189 One time per seat with 30 day Money back guarantee.

Kodak to Use Film Manufacturing Machines to Make EV Batteries

You can read the entire article on Petapixel.com.

Kodak has announced that it is repurposing some of the expensive, high-tech machines used to manufacture its photography film for use on batteries for electric vehicles (EV). The company has invested in Wildcat Discovery Technologies, which makes EV batteries.

Engineers at Kodak have discovered that the "supercell" batteries Wildcat manufactures, require a similar coating and engineering services, like their 35mm film. So, with minimal retooling, these $70 million machines have a new life, producing materials needed to create batteries.

According to a video tour of the Kodak facility by Destin of Smarter Everyday on YouTube, Kodak's current process of film manufacturing , known as ESTAR, requires using polymers to create the film itself. These polymers have replaced the old school acetate base in 35mm film (except for motion picture film) and requires special chemical coatings, which Kodak says is very similar to what is required in Wildcat's Supercell EV batteries.

"[These machines are] probably a $70 million or $80 million machines, and we were selling them extremely cheap, [for less than] $2 million," Jim Continenza, CEO of Kodak, tells the Rome Sentinel. "And it's like, 'No, we've got to put this back to work. This is an incredible piece of equipment.'"

Continenza goes on to say that it was at that moment that he realized, accidentally, that George Eastman made a battery company, he just didn't know it. "It's identical to making film and coating on batteries."

n order to keep the company growing, Continenza and his team have been looking for ways to capitalize on the manufacturing capability of its Advanced Materials & Chemicals business at Eastman Business Park (formerly known as Kodak Park). Since then, Kodak has expanded into making components for pharmaceuticals, health care operations, and chemicals for various lab operations.

With this new vision for Kodak, the company has gone from laying off personnel to cope with a shrinking film industry, to working overtime to fill nearly 100 vacancies. That is a remarkable turnaround.

Tell a Friend

I was thinking the other day about how people love to tell me about their favorite podcasts, which I appreciate!

Then, I started thinking, we should be telling our friends about The Digital Story podcast. It's available on every service that's commonly used: Apple Podcasts, Google Play, Amazon, Spotify, and on and on.

If each or our regular listeners told just one friend about this podcast and encouraged them to listen, those should be substantial numbers.

So let's try it! Tell a friend about the TDS Photography Podcast.

Virtual Camera Club News

Have you been unsubscribed? A number of listeners have let me know that they were unceremoniously unsubscribed from the show. If that happens to you, just go back to the app and click on subscribe.

Inner Circle Members: A big thanks to those who support our podcast and our efforts! We are having a blast at our new Inner Circle hangout, the private group I've set up at DerrickStoryOnline. We'd love it if you join us. You can become an Inner Circle Member by signing up at our Patreon site. You will automatically be added to the new hangout.

My Writing on Medium.com: I now have 51 published articles on Medium.com. And if you haven't visited the site, and enjoy good writing on a variety of topics, I suggest that you may want to take a look. You can just go to the home page and enter "Derrick Story" in the search field. And if you like what you read, then follow me!

The New Donation Kit for Carefree Shipping of Found Film Cameras - If you've discovered a film camera that's no longer being used, our new Donation Kit makes it easy to pack and ship. Just visit the Contact Form on thenimblephotographer.com, click the box next to Donating a Film Camera, and let me know what you have. In your note, be sure to include your shipping address.

Affiliate Links - The links to some products in this podcast contain an affiliate code that credits The Digital Story for any purchases made from B&H Photo and Amazon via that click-through. Depending on the purchase, we may receive some financial compensation.

Red River Paper - And finally, be sure to visit our friends at Red River Paper for all of your inkjet supply needs.

See you next week!

You can share your thoughts at the TDS Facebook page, where I'll post this story for discussion.

This is The Digital Story Podcast #852, July 19, 2022. Today's theme is "Finally! Your Entire Digital Catalog in One Place with Peakto." I'm Derrick Story.

Opening Monologue

Photography cataloging software has evolved a lot over the years. And as we move from software to software we often have to leave our older images behind. No more! Thanks to a breakthrough app called Peakto (for Mac), you can browse pictures from Aperture to Capture One, all in one interface, plus leverage the power of AI to search and sort. It's nothing short of amazing, and you'll learn all about it on today's TDS Photography Podcast. I hope you enjoy the show.

Digital Photography Podcast 852

Tune-In Via Your Favorite Podcast App!


podcast-icon.jpeg

Apple Podcasts -- Spotify Podcasts -- Stitcher

Podbean Podcasts -- Podbay FM -- Tune In

Finally! Your Entire Digital Catalog in One Place with Peakto

Peakto-Full-Interface-1024.jpg

I've been testing Peakto 1.0 and currently have it cataloging my Aperture and Capture One catalogs side by side, plus watching a few folders. And I have to say that I'm amazed. Let's start with its basic specs.

Peakto requires macOS 11 (Big Sur) or later and runs well on Apple M1 chips.
Peakto is compatible with:

  • Aperture catalogs from version 3.6
  • Lightroom Classic catalogs from version 5
  • Luminar catalogs from version 4.2
  • Luminar AI catalogs from version 1.0
  • Capture One catalogs from version 20
  • Apple Photos catalogs from version 6 (Big Sur)
  • iView Media Pro catalogs from version 3

A working copy of the supported apps (Apple Aperture, Lightroom, CaptureOne, iView Media Pro...) is not required when using Peakto, as Peakto opens those libraries natively.

Peakto gathers tons of existing data from your catalogs, such as EXIF, IPTC, keywords, ratings, geotags, and faces. The faces recognition is particularly impressive. All the faces data from my Aperture libraries were recognized in Peakto.

Working with Peakto

Peakto can pull from a variety of hard drives and keeps track of where everything is. If you edit a photo in one of your apps on one of your drives, Peakto will recognize the change and update the image in its browser.

If you unplug a drive that Peakto is following, you can still browse the images, even when the drive is detached. I've tested Peakto with external SSD, external HDD, and Drobos. Worked equally well with all.

If you have an older version of a catalog, let's say Capture One, Peakto will notify you to update it (by simply opening it in a current version of the app) before it can be cataloged. I'm going through that process now with some of my older stuff.

If you find an image that you want to do more with, Peakto will let you open it for editing in the native app, or it will point you to the location of the originating library in the Finder.

Impressive Use of AI and Organization

Obviously, we don't want to flat browse thousands of images to find what we're looking for. Peakto helps us with this process in two basic ways.

First, it shows us our original catalog organization. You can reveal a second column that shows you the organization from the original catalog, even if it's Lightroom, Aperture, or Capture One. It's amazing.

Next, you have your keywords, star ratings, labels, and faces info that you can use as search criteria as well.

And finally, Peakto uses AI that gathers images in intelligent ways such as by color or visual subject. This part is fun too.

Impact on Computer and Performance

Peakto stores everything in the Application Support folder. Currently it's occupying 10.14 GB for 226,329 items. I'm projecting that I will easily reach 500,000 items soon, guessing that I'll need 20 GBs of storage to manage that. A good deal indeed!

It does take time to register catalogs. This is a multi-phase process that can operate in the background once it gets to a certain stage.

I set up five catalogs last night and went to bed. Everything was completed this morning, probably a good way to go in the beginning.

Clever Trick for Exporting Pictures Out of Peakto

Even if you don't have the host app available, you can export high quality Jpegs out of Peakto. Here's how I did it for images in an Aperture catalog.

  • Create an album or reuse an existing album. Note that you can create an album from the current selection easily.
  • Put all images to export in the album.
  • Choose "Export Album" from the Contextual menu.
  • You will be presented with the Export dialog. It is a fairly sophisticated export dialog because we need to handle the presence/absence of large resolution 'previews' for all the images selected.
    Peakto will carefully analyze what is available. Take Aperture for example: Aperture usually stores 1:1 image previews for all images. Exporting from Peakto will give you the ability to export those high resolution images.
    Lightroom has several options when it comes to preview sizes and quality, and we will analyse what is available and export it.

Peakto Pricing

Peakto is available three ways:

  • $9.99 Monthly with Zero Risk 7 day free trial.
  • $99 Yearly per seat with 15 day free trial.
  • $189 One time per seat with 30 day Money back guarantee.

Final Thoughts

I am wildly impressed with Peakto, and it is going to change my archiving and retrieval forever, and for the best.

Become a Medium Member and Support Independent Writers

The articles that I publish on Medium.com are an important part of our overall ecosystem. That work introduces new members to our community and what we're doing here.

If you enjoy the vast array of great writing on Medium, including the photography articles, consider becoming a member to support me and the other writers there.

Please use this link to do so.

Uh-oh: Cash-strapped storage company Drobo files for Chapter 11 bankruptcy

You can read the entire article on PopPhotography.com.

The data storage company, Drobo is facing an uncertain future. Late last month, the brand and its parent company, StorCentric, both simultaneously filed for Chapter 11 bankruptcy protection in California's Northern Bankruptcy Court (San Jose).

It's sad news for one of the earliest names in both direct- and network-attached storage, but it's not necessarily the end quite yet, as one or both companies could emerge rejuvenated. Should that happen, hopefully, the brand's products will have been reworked to reflect the needs and realities of the current storage market.

In the final weeks of 2018, the new company released its first--and to date, only--new Drobo product, the Drobo 8D. Initially, things seemed to be on the right path, with early reviews proving quite positive. But then in the second half of 2018, the stock suddenly disappeared from shelves right as StorCentric seemed ready to spread its wings. Over the next six months, availability fluctuated before the 8D suddenly disappeared altogether in March 2020.

The newest storage device wasn't alone in vanishing from the company's product listings, as the 5D, 5Dt, and B1200i models were also discontinued around the same time the 8D went AWOL. Five other Drobo models remain listed on the company's website, but all were geriatric, having launched anywhere from five to seven years earlier. By early 2020, only two of these five were still available at retail. (As of today, not a single one remains available to purchase.) Yet Drobo remained silent as to the reasons for its supply issues.

The process both Drobo and StorCentric have entered is for a Chapter 11 bankruptcy. This indicates an intention to reorganize the companies while under the control of a trustee, with the goal being to resolve debts and return the company to solvency, possibly under the control of the debtors should insufficient funds be available to cover their debts.

At the same time, though, there's no guarantee that Chapter 11 proceedings will reach a successful conclusion.

Tell a Friend

I was thinking the other day about how people love to tell me about their favorite podcasts, which I appreciate!

Then, I started thinking, we should be telling our friends about The Digital Story podcast. It's available on every service that's commonly used: Apple Podcasts, Google Play, Amazon, Spotify, and on and on.

If each or our regular listeners told just one friend about this podcast and encouraged them to listen, those should be substantial numbers.

So let's try it! Tell a friend about the TDS Photography Podcast.

How to Go from Garden to Greeting Card in 3 Easy Steps

You can read the entire article on TheDigitalStory.com.

Whether you have a window box over the kitchen sink, clay pots on the patio, or a raised bed in the backyard, the flowers you cultivate can live far beyond their vase-life expectancy with the help of your camera and inkjet printer.

Fine art greeting cards are one of the most satisfying print projects, and they are very easy to create. All you have to do is photograph a few of your favorite blossoms, then follow these simple steps.

1 - Prepare the Image

The finish size for our greeting card will be 5" tall and 7" wide. So you'll want to crop your image to 5"x7" so it looks exactly as you want on the front of the card. This is especially important if you're going to print a "full bleed" edge-to-edge picture.

Also, if you're printing on a matte surface paper, I would add a little extra sharpening to compensate for dot spread.

2 - Choose Your Paper

I recommend Red River Paper pre-scored 7x10 60lb. paper for this project. It has a lovely weight, folds easily along the score, and is available in a variety of surfaces.

For this project, I used Item #1058, 60lb. Red River Paper Canvas. Images look terrific on this matte surface, and the card feels absolutely lovely in the hands. There are many other stocks that work wonderfully as well, so have a few on hand. And don't forget to add a box of 5.25"x7.25" envelopes to your order.

3 - Print the Card

You can use any app that supports inkjet printing. I'm currently using Photos for macOS because it's easy and provides good results.

Prefold your card so that it's 5"x7" in dimension and insert it into the printer intake tray. Fold the card as flat as possible to ensure that it feeds smoothly. I print just one card at a time to prevent paper jams. (I know you're thinking that this won't work, but it does on both of my inkjet printers.)

In the print dialog box, set up your job. If you want to float the image on the front of the card, use the settings in the illustration below. (I think this is a handsome pro touch!)

Now all you have to do is enable Print, and within a few minutes your finished card will emerge from the printer. Finish it off by writing a note on the inside and put it in the envelope. You're ready to go!

Virtual Camera Club News

Have you been unsubscribed? A number of listeners have let me know that they were unceremoniously unsubscribed from the show. If that happens to you, just go back to the app and click on subscribe.

Inner Circle Members: A big thanks to those who support our podcast and our efforts! We are having a blast at our new Inner Circle hangout, the private group I've set up at DerrickStoryOnline. We'd love it if you join us. You can become an Inner Circle Member by signing up at our Patreon site. You will automatically be added to the new hangout.

My Writing on Medium.com: I now have 51 published articles on Medium.com. And if you haven't visited the site, and enjoy good writing on a variety of topics, I suggest that you may want to take a look. You can just go to the home page and enter "Derrick Story" in the search field. And if you like what you read, then follow me!

The New Donation Kit for Carefree Shipping of Found Film Cameras - If you've discovered a film camera that's no longer being used, our new Donation Kit makes it easy to pack and ship. Just visit the Contact Form on thenimblephotographer.com, click the box next to Donating a Film Camera, and let me know what you have. In your note, be sure to include your shipping address.

Affiliate Links - The links to some products in this podcast contain an affiliate code that credits The Digital Story for any purchases made from B&H Photo and Amazon via that click-through. Depending on the purchase, we may receive some financial compensation.

Red River Paper - And finally, be sure to visit our friends at Red River Paper for all of your inkjet supply needs.

See you next week!

You can share your thoughts at the TDS Facebook page, where I'll post this story for discussion.

Whether you have a window box over the kitchen sink, clay pots on the patio, or a raised bed in the backyard, the flowers you cultivate can live far beyond their vase-life expectancy with the help of your camera and inkjet printer.

DSCF2172.jpeg

Fine art greeting cards are one of the most satisfying print projects, and they are very easy to create. All you have to do is photograph a few of your favorite blossoms, then follow these simple steps.

1 - Prepare the Image

The finish size for our greeting card will be 5" tall and 7" wide. So you'll want to crop your image to 5"x7" so it looks exactly as you want on the front of the card. This is especially important if you're going to print a "full bleed" edge-to-edge picture.

P7121865-1024.jpeg Image cropped to fit properly on card.

Also, if you're printing on a matte surface paper, I would add a little extra sharpening to compensate for dot spread.

2 - Choose Your Paper

I recommend Red River Paper pre-scored 7x10 60lb. paper for this project. It has a lovely weight, folds easily along the score, and is available in a variety of surfaces.

For this project, I used Item #1058, 60lb. Red River Paper Canvas. Images look terrific on this matte surface, and the card feels absolutely lovely in the hands. There are many other stocks that work wonderfully as well, so have a few on hand. And don't forget to add a box of 5.25"x7.25" envelopes to your order.

3 - Print the Card

You can use any app that supports inkjet printing. I'm currently using Photos for macOS because it's easy and provides good results.

Prefold your card so that it's 5"x7" in dimension and insert it into the printer intake tray. Fold the card as flat as possible to ensure that it feeds smoothly. I print just one card at a time to prevent paper jams. (I know you're thinking that this won't work, but it does on both of my inkjet printers.)

In the print dialog box, set up your job. If you want to float the image on the front of the card, use the settings in the illustration below. (I think this is a handsome pro touch!)

Step-1-Print-Job-1024-v2.jpg

Now all you have to do is enable Print, and within a few minutes your finished card will emerge from the printer. Finish it off by writing a note on the inside and put it in the envelope. You're ready to go!

Final Thoughts

What I love about this project is that it combines the beauty of gardening with the joy of sharing handmade greeting cards with those you care about.

You don't need a professional photo printer - just about any all-purpose inkjet device will work. And trust me, you will truly impress the recipients with your "garden to fine art" skills.

Make someone happy today!

IMG_1664.jpeg Printing days are fun! All images by Derrick Story.

You can share your thoughts at the TDS Facebook page, where I'll post this story for discussion.