This is The Digital Story Podcast #731, March 24, 2020. Today's theme is "How to Disinfect Your Gear." I'm Derrick Story.
Opening Monologue
Whether it's our smartphone or an interchangeable lens camera, our tech gear qualifies as some of our most personal possessions. We hold them in our hands, bring them to our face, and show them to other people. It only makes sense that we keep these items as clean as possible. This week I'll talk about good habits for healthy photography, both with our gear and our immediate surroundings. I hope you enjoy the show.
How to Disinfect Your Gear
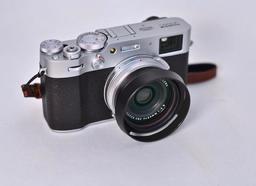
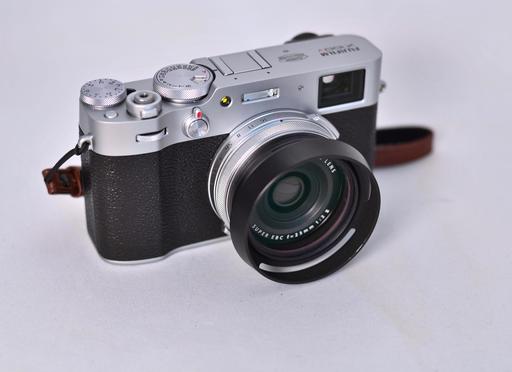
One of the first rules when we were working in LA was that you could not hand your camera to another person. Depending on environmental conditions, germs can linger on those surfaces for 24-72 hours. In group conditions, we decided to play it safe.
But it's not just others we should be concerned about. We need to take care of ourselves as well. I'm going to talk about cleaning techniques that are worth embracing at any time. So let's get to work.
Follow all instructions on the labels of any products you use. Read the safety notes and follow them!
Dwell Times: What Are They and Why Do They Matter?
This is from the article PathoSans.com. You can read it in its entirety there.
The Environmental Protection Agency (EPA) defines dwell time as, "the amount of time that a sanitizer or disinfectant must be in contact with the surface, and remain wet, in order to achieve the product's advertised kill rate." Different disinfectants target a wide array of different pathogens. The surfaces these pathogens inhabit also vary greatly. For best results, professional cleaners must know the target pathogens and the corresponding dwell times. Some products may have dwell times of only seconds, while others may require up to 10 minutes or more before they achieve the desired pathogenic control.
For most projects, the dwell time should be listed on the back label with its application directions.
For maximum effectiveness, we recommend using the two-step cleaning process to help prevent the spread of disease-causing pathogens. Step one: Clean and remove unwanted soils from surfaces using a cleaning solution with a microfiber. This will help to remove potential microbial harborage areas. Step two: Apply a disinfecting solution to surfaces while adhering to the manufacturer recommendations for dilution, safety, and dwell time. Finally, after waiting for the recommended dwell time, remove the solution with a wet/dry vacuum or microfiber.
How to Disinfect Camera Equipment and Spaces
This is from the article LensRentals.com. You can read it in its entirety there. Roger Cicala writes:
I'm qualified to talk about this subject to some degree; I take care of a ton of camera equipment, and I was a physician in my past life. And I've had so many requests for information about this that it seems logical to put something out, so everyone has access to it.
That being said, at this moment in time, there are NO right answers. This is my best knowledge and best opinions. Other people have other thoughts. Two weeks from now, new information may make some of this incorrect or show there are better ways to do things. If I say something today and the CDC says something else next Thursday, go with the CDC.
Finally, we're talking about using products that can have some side effects and cause problems. What I'm going to discuss is relatively safe, but if you use one of these suggestions, be smart, test a small amount on yourself and your gear and make sure it doesn't cause any problems for you.
What Roger says about disinfectants:
- Soap and Water - Used for 20 seconds is superbly effective on skin and other surfaces. Whatever soap is fine, it works by dissolving the lipid (fatty) capsule around the virus. And here's an alternative for those of you freaking out about "I can't get Lysol wipes". Just use some soap and water, it's effective if not quite as easy.
- Isopropyl Alcohol - At concentrations of 60% or higher this is very effective although it works a bit better on surfaces than on skin. Purell and most other hand sanitizers are basically 60% isopropyl alcohol. Alcohol may not work as fast as soap, and the rule of thumb is just let it dry rather than wiping it off.
- Chlorine Bleach - Standard laundry bleach is usually 2.6% to 5.25% sodium hypochlorite (bleach), which is WAY too high a concentration to use for disinfecting. To make a disinfectant, you want to add 20ml of 5.25% bleach to a liter of water. Double it to 40ml if you have 2.6% bleach, etc.
Two important notes here: NEVER mix chlorine bleach with any other cleanser, or put it into a bottle that used to have another cleanser without thoroughly rinsing the bottle. And mix it in a well-ventilated area just in case. Bleach plus ammonia, vinegar, and several other things can cause noxious fumes. Chlorine bleach is very effective, hospitals use it, but it can be irritating in large quantities, and it can fade dyes and color. If you decide to spray down an entire room, for example, keep people out of that room until the fumes clear.
- Non-Chlorine Bleach / Oxidizing Agents - There are a lot of products in this category; basically oxy-this, non-bleach that, 'safe bleach,' and of course the dreaded 'non-chemical', 'all-natural', and I'm sure you can get it as organic and non-GMO bleach at slightly higher prices. They mostly are peroxides, like hydrogen peroxide, but often slightly different chemicals that are more stable; regular hydrogen peroxide tends to bubble off and lose effectiveness over time once it's opened.
You need at least 2%, and probably 3% peroxide to be an effective disinfectant, and even then, its effectiveness against Coronavirus is 'probable,' but not guaranteed.
- Quarternary Ammonium Products - There are tons of these (tons of slightly different chemicals, more tons of products containing them). Benzalkonium Chloride is probably the one you see most commonly if you read ingredient labels, but if you're interested in chemical names, just google it. They are both detergents (like soap) and disinfectants, so they're very common in disinfecting wipes and such. They're also what's in most fabric softeners.
While I haven't seen any actual studies regarding specific effectiveness against Covid-19, they are effective against other coronavirus and expected to be effective against this one.
- Dryer antistatic sheets usually contain lots of quaternary ammonium compounds. My significant other (an ICU nurse) carries a few in her purse as door grabbers and emergency cleansing wipes.
What Roger says about cleaning your gear
First, remember that if your gear has been sitting away from people for a couple of days, it's safe. If you're on a video production or multi-camera shoot, don't share cameras. Assign who uses what equipment as much as is possible.
Alcohol and Soap - Despite what some manufacturers have said, we, and every repair shop I know have used isopropyl alcohol in 60% or greater concentrations on camera equipment for a long time and haven't seen any adverse effects. Some manufacturers said 99% isopropyl might maybe affect lens coatings. I respectfully disagree, although I will say vigorous rubbing can affect some lens coatings, so take it easy and don't use wire brushes or such.
Don't soak it; that is asking for trouble and isn't necessary. Just moisten it. Use common sense to try to keep your disinfectant on the outside and not let it run into the inside. A light mist with a spray bottle, or a cloth or paper towel dipped in alcohol works great for large surfaces. You might want to dip a Q tip or similar thing to get into small areas or places where you'd rather not spray.
There is a chance that alcohol used repeatedly could dull the rubber of lens rings or camera bodies. I haven't seen it, but I have seen it claimed. I have also heard that it can dull or fog the finish of LCD screens, but again I haven't seen it, and I do know the 'monitor cleaner' I use contains isopropyl alcohol. Still, given the others who claim it can, at least in some cameras, I'd try to keep it to a minimum.
A final note about cameras - I think it's pretty easy and pretty safe to disinfect all of your equipment and studio space or office effectively EXCEPT, for your camera. Let's face it; you (or them) got your face all up in there, so it's the most likely place to have received a big viral load. It's also the place you DON'T want to soak and saturate with any of the above solutions. Plus, the areas around the LCD, viewfinder, etc. are full of nooks and crannies, making them more difficult to get to, and according to some manufacturers, LCD screens might be sensitive to disinfectants. (Again, my own opinion is I haven't seen it, but what manufacturer's say can't just be ignored).
I'd recommend just not sharing cameras on a shoot, right now. If you do share, disinfect it carefully with a minimal solution and set it aside for 24 hours; 48 hours if you are paranoid. Virus particles don't make spores and are not going to last on a surface for a long time. I, personally, am comfortable that 24 hours is long enough, but there is some evidence that it takes 72 hours to be absolutely safe.
Portfoliobox 4 Offers Great Enhancements and Is Available for Free to TDS Listeners
We have many, many Portfoliobox photographers in our community, including myself, and I think all of us are going to enjoy the new features in Version 4 that just launched today.
And if you're not currently a Pro user, I have great news for you at the end of this spot. Here are the highlights for Portfoliobox 4.
- Add sections to your pages - The initial content of a page can be extended with one or several sections. You can add different types of sections: gallery, text, links, services, team, submenu, contact form, and even blog or store teaser. This allow you to build your page as you like.
- Add elements to your section - Each element in a section is independent from the others. You can add elements below existing elements, e.g. you can add a border under your menu, or a button below a text. You can even reorder the elements.
- Edit margins, padding and position - You can easily fine-tune your website by editing the margins, padding or position of each elements on your page.
- Animations - You can add animation to each element of your website, e.g. fade in, zoom, etc.
- Client proofing gallery - Allows you to share dedicated and protected photo galleries with your clients. Your client can log in, check the gallery, comment and share their favorites with you. This makes it easy to share and proof directly from your website. You also have the possibility to automatically add a watermark to your photos.
- E-commerce improvements - New features and functions that will make it easier for your to handle your products & orders. Here is a non-exhaustive list of the new features: digital product, discount codes, flexible shipping rates, duplicate product, stock management, multiple payment solutions, etc.
- Preview your site before publishing it - You can now build your site offline peacefully, take the time you need to get the result you want. When you're ready, publish your site and choose a domain name. Meanwhile, you can fully preview your work by clicking the preview button at the lower-left corner of your site.
They have published a super helpful 30-minute video that you can watch here to help you get the most out of these features.
And if you don't have a Portfoliobox Pro account, you can get free year by going to www.portfoliobox.net and using Special Offer Code: 15SAMDPTBL81M5. That's right, a 100 percent discount for the first year.
Next week I'll dig deeper into some of these new exciting features. Until then, sign up today so you can follow along with me. And a big thanks to Portfoliobox for co-sponsoring this show.
Update for the TDS 2020 Photography Workshop Season
If you want to join us for a workshop later this year, hop over to the 2020 Workshops Signup Page and get on the Reserve List.
If you have questions about the workshops, feel free to drop me a line using the Contact Form on www.thenimblephotographer.com.
When you decide which event is best for your, jump over to our 2020 Workshops Signup Page and place a $100 deposit to secure your place. Only participants on the Reserve List who have placed a deposit will be eligible to register for a workshop. If you have questions or need more information, fill out the "Send Me Info!" request form. I'll get back to you asap.
- Humboldt Redwoods and Coast Workshop - May 12-14, 2020 - 2 Seats Remaining -- Our home base for this experience is in the hospitable town of Fortuna that's on the banks of the Eel River. From there we explore the magnificent redwood groves of Humboldt County and the rugged coastline of Northern California. This workshop explores three distinct ecosystems in a satisfying 3-day event. Limited to just 9 participants, you can reserve your spot and learn more about this event here.
- Lassen Volcanic Park Photo Workshop - July 16-18, 2020 - 2 Seats Remaining -- We'll convene at a spacious cabin at Lake Almanor that serves as our HQ. From there we explore the stunning Lassen landscape, peaceful shores of Lake Almanor, and the magnificent mountain night skies. This hands-on photo workshop is limited to 8 participants and is a wonderful blending of experience, camaraderie, and artistry. Limited to just 8 participants, you can reserve your spot and learn more about this event here.
- The Eastern Sierra Photography Workshop - Oct. 1-3, 2020 - 0 Seats Remaining - Our event is headquartered at the Silver Maple Inn in Bridgeport, CA - gateway to Bodie, Mono Lake, and June Lake. We'll take advantage of the magical morning light to photograph some of the most unique landscape in North America. We'll photograph the sparkling night skies of the Sierra and explore rustic urban environments. Limited to just 9 participants, you can reserve your spot and learn more about this event here.
Updates and Such
Inner Circle Members: A big thanks to those who support our podcast and our efforts!
How to Watch Photos for macOS Catalina and iPadOS - Learn everything you need to know about Photos for the Mac and iPad by checking out my latest course on LinkedIn Learning and on lynda.com. This course is perfect for Mac and iPad based photographers who shoot with iPhone, Mirrorless, and DSLR cameras. It covers both photography and movies. And if I say so myself, it's a lot of fun.
B&H and Amazon tiles on www.thedigitalstory. If you click on them first, you're helping to support this podcast. (The Digital Story is supported by its audience. When you purchase through links on our site, we may earn an affiliate commission.) And speaking of supporting this show, and big thanks to our Patreon Inner Circle members:
Affiliate Links - The links to some products in this podcast contain an affiliate code that credits The Digital Story for any purchases made from B&H Photo and Amazon via that click-through. Depending on the purchase, we may receive some financial compensation.
And finally, be sure to visit our friends at Red River Paper for all of your inkjet supply needs.
See you next week!
More Ways to Participate
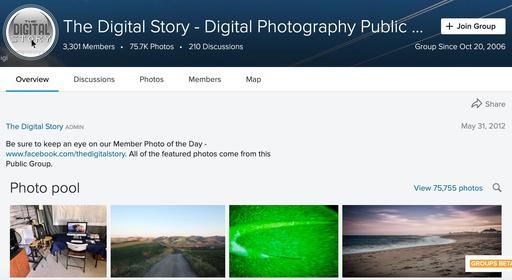
Want to share photos and talk with other members in our virtual camera club? Check out our Flickr Public Group. And from those images, I choose the TDS Member Photo of the Day.
Podcast Sponsors
Red River Paper - Keep up with the world of inkjet printing, and win free paper, by liking Red River Paper on Facebook.
The Nimbleosity Report
Do you want to keep up with the best content from The Digital Story and The Nimble Photographer? Sign up for The Nimbleosity Report, and receive highlights twice-a-month in a single page newsletter. Be a part of our community!
Want to Comment on this Post?
You can share your thoughts at the TDS Facebook page, where I'll post this story for discussion.
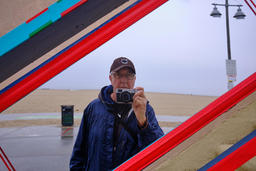
 Photo by Jim Sollows, photographer, communicating with others from his home via ham radio.
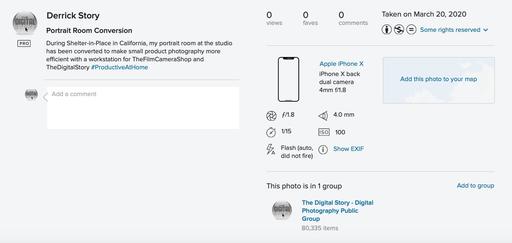
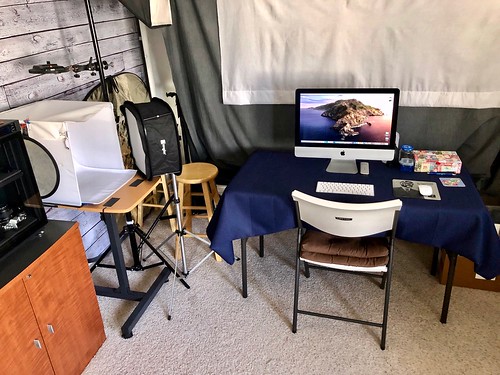 During Shelter-in-Place in California, my portrait room at the studio has been converted to a small product photography studio with a workstation for TheFilmCameraShop and TheDigitalStory #ProductiveAtHome
 Join the Group!
 Click on Add to Group from your picture page.
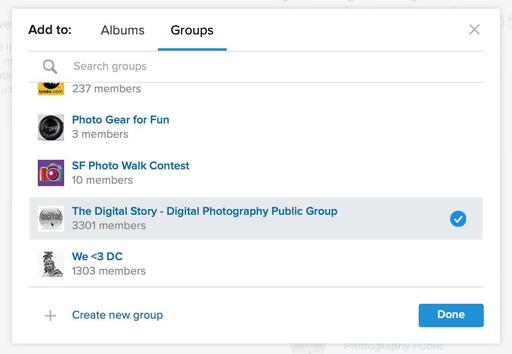 Choose The Digital Story and click on the Done button.