Recently in Photography

  Page 227 of 384 in Photography  

Remote Release for Your iPhone

Small enough to fit in your pocket, but adds big capability to your iPhone photography, the iPhone Shutter Remote is great for group shots, time-lapse, and long exposures.


Buy the The iPhone Shutter Remote at the Photojojo Store!

They are available now for $40.

I was intrigued by a new free photo sharing service called Blinq. In essence, it facilitates seamless image sharing among your computers and iOS devices, even to the point of being able to tap your iPhoto or Aperture library from an iPad or iPhone. Then, beyond that, you can share selected images with friends and via social networking.

Blinq on iPad

This type of widespread capability usually makes me a bit nervous at first, even if I like the flexibility. But after just a short bit of testing with my Mac, iPhone 4S, and iPad 2, Blinq seems more like a smart facilitator rather than a "grab your stuff" service. The images live on your devices, not their servers.

When you share stuff from an iOS device, a folder is created in your Mac's Pictures folder titled Blinq, and the images are placed inside via dated folders. I made an alias of the Blinq folder and placed it on my Desktop for easy access.

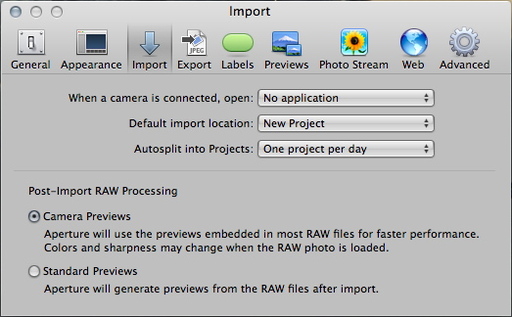
The files are compressed during transfer. The screenshot I used for this article originated on the iPad. If I were to email it to my Mac via the Photos app (the old fashioned way), it arrives as a 1.2 MB PNG file. Sharing the same photo with my Mac via Blinq, it arrives as a 215 MB JPG. Both images look about the same, side by side, even at increased magnification.

If you want to tap your iPhoto or Aperture library via an iOS device, Blinq handles that well, as long as you're using a default library name. If you create custom Aperture Libraries, as I do, Blinq can't see them.

Overall, this service and its apps seems useful for photographers with multiple devices, including Windows machines. They have apps for both platforms. I'll keep testing and keep you posted.


The Digital Story on Facebook -- discussion, outstanding images from the TDS community, and inside information. Join our celebration of great photography!


"Awareness" - Grab Shot 219

awareness_grab_shot.jpg

TDS member Brandt Ryan talks about the tip, "always look behind you," and how it led to this photo he captured.

"Not long ago I was in San Francisco (first time) and was trying to get some good shots of the Golden Gate during and after sunrise. I had my tripod and composition setup and had been going at it for much of the morning.

"As fate would have it, I remembered a tip from Martin Bailey about periodically checking behind you, particularly when you have been shooting a setup shot (Golden Gate). For whatever reason, this tip popped into my mind. So I turned around, brought the camera to my eye and noticed the road was a nice S type curve, and that a cyclist was racing down it, completely focused and aware of his "line".

" I quickly set camera to Tv mode (shutter priority), flicked the dial somewhere past 1/500th of a sec and snapped 3 bracketed shots, which had been the setting I was using for the bridge and didn't have time to change. I ended up with 3 images--this one being the last. The previous two show the cyclist about one bike length back from the one before.

"I like the shot--but I really like the fact that I had the awareness to turn around and check out what was happening behind me. The title of the shot, "Awareness," speaks for itself, I think, especially when one reads the story behind the photo :) Cheers to Martin Bailey for the tip, and thanks to you Derrick for a wonderful podcast."

This is our 219th Grab Shot! Wow. If you want to review the collection that began back in 2006, go to our Grab Shots page.

If you have a candid you'd like to share, take a look at our Submissions page, then send us your Grab Shot. We'll try to get it published for you on The Digital Story.

And you can view more images from our virtual camera club in the Member Photo Gallery.


The Digital Story Podcast App is the best way to stream or download weekly TDS podcast episodes. No more syncing your iPhone, iPod Touch, iPad, or even your Android phone just to get a podcast. And the best part is, The Digital Story Podcast App is your way to help support this show. Download it today!


twitter.jpg Follow me on Twitter


iPod mini

Here's a crazy idea for a nimble studio set up: two iPads running Photo Soft Box to illuminate your subject, then take the picture with an iPhone 4S using Camera Awesome. For the finishing touch, open the image in iPhoto for iOS to crop and remove the location data. Now all that's left to do is upload the image from iPhoto to Flickr.

Sounds like a lot of fooling around, doesn't it? But take a look at the picture. Not bad. I know the iPhone isn't a 5D Mark III, but it does OK in a pinch.

I created the whole set up on a shelf in a closet. First, I set the iPod mini on a black iPad case. I then placed one iPad running Photo Soft Box on the left, and another on the right. I moved things around here and there until I got the look I wanted. Since you can set the color temperature in Photo Soft Box, I chose 5500K so I wouldn't have to do any white balance correction later.

photo_soft_box_ipad.jpg The Photo Soft Box interface running on an iPad. Once you tap the settings you want, double-tap the screen to turn the entire iPad display into a soft box.

After I captured the image with the iPhone, I opened it in iPhoto for iOS for cropping and to remove the location data before sending it up to Flickr.

So, two soft box lights ($2.99 for the app) and the iPhone 4S for my ultra nimble studio set up on the go. If I were just using these tools for this, you could say that it's a rather pricy portable studio. But obviously I use the iPad and iPhone for a million other tasks. Well, now make it a million and one.


The Digital Story on Facebook -- discussion, outstanding images from the TDS community, and inside information. Join our celebration of great photography!


When Apple announced the new iPad, many of us got what we had hoped for: a new Retina display, more horsepower under the hood, and 4G connectivity. What we didn't expect was a "built from the ground up" iPhoto app that runs on both iPad 2 and the new iPad. In many ways, iPhoto fills a gap in the nimble photographer workflow. In this week's podcast, I cover the new iPad, then dig into iPhoto to explain its capabilities and how it can help shooters on the go.

Listen to the Podcast

You can also download the podcast here (34 minutes). Or better yet, subscribe to the podcast in iTunes. You can support this podcast by purchasing the TDS iPhone App for only $2.99 from the Apple App Store.

Beaming in iPhoto

Monthly Photo Assignment

Eyes is the Mar. 2012 Photo Assignment. You can read more about how to submit on our Member Participation page. Deadline for entry is March 30, 2012.

More Ways to Participate

Want to share photos and talk with other members in our virtual camera club? Check out our Flickr Public Group. And from those images, I choose the TDS Member Photo of the Day.

Podcast Sponsors

Red River Paper -- The $7.99 Sample Kit is back! And with free shipping.

Make Your Photos Sizzle with Color! -- SizzlPix is like High Definition TV for your photography.

Need a New Photo Bag? Check out the Lowepro Specialty Store on The Digital Story and use discount code LP20 to saven 20% at check out.


Technorati Tags:
, , , , ,


canon_600ex_flash.jpg

I enjoyed reading Sly Arena's first impressions of Canon's New Speedlite 600EX-RT & Speedlite Transmitter ST-E3-RT. But then I calculated the costs. The 600EX-RT flash can be preordered for $629 from B&H, plus the Speedlite Transmitter ST-E3-RT will run you another $319. Add shipping and the tax we're supposed to pay at the end of the year, and you have a $1,000 flash and trigger system.

As David Hobby wrote on his Strobist site: "Official price for the Canon 600EX-RT speedlite was set at: 1 Paul Buff 640WS Einstein + 8" hi-output reflector + 2-grid set + 64" soft silver PLM + 64" diffusion fabric."

I think that sums it up.


The Digital Story on Facebook -- discussion, outstanding images from the TDS community, and inside information. Join our celebration of great photography!


Working with Negative Spaces

A negative space, such as my shadow against this yellow wall, can help you create strong graphical compositions.

Yellow Wall

Elements to watch for include strong, directional light, color, and texture. Play with different compositions, both when shooting, but also later in post production. These types of shots can make interesting prints, as well a cover art. They often have an iconic feel to them. Certainly worth keeping in your bag of tricks.


The Digital Story on Facebook -- discussion, outstanding images from the TDS community, and inside information. Join our celebration of great photography!


Lightroom 4 Pros and Cons

Lightroom Develop Module

Macworld Magazine today published my full review of Lightroom 4, which is now available for $149. Here are my pros and cons from that article.

Pros

  • Develop module has improved organization and functionality
  • Additional brushing tools
  • New soft proofing capability
  • New video management tools
  • New Map module includes reverse geotagging
  • New Book module with Blurb integration and PDF output
  • New DNG conversion options
  • Email capability for sending photos from within the application
  • Lower price compared to previous versions

Cons

  • Can't stitch video snippets together
  • No Mac Address Book integration for email

As you can see, the pros definitely outweigh the cons with this latest release. It's a good value for the dollar.


The Digital Story on Facebook -- discussion, outstanding images from the TDS community, and inside information. Join our celebration of great photography!


You can tell that Apple worked hard to bring iPhoto to the iPad. It's designed from the ground up, and is a joy to use. To help you get started, here are a few tips.

iPhoto for iPad

Use the Help Button

We often shy away from Help because it takes us out of the app and usually down a rabbit hole. But the Help for iPhoto is much better. On any given screen, tap the Question Mark in the upper left corner, and you'll get labels for all of the tools on that screen. Use this frequently in the beginning, and you'll get comfortable with the app much faster.

Get a Stylus

I love that you don't need a stylus to work on an iPad. But iPhoto is one of those apps where you'll enjoy having one. Working with the brushes is a great example. You can lighten, darken, sharpen, and do just about anything else with great precision. Using a stylus is not only more accurate, it's fun. And you can get them for just a few bucks.

iPhoto Brushes

Load it on Your iPhone

I don't think I've heard the phrase, "Beam that to me" since the Palm Pilot days. But it's back. And if you have iPhoto loaded on another iOS device, you can "beam" photos back and forth to their libraries.

I prefer to work on images on the iPad where I have more real estate, but then I do want some of them on my iPhone 4S for immediate sharing with others, since I always have my iPhone in my pocket.

To beam, just go to the Share menu and choose Beam.

Beam Photo

Save to Camera Roll

Once you've edited a photo and decide you really like it, save it to your Camera Roll (once again using the Share menu). Your Camera Roll is the image database for your iPad that allows other applications to access those pictures. If you save important shots to Camera Roll right away, they will be available to you in Keynote, Pages, etc. You'll be glad you did this when you're jamming to finish a presentation.

Create a Journal

This is an innovative way to share a collection of images with others. Instead of sending an email attachment with a dozen photos, create and publish a journal.

I began by flagging a handful of images that will be part of my journal. Then go to the Share menu, and choose Journal. One of the options will be your Flagged photos. You can then choose a design and add all sorts of goodies, such as quotes, map, etc.

Once you've finished, go to Share and choose iCloud. iPhoto will store your journal there, and give you the options to email mail it (Tell a Friend) or view it in Safari. The recipient gets a beautiful overview page, and then can enjoy each photo individually.

Here's a basic Sample Journal that you can view.

Final Thoughts

iPhoto for iPad works great on iPad 2, and it should be even more beautiful on iPad 3. Make sure you upgrade to iOS 5.1 before purchasing. It's available in the App Store for $4.99.


The Digital Story on Facebook -- discussion, outstanding images from the TDS community, and inside information. Join our celebration of great photography!


Working with off-camera flash doesn't have to be expensive. Yes, we see wireless flash systems that cost $1,000 and up, but you don't need those for professional results.

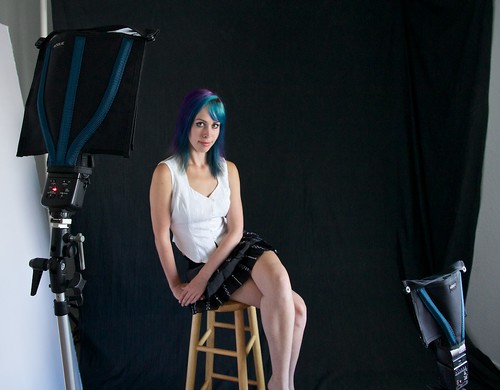
off-camera-flash-ashley Photographers Ed Shields and Ernesto Pono work with model Ashley Tuttle during the TDS Off-Camera Flash workshop.

During the recent TDS Off-Camera Flash Workshop, I showed participants how to put their old flash units to works using affordable gear such as the triple shoe adapter and a soft box. You'd be surprised how often you don't need automated flash. In a home studio, for example, all you have to do is figure out the aperture setting for a flash set in manual mode. That usually takes about 3 shots. Once you see what you like on the LCD, you're set.

I'm using my old Sunpak 283 flashes that have manual output settings, such as full, half, one quarter, etc. By putting one or two of these on a triple shoe in a soft box, I can lower their output to one-half, still get the light I need, but enjoy faster recycling times.

If we add a hair light or background light, we don't have to worry about those messing up the ETTL flash readings - because we're in manual mode. To tell you the truth, there are many situations where manual flash is actually easier.

The next TDS workshop is on Close Up Photography on April 21 and 22 in Santa Rosa, CA. I have lots of creative techniques to share for lighting and composition. You can get more information by using the Send Me Info box on the workshops page.

Also, don't forget about my lynda.com online training, Off-Camera Flash. I provide an overview of the basic gear and techniques that will help you get professional results, even on a hobbyist's budget.


The Digital Story on Facebook -- discussion, outstanding images from the TDS community, and inside information. Join our celebration of great photography!