This week on The Digital Story: Winners and Workshops, Flickr Update, and a behind the scenes interview with the Everpix co-founders - All of this and more in today's photography podcast.
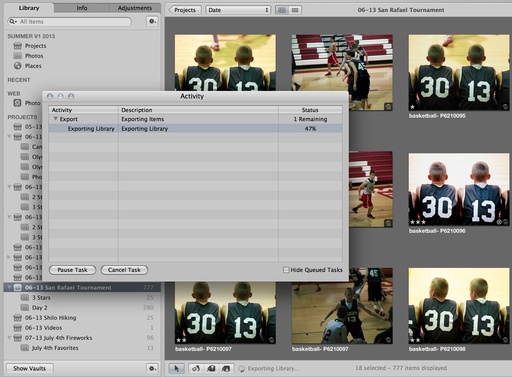
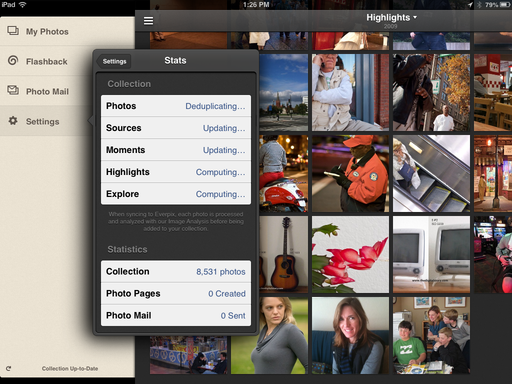 Everpix updating in the background while being used on an iPad mini.
Story #1 - Recent SizzlPix Winners as part of the Monthly Photo Assignment.
Dec. 2012 - Long Exposure
http://www.thedigitalstory.com/galleries/dec12_assign/index.html
Mark Steven Houser
Jan. 2013 - Self Timer
http://www.thedigitalstory.com/galleries/jan13_assign/index.html
Kevin Ned Miller
Feb. 2013 - Furry Friends
http://www.thedigitalstory.com/galleries/feb13_assign/index.html
Phil Fisher
March - B&W
/2013/05/black-white---result-1.html
Oliver Rutherford
April - Architecture
http://www.thedigitalstory.com/galleries/ap13_assign/index.html
Jack Mueller
A Fun SizzlPix Story
PHOTOJOURNALISM AS ART
http://www.sizzlpix.com/main/2013/06/19/photo-journalism-as-art/
David Thurston, acclaimed British photographer has lived in Hong Kong and travelled extensively in China. His provocative candid "Boy Smoker" is one of just a few photographic images selected from thousands for display in London's prestigious Royal Academy Of Arts Summer Exhibition 2013, which continues through August 18 in Burlington House, Piccadilly.
The unfortunate child captured so magically in David's "Boy Smoker" may not last as long as his picture, which is displayed as a SizzlPix!, a proprietary state-of-the-art process for High-Definition photography display, among whose unique characteristics is a rated fade-resistance of 100 years.
Story #2 - Opening for Fall Color/Safari West Workshop on Oct. 20-22. Registration fee is $595 that includes the exclusive photo excursion in Safari West, a model shoot, landscape field trip, lunches, swag, and more. Go to the TDS Workshops page and use the "Send Me Info" form.
Story #3 - Have your joined the The Digital Story Flickr Public Group? That's where we draw from for the TDS Member Photo of the Day featured on the TDS Facebook page.
Story #4 - Interview with Pierre and Wayne, co-founders of Everpix. Here's your chance to get a behind the scenes look as this amazing online photo platform.
Reminder! - If you're going to purchase gear through Amazon or B&H Photo, please stop by the TDS home page first. Look for the "Products" box about half way down the page in the second column. There you will see display tiles for Amazon, lynda.com, and B&H Photo, in that order. By entering those sites through those display tiles, you help support The Digital Story.
Listen to the Podcast
In addition to subscribing in iTunes, you can also download the podcast here (31 minutes). You can support this podcast by purchasing the TDS iPhone App for only $2.99 from the Apple App Store.
Monthly Photo Assignment
The July 2013 photo assignment is Duality.
More Ways to Participate
Want to share photos and talk with other members in our virtual camera club? Check out our Flickr Public Group. And from those images, I choose the TDS Member Photo of the Day.
iPad for Digital Photographers
If you love mobile photography like I do, then you'll enjoy iPad for Digital Photographers -- now available in print, Kindle, and iBooks versions.
Podcast Sponsors
Red River Paper -- Keep up with the world of inkjet printing, and win free paper, by liking Red River Paper on Facebook.
Make Your Photos Sizzle with Color! -- SizzlPix is like High Definition TV for your photography.Special Offer! Anyone buying Derrick's new book, iPad for Digital Photographers, even at Amazon's or Barnes And Noble's discount, and putting the password for the Book Owners lounge in the comments space of their SizzlPix! order, will get 10 percent off their entire order -- the equivalent of more than a full refund for the book!
Need a New Photo Bag? Check out the Lowepro Specialty Store on The Digital Story and use discount code LP20 to save 20% at check out.
Want to Comment on this Post?
You can share your thoughts at the TDS Facebook page, where I'll post this story for discussion.