Recently in Photography

  Page 94 of 383 in Photography  

This is The Digital Story Podcast #571, Feb. 14, 2017. Today's theme is "The Home Studio: Easier than You Think." I'm Derrick Story.

Opening Monologue

As much as I love outdoor portraiture, some shoots are just better inside. Wardrobe changes are easier, lighting is controllable, and the temperature is far more comfortable. And if you do product photography too, a home studio becomes a necessity. But how much room and equipment do you need to have a functional workspace? Probably less than you realize. And that's what I'm going to discuss in today's show.

P2106268-Brittney-orginal.jpg "Brittney" by Derrick Story. Unretouched portrait (no image editing other than a crop) captured at Sunleaf Studio with OM-D E-M5 Mark II and Panasonic 12-35mm f/2.8 zoom lens.

The Home Studio: Easier than You Think

One of the aspects of having a studio workspace is that it's there waiting for you whenever inspiration strikes. And when you're finished shooting, you can just close the door and tidy up later. Half of my photography happens in this environment.

A lot of folks believe that such a space is expensive. And that the room needs a lot of modification. But this just hasn't been the case for me. And to help you with your considerations about such an endeavor, I'm going to take you behind the scenes of my shooting room. Here's a photo of my working space.

  • How Much Space? - The room I use is a standard bedroom that measures 11'x10', with a north facing window. I did swap out the sliding closet doors with mirror door, which photo subjects really like because they can follow how they look during the shoot. The walls are painted flat white, providing me with a bright, airy feeling. If I want to change the mood, I can always close the blinds and work with just supplemental lighting.
  • What About Backdrops? - When I first set up the studio, I constructed my backdrop frame out of PVC pipe. Later, I bought a backdrop stand for less than $75, and it's great. I use muslin and roll paper for my backdrops. And with the stand system, it's easy to change the backdrop during the shoot if I want.
  • Do I Need Expensive Lights? - I started with simple off-camera speedlights. But when the price of LED lighting dropped, I switched completely to those. I love LEDs because I can control both the intensity and color temperature. Plus, the constant light makes exposure and composition very easy. And they are cool too.
  • What Type of Modifiers Work Best? Since I have a north facing window, sometimes I just that light only with a couple reflectors. This is one of my favorite lighting schemes because it's so beautiful and natural. But I also use inexpensive soft boxes and umbrellas.
  • Do I Need a Lot of Hardware? - Light stands are essential to help you position the lights exactly where you want them. And the good news is, they last forever. You'll also need a variety of clamps and light holders. Most of use just start with the basics, then add on over time. I've been adding to my collection for more than 20 years.

If you can't swing a dedicated room for your studio work, a shared space can work quite well. The main thing to consider is, can you keep the clutter in check? I have tables and cabinets around the edges of the room. But the central area remains open, providing enough space for my shoots.

In the News

Nikon reports "extraordinary loss", "fundamental company-wide restructuring" (via NikonRumors):

In addition to canceling the DL line of premium compact cameras, Nikon also issued several statements describing "extraordinary loss", "fundamental company-wide restructuring" and a revision of their last financial forecast.

  • Nikon Corp. reported a net loss to owners of the parent of 831 million yen or 2.10 yen per share for the nine months ended December 31, 2016 compared to profit of 18.71 billion yen or 47.08 yen per share, previous year.
  • In accordance with the restructuring announced on November 8, 2016, the Group recorded extraordinary loss of 29.79 billion yen, mainly incurred from inventory write-downs/write-off in Semiconductor Lithography Business, as restructuring expenses for the nine months ended December 31, 2016.
  • Nine-month operating income increased by 67.1% year on year to 42.18 billion yen, and ordinary income increased by 42.5% year on year to 44.79 billion yen.
  • Nine-month net sales were 565.89 billion yen compared to 616.50 billion yen, a year ago.

Dates Set for the Northern CA Coast Tour Workshop

Good news for those wishing to join us for a tour up the Northern CA Coast. We've set the dates for this event: May 18-20th, 2017. Originally, we were planning this as a summer workshop. But after working with experts who actually live in the areas that we'll be working, we moved the event to late May. This provides us with Spring weather and far cheaper room accommodations.

Those of you on the Reserve List will receive your personal invites later this week. You will have 10 days to secure your spot before we open up the event to the general public. If you're not on the reserve list, and would like to be, please visit the TDS Workshops Page and use the Send Me Info form.

Updates and Such

Big thanks to all of our Patreon members! I was able to pay for the podcast server and the backup system from last month's pledges. Your contributions are making a positive impact. You can learn more here.

B&H and Amazon tiles on www.thedigitalstory. If you click on them first, you're helping to support this podcast. And speaking of supporting this show, and big thanks to our Patreon Inner Circle members.

And finally, be sure to visit our friends at Red River Paper for all of your inkjet supply needs.

See you next week!

More Ways to Participate

Want to share photos and talk with other members in our virtual camera club? Check out our Flickr Public Group. And from those images, I choose the TDS Member Photo of the Day.

Podcast Sponsors

MindShift Gear - MindShift Gear is a group of committed professional photographers and product designers who support conservation and protection of our natural resources and planet.

Red River Paper - Keep up with the world of inkjet printing, and win free paper, by liking Red River Paper on Facebook.

The Nimbleosity Report

Do you want to keep up with the best content from The Digital Story and The Nimble Photographer? Sign up for The Nimbleosity Report, and receive highlights twice-a-month in a single page newsletter. Be a part of our community!

Want to Comment on this Post?

You can share your thoughts at the TDS Facebook page, where I'll post this story for discussion.
The path to my affection for Pentax cameras has been a windy one. In my 35mm film days, round 1, I shot Canon, Contax, and Yashica. Canon made the transition to autofocus and has flourished. Contax and Yashica never really established themselves in the digital age. Meanwhile, Pentax quietly evolved to autofocus, and then to digital, with far less fanfare than Canon and Nikon.

P2093725-etsy-program-plus.jpg Pentax Program Plus with 50mm Pentax-A manual focus lens.

When I would write reviews about the latest crop of cameras, however, I knew that I had better included a Pentax in the lineup, or I would hear about it from a small, but vocal community of photographers. And now, years later, I know why.

The genius of Pentax boils down to two core standards that they have maintained throughout the years.

  • Pack as much functionality as possible into a compact form factor. The minute you pick up a ME Super, Program Plus, ZX-5n, or the latest KP, you'll notice that the camera fits nicely in your hands and takes up less room in your bag. Yet, everyone of those bodies were or are as fully featured as their peers of the time. My Canon EOS Elan II feels huge compared to its competitor at that time, the Pentax ZX-5n. Both take great shots.
  • If you buy a Pentax lens, it should work on their bayonet-mount cameras regardless of when they were made. Pentax protects your lens investment. Their bayonet mount, starting with the Pentax-M, then the Pentax-A, Pentax-F, Pentax-FA and onward are compatible across their line of analog and digital cameras. Yes, their are minor exceptions here and there, but overall it's impressive. I mix and match glass daily on bodies that span decades of design.

P2093712-etsy-zx5n.jpg Top deck of the Pentax ZX-5n 35mm film camera.

Currently, my favorite lenses are the Pentax-F 35mm f/2.0 (the ultimate street prime), Pentax-F 35-70mm f/3.5-4.5 (super compact zoom with macro), Pentax-A 50mm f/1.7 (just freakin' beautiful), and the Pentax-M 135mm f/3.5 (very compact with built-in lens hood). They are a mix of autofocus mounts (F) and manual focus (A and M) that work on all of my Pentax bodies, including my upcoming test of the Pentax KP.

My current favorite 35mm Pentax bodies are the manual-focusing Super Program (tons of features with a classic SLR design), its handsome little brother the Pentax Program Plus, and the autofocus ZX-5n (Pop Photo called it "retro" when it came out in the mid 1980s). I have a digital *ist DL that's a total blast. I shot with (and loved) a Pentax K5 for years. And now I can't wait to get my hands on the new KP.

PC083213-Analog-Store-zx5n-with-lens.jpg Pentax ZX-5n with Pentax-F 35-80mm autofocus zoom lens

Those of you who frequent my TheFilmCameraShop on Etsy know that it is stocked with Pentax gear. That's because those lenses and bodies are high value/low cost items. Pentax owners tend to take good care of their gear, it is well made, and you can get great deals on the used stuff. To that point, my 35mm f/2.0 autofocus lens that I bought for $219 in pristine shape, provides great images on every Pentax body I own, or will ever own.

Why did it take me so long to figure this all out?

Want to Comment on this Post?

You can share your thoughts at the TDS Facebook page, where I'll post this story for discussion.

My Studio Before a Portrait Shoot

I have a portrait shoot scheduled for later this morning, and I thought that you might like a peek inside my nimble studio.

Sunleaf-Studio.jpg

Those of you who have been here for a shoot or for a workshop, know that I bought a townhouse a while back and converted it into TDS headquarters. The downstairs is where I meet clients and conduct classroom sessions.

There are two rooms upstairs. On the south side is the recording room for all of my lynda.com work. It is relatively sound quiet, and a great place to conduct my screen casting and podcast taping. On the north side is the shooting room, as shown above. Here I have a backdrop stand, reflectors, lighting, and a product shooting box for the items that I sell on TheFilmCameraShop. This is where I'll be working later this morning.

You don't need a lot of room for a functional portrait studio. Mine is only 10' x 11', yet it works great for both people and products. The hardest part is keeping it from getting too cluttered with lighting, stands, tripods, and modifiers.

Capture One Pro Tips and Techniques

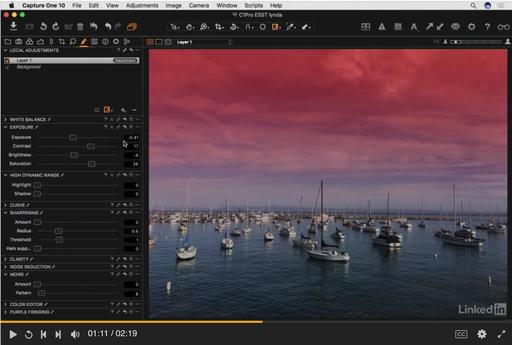
I'll be using Capture One Pro to work on the images that I make this morning in the studio. You can learn more about this great app by watching Capture One Pro Essential Training now available on lynda.com. More than 5 hours of tips, tricks, and techniques. Plus many free movies using advanced techniques.

I've also created a dedicated Capture One Pro Training page on The Digital Story. You can follow all of the tips and techniques that I publish in one convenient spot.

Thinking About Making the Transition from Aperture or Lightroom? - Download my free eBook titled, Rocky Nook's Guide to Moving to Capture One Pro. I show you the steps to create a test library, then build the foundation for a smooth transition to Capture One Pro.

Want to Comment on this Post?

You can share your thoughts at the TDS Facebook page, where I'll post this story for discussion.

There are two basic ways to tap the power of Luminar. One is to use is as a standalone app (and there are advantages to that). Or you can tap its power as a plugin/editing extension (Lightroom, Photoshop, Photos for macOS). When would you choose one over the other?

The primary reason for going the standalone route would be if you wanted to go back and fine tune a layered document. I explain exactly how this works in the following video.

Most of the time I'm using Luminar as a plugin/editing extension. But for my special projects, I go the standalone route so that I can continue to refine the image without any loss of quality. This is particularly fun for ongoing projects.

Limited Special Offer Plus Coupon

Luminar Hot Deal

If this is a workflow that you're interested in, the timing couldn't be better. Macphun is offering a sweetheart of a deal for Luminar. This offer is valid until Saturday, Feb. 18th. Here are the details. For $69 you'll get:

  • Luminar, super-charged photo software for any Mac photographer (standalone version plus plugins and editing extension).
  • Vivid Wonderland Luminar preset pack.
  • Pose like the Pros: Family Photos - eBook.
  • Top 25 Places to Shoot the Most Romantic Photos - eBook (I think this is the Valentine's day part :-)
  • Creative Sky Overlays (include 166 Color Sky Overlays, 69 Landscape & Ocean overlays).

And a Coupon for an Additional $10 Savings

luminar-feb2017.png

In addition to this special offer of Luminar plus bonuses for only $69 (total value $139 Savings of 50 percent), I can save you another $10 if you use coupon code: THEDIGITALSTORY at checkout. That lowers the price for the entire package to $59.

With this offer, you get the standalone version of the app, and all of its plugins, including for Lightroom, Photoshop, and Photos for macOS. This gives you maximum flexibility in how you use Luminar's powerful editing tools.

I'm having a blast editing my images with Luminar. I hope you give it a try.

Photos for macOS as Your Digital Darkroom

You can learn more about using Luminar as an editing extension in my lynda.com training, Photos for macOS: Advanced Editing Extensions.

And if you'd prefer to cozy up with a book, check out The Apple Photos Book for Photographers that features chapters on basic editing, advanced post processing, and editing extensions.

You can share your thoughts at the TDS Facebook page, where I'll post this story for discussion.

Deanne-Headshot-web.jpg

This is The Digital Story Podcast #570, Feb. 7, 2017. Today's theme is "Building Trust with Your Subjects." I'm Derrick Story.

Opening Monologue

The profession of photojournalism is changing, as is media in general. How do photographers find their voice in a world where social media and citizen reporting compete for viewer's attention, alongside established news outlets such as the San Francisco Chronicle and the Washington Post? Fortunately, Pulitzer Prize honored photographer Deanne Fitzmaurice took time out from her busy schedule to discuss these very issues with me. And I think you'll be fascinated by what she has to say.

Visit deannefitzmaurice.com to see more of Deanne's work. And don't forget to follow Deanne on Instagram too.

Lily Deanne Shoulder Bags

Senior product designer, Lily Fisher and Pulitzer Prize-winning photographer, Deanne Fitzmaurice, collaborated to design the ideal bag for professional female photographers.

With room for pro-size lenses and hoods, your gear will feel right at home and at your fingertips. Extensive pockets and compartments make this camera bag as functional as it is fashionable. You can learn more about the bags here.

Updates and Such

Registration for the The Chicago to New Orleans Rail Adventure - June 26-29, 2017, and for the San Francisco Street Photography Workshop - is now open to the public. You can see the details for each event by visiting the Official TDS Workshops Registration Page.

Big thanks to all of our Patreon members! I was able to pay for the podcast server and the backup system from last month's pledges. Your contributions are making a positive impact.

And finally, be sure to visit our friends at Red River Paper for all of your inkjet supply needs.

See you next week!

More Ways to Participate

Want to share photos and talk with other members in our virtual camera club? Check out our Flickr Public Group. And from those images, I choose the TDS Member Photo of the Day.

Podcast Sponsors

MindShift Gear - MindShift Gear is a group of committed professional photographers and product designers who support conservation and protection of our natural resources and planet.

Red River Paper - Keep up with the world of inkjet printing, and win free paper, by liking Red River Paper on Facebook.

The Nimbleosity Report

Do you want to keep up with the best content from The Digital Story and The Nimble Photographer? Sign up for The Nimbleosity Report, and receive highlights twice-a-month in a single page newsletter. Be a part of our community!

Want to Comment on this Post?

You can share your thoughts at the TDS Facebook page, where I'll post this story for discussion.

Thinking about your summer photography adventure? How about this...

Join me for the terrific Out of Chicago Conference with a host of top shelf instructors, then become part of a select group of photographers who will board The City of New Orleans train for a 19-hour journey through the South, only to arrive in the French Quarter of New Orleans for two and a half more days of fellowship and photography. Think you might get some shots?

Chicago Theater

Here's how to make it happen.

  • Sign up now for Out of Chicago Conference and use coupon code EARLYSUMMER to save $50 (valid until Feb. 18). Conference runs from June 23-25, 2017
  • Put together your personal schedule of events choosing from an array of photo walks, classes, workshops, and panel discussions. You also might be interested in my pre-conference workshop, "Down and Dirty Street Photography with Film," where each participant receives their own 35mm camera to keep. (That's correct, you own 35mm SLR with a roll of Tri-X to boot!)
  • Then, sign up for the TDS Rail Adventure Workshop that runs June 26-June 29, 2017. All of the information about the workshop is on the registration page. We begin our adventure in Chicago on Monday, the 26th, then board the train to New Orleans, work together during the rail ride, arrive at our hotel in the French Quarter, and spend the remainder of the event meeting, shooting, and sharing our work (in the heart and soul of New Orleans!).

new-orleans-1024.jpg New Orleans 1987, captured on Kodachrome by Derrick Story.

This is a week of photography adventure that covers it all: street shooting in Chicago and New Orleans, a rail adventure through the South, a full photography conference with some of the best instructors in the business, and spending time with others who share your passion for this wonderful artistic craft.

The TDS Rail Adventure Workshop is limited to 8 participants, and it's already half full. So don't delay your registration too long. Also, the early bird discount for Out of Chicago ends on Feb. 18, 2017. So you don't want to miss out on that $50 savings by using coupon code EARLYSUMMER.

If you have any questions about my Rail Adventure Workshop, or about my participation in Out of Chicago, just drop me a note via this Contact Form on The Nimble Photographer site. I hope to see you this summer for this amazing journey.

Want to Comment on this Post?

You can share your thoughts at the TDS Facebook page, where I'll post this story for discussion.

I met Frederick Van Johnson last night at Oracle Arena to take-in a Warriors game. At one point he said to me, "What's missing here?" We both looked at each other, and neither had a camera other than our iPhones. "Times have changed, haven't they?"

Oracle-Noise-Reduction.jpg Oracle Arena at Twilight. Photo by Derrick Story captured with an iPhone 6S and processed in Photos for macOS with Luminar editing extension.

Obviously, I still shoot with dedicated cameras most of the time. But there are those moments, such as going through security at Oracle Arena, where just having an iPhone is so convenient.

But I do notice, that with shots like this one of the arena at twilight, that the iPhone produces a little more noise in the sky than I like. Since my smartphone images go directly into Photos for macOS, this isn't much of a problem because I have the excellent noise reduction of Luminar waiting as an editing extension. (Luminar noise reduction is far more powerful than the noise reduction slider built into Photos.)

noise-reduction-web.jpg The noise reduction tool built into Luminar.

All I have to do is open the shot in Photos, then choose the Luminar editing extension. Its noise reduction tool provides many options allowing me to apply just the right amount. Plus, it puts the adjustment on its own layer. Nice. I then save the image, and it appears back in Photos, and it's shared across all of my devices.

The process is totally non-destructive, so I can view or revert to the original at any time. And having a robust noise reduction tool to complement my iPhone photography makes it that much easier to travel super light, yet still capture important moments as they present themselves.

Photos for macOS as Your Digital Darkroom

You can learn more about using Luminar as an editing extension in my lynda.com training, Photos for macOS: Advanced Editing Extensions.

And if you'd prefer to cozy up with a book, check out The Apple Photos Book for Photographers that features chapters on basic editing, advanced post processing, and editing extensions.

You can share your thoughts at the TDS Facebook page, where I'll post this story for discussion.

This is The Digital Story Podcast #569, Jan. 31, 2017. Today's theme is "Plugins: Cake and Eat it Too." I'm Derrick Story.

Opening Monologue

The phrase, "You can't have your cake and eat it too," refers to telling someone that they can't have two good things that don't normally go together at the same time, like eating a cake and then continuing to possess that same cake so you can eat later*. An exception to this rule in the world of photography is with our photo management apps and plugins. I explain more in today's show.

* as written by Jacob Shamsian of the Business Insider.

Plugins: Cake and Eat it Too

On one hand, we want continuity with our photo management applications. So whether you're using Lightroom, Photos for macOS, Capture One Pro, or something else, you want to know that your photos are safe and retrievable.

But at the same time, this is also our digital darkroom where we fine tune, experiment, and test new approaches to get the most our of our imagery. For these activities we want new tools and filters that fuel our creativity. And to be honest, new tools don't come fast in photo management applications.

A way that we can have both security and creativity is through the use of plugins. We don't have to give up our stable photo management system to experiment with new image editing tools. So I thought that I would share three interesting plugins with you today.

on1-Photo-RAW-web.jpg

On1 Photo RAW

Available for both Mac and Windows. No catalog means you (or anyone with access) can store and edit your photos anywhere (local network and cloud). Built-in layers, brushes, and masking tools. Includes all of the ON1 apps; Browse, Develop, Effects, Portrait, Layers, Resize, and Photo Via Works as a standalone app, as a plug-in (for Adobe� Photoshop� and Lightroom�), a host app (Google� Nik� and other apps), or as an extension (for Apple� Photos�).

I'm most interested in Photo RAW as a complement to Photos for macOS. But I think it's useful as a Lightroom plugin too. I downloaded the trial, and went for a test drive.

Bottom line was that Photo RAW worked well for Lightroom with smooth handoffs back and forth. But as an editing extension for Photos for macOS, it crashed Photos and didn't work. On1 Photo RAW is available for $99.

Luminar

No surprise here, I'm sure, that Luminar is at the top of this list. Mac users who rely on Lightroom, Aperture, or Photos for macOS, can expand their post processing chops with an array of sophisticated filters, layers, and localized editing brushes. You can purchase Luminar for $69 that includes the full set of plugins with a standalone version of the app.

DxO Film Pack

Available as a plugin for Lightroom, Photoshop, and Aperture 3, or as a standalone app. Mac and Windows compatible. In Lightroom you need to set it up as your additional external editor in Preferences. Once doing so, the roundtrip is painless, and the adjusted image is returned to Lightroom in a stack with the original.

This plugin gives access to more than 80 analogue films, and combines many original renderings with filter, vignetting, blur, texture, frame or light leak effects.

I really like these film emulations, and the fact that it is an excellent RAW processor at the same time. You can purchase versions starting at $79.

In the News: Advanced Editing Extensions from lynda.com

This is a very cool training from lynda.com: Photos for macOS: Advanced Editing Extensions. I show you how to use Luminar, DxO Optics Pro, Pixelmator, Affinity Photo, and Polarr. I cover standalone versus editing extension, and how to blend all of these tools into a creative, easy to use workflow.

Updates and Such

The registration forms for the The Chicago to New Orleans Rail Adventure - June 26-29, 2017, and for the San Francisco Street Photography Workshop - have been sent out to members of our reserve list. This workshop begins the day after Out of Chicago concludes. So if you're going to OOC, just add Sunday night to your hotel reservation if you plan on joining us. You can still get on the reserve list for this event, and for our others, by visiting the TDS Workshops Page and using the Send Me Info form on that page. I'm going to open both of these workshops to the general public soon. So if you're on the reserve list, and want to go, I would sign up soon.

Big thanks to all of our Patreon members! I was able to pay for the podcast server and the backup system from last month's pledges. Your contributions are making a positive impact.

B&H and Amazon tiles on www.thedigitalstory. If you click on them first, you're helping to support this podcast. And speaking of supporting this show, and big thanks to our Patreon Inner Circle members.

And finally, be sure to visit our friends at Red River Paper for all of your inkjet supply needs.

See you next week!

More Ways to Participate

Want to share photos and talk with other members in our virtual camera club? Check out our Flickr Public Group. And from those images, I choose the TDS Member Photo of the Day.

Podcast Sponsors

MindShift Gear - MindShift Gear is a group of committed professional photographers and product designers who support conservation and protection of our natural resources and planet.

Red River Paper - Keep up with the world of inkjet printing, and win free paper, by liking Red River Paper on Facebook.

The Nimbleosity Report

Do you want to keep up with the best content from The Digital Story and The Nimble Photographer? Sign up for The Nimbleosity Report, and receive highlights twice-a-month in a single page newsletter. Be a part of our community!

Want to Comment on this Post?

You can share your thoughts at the TDS Facebook page, where I'll post this story for discussion.

Even with Adobe's recent announcement that Creative Suite is Dead, meaning that Photoshop must be purchased through Creative Cloud, they have stayed true to always offer a perpetual license for Lightroom... at least after my testing here in the U.S.

Screen Shot 2017-01-29 at 8.08.36 AM.png

To download this version of Lightroom, go to Adobe's Product Page and scroll down to "Photoshop Lightroom." The next step is very important. Do Not click on the link for Photoshop Lightroom (that takes you to the Creative Cloud page), rather; click on the Buy link to reveal the Add to Cart button ($149), as shown in the top illustration.

Screen Shot 2017-01-29 at 8.09.12 AM.png

After your purchase, you'll be directed to a download page where you can secure a perpetual license version of the app (Mac/Win).

Want to Comment on this Post?

You can share your thoughts at the TDS Facebook page, where I'll post this story for discussion.

Check out this list of killer software: Luminar, DxO Optics Pro, Pixelmator, Affinity Photo, and Polarr - they are all explained in my latest title for lynda.com, Photos for macOS: Advanced Editing Extensions. Here's the overview movie.

All of this software is available in the Mac App Store and provides you with standalone versions or can be integrated into Photos for macOS as editing extensions. I show you how to use each of these great apps in one complete title.

luminar-in-adv-ext.png

If you want to supercharge your post production using the latest technology available, and have a blast doing so, check out Photos for macOS: Advanced Editing Extensions. I think you're going to love it.

Book or Videos: Photos for macOS

Explore the world of modern photography with my The Apple Photos Book for Photographers that features insightful text and beautiful illustrations.

And if you'd like to cozy up to a video at the same time, watch my latest lynda title, Photos for macOS Essential Training

You can share your thoughts at the TDS Facebook page, where I'll post this story for discussion.