Recently in Photography

  Page 229 of 385 in Photography  

Working with Negative Spaces

A negative space, such as my shadow against this yellow wall, can help you create strong graphical compositions.

Yellow Wall

Elements to watch for include strong, directional light, color, and texture. Play with different compositions, both when shooting, but also later in post production. These types of shots can make interesting prints, as well a cover art. They often have an iconic feel to them. Certainly worth keeping in your bag of tricks.


The Digital Story on Facebook -- discussion, outstanding images from the TDS community, and inside information. Join our celebration of great photography!


Lightroom 4 Pros and Cons

Lightroom Develop Module

Macworld Magazine today published my full review of Lightroom 4, which is now available for $149. Here are my pros and cons from that article.

Pros

  • Develop module has improved organization and functionality
  • Additional brushing tools
  • New soft proofing capability
  • New video management tools
  • New Map module includes reverse geotagging
  • New Book module with Blurb integration and PDF output
  • New DNG conversion options
  • Email capability for sending photos from within the application
  • Lower price compared to previous versions

Cons

  • Can't stitch video snippets together
  • No Mac Address Book integration for email

As you can see, the pros definitely outweigh the cons with this latest release. It's a good value for the dollar.


The Digital Story on Facebook -- discussion, outstanding images from the TDS community, and inside information. Join our celebration of great photography!
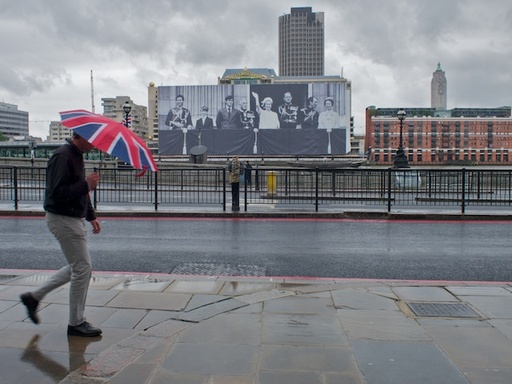

You can tell that Apple worked hard to bring iPhoto to the iPad. It's designed from the ground up, and is a joy to use. To help you get started, here are a few tips.

iPhoto for iPad

Use the Help Button

We often shy away from Help because it takes us out of the app and usually down a rabbit hole. But the Help for iPhoto is much better. On any given screen, tap the Question Mark in the upper left corner, and you'll get labels for all of the tools on that screen. Use this frequently in the beginning, and you'll get comfortable with the app much faster.

Get a Stylus

I love that you don't need a stylus to work on an iPad. But iPhoto is one of those apps where you'll enjoy having one. Working with the brushes is a great example. You can lighten, darken, sharpen, and do just about anything else with great precision. Using a stylus is not only more accurate, it's fun. And you can get them for just a few bucks.

iPhoto Brushes

Load it on Your iPhone

I don't think I've heard the phrase, "Beam that to me" since the Palm Pilot days. But it's back. And if you have iPhoto loaded on another iOS device, you can "beam" photos back and forth to their libraries.

I prefer to work on images on the iPad where I have more real estate, but then I do want some of them on my iPhone 4S for immediate sharing with others, since I always have my iPhone in my pocket.

To beam, just go to the Share menu and choose Beam.

Beam Photo

Save to Camera Roll

Once you've edited a photo and decide you really like it, save it to your Camera Roll (once again using the Share menu). Your Camera Roll is the image database for your iPad that allows other applications to access those pictures. If you save important shots to Camera Roll right away, they will be available to you in Keynote, Pages, etc. You'll be glad you did this when you're jamming to finish a presentation.

Create a Journal

This is an innovative way to share a collection of images with others. Instead of sending an email attachment with a dozen photos, create and publish a journal.

I began by flagging a handful of images that will be part of my journal. Then go to the Share menu, and choose Journal. One of the options will be your Flagged photos. You can then choose a design and add all sorts of goodies, such as quotes, map, etc.

Once you've finished, go to Share and choose iCloud. iPhoto will store your journal there, and give you the options to email mail it (Tell a Friend) or view it in Safari. The recipient gets a beautiful overview page, and then can enjoy each photo individually.

Here's a basic Sample Journal that you can view.

Final Thoughts

iPhoto for iPad works great on iPad 2, and it should be even more beautiful on iPad 3. Make sure you upgrade to iOS 5.1 before purchasing. It's available in the App Store for $4.99.


The Digital Story on Facebook -- discussion, outstanding images from the TDS community, and inside information. Join our celebration of great photography!


Working with off-camera flash doesn't have to be expensive. Yes, we see wireless flash systems that cost $1,000 and up, but you don't need those for professional results.

off-camera-flash-ashley Photographers Ed Shields and Ernesto Pono work with model Ashley Tuttle during the TDS Off-Camera Flash workshop.

During the recent TDS Off-Camera Flash Workshop, I showed participants how to put their old flash units to works using affordable gear such as the triple shoe adapter and a soft box. You'd be surprised how often you don't need automated flash. In a home studio, for example, all you have to do is figure out the aperture setting for a flash set in manual mode. That usually takes about 3 shots. Once you see what you like on the LCD, you're set.

I'm using my old Sunpak 283 flashes that have manual output settings, such as full, half, one quarter, etc. By putting one or two of these on a triple shoe in a soft box, I can lower their output to one-half, still get the light I need, but enjoy faster recycling times.

If we add a hair light or background light, we don't have to worry about those messing up the ETTL flash readings - because we're in manual mode. To tell you the truth, there are many situations where manual flash is actually easier.

The next TDS workshop is on Close Up Photography on April 21 and 22 in Santa Rosa, CA. I have lots of creative techniques to share for lighting and composition. You can get more information by using the Send Me Info box on the workshops page.

Also, don't forget about my lynda.com online training, Off-Camera Flash. I provide an overview of the basic gear and techniques that will help you get professional results, even on a hobbyist's budget.


The Digital Story on Facebook -- discussion, outstanding images from the TDS community, and inside information. Join our celebration of great photography!


There's plenty to play with in Adobe Photoshop Lightroom 4with new features such as the book layout tool, video management, and geotagging. But the things I like best about this release are more subtle.

lightroom4_recovery.jpg

At the top of the list is the overhaul of the Basic panel in the Develop Module. Image editing has always been a strength of Lightoom, and they've improved both the usability and the technology under the hood for this release. Making your pictures look great is easier than ever.

A really cool addition is the option to add lossy compression to DNG conversion. The image degradation is virtually unnoticeable, but the file savings are substantial. So if you have 30 shots of a wide receiver catching a football, you can compress the 27 that aren't the picks, and still keep them in your catalog.

Soft proofing is a handy tool to have when you need it. Sometimes I prefer the wilder approach to my printing and don't need soft proofing. But for those jobs where I do have to precisely manage color, it's good to have.

And believe it or not, I'm very happy about the email integration. Seems like we should have had that long time ago. Regardless, it's well implemented, and we have it now.

And finally, I love the price reduction. $149 for full copy; $79 for an upgrade. That is a lot of software for the money.

Just in case you're wondering what I'm not as crazy about... Well, I don't think the video features are fully baked (cannot attach snippets together!) and the Map module seems a little basic. But what the heck. I'm not thinking Lightroom for video anyway.

Overall, I give Lightroom 4 a big thumbs up. Good tools and great value.


The Digital Story on Facebook -- discussion, outstanding images from the TDS community, and inside information. Join our celebration of great photography!


Over the last decade, digital photography hardware has evolved at a fast pace. This led to us buying cameras more frequently than in the film days. But now that the technology has stabilized a bit, do we need to upgrade as often? And camera manufacturers seem keen on charging more than ever for their gear. This came into focus for me when Canon announced that the Canon 5D Mark III would cost $1,000 more than its predecessor. And it got me thinking, "How much am I willing to pay?" I provide the answer in this week's podcast.

Listen to the Podcast

You can also download the podcast here (24 minutes). Or better yet, subscribe to the podcast in iTunes. You can support this podcast by purchasing the TDS iPhone App for only $2.99 from the Apple App Store.

Monthly Photo Assignment

Eyes is the Mar. 2012 Photo Assignment. You can read more about how to submit on our Member Participation page. Deadline for entry is March 30, 2012.

More Ways to Participate

Want to share photos and talk with other members in our virtual camera club? Check out our Flickr Public Group. And from those images, I choose the TDS Member Photo of the Day.

Podcast Sponsors

Red River Paper -- The $7.99 Sample Kit is back! And with free shipping.

You might also want to check out my article, Artistic Gifts You Can Make in an Hour.

Make Your Photos Sizzle with Color! -- SizzlPix is like High Definition TV for your photography.

Need a New Photo Bag? Check out the Lowepro Specialty Store on The Digital Story and use discount code LP20 to saven 20% at check out.


Technorati Tags:
, , , , ,


Camera Awesome

It's rare when all of the hosts on TWiP agree on anything, but we all wanted to choose Camera Awesome as our pick of the week last week. Why? In short, if you have an iPhone 4/4S, this app brings it very close to being a great compact camera.

Camera Awesome (by the cool folks at SmugMug) has three basic modes: shooting, editing, and sharing. In shooting mode you have a number of helpful controls including burst rate, IS, self timer, interval timer, level adjustment, grid lines, and more.

One of its best tricks is allowing you to focus and expose on different parts of the composition. For example, when in Single Shot mode, tap the frame and you'll see a blue circle inside a green box. You can move this anywhere around on the frame and the camera will focus and expose based on where you place the target.

Now, pinch open on the target, and you can separate the "blue circle expose" from the "green box focus" and work with those points independently. If you decide you want to return to something more simple, click on the triangle pop up menu, and choose Big Button. Now you just have to tap the screen to take a picture. Want to go back? Chose Single Shot and get the focus/exposure target.

When it's time to edit, tap on the photo box in the lower left corner. Click on the Magic Wand icon and start with the "Awesomize" filter. In most cases, that's all you'll need. But there are tons of other editing controls included. And if you need more, Camera Awesome offers "in-app" purchases for additional tools.

Now, it's time to share your image with the world. You'd think that SmugMug would be the only option. It's not. You can set up Facebook, Twitter, Flickr, Picasa, Photobucket, Email, and of course, SmugMug. Hats off guys!

There are plenty of other features too, that I don't have time for here, that you should explore once you download the app.

Camera Awesome is available in the App Store for free. Even if you go crazy with the in-app purchases, you'll still only spend a couple bucks. I've replaced my Apple Camera app with Camera Awesome on my home page. The only thing I wish it could do is become my default camera when I double-push the home button. I guess Apple would have something to say about that.

Canon 5D Mark III - Not Now

canon_5d_mark3.jpg

Good news! Canon releases the 5D Mark III. Bad news: Price tag is $3,500 here in the US. That's $1,000 more than I paid for my 5D Mark II. Seriously?

So what do I get for that additional $1,000? 61-point autofocus, 6 fps, DIGIC 5 processor, and better weather sealing. Yes, yes, I know about better high-ISO performance and those other under-the-hood refinements. But I expect those when it's been 3 years since the camera has been updated.

Don't get me wrong. I think the specs for the 5D Mark III look great. It will probably be one of the best DSLRs on the market. I would have been willing to pay $2,999 for it (but with some grumbling). But $3,500 in this economy where photographers are doing our best to keep business afloat, is too high.

So instead, I'm gong to send my 5D Mark II in for a cleaning. Because for now, it will remain my go-to camera for assignments.


The Digital Story on Facebook -- discussion, outstanding images from the TDS community, and inside information. Join our celebration of great photography!


For the Jan. 2012 Photo Assignment, TDS shooters put their callers on hold and snapped photos with their camera phones. You can view a wide variety of on-the-go imagry in our gallery, Mobile Phone. It's a glimpse of the world as it passes by. And which one will be the SizzlPix Pick of the Month?

Bernie Anderson Mobile Phone

Photo by Bernie Anderson. "This is a building across from one of the schools I teach at. Not very welcoming, I'd say..." Bernie captured this wonderful image with his iPhone 4, then color corrected in Aperture 3. To see all of the other terrific shots from Jan., visit the Mobile Phone gallery page.


Participate in This Month's Assignment

The March 2012 assignment is "Eyes." Details can be found on the Member Participation page. Deadline is Mar. 30, 2012.

Please follow the instructions carefully for labeling the subject line of the email for your submission. It's easy to lose these in the pile of mail if not labeled correctly. For example, the subject line for this month's assignment should be: "Photo Assignment: March 2012." Also, if you can, please don't strip out the metadata. And feel free to add any IPTC data you wish (These fields in particular: Caption, Credit, Copyright, Byline), I use that for the caption info.

Good luck with your March assignment, and congratulations to all of the fine contributors for January.

SizzlPix Pick of the Month for the Dec. Photo Assignment

Congratulations to Michael DeBuhr for his image titled, Brothers. Michael will receive a SizzlPix for his winning image, selected by the good folks at SizzlPix.


twitter.jpg Follow me on Twitter

-


Now Available! The Digital Photography Companion. The official guide for The Digital Story Virtual Camera Club.

  • 25 handy and informative tables for quick reference.
  • Metadata listings for every photo in the book
  • Dedicated chapter on making printing easy.
  • Photo management software guide.
  • Many, many inside tips gleaned from years of experience.
  • Comprehensive (214 pages), yet fits easily in camera bag.

Technorati Tags: , ,

Is 1 Second the Perfect Long Exposure?

When I review my twilight shots that blur motion, it's amazing how often the ones I like best were exposed at 1 second.

Las Vegas Blur "Las Vegas Blur" photo by Derrick Story.

What's even more curious, is that I'm usually controlling the settings with Aperture Priority, not Shutter Priority. I do this typically because I'm figuring how much depth of field I want. But when I review the metadata for the shots (don't you just love metadata!), the cool exposures are often around 1 second.

This has often held true for waterfalls and other motion shots. And I'm beginning to think, maybe I should switch to Shutter Priority?


The Digital Story on Facebook -- discussion, outstanding images from the TDS community, and inside information. Join our celebration of great photography!