This is The Digital Story Podcast #702, August 27, 2019. Today's theme is "5 Things I Learned Taking Pictures on Las Vegas Blvd." I'm Derrick Story.
Opening Monologue
I packed my carry-on bag with three cameras, a couple changes of clothes, and a water bottle and flew to Las Vegas for the week. My goal was to explore The Strip, not as an afterthought as I normally do while there for a conference, but as a primary goal. Four days later I returned home with a collection of images and a bit wiser than when I had left. The latter is the focus of today's TDS Photography Podcast.
5 Things I Learned Taking Pictures on Las Vegas Blvd.
I have a screenshot of the weather app on my iPhone that was captured at 7:46pm last Wednesday in Las Vegas. It reads that the current temperature was 106 degrees. By the time I wrapped up the evening's photography at 11pm, the temp had dropped to tepid 92 degrees.
Weather was definitely a factor during the entire week's shoot. And it is the best place for me to start with lessons learned.
- Do Your Homework - With a little bit of research, I learned that there is a second Monorail access at the MGM Grand that saved me 15 minutes of walking through the smoky casino to the entrance that everyone knows about. I learned about free trams that I didn't know about. I found ATMs that were a fraction of the service charge price in most casinos. And I found the best places to eat at an affordable price.
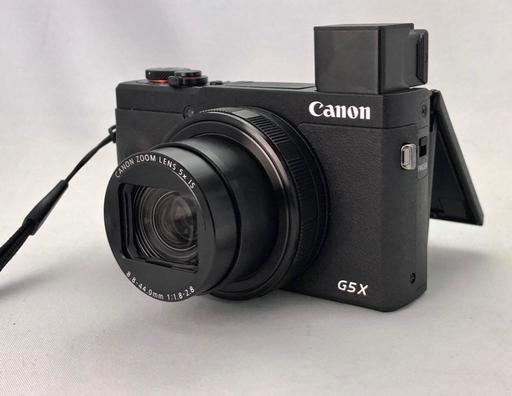
- Take into Account Factors that affect Your Energy - As I've said many times before, creativity and energy level are tied to one another. In order for me to be effective in the searing Nevada heat, I had to plan my excursions to incorporate relief during the shoot itself. For camera bag, I was carrying the Think Tank Urban Approach 5 with Canon G5X Mark II, Olympus OM-D E-M5 Mark II, Panasonic 20mm f/1.7 lens, and sometimes a Contax Aria film camera with 50mm lens.
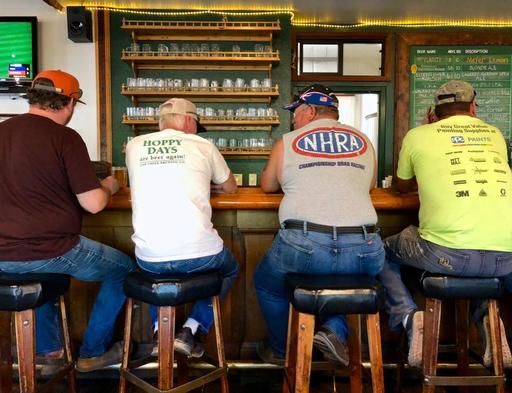
- Don't Shy Away from Tourists, Embrace Them - To be perfectly honest, most people in tourist locations don't care about you or your camera. I would stand there taking pictures as people walk by without ever a word about what I was doing. And if they did ask, I would say that I'm a tourist as well capturing the sites and sounds of the location. I often initiated conversations just to learn more about folks.
- Don't Look Like a Pro - Leave the DSLR with super tele at home. Forget your humongous tripod. And don't even think about a bulky photographer's vest packed to the gils. These items will make people uncomfortable and attract unwanted attention to yourself. Save the bulky gear for your next landscape shoot where the trees don't care. And you definitely want to stay off the radar of security personal and people who don't like photographers.
- Be Flexible - This applies to all aspects of your being. Be flexible mentally and adapt to your environment. Be flexible in your choices of subject and technique. Be flexible physically and remember to work all of the angles from low too high. And be flexible emotionally, understanding that the world doesn't care about your photography and isn't there to accommodate your needs.
So, now that I'm home, how do I feel about the photo shoot? In my pick set, I currently have 32 images that show the people and places on the Las Vegas Strip. And I very much like those photographs. I can tell that I was more focused about my photography than I had been in trips past where I did not make it my primary work.
New Course Offering: Podcast Skills
A course on podcasting has been the number 1 request for new workshop topics. And after some time thinking about the best way to make this happen, I've come up with a one day skills course that you can attend from home, or wherever you have an Internet connection.
This one day event will cover the following topics:
- Recording Hardware
- Editing Software
- Concept and Creation
- Essential Storytelling Techniques
- Show Notes
- Syndication and RSS Feeds
- Getting Your Show on Apple Podcasts, Google Play Music, Stitcher, and More
- Adding Music to Your Show (and Where to Get It)
- Editing Workflow
- Promoting Your Podcast
- The Ins and Outs of Advertising and Sponsorships
The topics will be divided into modules and presented live, and they will be recorded as movies as well. Each participant will receive the catalog of HD movies from the day as part of their tuition.
The course will include insider tips, best practice techniques, and multiple Q&A sessions. Each participant is also entitled to one follow up one-on-one session after the workshop to address questions unique to his or her goals.
The live course, set of recorded videos, and the follow up one-on-one session costs only $249. Inner Circle Members get a 10 percent discount on tuition.
The first two course dates are scheduled for October 12 and November 9, 2019. Participation is limited to 10 people per course, first come, first served. Registration is open now at www.thenimblephotographer.com. Click on the Workshops tab.
How Do You Listen to Your Podcasts?
Here are the results from, How Do You Listen to Your Podcasts?.
- Apple Podcasts (twice as many as second place)
- Overcast
- A smattering of others including Pocket Cast, Google Play, and Spotify.
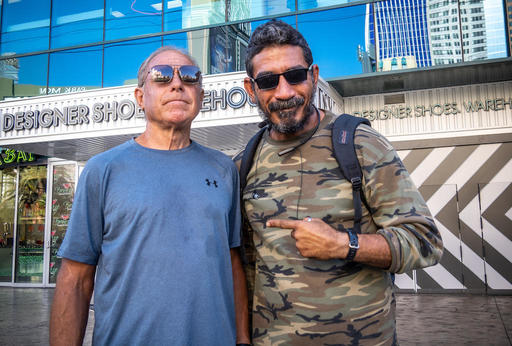 "Paul and His Dad" - Las Vegas Blvd. - Canon G5X Mark II - Photo by Derrick Story.
The Story of Paul
When people approach me on the street, it usually takes me a few seconds to gauge how to react. So when Paul plopped his backpack down on the bench where I was working, I wasn't sure what to think at first.
This story is about what happened next.
Try LinkedIn Learning Free for 30 Days
- Access 13,000+ expert-led courses Watch as many courses as you like - there's no limit. Dozens of new courses added each week across business, tech and creative. Courses available in English, French, German, Japanese, and Spanish.
- Get personalized course recommendations based on your current job, skills, and what professionals like you are learning.
- Watch anytime on your computer or phone Easily access and watch courses from your desktop or mobile device. Apps available for iOS and Android.
- Earn a certificate when you complete a course Show off the new skills you've learned on your LinkedIn profile by earning a certificate for each course you've watched.
- Practice with exercise files and quizzes Validate what you're learning with quizzes within courses, and download exercise files so you can practice while you learn.
- Download to mobile app for offline viewing Download and watch courses on the LinkedIn Learning mobile app for internet-free viewing.
- Access LinkedIn's Premium Career features.
You can get started today by clicking on this link to start your 30 day free trial.
Updates and Such
Inner Circle Members: A big thanks to those who support our podcast and our efforts!
B&H and Amazon tiles on www.thedigitalstory. If you click on them first, you're helping to support this podcast. And speaking of supporting this show, and big thanks to our Patreon Inner Circle members:
And finally, be sure to visit our friends at Red River Paper for all of your inkjet supply needs.
See you next week!
More Ways to Participate
Want to share photos and talk with other members in our virtual camera club? Check out our Flickr Public Group. And from those images, I choose the TDS Member Photo of the Day.
Podcast Sponsors
Red River Paper - Keep up with the world of inkjet printing, and win free paper, by liking Red River Paper on Facebook.
Portfoliobox - Your PortfolioBox site is the best way to show off your best images.
The Nimbleosity Report
Do you want to keep up with the best content from The Digital Story and The Nimble Photographer? Sign up for The Nimbleosity Report, and receive highlights twice-a-month in a single page newsletter. Be a part of our community!
Want to Comment on this Post?
You can share your thoughts at the TDS Facebook page, where I'll post this story for discussion.