The Retouch tool in iPhoto 6 has more capability than most people realize. The default mode is a frustratingly blunt cross hairs that provides very little control. You can, however, enable an advanced mode that lets you set the diameter of the brush for more precise retouching.
First launch iPhoto 6, choose a picture and enter Edit mode by clicking on the Edit button in the row of buttons beneath the thumbnails. Click on the Retouch tool and your mouse pointer will become the normal cross hairs that we're accustomed to with Retouch.
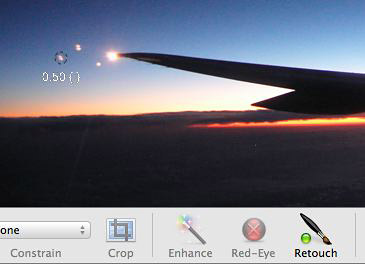
To enable the advanced options, press the "Caps Lock - CTRL - 9" keys all at the same time. You won't notice any difference at first, but you have activated the advanced mode. Now press the Tab key, and your cursor will change from a cross hairs to the brush diameter indicator as show in the illustration above. You can make the diameter of the brush bigger by pressing the right bracket key ] and smaller by using the left bracket key [.
You can also control the density of the retouching by holding down the SHIFT key and using the right and left curly braces { }. SHIFT - Right Brace } increases the density of the retouch and SHIFT - Left Brace { decreases the density.
If you press the Tab key again, you go to Lighten mode. This tool is good for lightening areas of the image that have a little too much density. Again, you can control the diameter of the brush via the left and right bracket keys. Press the Tab button again and you return to the normal cross hairs mouse pointer.
The advanced options stay on as long as iPhoto is open. If you relaunch the application, then you'll need to enable them again via the "Caps Lock - CTRL - 9" keys. You can read more about these tools in Rob Griffiths excellent Macworld article, Use advanced iPhoto 6 edit tools.
Technorati Tags:
digital photography, technique, software, Mac