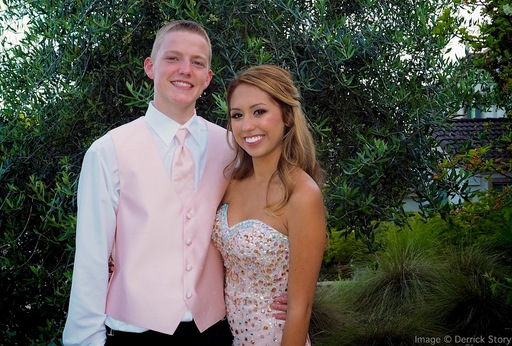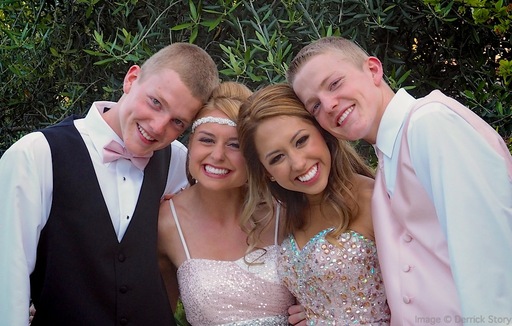
This week on The Digital Story photography podcast: Canon G1X Mark II, B&W Printing Tips; Fujifilm XT1 Sharpness, To Watermark or Not? - All of this and more on today's show with Derrick Story.
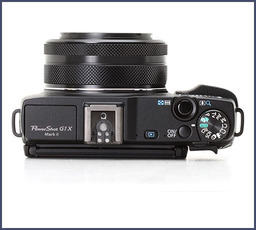
Story #1 - The Weekly Update: Canon PowerShot G1 X Mark II Review (Source DP Review)
In other news, Is the Fuji X-T1 the sharpest APS-C camera out there? You be the judge: Image comparison tables posted on Imaging-Resource.com.
And finally, Cactus V6 Trigger is Capable of Being Used with Almost Any Flash System. (Source: Petapixel)
Story #2 - B&W Printing Tips - Have you seen Red River Paper's Best Inkjet Photo Papers for Black & White Printing that includes a downloadable "basics" guide? This page covers "the best" papers for the task and breaks them up by warm and cool tone. That segmentation resonates with older customers who remember buying darkroom paper that was either warm or cool. It also gives people a mental image of how paper contributes to the end result.
Story #3 - The Nimbleosity Report: "To Watermark or Not?" Photographer Sean Duggan wrote on The Nimble Photographer: "I favor a very small, subtle watermark in one of the lower corners of the mage (or sometimes along a vertical side...also in a corner) that has a lower opacity. I want it to be visible and legible, but not get in the way of the image. It's there to help honest people track the image back to me if they want to use it for anything. I can't worry about those who would crop it off or retouch it out of the image. But it's so easy for web images to become 'orphaned' and disconnected from their original posting context, as well as having embedded metadata stripped out, that a subtle watermark is important." I think he makes a great point.
Story #4 - From the Screening Room - iMovie 10.0.2 Essential Training with Garrick Chow. iMovie is sometimes overshadowed by Final Cut Pro X. But it can produce professional results easily. And Garrick is an excellent trainer.
You can watch Garrick in action by visiting the TDS Screening Room at lynda.com/thedigitalstory. While you're there, you can start your 7 day free trial to watch other design, photography, and computing titles, plus every other topic in the library.
Virtual Camera Club News
May is Wow and Double Wow Month For Mothers Day, Graduation, Engagements, June Weddings, Birthday, Fathers Day ... and, because SizzlPix! loves making you a super hero with a camera strap around your neck, order TWO: one for them; one for yourself, and your second SizzlPix! is 25% off! Any two SizzlPix!, from the same image or two different, any sizes, any hanging options, save 25% on the second or more.
Workshop News: I've sent out invites to the Reserve List for the Fall Color with Safari West Workshop, October 24-26, 2014. You can learn about them both, plus request a reservation form by visiting the TDS Workshops Page and using the "Send Me Info" box.
Photo Assignment for May 2014 is "Around the House".
If you haven't done so already, please post a review for The Digital Story Podcast in iTunes.
BTW: If you're ordering through B&H or Amazon, please click on the respective ad tile under the Products header in the box half way down the 2nd column on thedigitalstory.com. That helps support the site.
Listen to the Podcast
In addition to subscribing in iTunes, you can also download the podcast file here (33 minutes). You can support this podcast by purchasing the TDS iPhone App for only $2.99 from the Apple App Store.
More Ways to Participate
Want to share photos and talk with other members in our virtual camera club? Check out our Flickr Public Group. And from those images, I choose the TDS Member Photo of the Day.
Podcast Sponsors
lynda.com - Learn lighting, portraiture, Photoshop skills, and more from expert-taught videos at lynda.com/thedigitalstory.
Red River Paper -- Keep up with the world of inkjet printing, and win free paper, by liking Red River Paper on Facebook.
SizzlPix! - High resolution output for your photography. You've never seen your imagery look so good. SizzlPix.com. SizzlPix! now is qualified for PayPal "Bill Me Later," No payments, No interest for up to 6 months, which means, have your SizzlPix! now, and pay nothing until August!
Want to Comment on this Post?
You can share your thoughts at the TDS Facebook page, where I'll post this story for discussion.