On today's The Digital Story Photography Podcast: Favorite Hardware from PPE, Interview with Simone Wilson and John Hershey, TDS Fall Photography Workshop Wrap-up - all of this and more on today's show with Derrick Story.
Weekly Update - c't Digital Photography reports: Noteworthy Announcements from PhotoPlus Expo:
Canon has done their part with the G5X (Oct. 13) and a new mirrorless model. They also had a solid printer announcement (Oct. 21). Sony dropped the RX1R II with 42MP sensor and EVF (Oct. 14), and then Leica's cool SL system with Type 601 full-frame mirrorless camera and lenses (Oct. 20) was a great surprise. Sigma piled on with the 20mm f/1.4 (Oct. 16), And I love Fujifilm's unveiling of the weather-sealed 35mm F2 lens and 1.4x teleconverter (Oct. 21).
In other news, "How to make a dead simple DIY speedlight grid" Imaging-Resource reports: "If you're looking for a fun, simple DIY project this week, photographer Isiah Xiong has you covered. In his latest video, shared on YouTube, he shows off a simple way to make a speedlight grid with nothing more than straws, tape, scissors and thick construction paper."
Story #1 - "Interview with Simone Wilson and John Hershey"
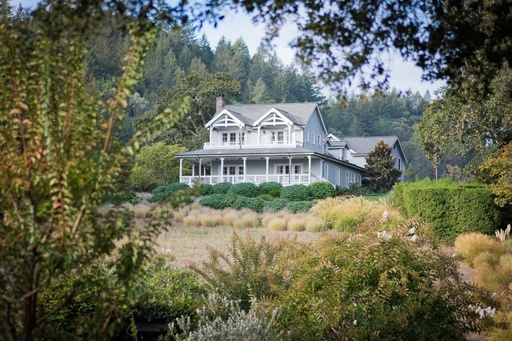
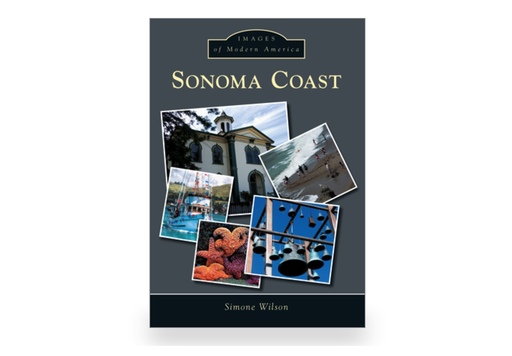
Simone Wilson has authored the beautiful, informative Sonoma Coast book featuring images by herself and TDS member John Hershey. I sit down with Simone and John at the TDS Studio to discuss what it takes to conceive, author, and publish a book.
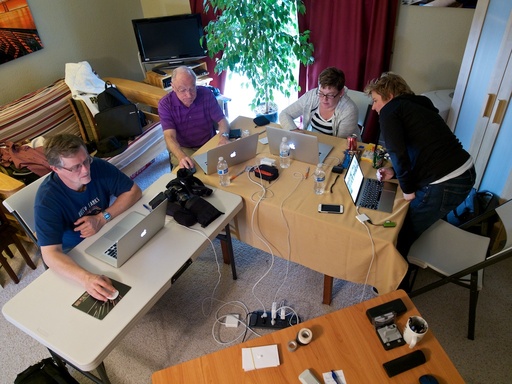
Story #2 - Wrap-up from the TDS Fall Photography Workshop
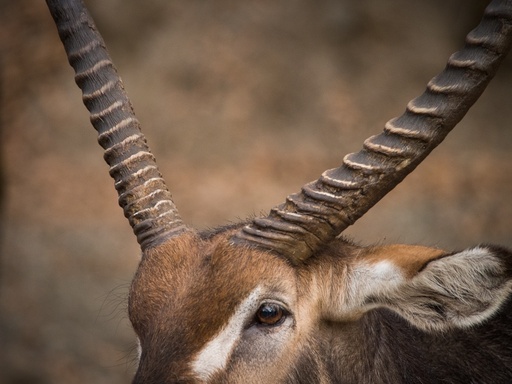
We covered everything from color temperature for portraits, to wildlife photography, to shooting landscapes. Here's a brief wrap-up of the just-concluded TDS workshop in Sonoma County.
Story #3 - From the Screening Room - Up and Running with FotoMagico with Richard Harrington. Slideshows are a great way to showcase your favorite photos. FotoMagico is an easy-to-use Mac application for exporting high-quality slideshows in variety of formats, including movies, DVDs, and even standalone iOS apps. FotoMagico lets you combine photos and music as well as add narration, movies, transitions, and movement. In this course, Rich Harrington shows how to set up a new slideshow; customize the display and playback options; enhance the slideshow with layers, graphics, and watermarks; and publish it as a self-contained movie, an iOS app, and as a reel for posting on YouTube or Vimeo.
You can watch Richard in action by visiting lynda.com. And you can sign up for your 7-day free trial by visiting the TDS Screening Room.
Virtual Camera Club News
TDS Workshops 2016
We've had a change at the top spot for week two of the Reserve list with Fall Color in the Eastern Sierra garnering the most reservations. If you're looking for a satisfying photo adventure, take a look at the TDS Workshops Page for more information.
Holiday Note from SizzlPix
5k Ultra High Definition SizzlPix orders received over the next few weeks can be guaranteed to beat the rush and be delivered for the holidays. (a surprise for that person who "has everything.")
For The Digital Story Virtual Camera Club members ... if you'd like additional copies of for gifts, or 5k Ultra High Definition SizzlPix of any other of your images to make spectacular, amazing holiday gifts, order any two SizzlPix to be shipped together, and we'll give you 20% off on the second one! Order any sizes from 18-inches up to a mind-boggling 48 by 72". Imagine -- six feet! and no sacrifice in resolution, luminance, and impact. You can walk up to even the biggest 5k Ultra High Definition SizzlPix as close as you can focus your eyes, and every detail will be there, without grain, noise nor distortion, just as you see it on your phone or pad! Yes, it is like retina display for your wall.
Note from Kevin Miller about Red River Paper - Kevin did some price comparisons with Epson stock, and here's what he found for 10 mil thickness and luster/satin surface:
Epson Ultra Premium Luster 13x19 (from Epson site), #50, $115 or $2.30 per sheet. Thickness 10 mil.
Epson Ultra Premium Luster 13x19 (from B&H Photo), #50, $77.50 or $1.55 per sheet. Thickness 10 mil.
Red River Arctic Polar Satin 13x19, #50, $64.76 or $1.30 per sheet. Thickness 10.5 mil.
Thanks to everyone who recently reviewed the TDS Podcast in iTunes!
BTW: If you're ordering through B&H or Amazon, please click on the respective ad tile under the Products header in the box half way down the 2nd column on thedigitalstory.com. That helps support the site.
Download the Show
In addition to subscribing in iTunes, you can also download the podcast file here (41 minutes). You can support this podcast by purchasing the TDS iPhone App for only $2.99 from the Apple App Store.
More Ways to Participate
Want to share photos and talk with other members in our virtual camera club? Check out our Flickr Public Group. And from those images, I choose the TDS Member Photo of the Day.
Podcast Sponsors
lynda.com - Learn lighting, portraiture, Photoshop skills, and more from expert-taught videos at lynda.com/thedigitalstory.
Red River Paper -- Keep up with the world of inkjet printing, and win free paper, by liking Red River Paper on Facebook.
SizzlPix! - New 5k Ultra High Definition SizzlPix output for your photography. You've never seen your imagery look so good. SizzlPix.com.
Zenfolio If you want your site to look as good as your photos, visit www.zenfolio.com today.
Want to Comment on this Post?
You can share your thoughts at the TDS Facebook page, where I'll post this story for discussion.
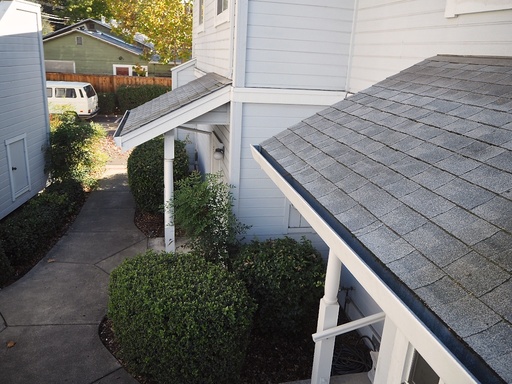 Rooftop perspective using the Air Stick fully extended. Photos by Derrick Story.
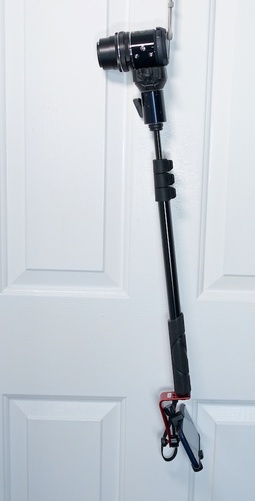
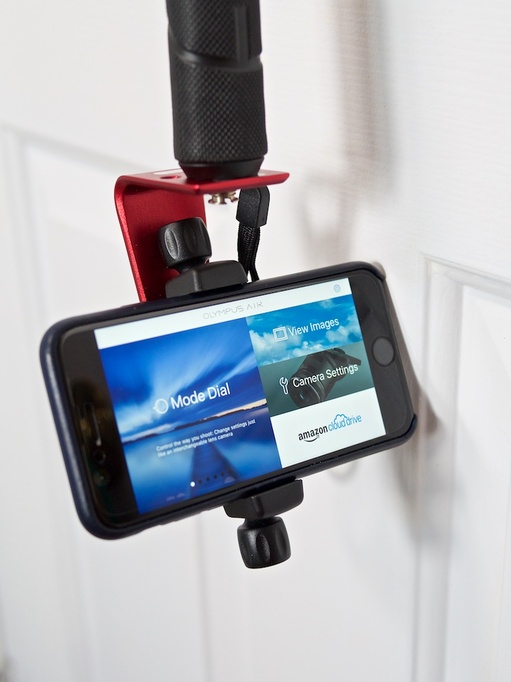 iPhone 6S attached to the Xtreme pole using the MeFOTO SideKick.
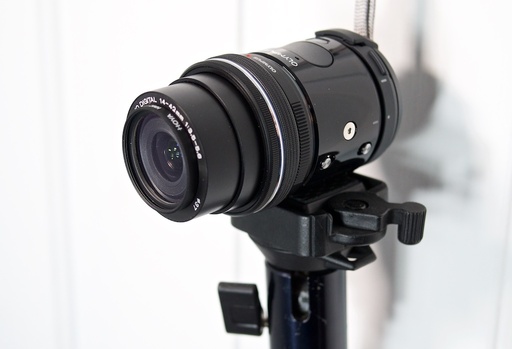 Olympus Air attached to the Xtreme pole using a ball head with quick release.