Recently in Photography

  Page 57 of 386 in Photography  

This is The Digital Story Podcast #683, April 16, 2019. Today's theme is "What Makes Nikon, Nikon?" I'm Derrick Story.

Opening Monologue

Nikon is celebrating 60 years of the Nikon F, which was released in 1959 to overcome technical obstacles inherent in the rangefinder design. At that time, the F wasn't designated as a professional camera. But that soon changed. And the events that fueled its evolution are the subject of today's TDS podcast.

What Makes Nikon, Nikon?

IMG_4297.jpg

Anyone who has ever pressed the shutter button and wound the film advance on an analog Nikon camera, knows that they were a marvel of mechanical design. And that's one of things that always stood out for me with those early Nikons, was attention to detail.

To help illustrate this point, here is a common scenario for me. I will purchase some forgotten Nikon that had been sitting in someone's garage for decades. On the outside, it will be covered in layers of fine grime that had settled on it over the years. It probably endured extreme temperatures as well.

More often than not, after a through cleaning of the exterior, and replacing the rubber seals in the back, the camera will fire up, take a picture, and wind with the precision of a finely designed machine. How many of today's cameras would fare as well under those conditions?

There are definite milestones to the evolution of the Nikon SLR and DSLR. For today's show, I'm choosing five of them that I think make Nikon, Nikon.

  • 1959 - The Introduction of the Nikon F - Nikon rangefinders were popular cameras and sold well. But there were a handful of technical challenges that required a new camera design. One of the problems that had to be solved was attaching longer, telephoto lenses, which was difficult to do on rangefinders. Another was designing a large, inner diameter lens mount to accommodate faster lenses and reducing vignetting. Plus, a total system camera with a wide variety of interchangeable lenses and accessories seemed to be the path forward. (Source: The Phoblographer.)
  • 1959 - World's First Telephoto Zoom Lens - In the same year, Nippon Kogaku K.K. released the Auto NIKKOR Telephoto-Zoom 8.5 - 25cm f/4-4.5--the world's very first telephoto zoom lens for still photography cameras. Source: Nikon Rumors.
  • 1971 - NASA and the Nikon F2 - 1971 was a busy year for Nikon. First, the production of Cameras for NASA, which commissioned a specially designed, space-ready cameras for their Apollo 15 and 17 missions. The result was the Nikon Photomic FTN, which was constructed to withstand the extreme environments of space.
    Also that year, Nikon releases the iconic Nikon F2, which was a reliable, easy-to-use, and feature-packed camera heavily patronized by professional photographers, especially newspaper and magazine photographers of that decade. Source: Nikon Rumors.
  • 1972 - World's First Extra-Low Dispersion Lens - The NIKKOR-H 300mm F2.8, which was the first lens to use extra-low dispersion glass, was released. This technology is widely used today by practically all lens makers.
  • 1986 - First SLR with Built-In Autofocus - The Nikon F-501 (N2020) is released. It was the first Nikon SLR camera to have its autofocus mechanism controls built into the body. Apart from its outstanding features, the F-501 also sported a different look compared to previous models. The black polycarbonate body instead of metal was one obvious change; another is the extended grip on the shutter button side. However, it also borrowed the red stripe that first appeared in the F3, but placed horizontally instead of vertically. (Source: The Phoblographer.)
    BTW: this camera is truly under-rated. It has a fantastic feature set and great durability, and can be purchased today for less than $100.

Other fun facts include that the iconic red line made its debut in 1980 with the Nikon F3. In 1992, Nikon released the NIKONOS RS, the first underwater SLR with autofocus. And in 2004, the company releases the Nikon F6, which was to be the final installment in their highly popular flagship Nikon F-series line. The F6 combines the well-loved features of the previous Nikon F cameras and the latest technological advances during this time. Source: Nikon Rumors.

The release of the F6 marks the end of an era, but Nikon does not slow down, with subsequent milestones including the first camera with WiFi, first DSLR with video capture, and back to space with the International Space Station.

But after all of this, what still makes Nikon to me is a company that's priority is making cameras, lenses, and the accessories for them. Their optical expertise expands to microscopes, surveying equipment, and scanners. And they don't stray far from products that don't include lenses.

Regardless of which camera brand you favor and shoot with, chances are good that Nikon technologies have in some part influenced them. And their 60 year run with the F Mount has been good for all of photography.

Wedding photographers reveal the 'red flags' they see at ceremonies that signal a doomed marriage - including no eye contact and poor 'cake etiquette'

This is an excerpt from an article published on The Daily Mail.

A group of wedding photographers have revealed the relationship 'red flags' they have noticed at ceremonies over the years that ultimately signaled a 'doomed' marriage. The photographers formed Reddit thread to explain how various simple moments at weddings ultimately spelled the start of a marriage breakdown.From smashing cake into one another's faces to fighting on the day of their nuptials, these were the tell-tale signs they could all agree on.

  • Whether there was cake etiquette - Couple needs to be in sync. "Sometimes one of them (usually the groom) will force cake all over the other's face and embarrass and upset them. I've seen this happen a handful of times and all of those relationships that I have kept up with have ended in a divorce."
  • Having a bad fight on the day - "If they are respectful toward one another (and toward me) during a day full of stress then I think that's a good indicator of being able to deal with other problems that may arise during a marriage," a woman said.
  • When the couple are very quiet or won't talk - Just as overly loud and obnoxious couples can signal trouble, those that barely speak throughout the day are also a concern, so says their photographers.
  • Wanting to change a partner
  • The omen of getting married outdoors - So other professionals chimed in to say they distrusted any sort of outside venue at all. Just try to be under some sort of cover. Whether it be rain or wind, you'll want some kind of protection from the elements - or it could lead to unnecessary fighting on the day,' another said.

TDS Workshops Update

Humboldt Redwoods Workshop Update

Our grand finale of the season will be on Sept. 18-20 in one of the most beautiful areas on the planet. Our headquarters will be in Fortuna, CA - an easy drive from the Eureka Airport only 25 minutes away.

We're located on the Eel River, and situated perfectly to explore the Redwoods just south of us. This will be an excellent event to cool off, slow down, and get some great images. Plus, you'll be able to spend some quality time with your fellow virtual camera club members.

We still have a couple openings on the reserve list. You can secure your seat by visiting TheNimblePhotographer.com, and place a fully refundable deposit for the event.

Updates and Such

Inner Circle Members: A big thanks to those who support our podcast and our efforts!

B&H and Amazon tiles on www.thedigitalstory. If you click on them first, you're helping to support this podcast. And speaking of supporting this show, and big thanks to our Patreon Inner Circle members:

And finally, be sure to visit our friends at Red River Paper for all of your inkjet supply needs.

See you next week!

More Ways to Participate

Want to share photos and talk with other members in our virtual camera club? Check out our Flickr Public Group. And from those images, I choose the TDS Member Photo of the Day.

Podcast Sponsors

Red River Paper - Keep up with the world of inkjet printing, and win free paper, by liking Red River Paper on Facebook.

Portfoliobox - Your PortfolioBox site is the best way to show off your best images.

The Nimbleosity Report

Do you want to keep up with the best content from The Digital Story and The Nimble Photographer? Sign up for The Nimbleosity Report, and receive highlights twice-a-month in a single page newsletter. Be a part of our community!

Want to Comment on this Post?

You can share your thoughts at the TDS Facebook page, where I'll post this story for discussion.
Day Hiking with the Ricoh GR III

The blustery Spring weather in Northern California was perfect for a Sunday day hike. Normally, I would slip the Fujifilm XF10 into my cargo shorts pocket because of its excellent color rendition. But since I have the equally svelt Ricoh GR III on loan, I packed it instead. It did not disappoint.

R0000087-Big-Rock-Flex-1024.jpg Big Rock Trailhead - Ricoh GR III. Photo by Derrick Story.

One of the challenges of springtime hiking is that I'm not in my best outdoor shape after the wet winter. So climbing those hills with as little gear as possible is important.

For this 5 mile hike with 1,100' elevation gain, I brought the Ricoh, a water bottle, and my iPhone X. Other than what I was actually wearing, that was it. And I have to say that climbing those hills was much more enjoyable as a result.

Elevation Gain Hiking on the Ridge - Ricoh GR III. Photo by Derrick Story.

In addition to its APS-C sensor, and excellent 28mm lens (equivalent), the GR III produces excellent DNG files with good color.

I mention the DNG files on purpose. I shot RAW+Jpeg on this hike, and it was clear that the DNG files looked much better in Capture One Pro 12 than the corresponding Jpegs. The RAW files had better color and tonal gradation. A lot of times I don't really start to notice a difference between RAW and Jpeg until editing. But in the case of the GR III, there was quite a distinction between the two even at the thumbnail phase.

The upshot of this is interesting to me. Because for urban shooting, I really love the Jpegs in the various monochrome modes available on the GR III. They are just beautiful. But for color work, I very much prefer the DNG files, at least those processing in Capture One Pro, to the Jpegs.

Cattle on the Ridge Cattle on the Ridge - Ricoh GR III. Photo by Derrick Story.

After process the RAWs in Capture One Pro 12, I did a little finishing work on a couple of the images with Luminar Flex. I particularly like warming up the tones a bit with the Golden Hour filter, then adding a dash of secret sauce with the Orton Effect adjustment.

The bottom line, I was pleased with the images that I created with the Ricoh GR III on this hike. And I throughly enjoyed my workout as well, staying nimble with this little guy not slowing me down at all.

Capture One Pro 12 Essential Training

You can learn all the ins and outs of this amazing software in the comfort of your home, or even on your smartphone by watching this fast-paced training: Capture One Pro 12 Essential Training on LinkedIn Learning. If you're a lynda.com fan, it's available there as well. You will learn everything from image organization, to expert editing, to output and more. It will feel good to finally take control of your photo library with Capture One Pro 12.

You can share your thoughts at the TDS Facebook page, where I'll post this story for discussion.
You can squeeze every drop of quality from your optics in Capture One Pro 12 by tapping the Lens Correction panel before editing your shot. Here you can enable profiles for your optics, adjust distortion, reduce light falloff, and even correct for diffraction. Combine this capability with a good RAW file, and you can enjoy amazing image quality as a result.

In this 4-minute video, I walk you through the steps for maximizing optical performance in Capture One Pro 12. This is from my essential training on LinkedIn Learning and lynda.com.

Improve optical performance with Lens Correction from Capture One Pro 12 Essential Training by Derrick Story

I don't apply Diffraction Correction to every image, only those where I think it's appropriate or can improve an important photograph. It does use extra processing power, so I save it for those pictures that really count.

lens-correction.png

This is just one of the many techniques that I cover in this course. Other topics include (peppered with inside tips):

  • Tapping all the new features in Capture One Pro 12
  • Auto adjustments and basic image editing
  • Advanced editing techniques (and goodbye to Photoshop)
  • Organizing your catalog
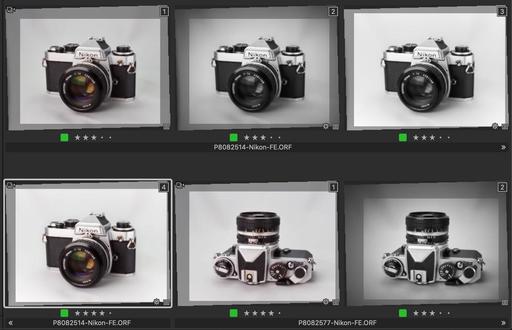
  • Using star ratings and color labels to cull images
  • Building an electronic contact sheet
  • Creating a slideshow to review and present images
  • Strategies for protecting master images

For those of you new to this application, I have a Quick Start chapter that gets you up and running in less than 20 minutes. Yes, that's the entire workflow, start to finish, in less than half an hour.

You can learn all the ins and outs of this amazing software in the comfort of your home, or even on your smartphone by watching this fast-paced training: Capture One Pro 12 Essential Training on LinkedIn Learning. If you're a lynda.com fan, it's available there as well. You will learn everything from image organization, to expert editing, to output and more. It will feel good to finally take control of your photo library with Capture One Pro 12.

You can share your thoughts at the TDS Facebook page, where I'll post this story for discussion.

This is The Digital Story Podcast #682, April 9, 2019. Today's theme is "Spark Joy by Organizing Our Camera Gear." I'm Derrick Story.

Opening Monologue

Marie Kondo is a best-selling author who hosts a show on Netflix titled Tidying Up. Her mission is to spark joy through cleaning and organizing using the KonMari Method. She attacks clutter by organizing a home into 5 categories: clothing, books, paper, komono, and sentimental items. As photographers, our gear falls into the komono category, and that is the focus of today's TDS podcast.

Spark Joy by Organizing Our Camera Gear

R0000077-organizing-1024.jpg

Even though I've never seen Marie address photography gear directly, her systems lends itself well to our challenges, which I see as two-fold: 1) Avoiding redundancy in cameras and lenses, and 2) providing organized access to the items that we use.

To help us tackle both challenges, I have five steps for you to consider when address your gear.

  • Make a list of all the gear that you own - This is important to help us spot redundancies. In her show, Marie has clients put all of their clothing on the bed so they can see how much stuff they have accumulated. We can do the same with our gear, either physically or by list. Either way, this step is critically important.
  • Organize gear by category - For example, I have one kit that I use for my public relations clients, another for my personal travel, and a third for my portrait and studio work. Every piece of gear must go in a category.
  • Review your categories for redundancies - This is where the opportunity for thinning happens. Do you really need 3 zoom lenses that cover the same focal lengths? Tighten up your categories so that you have what you need, but nothing more. The items that don't make the cut can be sold for cash.
  • Create storage units that are organized by the categories that you've established - Old camera bags are great for this. Each category should have its own storage unit or units. These containers should fit neatly into a secure space that you've established to store your gear.
  • Get in the habit of returning gear to its assigned space after use - I will admit that there are times that I don't want to spend the extra few minutes maintaining my organizational system. But in the long run, this saves me time because I always know where everything is, and I never lose an item.

Since I've started using this system, it really has sparked joy, and Marie advocates. I actually smile when I open up my storage area and see those neatly stacked containers with my cameras, lenses, and accessories inside.

10 Life Hacks for Your Photo Studio

This is an excerpt from an article published on PetaPixel.com.

Having a photography studio is fun, but it is even more fun when you start applying simple and cheap solutions plus common sense to make your shooting experience (and your clients' experience) smoother. This is the list of what I think are the smartest and most useful photography studio life hacks.

  • Transparent Rubber Hairbands
  • Wine Boxes
  • IKEA Pegboard
  • Shelf Rails and Wood
  • Metal Clips and Magnets
  • Shoe Rack
  • Elastic Ropes and Clips
  • Door Stopper
  • Silver Reflector Backdrop
  • Neon Tubes and PVC Corrugated Roofing Sheets

TDS Workshops Update

Sonoma Coast Workshop Update

I've secured a beautiful home for us just south of Bodega Bay. This will serve as our headquarters during the event. There's plenty of room for our classroom and presentation work, plus beautiful areas for relaxing, and even sleeping accommodations for those who wish to stay there.

We've just had one seat open up. So I've updated the inventory on the reserve list page. And you can place your deposit if you want to join us. If you do, you'll have an incredible photography experience.

Updates and Such

Inner Circle Members: A big thanks to those who support our podcast and our efforts!

B&H and Amazon tiles on www.thedigitalstory. If you click on them first, you're helping to support this podcast. And speaking of supporting this show, and big thanks to our Patreon Inner Circle members:

And finally, be sure to visit our friends at Red River Paper for all of your inkjet supply needs.

See you next week!

More Ways to Participate

Want to share photos and talk with other members in our virtual camera club? Check out our Flickr Public Group. And from those images, I choose the TDS Member Photo of the Day.

Podcast Sponsors

Red River Paper - Keep up with the world of inkjet printing, and win free paper, by liking Red River Paper on Facebook.

Portfoliobox - Your PortfolioBox site is the best way to show off your best images.

The Nimbleosity Report

Do you want to keep up with the best content from The Digital Story and The Nimble Photographer? Sign up for The Nimbleosity Report, and receive highlights twice-a-month in a single page newsletter. Be a part of our community!

Want to Comment on this Post?

You can share your thoughts at the TDS Facebook page, where I'll post this story for discussion.
Photographers who want to use the latest image editing technology with their existing workflow may want to take a look at Luminar Flex ($70), that offers the power of Luminar 3 in a plugin format for Lightroom, Photoshop, Photos for macOS, and Aperture.

Luminar-Flex-001.jpg Once installed, Luminar Flex is accessible via Plugins in Lightroom Classic.

The Luminar Flex Experience

If you've worked with Luminar in the past, you'll feel right at home with Flex. It's essentially Luminar 3 without the organizer. (More on its strengths later.) As the two products continue to evolve, Flex with be the plugin version, and Luminar 3 will be the editor with the organizer, but without plugin functionality. Current registered users of Luminar 3 will receive Flex 1.0 for free. But up the road, they will be separate products.

I've tested Flex with Photos for macOS and Lightroom. With Photos, it's an editing extension and very straightforward to use. With Lightroom Classic, the first step is to make sure the plugin is installed. Luminar will give you that option with you first launch Flex, which I did as a standalone app. (This was the only time I opened it as a standalone.) There's also an Install Plugins option in the top menu bar for Flex.

Once Flex has been installed as a plugin for Lightroom, you can access it via the normal way you tap other plugins. In my case, I go to File > Plugin Extras. (See the first illustration.)

Luminar-Flex-002.jpg Luminar Flex interface via Lightroom. Click the Apply button in the upper right to return the edited photo to Lightroom.

Next, load a Lightroom image in Luminar Flex. Now you can use all of its tools including, filters, looks (there are some new ones), and layers. When you have the image to your liking, click on the Apply button for the edited image to return to your Lightroom library. After that, you have both versions available: the original image and the Luminar-edited one.

Two usage notes: First, my images always returned from Flex in the Tiff format, regardless of what settings I made in Lightroom preferences. I may be missing something somewhere, but I wanted to mention it in case you were having the same experience. And second, I noticed that my IPTC metadata was removed from the file upon return. This will definitely need to be fixed in an update.

Luminar-Flex-003.jpg Images side-by-side in the Lightroom library - the original on the left and the returned image from Luminar Flex on the right.

Luminar Flex Moving Forward

Up until this point, Luminar users have received some of these plugins as part of the overall package. So, if you're running Luminar 2018 or Luminar 3, you may already have this capability, depending on your host app. But if I understand Skylum correctly, this will change up the road. Luminar with Libraries will evolve as a standalone image editor and organizer. Luminar Flex will take a different path as an enhancement fine-tuned to existing workflows with Photoshop, Lightroom, Photos, and Aperture.

So, for the current Luminar user, what exactly are the advantages of using Luminar Flex? According to Skylum, they include:

  • An easier installer for plugins.
  • An updated install path for improved compatibility with Adobe software.
  • Support for Photoshop Elements on Windows.
  • Support for re-editing smart objects and picking up where you left off.
  • Support for Photoshop Actions.
  • A faster workflow, optimized for plugin users.
  • New Luminar looks.
  • New workspaces for designed for task-based workflows.

Also, if you are a current Luminar user, and have downloaded additional Looks, you can use them with Flex as well. Looks that you made or used in Luminar 3 or Luminar 2018 are compatible with the new app. You can either reinstall your custom Looks packs in Flex, or manually copy items between the Luminar Looks folders.

Luminar Flex is available now for $70 for new users and as a free download for registered Luminar 3 and Luminar 2018 photographers. (From Skylum: "All current customers will receive a free license to Luminar Flex Plugin. If you own Luminar 2018 or Luminar 3, you get a free version of Luminar Flex, just check the My Software section in your Skylum account.).

My recommendation is that if you can download a free copy, do so and test it. If you haven't started using Luminar yet because you don't want to migrate away from your current workflow, Luminar Flex might be a good solution. I use Luminar with both Lightroom and Photos, and it really adds depth to my workflow. To be honest, I can do things in Luminar that I just can't with other applications.

You can share your thoughts at the TDS Facebook page, where I'll post this story for discussion.
This is a guest post by Craig Tooley, nature and wildlife photographer, and TDS community member.

I am primarily a nature/conservation/landscape, and occasionally an event photographer. And regardless of which of these hats that I'm wearing, I very much like the new Olympus OM-D E-M1X.

P3300204-Edit.jpg Exposure time: 1/4th of a second, handheld.

Yes, it's heavier than the previous Olympus models, but it's less than half the weight of my past Nikon D5, and over 10 ozs lighter than my D500. The ergonomics of the E-M1X feel quite natural. The button placement is well thought out, and they can be customized to accommodate a shooter's personal preferences (muscle memory).

A word about the weather sealing. I'm not going to take it into a shower just to see if it's waterproof, but I have been known to slip while shooting tide-pools, and of course there are those occasional face-plants when skirting the edge of a stream. It's comforting to know that in these situations the camera is water resistant.

P3270080-Edit.jpg Long, handheld exposure and GPS metadata.

Also, the GPS is a welcome addition. I've gone through at least four external GPS units for my Nikons over the years. They've always been problematic. For the units that had their own batteries, I had to make sure they were charged before heading out to shoot.

Another annoyance was accidentally bumping the cables that run from the GPS unit to the Nikon, often leading to data loss. And finally, forgetting to turn off the camera, then finding later (when needing to use it), that the GPS unit had drained the Nikon's battery. When the E-M1X goes to sleep, the built in GPS does as well. As a result, recently, when I grabbed my Olympus in the morning and realized I had left it powered on, I was relieved to find that most of the battery charge still remained. What a relief!

P3130023-Edit.jpg Olympus 300mm f/4 with 1.4X tele-extender - handheld.

So far, I've been using the "Continuous single or five-point tracking autofocus" for most of my wildlife work, and have found it to be very good. I've been experimenting with "intelligent subject," using "Airplanes mode" when shooting birds in flight. This works better than I expected. (But not good at all if the birds are in a brushy area.) The "multi selector" for moving the focus is well-placed and very responsive. Not to mention that I definitely appreciate the ability to handhold the equivalent of an 800mm lens at 1/60th of a sec.

When I want to get the creative juices flowing, I enable the " Live ND filter". Now, working tripod-free, I find myself walking around looking for stuff that is moving in a static scene just to have an excuse to play with this feature. In some situations, the results may not be as good as a fixed glass ND filter, but "Fun" is definitely the operative word for the Live ND filter.

The Olympus OM-D E-M1X may not be the perfect fit for everyone, but, I certainly don't have buyer's remorse. Meaning, there's no way I'm giving up this camera.

All photos are by Craig Tooley, captured with the E-M1X. You can see more of Craig's work by visiting his site, RuffImages.

You can share your thoughts at the TDS Facebook page, where I'll post this story for discussion.
.

.

Opening Monologue

It is stealth black and can hide behind an iPhone without detection. It is so nondescript that you can point it directly at a subject on the street, and they will barely notice that a camera is pointing at them. Yet, once an exposure is made, the takeaway is a high quality 24MP image that's capable of making posters. What is this ninja camera? It is the Ricoh GR III, and it's the subject of today's TDS photography podcast.

Ricoh GR III Review and Comparison to the Fujifilm XF 10

P4017650-compact-compare.jpg

What a feeling of freedom to embark upon an afternoon of street photography in San Francisco with nothing more than the Ricoh GR III ($899) in my front pocket. Between that, and my iPhone on the other side, I had everything that I needed for my adventure.

Today, I'm going to talk about the performance and the images produced by the svelt GR III. First, let's take a look at the feature highlights.

  • 24.2MP APS-C CMOS Sensor
  • GR Engine 6
  • 28mm f/2.8 Lens (35mm Equivalent)
  • 3-Axis Shake Reduction System
  • 3.0" 1.037m-Dot Touchscreen LCD
  • Full HD 1080/60p Video Recording
  • Bluetooth LE and Wi-Fi
  • Hybrid AF System, Macro Mode
  • 35mm and 50mm Focal Length Crop Modes
  • USB Type-C Port, 1x SD Card Slot

Stockton Tunnel at Night "Stockton Tunnel at Night" - Captured with a Ricoh GR III in Hard Monotone mode. Handheld. ISO 3200. Photo by Derrick Story.

The things that I liked about this little powerhouse:

  • Very responsive - Fast performance is something that you want in a street camera.
  • Really impressive image stabilization - I kept pushing and pushing the handheld long exposures, and I captured shots that I liked at 1/2 second.
  • Outstanding black and white options - There are four B&W modes: Monotone, Soft Monotone, Hard Monotone, and Hi-Contrast B&W - and they are all excellent. Hard Monotone is my favorite.
  • Easy to Use and Powerful Macro Mode - Just push a button, and get close.
  • Handy Crop Mode for 35mm and 50mm Perspectives - I programmed the FN button to cycle through the different crop modes so I could change them on the fly. The standard dimensions for an image are 6000x4000 px. At 50mm crop mode, you still have 3360x2240 px.

Building Speed, Union Square "Building Speed, Union Square" - Captured with a Ricoh GR III, ISO 100, standard color mode. Photo by Derrick Story.

Now, how does the $899 Ricoh GR III compare to the $499 Fujifilm XF 10 compact camera.

  • Image Stabilization Winner - Ricoh - The IS is quite good in the GR III, and the XF 10 doesn't have stabilization.
  • Flash Photographer Winner - Fujifilm - Yes, the GR III has a hot shoe, but who wants to carry a flash around that's bigger than the camera? The XF 10 has a super intelligent built-in flash that works great.
  • Connectivity and Geotagging Winner - Fujifilm - The XF 10 connects easily to my iPhone and uses its location data to geotag my images. After many tries, I could not get the GR III to connect to my smartphone via bluetooth.
  • Film Simulation Winner - A Draw - Both cameras have great film simulation filters. The GR III is a tad better at B&W and the XF 10 is a notch better at color.
  • Autofocus Winner - A Draw - The XF 10 has been criticized for its slowish autofocus, but using single point focusing, it performs about the same as the GR III. And to tell you the truth, I don't have a problem with either of them.
  • Macro Mode Winner - Ricoh - The close up mode on the GR III is really good, and on the XF 10, it's really frustrating.
  • Looks and Operation Winner - A Draw - I love the auto lens cap on the GR III and really don't like the removable cap on the XF 10. But the XF 10 has great looks and a leather strap compared to the nondescript styling and string strap of the GR III. I also like the around the lens command ring on the XF 10.

Classic San Francisco
"Classic San Francisco" - Captured with a Ricoh GR III in Standard Color mode. ISO 100. Photo by Derrick Story.

So is the Ricoh GR III worth the hefty price tag? I think it comes down to image stabilization, hot shoe, and design. If you feel like you need IS and the hot shoe, the GR III is an excellent choice. If you don't, then you can save a lot of money with the Fujifilm XF 10.

Ricoh says it will repair GR III cameras affected by a wobbly control dial, scroll wheel

This is an excerpt from DPreview.com.

Ricoh Korea and Japan have issued a statement regarding an issue with select Ricoh GR III cameras that caused the control dial of the camera jiggles more than it should, as seen in the above video shared by Photo Rumors. Following an investigation of the issue, Ricoh says it will fix affected devices free of charge and notes that the movement of the controls does not interfere with the functionality of the camera.

The translated statement says 'The basic specification is to set a slight rotation allowance width, but as a result of investigation, it has been found that some products with the following target serial numbers have combinations with large display inclinations.'

The list of serial numbers for affected cameras can be found at DPreview.com.

The Best Photography April Fools' Day Jokes of 2019

This is an excerpt from Petapixel.com.

Favorites included: Nikon's Left-Handed DSLR, Elon Musk's Camera Ambitions, Pentax Unveils the ME-D, The SD Card Photo Printer, and my personal favorite, Minolta DiMAGE V hands-on review.

Do You Have a Film Camera that Needs a Good Home?

Over the last year, I've received donations from TDS members who have film cameras that need a good home. What I do is inspect the items, repair and clean as I can, then list them in TheFilmCameraShop where I can find a good home for them. If you're interested in donating, please use the Contact Form on TheNimblePhotographer site. And thanks for you consideration!

TDS Workshops Update

Sonoma Coast Workshop Update

I've secured a beautiful home for us just south of Bodega Bay. This will serve as our headquarters during the event. There's plenty of room for our classroom and presentation work, plus beautiful areas for relaxing, and even sleeping accommodations for those who wish to stay there.

We've started registrations for Sonoma Coast Exploration, and it looks like we have two seats open. So I've updated the inventory on the reserve list page. And you can place your deposit if you want to join us. If you do, you'll have an incredible photography experience.

Updates and Such

Inner Circle Members: A big thanks to those who support our podcast and our efforts!

B&H and Amazon tiles on www.thedigitalstory. If you click on them first, you're helping to support this podcast. And speaking of supporting this show, and big thanks to our Patreon Inner Circle members:

And finally, be sure to visit our friends at Red River Paper for all of your inkjet supply needs.

See you next week!

More Ways to Participate

Want to share photos and talk with other members in our virtual camera club? Check out our Flickr Public Group. And from those images, I choose the TDS Member Photo of the Day.

Podcast Sponsors

Red River Paper - Keep up with the world of inkjet printing, and win free paper, by liking Red River Paper on Facebook.

Portfoliobox - Your PortfolioBox site is the best way to show off your best images.

The Nimbleosity Report

Do you want to keep up with the best content from The Digital Story and The Nimble Photographer? Sign up for The Nimbleosity Report, and receive highlights twice-a-month in a single page newsletter. Be a part of our community!

Want to Comment on this Post?

You can share your thoughts at the TDS Facebook page, where I'll post this story for discussion.
If you want to stretch beyond the limitations of the vignette tool in Capture One Pro 12, I recommend getting familiar with the new radial mask option. It's far more flexible and powerful, yet you can learn how to use it in just 3 minutes. Here's a video to show you how.

Radial gradient masks from Capture One Pro 12 Essential Training by Derrick Story

The way that I approached editing the portrait in this video was by creating two radial masks on two different layers. The first one was designed to lighten the tones on the subject's face. The second mask, on another layer, darkened the tones for the background. By having two masks on different layers, I had complete control over the relationship between the compositional elements. And because it's so easy to do, I could build this effect in just minutes.

You can use the masks for more than just tones as well. I can adjust colors, clarity, and other aspects of the photo. Again, this is so much more powerful than a basic vignette tool.

radial-mask-c1p12-1024.jpg

This is just one of the many techniques that I cover in this course. Other topics include (peppered with inside tips):

  • Tapping all the new features in Capture One Pro 12
  • Auto adjustments and basic image editing
  • Advanced editing techniques (and goodbye to Photoshop)
  • Organizing your catalog
  • Using star ratings and color labels to cull images
  • Building an electronic contact sheet
  • Creating a slideshow to review and present images
  • Strategies for protecting master images

For those of you new to this application, I have a Quick Start chapter that gets you up and running in less than 20 minutes. Yes, that's the entire workflow, start to finish, in less than half an hour.

You can learn all the ins and outs of this amazing software in the comfort of your home, or even on your smartphone by watching this fast-paced training: Capture One Pro 12 Essential Training on LinkedIn Learning. If you're a lynda.com fan, it's available there as well. You will learn everything from image organization, to expert editing, to output and more. It will feel good to finally take control of your photo library with Capture One Pro 12.

You can share your thoughts at the TDS Facebook page, where I'll post this story for discussion.

One of the features that I was most excited about with the new Olympus OM-D E-M1X mirrorless camera was the built-in field sensor system that has an integrated GPS module (GLONASS and QZSS) along with an electronic compass, manometer, temperature sensor, and acceleration sensor.

This is something that I absolutely love with my Olympus Tough TG-5, but having it in a sophisticated, interchangeable lens body elevates the game considerably. So I decided to take the E-M1X for a spin to see how the GPS worked.

P3257589-gear-upward-e1mx.jpg Olympus OM-D E-M1X with 75mm f/1.8 lens.

You have to turn on the GPS via the menu. My recommendation is to program one of the function buttons to toggle this feature on and off. That way you won't unnecessarily drain the batteries (even though there are two in the camera) when you don't need geotagging.

Once the system is active, you will see a satellite icon at the top of the back LCD panel. When it has determined your location, that information will be included with the file data for your images.

gps-preview.jpg Location data displayed for a file captured with the Olympus OM-D E-M1X.

I checked the files in Lightroom, Photos for macOS, and Preview, and each displayed the location where I captured the image. Once I went back inside, I turned off the GPS module to conserve power.

This feature lived up to my expectations. The joy of being able to geotag images with your "real camera" and not being limited to a smartphone or compact is wonderful. And with two batteries in the E-M1X, there's enough power to run it.

The Olympus OM-D E-M1X is shipping now for $2,999.

You can share your thoughts at the TDS Facebook page, where I'll post this story for discussion.
This is The Digital Story Podcast #680, March 26, 2019. Today's theme is "Who Would Want the Olympus OM-D E-M1X?" I'm Derrick Story.

Opening Monologue

For a Micro Four Thirds camera, it's big. For a non-full frame body, it's expensive. When I tried to squeeze the OM-D E-M1X into my camera bag, it didn't fit. It is the least nimble Olympus camera I have ever held. It's like I requested a Jetta and they handed me the keys to a Caravan. So, reluctantly, I packed it up anyway, and hit the road. Here's what I discovered along the way.

Who Would Want the Olympus OM-D E-M1X?

P3257585-gear-1024.jpg

Being a taller than average guy, I have pretty good sized hands. But when I warp my fingers around the grip of the Olympus E-M1X ($2,999), I suddenly feel a bit shorter. Putting it bluntly, this thing is a handful.

I put the camera to my eye and look through the viewfinder. It is clear and crisp with excellent readouts. I press the shutter button halfway, and the image snaps into focus. Yes indeed, it is fast.

P3257588-gear-1024.jpg

The drive is in High Speed mode. I full press the shutter button and the camera records 15 frames in one second. RAW+Jpeg, it doesn't care. It sounds like a machine gun from a war movie. It's actually kind of exciting.

I decide to take it with me on a walk. Hundreds of frames later, I think to myself, "My word, this thing is a beast."

You're probably familiar with the specs already, so let's just recap the highlights of the OM-D E1MX.

  • 20.4MP Live MOS Micro Four Thirds Sensor
  • Dual TruePic VIII Image Processors
  • Integrated Vertical Grip, Dual Batteries
  • 2.36m-Dot 0.83x Electronic Viewfinder
  • 3.0" 1.037m-Dot Vari-Angle Touchscreen
  • DCI 4K/24p & UHD 4K/30p Video Recording
  • 5-Axis Sensor-Shift Image Stabilization
  • 15 fps Shooting and Expanded ISO 25600
  • 121-Point All Cross-Type Phase-Detect AF
  • Weather-Sealed Construction

So this leads us to the question, who is this camera for? I have five scenarios where I think the E-M1X is a good choice.

P3257592-gear-1024.jpg

  • The Need for Speed - If you're a sports photographer who wants to shoot mirrorless, this camera is perfect.
  • Former DSLR Photographers Who Like a Good Handle - For those who have moved over from bulky DSLRs and feel that many mirrorless cameras just feel and look too small, this is your camera.
  • Outdoor Photographers Who Need Strong and Long - Combine dual batteries with robust weather sealing, and you have a camera that can last all day in the nastiest of conditions.
  • Photo Nerds Who Want to Geek Out - There is a ton of technology in the E-M1X. Handheld HiRez shot, Live ND Filter shooting, built-in GPS recording, configurable dual SD card slots, and more.
  • Those Who Want the Best Micro Four Thirds Camera - Even if you don't care about the previous four reasons, but are someone who insists on owning the best in its class, that indeed would be the OM-D E-M1X.

Truly, it is not a camera for everyone. But for certain types of photographers, I think it's a worthy investment.

Olympus 12-200mm f/3.5-6.3 First Impressions: The all-in-one vacation zoom for MFT stretches its legs

This is an excerpt discussing the $899 Olympus 12-200mm f/3.5-6.3 from an article on Imaging-Resource.com.

In terms of initial handling, the lens feels terrific in the hands. It's very light for such a long-zooming lens, weighing in at just 16oz (455g). The 12-100mm Pro tips the scales at almost 20oz (561g) and that's with less zoom range, but of course that lens has on-board IS and a beefier build, not to mention the constant f/4 aperture, so we're talking about different animals here. And yet, for the 12-200mm to come in at 16.6x zoom and weigh only 1lb is, well, a neat feat for the Olympus engineers!

The zoom and focus rings are amply textured and certainly straightforward to operate. They don't rotate with the buttery smoothness of the Zuiko Pro lenses, but again that's not their intended market first and foremost, nor price point. It does feel quite well-built though, even if not a Pro lens. The zoom functionality, while not internal like some high-end zooms (meaning the lens doesn't change size as you zoom) is still smooth enough to be reassuring.

Autofocus operation with the E-M1 II proved quick and capable. No surprises to report here on this first impressions pass, and this combination locked focus quickly on my intended subjects. The only time this didn't happen was shooting the setting moon, as the combo struggled in twilight and I ended up using manual focus. But I've had that issue on many a camera and lens combo, including with some high-end full frame cameras, and virtually always manually focus the moon regardless of camera body, so this isn't a big deal at all.

Do You Have a Film Camera that Needs a Good Home?

Over the last year, I've received donations from TDS members who have film cameras that need a good home. What I do is inspect the items, repair and clean as I can, then list them in TheFilmCameraShop where I can find a good home for them. If you're interested in donating, please use the Contact Form on TheNimblePhotographer site. And thanks for you consideration!

TDS Workshops Update

Sonoma Coast Workshop Update

I've secured a beautiful home for us just south of Bodega Bay. This will serve as our headquarters during the event. There's plenty of room for our classroom and presentation work, plus beautiful areas for relaxing, and even sleeping accommodations for those who wish to stay there.

We've started registrations for Sonoma Coast Exploration, and it looks like we have two seats open. So I've updated the inventory on the reserve list page. And you can place your deposit if you want to join us. If you do, you'll have an incredible photography experience.

Updates and Such

Inner Circle Members: A big thanks to those who support our podcast and our efforts!

B&H and Amazon tiles on www.thedigitalstory. If you click on them first, you're helping to support this podcast. And speaking of supporting this show, and big thanks to our Patreon Inner Circle members:

And finally, be sure to visit our friends at Red River Paper for all of your inkjet supply needs.

See you next week!

More Ways to Participate

Want to share photos and talk with other members in our virtual camera club? Check out our Flickr Public Group. And from those images, I choose the TDS Member Photo of the Day.

Podcast Sponsors

Red River Paper - Keep up with the world of inkjet printing, and win free paper, by liking Red River Paper on Facebook.

Portfoliobox - Your PortfolioBox site is the best way to show off your best images.

The Nimbleosity Report

Do you want to keep up with the best content from The Digital Story and The Nimble Photographer? Sign up for The Nimbleosity Report, and receive highlights twice-a-month in a single page newsletter. Be a part of our community!

Want to Comment on this Post?

You can share your thoughts at the TDS Facebook page, where I'll post this story for discussion.