Recently in Photography

  Page 102 of 386 in Photography  

This is The Digital Story Podcast #557, November 8, 2016. Today's theme is "The 2017 TDS Workshop Season." I'm Derrick Story.

Opening Monologue

We started working on the 2017 photo workshop season three months ago. Every year we bring in new events and blend them with those that are still popular with our audience. What we came up with for 2017 is truly exciting. And I'm going to provide you with a complete overview in today's show.

The 2017 TDS Workshop Season

The 2017 workshop Season breaks new ground for the upcoming year. We're riding the rails from Chicago to New Orleans, learning about analog, and exploring California's wine country. Take a look at this lineup, pick your favorite, then get on our reserve list now.

Take a look at this overview, and if you see something you're interested in, fill out the "Send Me Info!" request form. By doing so, you're placed on the reserve list for the event of your choice. (That means you have first opportunity to sign up before all the seats are filled.)

  • Film Photography in the Digital Age - Feb. 11-12, 2017 - We'll explore the convergence of film and digital imaging in this fascinating two-day event. Each participant receives their own SLR to use during the workshop, then to take home and keep. You will learn shooting techniques, film choices, lab vs home darkroom, digitizing, adding metadata, cataloging, and how analog photography can help you evolve as both an artist and craftsman. If you've been curious about film, this is the workshop for you. Participants receive their own camera to keep, film, and all of the amenities that our workshops are famous for - all for just $495.
  • San Francisco Street Photography - April 6-9, 2017 - We'll work entirely on location in San Francisco. We'll book a hotel in picturesque Union Square that will serve as our headquarters during the event. No rental car will be necessary. We'll explore the City's hidden treasures and capture them through our lenses. And we're adding new shooting locations again this year, including twilight assignments. This is San Francisco like you've never seen it before. And as a bonus, Olympus Trailblazer Mike Boening will be joining the teaching staff and leading sessions on street shooting and night photography. Two instructors, three days, and all for just $695. (That's right, it's 3 full days in one of the most photogenic cities in the U.S.)
  • Chicago-D1-train.jpg

  • The Chicago to New Orleans Rail Adventure - June 26-29, 2017 - For this unique photography workshop, we'll launch our adventure in Chicago, visiting iconic locations for street photography (and including a visit to the historic Central Camera Company). We'll then board a train called the "City of New Orleans." The route leads us through several states southbound, passing through Kentucky, Tennessee, Mississippi, and arriving in the dynamic city of New Orleans, LA. It is approximately a 19-hour trip, starting in a city of street shooting paradise, traveling through lush, beautiful landscapes, and ending in the Deep South in a city rich in culture, history, and of course, a myriad of photographic possibilities. We'll then explore the French Quarter and other intriguing locations within NOLA. You'll fly into Chicago, then out of New Orleans. What a trip! Four days including train fare: only $795
  • The Northern CA Coast Tour - Mid August 2017, 2017 - After congregating in Santa Rosa, our adventure begins at the mouth of the Russian River where it meets the Pacific Ocean in Jenner, CA. For the next three days, we caravan north, exploring Fort Ross State Park, Salt Point State Park, Sea Ranch, Gualala, and Point Arena. We then head inland to Boonville, continuing to Highway 101, where we return to the TDS Studio on Santa Rosa. Three days, thousands of images, only $695.
  • Autumn in Wine Country: Late October, 2017 - Would you like to combine your interest in wine tasting with your passion for photography? And how about doing so during one of the most beautiful times of year in Northern California Wine Country: Fall. We'll spend the mornings fine tuning our photography skills and shooting on location, and our afternoons wine tasting and learning about the entire process, from growing the grapes, to harvesting, to making the wine itself. This is the perfect workshop to bring a friend because the afternoon sessions are open to both paid workshop attendees, and to one friend. Three days: $595

For more information, visit the TDS Workshops page.

In the News

$400 Price Drop on the Fujifilm X-T1

Thanks to the introduction of the X-T2, we're seeing substantial price drops on the X-T1, which is now available for $899.

This is highly specified camera that has enjoyed numerous firmware updates to help keep it current. And right now, it's a great deal.

Luminar for the Mac

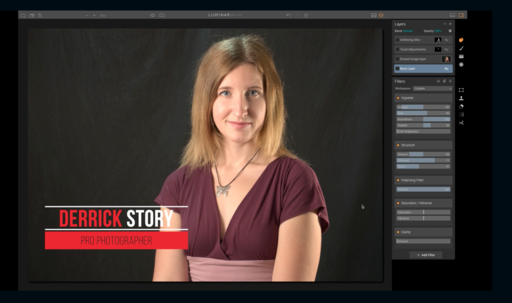
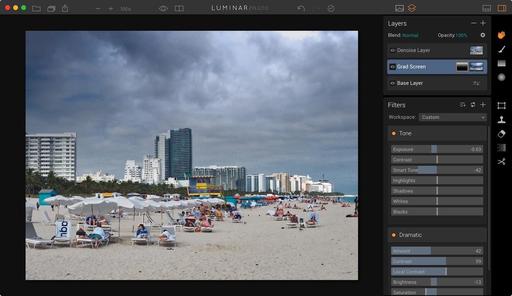
I've been testing a pre-release version of Luminar, both as a standalone app and as an Editing Extension for Photos for macOS. And after improving countless images, I can tell you that I really like this software. I've already integrated it into my photography workflow.

And now you can secure a copy for yourself. If you pre-order before Nov. 17th, you'll receive Luminar at a discounted price, plus two bonuses, all for only $49 total (existing Macphun customers) or for $59 (new customers).

I explain what Luminar is in this third segment of the show.

Updates and Such

Big thanks to all of our Patreon members! I was able to pay for the podcast server and the backup system from last month's pledges. Your contributions are making a positive impact.

I'll be announcing the 2017 TDS Workshop season next week. And I have to tell you, this is our most exciting lineup to date. Keep eye peeled!

B&H and Amazon tiles on www.thedigitalstory. If you click on them first, you're helping to support this podcast. And speaking of supporting this show, and big thanks to our Patreon Inner Circle members.

And finally, be sure to visit our friends at Red River Paper for all of your inkjet supply needs.

See you next week!

More Ways to Participate

Want to share photos and talk with other members in our virtual camera club? Check out our Flickr Public Group. And from those images, I choose the TDS Member Photo of the Day.

Podcast Sponsors

Red River Paper - Keep up with the world of inkjet printing, and win free paper, by liking Red River Paper on Facebook.

MacPaw Creators of CleanMyMac 3 and other great software for Apple computers. Visit www.macpaw.com today.

Hedge for Mac - The fast solution for moving photos and videos from memory cards to drives, or drives to drives for that matter. Learn more at Hedge for Mac.

The Nimbleosity Report

Do you want to keep up with the best content from The Digital Story and The Nimble Photographer? Sign up for The Nimbleosity Report, and receive highlights twice-a-month in a single page newsletter. Be a part of our community!

Want to Comment on this Post?

You can share your thoughts at the TDS Facebook page, where I'll post this story for discussion.
connect-to-camera.png

One of Phil Schiller's justifications for removing the SD card slot from the latest MacBook Pro laptops was that there are wireless options for photographers to use instead. I was curious about these alternatives, so decided to do a little investigation.

What I discovered is that there are practically no wireless options for my Olympus cameras. The one method I found is wholly unsatisfying, but I will share it with you nonetheless.

  • Enable WiFi on your Olympus camera.
  • Connect to the camera's network on your Mac.
  • Open your web browser and type http://192.168.0.10 - then hit return.
  • Click on the 100OLYMP button to reveal your thumbnails.

wifi-thumbnails.jpg

You will be able to see both Jpegs and RAW files, but you will not be able to execute a batch download. Instead, you can double-click on each Jpeg thumbnail individually, wait for it to download, then save that image to your desktop or application. This procedure will not work for RAW files.

save-to-desktop.png

In my opinion, this is hardly a robust solution. At best, you can grab a Jpeg or two in a pinch.

I checked the Mac App Store for software that might enhance this procedure. But I could not find anything. So I'm putting this out to our community. Is there software that will allow me to download wirelessly from my Olympus camera? And is it robust enough to replace the SD card slot?

Please post your solution on the TDS Facebook page, or feel free to send me an email: derrick@thedigitalstory.com.

I don't always have my best cameras with me when the great moments in life happen. And for those instances, thank goodness for plug-ins. More on that in a moment. First, a word about noise reduction.

In my mind, Apple has never been very good at taming noise. Even in their pro app, Aperture, that adjustment brick was ineffectual at best. And things haven't improved in Photos for macOS. Fortunately, we have third-party relief though editing extensions. And my current favorite is the noise reduction tool in Macphun's Luminar, that will offer its toolset to Lightroom and Aperture as plug-ins, and to Photos as an editing extension.

01-initial-editing-web.jpg Editing this image in Photos is fun, but noise is rearing its ugly head.

The process I use now, is that I edit my image natively in my photo management app, in this case Photos, knowing that I can apply noise reduction once I'm finished with it.

02-apply-reduction-web.jpg I then open the image in Luminar and apply my noise reduction. Reviewing the results with the before/after curtain.

The fine-tuned picture then comes back to Photos, looking much cleaner.

03-finished-image-web.jpg Finished image with noise reduction applied.

You may be thinking that you rarely have to deal with noise using your Nikon D800. Yes, that's true. But many of life's moments happen when the D800 is back on the shelf at home. The image I'm using here was captured as a Jpeg with a compact camera that was in my pocket while I was driving on an errand. I had never expected to engage in serious landscape photography.

Yet, there was the shot, and I was going to use what I had to capture it. I knew that in post I could probably clean it up. Between you and me, I like the picture. I decided to go for a painterly look, adding to the effect of the fog. But tomorrow I may feel differently, and possibly go back and do something else. The joy of non-destructive editing.

crane-creek-fog.jpg

I'm using Luminar for this type of work now because it can handle everything I need with just one editing extension or Lightroom plug-in. And I've tested it with Capture One Pro too, seeing great results.

I have a beta copy, but you can pre-order your copy now for a discounted price plus bonus items. It's a great help for all types of images, especially those you did not plan to take.

Master Photos for macOS

(It's More Powerful than You Think)

For hands-on tutorials, be sure to take a look at Photos for OS X Essential Training on lynda.com. I cover everything you need to know to get the most from this surprisingly powerful image management application.

Want to Comment on this Post?

You can share your thoughts at the TDS Facebook page, where I'll post this story for discussion.

Luminar Limited Time Pre-Order Offer

I've been testing a pre-release version of Luminar, both as a standalone app and as an Editing Extension for Photos for macOS. And after improving countless images, I can tell you that I really like this software. I've already integrated it into my photography workflow.

luminar-preorder.png

And now you can secure a copy for yourself. If you pre-order before Nov. 17th, you'll receive Luminar at a discounted price, plus two bonuses, all for only $49 total (existing Macphun customers) or for $59 (new customers). The package and bonuses include:

  • Save over 70 percent on the bundle
  • Full version of Luminar for Mac - the new supercharged all-in-one photo editor
  • Multiple license valid for 5 Macs
  • Build a Profitable Photo Business E-book
  • Premium WildlifePhoto.com membership
  • Video training by Matt Granger

You will get all the bonuses in the email right after you place the order. You will get Luminar software on November 17th, when it becomes available.

What I like most about this software is how it makes advanced editing easy (and fun). If you've shied away from layers and masking because they were difficult and complicated, Luminar will change your mind about these tools. Plus its built-in presets, adjustment sliders, and localized editing brushes are not only understandable, but enjoyable. And all of these capabilities work as an Editing Extension for Photos for macOS, and as a plugin for Lightroom and Aperture (yes, Aperture too).

Here are a few of Luminar's highlight features:

  • Adaptive User Interface - you can shape it to your tastes
  • Multiple Modes: From basic to advanced
  • One-click switch between modes
  • Change modes anytime
  • All-in-one photo editing tool set
  • Includes essential editing tools for different photography styles
  • Live editing, live processing, live previews
  • Non-destructive editing
  • Works as a standalone app, plug-in, and editing extension
  • RAW converter and processor
  • History Panel

Deep Dive Into Luminar Training Video

If you want to accelerate your mastery of Luminar, I've produced a 38-minute training video that shows you how to tap the power of the application's sophisticated tools. If you've never felt comfortable with layers and masking, all of that will change. Look for Deep Dive Into Luminar on the checkout page. It's available for $19.

Master Photos for macOS

(It's More Powerful than You Think)

And for an overview of all of the great features in Photos, my Photos for OS X Essential Training will get you up and running quickly. I cover everything you need to know to get the most from this surprisingly powerful image management application.

Want to Comment on this Post?

You can share your thoughts at the TDS Facebook page, where I'll post this story for discussion.

After a week in all types of weather, I can finally share some of my images from Iceland captured with the Olympus OM-D E-M1 Mark II. Since I don't have a RAW converter yet, these images are Jpegs recorded in RAW+Jpeg mode.

The Northern Lights, Iceland I used the Time Comp feature with the 12-100mm f/4 lens for this 39 second exposure. All images by Derrick Story.

The Southern Coast, Iceland Even though I captured this stormy image of the Southern Coast in RAW, near Vik, I used the in-camera RAW converter to apply an Art Filter.

Expansion Cracks, Iceland I loved shooting at the wide end of the Olympus 12-100mm f/4 PRO zoom.

Woman and Waterfall, Iceland With incredible 6.5 stops of image stabilization, I could record this shot, handheld, at 1/2 second exposure.

Geyser Eruption, Iceland The new Pro Capture mode records a few seconds before you push the shutter so you can capture events, such as this geyser, at peak.

Olympus released the price today for the OM-D E-M1 Mark II at $1,999.99. It should start shipping in early December.

PA270147-Iceland.jpg

Flickr Tips and Techniques

If you want to master Flickr on your mobile device, check out Flickr Mobile: Photo Sharing Anywhere. Desktop users might be interested in Sharing Photos with Flickr. Of course the platforms work well together too, and I discuss how you can integrate all of your devices to create a seamless photography workflow.

Want to Comment on this Post?

You can share your thoughts at the TDS Facebook page, where I'll post this story for discussion.

This is The Digital Story Podcast #556, November 1, 2016. Today's theme is "The OM-D E-M1 Mark II." I'm Derrick Story.

Opening Monologue

At first I was wondering, "Why were we in Iceland to test the new Olympus OM-D E-M1 Mark II?" After my first hour in the field, I had the answer: We had already shot in rain, cold, and sleet. Then we stood behind waterfalls, worked atop mountains to capture the Northern Lights in below-freezing temperatures, and had only two batteries to last us during the day's agenda. That's why we were in Iceland, and I'm going to tell you about how this camera survived in today's show.

The OM-D E-M1 Mark II

I just spent a week in Iceland testing the incredible E-M1 Mark II. Before I get into my hands on experience, let's review the highlight features.

PA285054-E-M1-MarkII.jpg

  • 20 Megapixel Live MOS sensor
  • 15fps sequential shooting (mechanical)
  • Cinema 4K video capture
  • 121-Point Dual FAST AF - Contrast & Phase Detection AF, all 121 points are cross sensors
  • Highly weather resistant body
  • 1/8000th second top shutter speed
  • Fully articulated 3" touch monitor
  • PRO Capture Lag-Free Electronic Shutter Mode
  • Dual SD card slots
  • Larger, more powerful battery
  • Still highly nimble, weighing in at 498 grams

As for the shooting experience, I highly recommend the new 12-100mm f/4 PRO lens. What a combination! I go into greater detail during the first segment of today's show.

In the News

Yongnuo Releases Budget 100mm f/2 Lens for Canon, Costs Just $170 (via Petapixel)

After tasting some success selling their budget 50mm f/1.8 and 35mm f/2 lenses, Yongnuo is adding another piece of glass to its ultra-affordable arsenal. Earlier today, they announced the arrival of their YN 100mm f/2 lens, and it'll only cost you $170.

The lens is made up of 8 lens elements in 6 groups, 58mm filter size, a 9-blade aperture, and looks pretty much exactly like Canon's EF 100mm f/2 USM.

Where it differs greatly is the price point. The Canon 100 currently costs $500, but you can already find the YN 100mm f/2 on AliExpress for just $170 US. Until it shows up in US stores we can't confirm that price will hold, but if it does, that'll be yet another dirt cheap Canon (and, in a few months, Nikon) alternative from Yongnuo.

Updates and Such

Big thanks to all of our Patreon members! I was able to pay for the podcast server and the backup system from last month's pledges. Your contributions are making a positive impact.

I'll be announcing the 2017 TDS Workshop season next week. And I have to tell you, this is our most exciting lineup to date. Keep eye peeled!

B&H and Amazon tiles on www.thedigitalstory. If you click on them first, you're helping to support this podcast. And speaking of supporting this show, and big thanks to our Patreon Inner Circle members.

And finally, be sure to visit our friends at Red River Paper for all of your inkjet supply needs.

See you next week!

More Ways to Participate

Want to share photos and talk with other members in our virtual camera club? Check out our Flickr Public Group. And from those images, I choose the TDS Member Photo of the Day.

Podcast Sponsors

Red River Paper - Keep up with the world of inkjet printing, and win free paper, by liking Red River Paper on Facebook.

MacPaw Creators of CleanMyMac 3 and other great software for Apple computers. Visit www.macpaw.com today.

Hedge for Mac - The fast solution for moving photos and videos from memory cards to drives, or drives to drives for that matter. Learn more at Hedge for Mac.

The Nimbleosity Report

Do you want to keep up with the best content from The Digital Story and The Nimble Photographer? Sign up for The Nimbleosity Report, and receive highlights twice-a-month in a single page newsletter. Be a part of our community!

Want to Comment on this Post?

You can share your thoughts at the TDS Facebook page, where I'll post this story for discussion.

I forgot to adjust one of my cameras to the proper time here in Iceland. And those images were driving me crazy in my Capture One catalog because they were out of order. Unfortunately, I discovered that there was no easy way to fix this problem within Capture One.

PA270026-TG-4 web2.jpg The original time stamp for this shot of Skogafoss Falls, Iceland was 7 hours off. I needed to fix that. Olympus TG-4 in Program mode. Image by Derrick Story.

After a great deal of hunting, I discovered that I must leave the application for my fix. So, I turned to Photos for macOS, which does have a batch time stamp fix tool. The basic task went like this.

  • Export images out of Capture One Pro.
  • Delete the existing shots from the Capture One Catalog.
  • Create a new library in Photos for macOS.
  • Import pictures into Photos.
  • Use the Adjust Date and Time tool in Photos to fix the time stamps.
  • Export the images out of Photos and back into Capture One Pro.

I was very careful along the way and backed everything up, just in case something went wrong. But I have to say that the entire process was a real hassle. In the future, I'm going to be more diligent about checking the time stamps on all of my cameras. I certainly don't want to spend time on this again.

More Capture One Pro Tips and Techniques

Improve your skills by watching Capture One Pro Essential Training now available on lynda.com. More than 5 hours of tips, tricks, and techniques. Plus many free movies using advanced techniques.

Master Photos for OS X

(It's More Powerful than You Think)

For hands-on tutorials, be sure to take a look at Photos for OS X Essential Training on lynda.com. I cover everything you need to know to get the most from this surprisingly powerful image management application.

You can share your thoughts at the TDS Facebook page, where I'll post this story for discussion.
The Olympus E-M1 Mark II in Iceland

As we explored the waterfalls and geysers in Iceland's famous Golden Circle, we faced rain, wind, and cold temperatures. And not once during the entire day did I worry about my camera.

PA260080.jpg Olympus OM-D E-M1 with the new Olympus 12-100mm f/4 Pro lens. Photo by Derrick Story.

The Olympus OM-D E-M1 with the new Olympus 12-100mm f/4 Pro lens is an amazing all-weather resistant duo that captures stunning images. (We can't share those quite yet, but stay tuned.) The most difficult part of the day was keeping the front element free of droplets while shooting. Other than that, I would occasionally wipe down the camera with a bandana in-between scenes.

The E-M1 Mark II has all the features that you would expect, building upward from the excellent M-1. But Olympus has added many new touches too. The battery is beefier, there's a pro grip accessory, a new pro flash will be available, and the focus and burst rates can compete with the best of DSLRs.

As for the 12-100mm lens... that is all I shot with the entire day. One lens, every situation. The focusing is fast and sure, the range is terrific, and with its built-in image stabilization (coupled with the sensor-based IS in the camera), I was able to capture soft, running water shots without a tripod (6.5 stops of stabilization!)

The E-M1 Mark II, 12-100mm zoom, 25mm f/1.2 prime, and my accessories all fit easily in the svelte Think Tank Mirrorless Mover 25i. Which is amazing when you think about it... an entire pro kit in a challenging environment that weighs just a few pounds.

I'll be reporting more on the OM-D E-M1 Mark II, and publishing pictures once the embargo lifts. But after day 1 of putting it through its paces, I can tell you this is one heck of a pro kit.

Want to Comment on this Post?

You can share your thoughts at the TDS Facebook page, where I'll post this story for discussion.
think-tank-mirrorless-mover.jpg

After nourishing myself with one of those famous Icelandic hot dogs, I spent a couple hours photographing the colorful activity on the chilly, damp streets of Reykjavik using the Think Tank Mirrorless Mover 25i to protect my weather resistant Olympus OM-D E-M5 Mark II with dust and splash proof Olympus ED 12-50mm zoom.

The quality of construction in this bag is top notch, as you would expect from Think Tank. The key to the design is the quick access top flap that uses a magnetic closure system for quick access while shooting, but has the option of zippered security when the weather turns bad.

mirrorless-mover-side.jpg

This system is highly efficient. I could leave my OM-D protected in the bag while exploring the streets of Reykjavik, then grab it quickly to capture an action shot when presented with the opportunity. The trick is to leave the camera on and ready to shoot.

Inside the bag I stashed the Olympus OM-D E-M5 Mark II with dust and splash proof Olympus ED 12-50mm zoom, an Olympus 60mm f/2.8 macro (also dust and splash proof), and the Olympus Tough TG-4. There was plenty of room for all of these components, plus the accessories I needed for the day. Yet, the bag was light and positioned discreetly behind my arm, wearing it messenger style.

running-Reykjavik.jpg "Running Late" - Olympus OM-D E-M5 Mark II with 12-50mm lens, ISO 400, f/5.6 at 1/60th. Photo by Derrick Story..

Other niceties include a dedicated tablet pocket that holds my iPad mini, smartphone pocket, twin SD card holders, high quality metal hardware, top handle, back belt loop, fitted rain cover (if the weather gets really bad), and stretchable side pouches on both ends, outside of the bag.

Natural-heat-Reykjavik.jpg "Natural Heat" - You can warm yourself via the steam pipes tapping the water beneath the ground. Photo by Derrick Story.

The Mirrorless Mover 25i fits nicely in my suitcase for travel. I filled it with socks to stay efficient. When I was ready to shoot, I emptied the socks and added the gear I needed for the day. It is a great bag for the nimble photographer on the go.


Nimble Photographer Logo

The Think Tank Mirrorless Mover 25i has a high Nimbleosity Rating. What does that mean? You can learn about Nimbleosity and more by visiting TheNimblePhotographer.com.

This is The Digital Story Podcast #555, October 25, 2016. Today's theme is " Bridgeport." I'm Derrick Story.

Opening Monologue

I'm recording this show on a crisp Sunday morning in the Eastern Sierra. We're in Day 3 of our TDS Fall Photography Workshop, and while the participants are working on their current assignments, I'm slipping off to say hello to you. Here's what's been going on.

cain-house-bridgeport.jpg

Top 5 Tripods for 2016

Top 5 Tripods for 2016 via PhotographyTalk

  • Sirui T2205X - If you want a lightweight tripod that's compact, yet has a maximum height of nearly 5 feet, the Sirui T-2205X is the tripod for you. It weighs just 2.6 pounds, meaning you can easily carry it on long journeys without getting fatigued. Folded down, the tripod is a mere 14.6 inches long, again, making it a great choice for photographers that need a full-size tripod but don't want to deal with carrying something that's heavy or cumbersome.
  • Handlepod - Handlepod offers sturdy support in a highly compact package and gives you the versatility of utilizing it in a number of ways. Hold it in your hand for steadier low-light or long exposure shots. Brace it against a support like a wall or a post for instant tripod-like stability. Use the Handlepod's built-in elastic cord to lash it to a steady object like a tree or even the side mirror of your car. That's versatility that no tripod can match!
  • Manfrotto 190go! - Being able to take shots close to the ground is not something that all tripods offer, but the Manfrotto 190go! certainly does. The center column can be positioned at a 90-degree angle to the ground, giving you the ability to take shots at a height of just 2.75 inches. As if that's not attractive enough, the 190go! is made of aluminum for strong, sturdy support, but doesn't weigh a ton either - just 3.7 pounds.
  • 3 Legged Thing Equinox Winston - With a maximum height of 76.9 inches, the Equinox Winston tripod from 3 Legged Thing will give you the height you need for virtually any shot. The Equinox Winston doesn't neglect the need to go low either, as it can get down to 10.6 inches above the ground for low perspective shots. Another advantage this tripod has over others is that it can support over 88 pounds.
  • Velbon Ultra 555A - This small, aluminum tripod from Velbon has five leg sections for an extended height of just over 60.6 inches, but folds down to a compact 14.7 inches when not in use. Weighing in a 3.25 pounds, it's relatively lightweight as well. It's telescoping legs have a twist to lock feature, ensuring that the legs don't become disengaged, causing the tripod to fall. The legs can be set at three different angles, giving you leeway to shoot from different perspectives. It even allows for shooting just 5 inches off the ground for those must-have shots with lots of foreground details.

Follow Us on Apple News for iOS Devices

I'm happy to announce that The Digital Story, The Nimble Photographer, and theAnalogstory are all available on the Apple News App for iOS devices. Just click on the following links on your iPhone or iPad, then save us to your Favorites.

Updates and Such

Big thanks to all of our Patreon members! I was able to pay for the podcast server and the backup system from last month's pledges. Your contributions are making a positive impact.

I'll be announcing the 2017 TDS Workshop season by the end of October. And I have to tell you, this is our most exciting lineup to date. Keep eye peeled!

B&H and Amazon tiles on www.thedigitalstory. If you click on them first, you're helping to support this podcast. And speaking of supporting this show, and big thanks to our Patreon Inner Circle members.

And finally, be sure to visit our friends at Red River Paper for all of your inkjet supply needs.

See you next week!

More Ways to Participate

Want to share photos and talk with other members in our virtual camera club? Check out our Flickr Public Group. And from those images, I choose the TDS Member Photo of the Day.

Podcast Sponsors

Red River Paper - Keep up with the world of inkjet printing, and win free paper, by liking Red River Paper on Facebook.

MacPaw Creators of CleanMyMac 3 and other great software for Apple computers. Visit www.macpaw.com today.

Hedge for Mac - The fast solution for moving photos and videos from memory cards to drives, or drives to drives for that matter. Learn more at Hedge for Mac.

The Nimbleosity Report

Do you want to keep up with the best content from The Digital Story and The Nimble Photographer? Sign up for The Nimbleosity Report, and receive highlights twice-a-month in a single page newsletter. Be a part of our community!

Want to Comment on this Post?

You can share your thoughts at the TDS Facebook page, where I'll post this story for discussion.