Recently in Photography

  Page 62 of 384 in Photography  

It's like a flash drive on steroids. The SanDisk Extreme 500GB Portable SSD (on sale for $109) is fast, sleek, and super nimble.

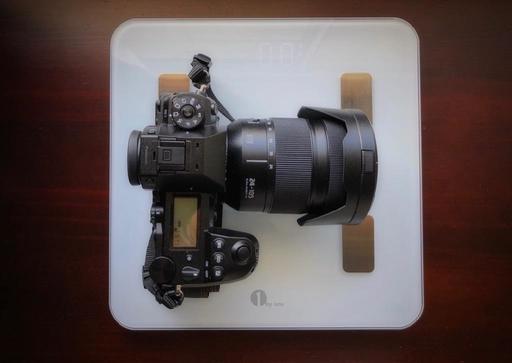
sandisk-scale.jpg The SanDisk 500 GB SSD next to my Apple AirPods.

When you look at a picture of the device online, you might not realize that it weighs just 39 grams and is less than 2" wide. It's small. Yet, the SanDisk SSD has very impressive specs.

  • 500GB Solid State Drive.
  • High-speed transfers with up to 550MB/s read speeds.
  • Water Resistance Rating: IP55 for water and dust resistance.
  • Dimensions: 0.348 x 1.951 x 3.787 in. (8.850 x 49.550 x 96.200 mm). Weight: 0.086 lbs (38.9g).
  • USB Type-C to Type-C cable; Type-C to Type-A adapter included.

I loaded a 65 GB Capture One Pro library on to the portable SSD and took it for a spin with my RAW files. Once it was connected to my MacBook Pro via the USB-A adapter, I applied a variety of edits, performed searches, filtered by star rating, and exported sampled-down jpegs. The SanDisk did not even blink.

sandisk-kit.jpg Kit includes USB-C cable and a USB-A adapter if you need it.

The SanDisk Extreme 500GB Portable SSD is currently on sale for $109 (normally $169) with free 2-day shipping for Amazon Prime members. I think it's worth every penny.

You can share your thoughts at the TDS Facebook page, where I'll post this story for discussion.

This is The Digital Story Podcast #659, Oct. 30, 2018. Today's theme is "How to Avoid Clogged Nozzles and Other Printing Woes" I'm Derrick Story.

Opening Monologue

If it wasn't for printers, making prints would be a lot of fun. Yes, there's nothing worse than finally getting in the mood to print a beautiful 13" x 19" print, only to discover that you have a clogged nozzle or some other malady. The good news is, that almost every woe that plagues us is preventable. And I have some excellent tips from printing experts to ensure output happiness in your future.

How to Avoid Clogged Nozzles and Other Printing Woes

Among the many visits that I enjoyed at PhotoPlus Expo last week, one of the best was with the printing gurus at the Epson booth. I had a laundry list of questions from listeners that I wanted advice about. And they were more than ready to respond to my every query.

Epson-1024.jpg

What I came away with were five tips that will help ensure a productive, non-frustrating printing experience, even if you only print every couple months. So without further ado, here they are.

  • Use Your Inkjet as an Occasional Document Printer - Printers like to print. But if we save our fancy 13" photo printer for photography only, it might not get enough use to stay in top shape. They work great for documents as well. Fire it up once a week and print a few sheets.
  • Cover Your Printer When Not in Use - Dust is your greatest enemy. Not only can it affect your prints, but it is the main culprit for clogged nozzles. It's the dust that commingles with residue ink that actually causes the problem.
  • Turn Off Your Printer When Not in Use - Many folks leave their printer on when not in use because they think it dumps a bunch of ink each time it starts up. Actually, that's not true with modern Epson printers. All that chugging and churning is really just a comprehensive system check. You can verify this by weighting your cartridges before and after start up.
  • Don't Change Cartridges When Their Warning Light Comes On - There's usually 10 percent or more of ink remaining when the warning lights illuminates. Don't change then. Use the light as a reminder to order a replacement cartridge when the previous one actually runs out of ink.
  • Check Out Informative Video Available Online - Great videos can be found at the Epson Print Academy that will help you stay on top of your printing game.

HoneyBook Makes Your Business as Good as Your Art

I was sitting in a client meeting today, and one of the dominate topics was how we could get ahead of these projects, and stay more organized along the way.

As we were talking about this, I was thinking about HoneyBook and how this service is designed to do exactly that. From scheduling with its integrated calendar (that also syncs with Google Calendar), to staying on track with its task list and project management tools. And when it's time to invoice, all the bookkeeping is integrated as well.

If you're grappling with these same sort of challenges in your freelance or startup business, I encourage you to explore Honeybook. It won't cost you a thing to learn what it can do for you. But it can save you hundreds, if not thousands of dollars up the road.

"Honeybook is a purpose-built business management platform for creative small businesses. They help photographers, designers, event professionals, and other solopreneurs save hundreds, if not thousands of hours a year by adding time-saving automation into their business. HoneyBook makes it easy to streamline the client process, so you never miss a thing!"

And that's why, for a limited time, TDS listeners can get 50 percent off the first year of Honeybook with promo code THEDIGITALSTORY. Honeybook membership includes unlimited access to ALL features, at one low monthly price. So go to HONEYBOOK.COM today, and use promo code THEDIGITALSTORY to get started. Again, that's HoneyBook.com, promo code THEDIGITALSTORY.

Tonality Mega B&W Pack Free to Luminar Users

One of the reasons why I like Tonality so much for B&W work is that it has these fantastic presets that make it easy to view and convert my images to a variety of styles. Luminar 2018 ($59) users can now enjoy those same benefits by downloading the Tonality Mega B&W Pack... for free.

When they say "mega," they mean it. There are collections of Tonality presets in different categories, film textures, workspaces, and more. They come in zipped files that you unzip, then use the File > Add Custom Presets Pack command in Luminar to add them to your work environment. They will be available to you under Categories when you have Presets enabled.

If you love B&W photography, and are using Luminar 2018 as a plug-in for Lightroom, Photoshop, or Photos for macOS (not to mention as a powerful standalone app), then you will definitely want to download this free mega presets pack.

Updates and Such

Inner Circle Members: Starting this month - Photo Critique. Check out the post on Patreon. Send your images to me with the subject line, "Photo Critique." More details on our Patreon page.

B&H and Amazon tiles on www.thedigitalstory. If you click on them first, you're helping to support this podcast. And speaking of supporting this show, and big thanks to our Patreon Inner Circle members:

And finally, be sure to visit our friends at Red River Paper for all of your inkjet supply needs.

See you next week!

More Ways to Participate

Want to share photos and talk with other members in our virtual camera club? Check out our Flickr Public Group. And from those images, I choose the TDS Member Photo of the Day.

Podcast Sponsors

Red River Paper - Keep up with the world of inkjet printing, and win free paper, by liking Red River Paper on Facebook.

HoneyBook - What small biz owner wants to spend their time on paperwork, endless emails, and dealing with payment collection? That's why there's HoneyBook. Learn more at HoneyBook.com. And save 50 percent your first year by using coupon code: THEDIGITALSTORY

The Nimbleosity Report

Do you want to keep up with the best content from The Digital Story and The Nimble Photographer? Sign up for The Nimbleosity Report, and receive highlights twice-a-month in a single page newsletter. Be a part of our community!

Want to Comment on this Post?

You can share your thoughts at the TDS Facebook page, where I'll post this story for discussion.
One of the reasons why I like Tonality so much for B&W work is that it has these fantastic presets that make it easy to view and convert my images to a variety of styles. Luminar 2018 ($59) users can now enjoy those same benefits by downloading the Tonality Mega B&W Pack... for free.

Tonality-Street-Pack.jpg

When they say "mega," they mean it. There are collections of Tonality presets in different categories, film textures, workspaces, and more. They come in zipped files that you unzip, then use the File > Add Custom Presets Pack command in Luminar to add them to your work environment. They will be available to you under Categories when you have Presets enabled.

If you love B&W photography, and are using Luminar 2018 as a plug-in for Lightroom, Photoshop, or Photos for macOS (not to mention as a powerful standalone app), then you will definitely want to download this free mega presets pack.

Have a blast with it!

You can share your thoughts at the TDS Facebook page, where I'll post this story for discussion.

Making an Impression in New York

Izzy Derrick and Yossi BW.jpeg

Many of the Skylum team members arrived in New York the day before PhotoPlus Expo opened its doors to the public. This gave us a chance to prepare for the event, and to meet with business contacts who are often friends as well.

One of those conversations, at Mr. Broadway in Midtown, led to some interesting thoughts that I want to share with you. Here's how it began.

Our server had just covered the table with plates of short rib tacos, chicken wings, and a pastrami reuben pizzette when my friend Izzy turned to me and asked, "So what do you think Skylum hopes to accomplish at the show?"

I had been watching the restaurant fill up, noticing that there were still a few open tables. But not for long. The lunch crowd was pouring in. I turned back to Izzy.

"I think we want people to know that Luminar and Aurora HDR are for real. These apps are innovative, powerful, and really fun," I said. "To tell you the truth, I love this software."

I reached for a short rib taco. Izzy was working on a bowl of chicken soup with a huge matzah ball floating in the middle of it.

"So you use it for your stuff?"

"I do. I test a lot of apps for my reviews, but at the end of the day when I'm editing just for me, I use Luminar."

Izzy's questions during lunch got me thinking about how others on our team might answer that question. How would Alex or Scott respond if they were there with us at Mr. Broadway? So after lunch, I decided to ask them and find out.

I started with Scott Bourne, President of Skylum Software. Scott is the one who brought me into the company, is a professional photographer, and he shares my passion for Luminar. Scott said:

"I hope that PPE attendees get a good sense of just how powerful our software is, and that they see that software doesn't have to be expensive or hard to use to be useful. I also want attendees to see that there are always alternative ways to accomplish their goals, and that Skylum is one such alternative."

One of the key points that Scott made is that software doesn't have to be hard to be powerful. I think that's so true for both Luminar and Aurora. Let the program do the heavy lifting; you focus on the creativity.

Alex Tsepko, Skylum CEO, made a great observation when I asked him this question. He pointed to Skylum's original approach to software design, which is in the company's DNA. They way he put was:

"PhotoPlus allows photographers to personally interact with Skylum team. As a result, we all have the opportunity to get to know one other even better."

"They will also experience the latest and the best releases of Aurora HDR, Luminar, and Photolemur. I hope they see that there's actually a software company that doesn't copy existing features from other tools, but rather, brings innovation and new approaches to photo editing."

Mr-Broadway-web.jpg Mr. Broadway is a fantastic Kosher bar and grill located on Broadway at 38th St. (Above) Yossi and Izzy with me in the middle. They both work for B&H Photo and are good business partners to me and to Skylum Software. Photos by Derrick Story.

After talking to Alex and Scott, I wish I were back at Mr. Broadway with Izzy and Yossi. There's so much more to say about innovation and ease of use.

But the plates have been cleared and we're all back to work. Fortunately, I'll be in the Skylum booth on Friday and Saturday at the show, and I can talk more about this with you.

Hope to see you there.

You can share your thoughts at the TDS Facebook page, where I'll post this story for discussion.

I have a shoebox in the closet that contains family snapshots from over the years. They came to me in a variety of ways. Some I took myself. Others were included in letters from my Mom. And I even have original prints that my Dad discovered doing his family archiving project. All of these valuable, important pictures were lying dormant until recently when I got my hands on a Epson FastFoto Scanner. Now they are digitized and cataloged in my photo management software.

epson-fastfoto-1024.jpg A wonderful snapshot of my Mom and late Dad preserved with the Epson FastFoto. Images by Derrick Story.

The workflow is easy. Spend about 5 minutes setting up the scanner, download the latest version of the software from the Epson site, choose your snapshots, and start scanning. I digitized stacks of 10 pictures at a time, grouping images of like kind together. Photos of me in younger days, my mom, other family members, etc. all were grouped in to their own stacks.

The stacks were placed facedown in the loading tray with the scanner connected to my Mac and the software running. There are some basic settings in the software, such as resolution and naming options. One of my favorite features was being able to have the scans go directly into my Photos for macOS library.

FastFoto-1.jpg

FastFoto-2.jpg

Then, just press the blue button on the scanner, and the pictures fly through the device where they are digitized and processed. I selected the auto enhance feature for my pictures, keeping both the edited version and the original. Then, I just selected the one that I liked best. Most of the time, that was the enhanced version. I could then fine-tune the images in Photos.

Ron-Lynn-Story_1992.jpg Ron and Lynn Story (my parents) circa 1992. Scanned with Epson FastFoto.

Derrick-Story_1995.jpg Derrick Story working in the Marin Headlands, 1995. Scanned with Epson FastFoto.

I ran a variety of sizes through the device, including 4" x 6", 5" x 7", square prints, and Polaroids. Everything scanned wonderfully. The best scanning speeds were with the 4" x 6" prints that averaged 1 second apiece. The sheer ease of use with the scanner motivated me to finally tackle this project. The FastFoto is Ferrari compared to my flatbed scanner. There is simply no comparison between the two.

scanning-setup.jpg

The Epson FastFoto Scanner ($599) is a quality device and a blessing for those who have stacks and stacks of prints they would love to digitize. The software is compatible with both Mac and Windows platforms. And on the Mac side, I really like how it integrates smoothly with Photos for macOS. Highly recommended.

Note: Epson will be demoing the FastFoto scanner at PhotoPlus Expo New York on Oct. 25-27, 2018. If you're in town, you might want to visit the Epson booth for this, as well as their printers and other devices.

You can share your thoughts at the TDS Facebook page, where I'll post this story for discussion.

This is The Digital Story Podcast #658, Oct. 23, 2018. Today's theme is "How's Lightroom CC Coming Along?" I'm Derrick Story.

Opening Monologue

Adobe recently release Lightroom CC 2.0 for the desktop and mobile devices. This seems like a good time to check-in on the Creative Cloud version of the app. Is it truly useful yet? Can it replace the Classic version? What's the experience like? I'll take a closer look in today's TDS Photography Podcast.

How's Lightroom CC Coming Along?

Among other things, Adobe provides RAW decoding for my new Fujifilm XF10 in Lightroom CC. So this seemed like the perfect opportunity to immerse myself in this application for a few days. And that's exactly what I did.

Lightromm-CC.png

First of all, I should mention what's new in this 2.0 version of Lightroom CC.

  • People View - Find photos of specific people faster now that Lightroom CC uses Adobe Sensei technology to automatically sort your photos based on who's in them. When you upload and sync photos to the cloud, Lightroom CC detects, recognizes, and groups photos of the same person.
  • Migrate Apple Photos - You can now easily migrate your Apple Photos Library into Lightroom CC on your desktop. Your photos sync to the cloud so you can access, edit, organize, and share them on all your devices.
  • Easily share your photos to the web - In addition to sharing albums, you can now share any random selection of photos as a web gallery.
  • Improved search - Start typing in the search bar and Lightroom CC automatically offers suggestions to help you quickly find what you need. Search for cameras, locations, and other metadata with ease. Also, your enabled filters are kept neatly organized in the search box. You can even search for a filter using its name (try 'camera:').
  • Local color toning - You can now apply colors to specific areas of your photo with the Brush and Gradient tools. When using the Brush, Linear Gradient, or Radial Gradient tools in Lightroom CC, scroll down to the bottom of the adjustment sliders panel to turn on Color.
  • HEVC file support on macOS - Beginning with this release, Lightroom CC supports Apple's HEVC video format (High Efficiency Video Coding, also known as H.265) on macOS High Sierra (10.13) or later.
  • Support for New Cameras and Lenses - New models include Canon EOS R, Fujifilm X-T3, Nikon Z7 and Lumix LX100 II.

In terms of the usability, Lightroom CC is becoming a real pleasure to use. Here are some of my observations.

  • Basic adjustments work well.
  • I like the way presets are handled.
  • The brushing tools are quite serviceable.
  • Linear and Radial Gradients work well.
  • Seems odd that there are no shortcuts for copy and paste settings.
  • Creative Cloud syncing is excellent.

Overall, I give Lightroom CC V2.0 high marks. If you're coming to it from Lightroom Classic, that might be difficult. There are still many tools that are not available in the CC version. Two that I really miss are HDR merging and Pano stitching. But if you're coming from a mobile perspective, then LR CC should be a welcome upgrade to working on a mobile device.

HoneyBook Makes Your Business as Good as Your Art

I was sitting in a client meeting today, and one of the dominate topics was how we could get ahead of these projects, and stay more organized along the way.

As we were talking about this, I was thinking about HoneyBook and how this service is designed to do exactly that. From scheduling with its integrated calendar (that also syncs with Google Calendar), to staying on track with its task list and project management tools. And when it's time to invoice, all the bookkeeping is integrated as well.

If you're grappling with these same sort of challenges in your freelance or startup business, I encourage you to explore HoneyBook. It won't cost you a thing to learn what it can do for you. But it can save you hundreds, if not thousands of dollars up the road.

"Honeybook is a purpose-built business management platform for creative small businesses. They help photographers, designers, event professionals, and other solopreneurs save hundreds, if not thousands of hours a year by adding time-saving automation into their business. Honeybook makes it easy to streamline the client process, so you never miss a thing!"

And that's why, for a limited time, TDS listeners can get 50 percent off the first year of Honeybook with promo code THEDIGITALSTORY. Honeybook membership includes unlimited access to ALL features, at one low monthly price. So go to HONEYBOOK.COM today, and use promo code THEDIGITALSTORY to get started. Again, that's HoneyBook.com, promo code THEDIGITALSTORY.

Digitizing Family Memories with the Epson FastFoto Scanner

I have a shoebox in the closet that contains family snapshots from over the years. They came to me in a variety of ways. Some I took myself. Others were included in letters from my Mom. And I even have original prints that my Dad discovered doing his family archiving project. All of these valuable, important pictures were lying dormant until recently when I got my hands on a Epson FastFoto Scanner. Now they are digitized and cataloged in my photo management software.

I talk about this unique scanner in this segment of the show.

Updates and Such

Inner Circle Members: Starting this month - Photo Critique. Check out the post on Patreon. Send your images to me with the subject line, "Photo Critique." More details on our Patreon page.

B&H and Amazon tiles on www.thedigitalstory. If you click on them first, you're helping to support this podcast. And speaking of supporting this show, and big thanks to our Patreon Inner Circle members:

And finally, be sure to visit our friends at Red River Paper for all of your inkjet supply needs.

See you next week!

More Ways to Participate

Want to share photos and talk with other members in our virtual camera club? Check out our Flickr Public Group. And from those images, I choose the TDS Member Photo of the Day.

Podcast Sponsors

Red River Paper - Keep up with the world of inkjet printing, and win free paper, by liking Red River Paper on Facebook.

HoneyBook - What small biz owner wants to spend their time on paperwork, endless emails, and dealing with payment collection? That's why there's HoneyBook. Learn more at HoneyBook.com. And save 50 percent your first year by using coupon code: THEDIGITALSTORY

The Nimbleosity Report

Do you want to keep up with the best content from The Digital Story and The Nimble Photographer? Sign up for The Nimbleosity Report, and receive highlights twice-a-month in a single page newsletter. Be a part of our community!

Want to Comment on this Post?

You can share your thoughts at the TDS Facebook page, where I'll post this story for discussion.
Nimbleosity knows no bounds.

I've been reading and thinking about the 2-lens approach to urban travel photography. The idea is that, we don't need a catalog of glass with us when we are shooting with just one or two optics anyway. And thanks to the major improvements in digital zoom technology, if we need a little more reach, that 84mm zoom can become 168mm with just the press of a button.

pen-f-zoom.jpg

The basic approach goes something like this. Pack one fast prime lens and one versatile zoom. In my case, I'm bringing to New York the handsome Olympus PEN-F with the 14-42mm EZ zoom and the workhorse Panasonic Lumix G 20mm f/1.7.

Factoring in digital zoom if I need it, those two optics give me 28mms on the wide end, 168mm telephoto reach, and a maximum aperture of f/1.7. Not bad for a couple of pancake optics that fit in the front pocket of my pants.

You may have noticed in the article title that I wrote "2.5 lens concept." That's because I do have one addition to this dual optics approach: the Olympus Fisheye Body Cap 9mm f/8. After all, technically, it's a body cap, right?

The thing about urban photography, at least for me, is that I need width more than length. I rarely use telephotos for street shooting, but there are many situations when I want to get more in the frame. The 28mm wide end of the zoom covers most of those subjects. But 18mm can be a lifesaver when 28mms just isn't enough. So the "body cap" is coming with me.

And, as along as I am in a confessing mood, I'll also admit that I'm bringing the Fujifilm XF10 compact. It will be in my pocket when I'm not carrying my bag, such as during my business meeting at B&H or when I'm working in the Skylum booth at PhotoPlus.

So there you have it. My 2.5 lens kit + XF10 + iPhone X in New York City. I can't wait to start shooting.

The Apple Photos Book for Photographers, 2nd Edition

Updated for macOS High Sierra, the The Apple Photos Book for Photographers, 2nd Ed. provides you with the latest tips, techniques, and workflows for Apple's photo management and editing application. Get your copy today!

You can share your thoughts at the TDS Facebook page, where I'll post this story for discussion.
Many excellent headline features for photographers appeared in macOS Mojave, but a small one that's truly helpful is the debut of filenames with our thumbnails. They're helpful in many ways, including knowing which camera the image was captured with when shooting RAW.

display-filenames.jpg Both original filenames and edited titles are displayed here in Photos. Read on to learn how to control this.

Alternatively, you can have a title appear with your thumbnail instead of a filename. (This used to be your only choice.) Either approach is controlled by the "Add a Title" field in the Info box (Window > Info). Just make sure that you have titles turned on so that either of these bits of information shows up (View > Metadata > Titles).

If the Add a Title field is left blank, then Photos will display the filename when viewing thumbnails. On the other hand, if you do add a title, then that is displayed instead. You can see examples of both in the illustration above.

And for those situations where I want the filename to appear, but I do want some additional information in the metadata, I enter that in the Add a Description field, which has no effect on the metadata displayed with the thumbnail.

Like I said, this isn't a headline feature. But for those of us who use Photos regularly, we really appreciate (finally) having filenames appear with our images.

The Apple Photos Book for Photographers, 2nd Edition

Updated for macOS High Sierra, the The Apple Photos Book for Photographers, 2nd Ed. provides you with the latest tips, techniques, and workflows for Apple's photo management and editing application. Get your copy today!

You can share your thoughts at the TDS Facebook page, where I'll post this story for discussion.

This is The Digital Story Podcast #657, Oct. 16, 2018. Today's theme is, "Gearing Up for PhotoPlus Expo." I'm Derrick Story.

Opening Monologue

Much in the way that Photokina was an important European event for the photography community, I think PhotoPlus Expo will carry more weight than usual in the U.S. How will the manufacturers follow up all of those September announcements? On today's podcast, I discuss what I anticipate in New York, and how I'm preparing for it. I hope you enjoy the show.

Gearing Up for PhotoPlus Expo

The show floor opens on Oct. 25 in Javits Convention Center, NYC. Most of the heavy hitters are there, ready for their U.S. encore performance. I will be there as well, reporting first, then working in the Skylum booth on Friday and Saturday.

nyc-1024.jpg

As I prepared for my show reporting, I started with the Expo Hall booth layout. I think a lot can be deciphered from the floor plan.

For example, Canon, Nikon, and Sony have the largest booths, with Fujifilm right on their heels. The investment by Canon and Nikon make perfect sense, since they both have new full frame mirrorless cameras to show off. Sony, being the leader in this category, needs to be on the offensive as well to protect their position.

But Fujifilm's very large booth shows their confidence in the X-T3 26 MP APS-C mirrorless offering - as well they should. They have a more extensive library of native mirrorless lenses than either Canon or Nikon, and a proven track record for the X-T series of cameras.

At the next level, we have Olympus, Epson, Tamron, and Sigma. Tamron and Sigma have been very active lately, including Sigma joining the Leica/Panasonic partnership for full frame mirrorless. Epson needs a lot of space to display its output and printers. But for me, Olympus is the interesting member of the second tier. They don't have any new announcements, so they may be positioning Micro Four Thirds as the smart alternative for travel photographers.

In the third tier, we have Ricoh/Pentax, Skylum, Think Tank Photo, Zeiss Camera Lenses, and Panasonic North America. I didn't see Lowepro or Tamrac on the list, so Think Tank so have the bag sector sewed up. Ricoh may show off a prototype of the GR III, but doesn't have much else in the works at the moment. Skylum is preparing to release their long-awaited digital asset manager, so their footprint makes perfect sense.

What seems odd to me here is the tiny Panasonic booth. They made one of the biggest headline announcements at Photokina. It seems odd to not follow that up with the big guns in New York.

As for my preparation, I'm going with the Olympus PEN-F with one zoom and 3 primes. I'm also keeping the Fujifilm XF10 in my pocket at all times, whether I'm at work or not. I'll have my audio recorder with me, just in case I'm able to snag an interview or two. Everything is already packed in my Think Tank Retrospective 7 II shoulder bag.

I'll be sure to get plenty of pictures and as many tidbits as possible during my visit to New York. If you plan on attending, be sure to come by and say hello on Friday or Saturday while I'm working in the Skylum booth.

HoneyBook Makes Your Business as Good as Your Art

I was sitting in a client meeting today, and one of the dominate topics was how we could get ahead of these projects, and stay more organized along the way.

As we were talking about this, I was thinking about HoneyBook.com and how this service is designed to do exactly that. From scheduling with its integrated calendar (that also syncs with Google Calendar), to staying on track with its task list and project management tools. And when it's time to invoice, all the bookkeeping is integrated as well.

If you're grappling with these same sort of challenges in your freelance or startup business, I encourage you to explore HoneyBook.com. It won't cost you a thing to learn what it can do for you. But it can save you hundreds, if not thousands of dollars up the road.

"Honeybook is a purpose-built business management platform for creative small businesses. They help photographers, designers, event professionals, and other solopreneurs save hundreds, if not thousands of hours a year by adding time-saving automation into their business. Honeybook makes it easy to streamline the client process, so you never miss a thing!"

And that's why, for a limited time, TDS listeners can get 50 percent off the first year of HoneyBook.com with promo code THEDIGITALSTORY. Honeybook membership includes unlimited access to ALL features, at one low monthly price. So go to HONEYBOOK.COM today, and use promo code THEDIGITALSTORY to get started. Again, that's HoneyBook.com, promo code THEDIGITALSTORY.

A fully-featured Photoshop is finally coming to the iPad

As published on DP Review

Earlier this year, Adobe Chief Product Officer, Scott Belsky, acknowledged Adobe was working on a full version of Adobe Photoshop for iPad. Today, we were given a glimpse into the fruits of its labor, with Adobe previewing Photoshop CC on iPad on stage at Adobe MAX 2018 in Los Angeles.

To achieve this, Adobe had to create an updated version of its PSD file format it calls Cloud PSDs. In Adobe's own words, "when we ship Photoshop on the iPad, [Cloud PSDs] will also run and automatically show up on your desktop...Suddenly, you'll have this cloud-powered roundtrip experience akin to a Google Docs experience, where literally the source of truth of your Photoshop creation is in the cloud." Gone are the days of having to figure out how to export files in a compatible format and send them to various devices.

Adobe Photoshop CC on iPad won't arrive until 2019. In the meantime, you can sign up for a chance to be included on the beta version on Adobe's website.

iPhone XS Max Comes Out on Top in New Battery Test

Via iPhone Hacks

This test includes the iPhone XS Max, the Samsung Galaxy Note 9, Google's Pixel 3 XL (which just got rave reviews), and Sony's Xperia XZ3. It's worth noting here that Apple's iPhone XS Max actually has the smallest battery out of the bunch (iPhone XS Max: 3174mAh; Galaxy Note 9: 4000mAh; Pixel 3 XL: 3430mAh; Xperia XZ3: 3300mAh), and that screen resolutions between phones should be the same for a proper test. That's the case here with Mrwhosetheboss, which made sure to set the Galaxy Note 9's display to the resolution of 2960×1440, rather than the 1080p HD resolution it can be set at.

With the resolutions set and the phone's fully charged, Mrwhosetheboss went to work on the test. The iPhone XS Max came in at just over six hours, while the Galaxy Note 9 fell about 12 minutes shorter. In third place? Google's Pixel 3 XL, which lasted about five hours. And the Xperia XZ3 finished out the bottom, finishing up under four hours before dying.

Updates and Such

Inner Circle Members: Starting this month - Photo Critique. Check out the post on Patreon. Send your images to me with the subject line, "Photo Critique." More details on our Patreon page.

B&H and Amazon tiles on www.thedigitalstory. If you click on them first, you're helping to support this podcast. And speaking of supporting this show, and big thanks to our Patreon Inner Circle members:

And finally, be sure to visit our friends at Red River Paper for all of your inkjet supply needs.

See you next week!

More Ways to Participate

Want to share photos and talk with other members in our virtual camera club? Check out our Flickr Public Group. And from those images, I choose the TDS Member Photo of the Day.

Podcast Sponsors

Red River Paper - Keep up with the world of inkjet printing, and win free paper, by liking Red River Paper on Facebook.

HoneyBook - What small biz owner wants to spend their time on paperwork, endless emails, and dealing with payment collection? That's why there's HoneyBook. Learn more at HoneyBook.com. And save 50 percent your first year by using coupon code: THEDIGITALSTORY

The Nimbleosity Report

Do you want to keep up with the best content from The Digital Story and The Nimble Photographer? Sign up for The Nimbleosity Report, and receive highlights twice-a-month in a single page newsletter. Be a part of our community!

Want to Comment on this Post?

You can share your thoughts at the TDS Facebook page, where I'll post this story for discussion.

Often Overlooked In-Camera Effects

Mirrorless cameras have brought a lot of innovation to our craft. One of the areas that I often remind photographers about is in-camera effects. They are often overlooked because they exist outside our normal shooting routines. But they can be quite helpful.

camera-effects.jpg

On Olympus cameras, for example, we have Art Filters that range from dramatic landscapes to soft focus portraits. You can preview the effects on the camera's LCD or in the electronic viewfinder. Fujifilm cameras have their Advanced Filters as well as film simulations. Other brands have their own proprietary take on this as well.

When I'm leading workshops, I encourage participants to try one or two of these to expand knowledge of their own cameras, while at the same time adding more creativity to their images. I also cover this topic in my lynda.com/LinkedIn Learning title, Portrait Photography: High School Seniors. Here's a short movie that covers exactly what I'm talking about.

Built-in camera effects for portraiture from Portrait Photography: High School Seniors by Derrick Story

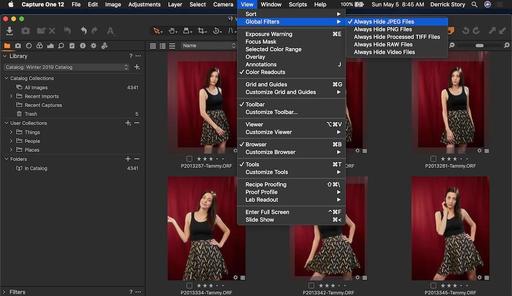
A few things to keep in mind include shooting in RAW+Jpeg so that the effect is applied to the Jpeg, yet you still have your RAW as an untouched safety net. And since you are now relying on those Jpegs, be sure their quality is set to maximum (Fine or Super Fine). And when you bring in those images to your photo management software, I recommend keeping the Jpegs and RAWs separate. I usually put the whole shoot in a project with albums for the different types of images inside.

You might be surprised at what you can create with in-camera effects. Sometimes it's a home run, other times it's a strikeout. But either way, I think it will energize your photography.

You can share your thoughts at the TDS Facebook page, where I'll post this story for discussion.