This week on The Digital Story: Lightroom 5 public beta is now available for download, Fujifilm X20 deluxe compact camera begins shipping, and the imminent release of iPad for Digital Photographers. All of this... and more!
Story #1 - Lightroom 5 public beta - Just a little over a year since the final release of Lightroom 4, Adobe has reloaded its image editing guns and fired off the first public beta of Lightroom 5. You now need Windows 7 or Mac OS X 10.7 to run Lightroom 5. Key features for testing include Smart Previews, Advanced Healing Brush, a Radial Gradient tool, and more. I take a closer look at the top three features in the first story of this week's show.
Radial Gradient tool - You can draw a circle or oval around an area in the photo, then apply effects to the area out side the selection. Typical uses would be exposure or color adjustments, but there are other sliders too.
Advanced Healing Brush - Great for cloning or healing odd shaped objects that you want to eliminate from your composition. This capacity is probably what has sent many Lightroom users to Photoshop in the past.
Smart Previews - Allows you to set up your Lightroom catalog to edit images, even when the originals are offline on another hard drive that isn't plugged in to your computer. Adobe pulls this off by using the lossy DNG format. Catalogs set up with Smart Previews can save a great deal of space, around 1/6 the size of a catalog with original RAW files connected. The edits you make in Smart Preview mode will be synced up with the originals when you reconnect the hard drive.
Story #2 - The Fujifilm X20 compact camera is now available.
Features include the 12MP 2/3" X-Trans CMOS II Sensor (RAW files can be processed in Lightroom 4.4), Fujinon 28-112mm f/2-2.8 zoom lens, amazing optical viewfinder that zooms and has a data overlay, a variety of intelligent features such as film simulation and pro focus, and looks great with its die-cast magnesium body construction and machined metal knobs. Currently sells for $599. I cover some of its pros and cons in the second segment of the show.
Story #3 - iPad for Digital Photographers will be released in just two weeks. The pre-order price is only $13.45. Not only do you get the book, but you'll gain access to a brand new, secure area on TDS called the Book Owners Lounge. I provide more details in the third story. There's a link for the book at the bottom of every TDS page.
Listen to the Podcast
You can also download the podcast here (32 minutes). Or better yet, subscribe to the podcast in iTunes. You can support this podcast by purchasing the TDS iPhone App for only $2.99 from the Apple App Store.
Monthly Photo Assignment
The April 2013 photo assignment is Architecture.
More Ways to Participate
Want to share photos and talk with other members in our virtual camera club? Check out our Flickr Public Group. And from those images, I choose the TDS Member Photo of the Day.
Podcast Sponsors
Red River Paper -- Keep up with the world of inkjet printing, and win free paper, by liking Red River Paper on Facebook.
Make Your Photos Sizzle with Color! -- SizzlPix is like High Definition TV for your photography. SizzlPix Spring Sale - 25% Discount! Offer good on orders placed by April 30. Again, "TDS" or "The Digital Story" in the comments space. Of course, they will honor the discount for all TDS listeners and readers, including those who've received SizzlPix samples.
Need a New Photo Bag? Check out the Lowepro Specialty Store on The Digital Story and use discount code LP20 to save 20% at check out.
Want to Comment on this Post?
You can share your thoughts at the TDS Facebook page, where I'll post this story for discussion.
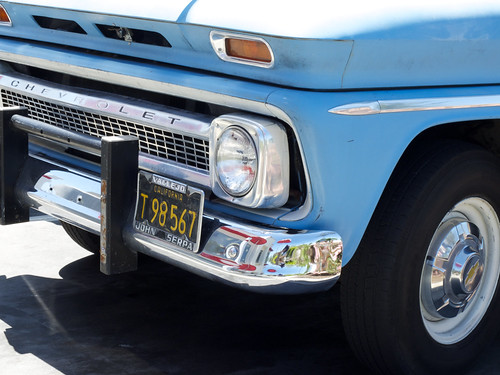
 Screenshot of unedited .RAF file in Aperture 3.4 with RAW Update 4.05
 A full resolution Jpeg export from a decoded RAF file in Aperture 3.4.
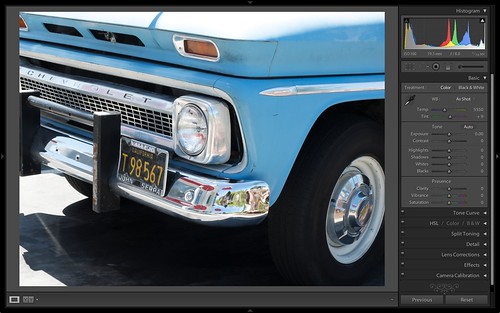 Screenshot of unedited .RAF file in Lightroom 4.4.
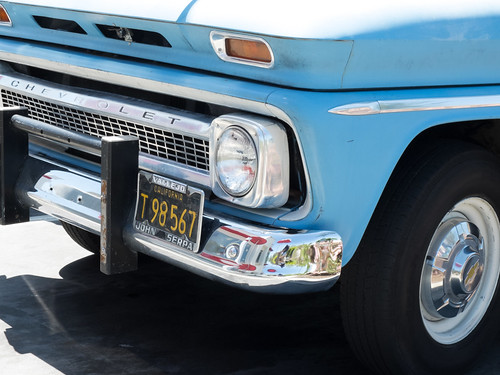 A full resolution Jpeg export from a decoded RAF file in Lightroom 4.4.