Recently in Photography

  Page 305 of 384 in Photography  

Editor's Note: Jim Garrett and I have exchanged emails about building a low cost photo workflow. I liked his thoughts and asked him if he would consider writing them up for publishing on The Digital Story. He agreed. So, here is his terrific article about building an efficient workflow. I think you're going to like what Jim has to say.

Diagraming Your Workflow

by Jim Garrett

After listening to I've Taken Great Pictures, Now What?, Podcast 176, I realized that I was using a lot of different software tools in my workflow, and I seemed to be jumping around a lot. I also realized that I was wasting time editing images that I had no intention of sharing -- just because I could. Although this improved my editing skills, I felt that if I could streamline the flow, it would mean spending less time on the computer and more behind the camera.

I am not a professional photographer. However, I am interested in making my pictures the best they can be. I do occasionally take family portraits for friends and family and have even taken pictures at wedding receptions for a nominal fee. I, like many enthusiasts, don't have the resources to purchase an all-in-one workflow solution like Lightroom or Aperture. I either use software that came with my camera, software that I got cheap or free with some piece of hardware, or freeware/shareware. This makes a workflow that moves from one program to another, since none of the cheap stuff does everything. For example, the software that came with my camera does a pretty good job processing my RAW images, but is slow and limited at image editing (removing red-eyes, cropping, repairing blemishes, etc.).

workflow_one.jpg

After listing to the podcast, I saw my workflow as a straight line, like this illustration.

However, when I really looked at how and what I shoot, I realized that the path I take is not at all straight or simple. My workflow depends on 3 factors. First, it depends on what I am shooting. Most of my pictures are just family events like the kids playing sports, camping trips, or get-togethers. The vast majority of these images are fine right out of the camera. However, sometimes I am taking a family portrait (myself, friends, or paying customers), or shots at a wedding reception that I may share or sell. These images I want to treat differently. My workflow also depends on the format I captured my images in, RAW or Jpeg. Since storage for me is limited, I don't want to keep every image I ever shoot in RAW format. The last factor that determines my workflow is the quality of the shot, my personal rating. Images I really like and want to share/sell/publish, I will also treat differently.

Once I realized that my workflow is not a simple straight path, I decided to make a workflow diagram (see the second diagram). I did this using Microsoft Visio, but you could do it with any word processor, or even a pencil and paper.

Here's what building the diagram did for me. (Click on image to enlarge it.)

1. It made me take a hard look at what I am doing and why. I discovered that there was some rhyme behind my reasoning, some reasons why I was skipping around and opening so many different software tools after each download.

2. As I focused on each step of the workflow, this naturally led me to analyze each piece of software and compare its strengths to the others. With these discrete steps in the process, I was able to compare the tools in a much more meaningful way. For example, I had 5 ways to download my images from my camera. I decided what was most important to me about downloading (location and folder names on my hard drive, speed, and skipping duplicates), then I tested each one to see what worked best for me. I did the same thing with each step in the process. When 2 tools work about the same, I went with the one that was the same as the previous or next step in the workflow. This saves time changing programs.

3. I found that following my "optimized" workflow helped me get organized and stop wasting time on images that I don't need to spend a lot of time on. This frees me up to use my limited time working on what matters most.

In my current workflow diagram, (the one I have posted on my computer) I have the task, the most important subtasks and the software tool that best accomplishes them. This helps me to not forget any step, remember which tool to use, and what the major tasks are in each step.

After you make your diagram and decide on the tools that work best, post it on your computer and follow it religiously. If it doesn't work for you, change it. If it does work, use it all the time. It will improve your efficiency, make your work more consistent, and make you a better photographer.

About the Author

Jim Garrett, husband and father of three, is also a photo enthusiast. Jim shoots with a Pentax DSLR. He's a research engineer for a major tire manufacturer. Other hobbies include hiking, camping and cycling.

Tips for Creative Wedding Shots

When you're not the primary photographer at an event, you have more freedom to experiment. I just read an article with good suggestions for adding creativity to your shoot, 7 Ways To Be More Creative At Your Next Wedding. I'll add one of my favorite tips too.

I like to get the bride and groom in a different setting nearby to change the look of the album. Sometimes I feel like the shots are all starting to look the same, so by finding a new context, I can jazz things up a bit. Once you have the couple isolated from the guests for a few minutes, encourage them to play. They're more likely to "let their hair down" if they don't have an audience staring at them.

Photo by Derrick Story, captured with a Canon 5D, ISO 400.


twitter.jpg Follow me on Twitter

-
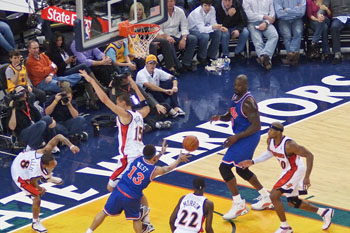

"Transport" challenged this month's contributing photographers to capture the world on the move. We have terrific images featured in this member gallery.

The October 2009 assignment is "Feet." Start working on your contribution now. Details can be found on the Member Participation page. You can submit photo assignment pictures up to 600 pixels in the widest direction.

Please follow the instructions carefully for labeling the subject line of the email for your submission. It's easy to lose these in the pile of mail if not labeled correctly. For example, the subject line for next month's assignment should be: "Photo Assignment: October 2009." Also, if you can, please don't strip out the metadata. And feel free to add any IPTC data you wish (These fields in particular: Caption, Credit, Copyright, Byline), I use that for the caption info.

Photo by David Bream. You can read more about how David captured this shot, plus see all of the other great images on the August 09 Gallery page.

Good luck with your October assignment, and congratulations to all of the fine contributors for September. It's a great collection of images.


twitter.jpg Follow me on Twitter

-

Now Available! The Digital Photography Companion. The official guide for The Digital Story Virtual Camera Club.

  • 25 handy and informative tables for quick reference.
  • Metadata listings for every photo in the book
  • Dedicated chapter on making printing easy.
  • Photo management software guide.
  • Many, many inside tips gleaned from years of experience.
  • Comprehensive (214 pages), yet fits easily in camera bag.

Technorati Tags: , ,

image_capture_icon.jpg

I've always been a big fan of the free application Image Capture, but with the release of Snow Leopard, new life has been breathed into this handy tool for photographers. In my latest Macworld article, Eight Amazing Image Capture Tricks, I show you how it can complement just about any workflow on the Mac.

What's interesting about the Macworld piece is that I had originally written it for Leopard. Even with the previous release of Mac OS X, I found Image Capture a noteworthy utility. But Snow Leopard brought about some major improvements.

  • You can control your WiFi connected scanners from any Snow Leopard Mac on your network. I've tested this with two multifunctional printer/scanners -- the HP C6380 and the older HP C8100. And it's not limited to rudimentary controls. Featured tasks include putting multiple photos on the flatbed and having them scanned into separate files, image adjustments, and even sharpening. Plus you can scan to a variety of formats. I use it all the time now for signed documents converted to PDFs.
  • I also like multiple device control for my various cameras and iPhone. I can set iPhoto to open for one device, and Aperture for another... or nothing at all. Very handy.
  • Another cool feature is network sharing of images on a device. So if I plug my iPhone into a computer downstairs, I can grab images off it from a Snow Leopard Mac upstairs.

If you haven't looked at Image Capture in a while, I encourage you to read the Macworld article and take it for a spin.


twitter.jpg Follow me on Twitter

-


The Lensbaby Composer ($270) is the latest in a line of special effects lenses that allow you to blur out areas of an image while maintaining relative sharpness in other parts. In this week's show, Derrick Story interviews Stephanie Scheetz who has been experimenting with the Lensbaby on an Olympus E-520 with live view functionality.

Listen to the Podcast

You can also download the podcast here (27 minutes). Or better yet, subscribe to the podcast in iTunes.

"Doll Arms" by Stephanie Scheetz. Captured with a Lensbaby Composer on an Olympus E-520 DSLR. Click on image to zoom.

Monthly Photo Assignment

Simple is the Sept. 2009 Photo Assignment. My original thought was the power that comes from a simple composition, with as few elements as possible. But you might find another twist on this month's theme. You can read more about how to submit on our Member Participation page. Deadline for entry is Sept. 30, 2009.

More Ways to Participate

Want to share photos and talk with other members in our virtual camera club? Check out our Flickr Public Group. It's a blast!


twitter.jpg Follow me on Twitter

-


Podcast Sponsors

SiteGrinder lets you take ownership of your websites. Effortlessly output pages right from Photoshop.

Red River Paper -- Try the $7.99 Sample Kit.

Add Magic to Your Slideshows -- FotoMagico presentations are so amazing that your audience will be asking how you did it.


Technorati Tags: , , , , ,

PhotoPlus Expo 2009: Are You Going?

One of my favorite US photography shows is right around the corner: PhotoPlus Expo 2009 in New York City, October 22-24. This event is a terrific blend of a vibrant expo hall and intelligent conference sessions. You can download an overview of the conference sessions in PDF format to see who is speaking on what. There are also more than 200 companies on the current exhibitor list, comprising a virtual who's who in the photography world.

I'll be hanging out in the expo hall too, working in the Lowepro booth (#818). I've signed on as their Photography Evangelist, and this will be my first event with them.

If you're attending the show, I'd like to say hi. You can find me by coming by the Lowepro booth, or arranging a meeting ahead of time. Leave a comment here if you're interested in a quick hello. I'll have a pocket full of TDS D-Ring keychains for all of our virtual camera club members. Just mention that you listen to the podcast to get one. I'll also be twittering my whereabouts while in NYC. You can follow me at twitter.com/Derrick_Story.

Hope to see you in New York on Oct 22!


twitter.jpg Follow me on Twitter

-


canon_7d.png

We're learning more about the Canon EOS 7D every day, including this hands-on report with a pre-production model by Luminous Landscape.

Camera characteristics that folks agree upon include its rugged build, solid feel, 19-point cross sensor autofocus system, 8 fps shooting speed, 24 fps HD video capture, 100 percent viewfinder, and a built-in wireless flash transmitter. All great stuff and wildly tempting for the travel photographer.

What we're still waiting for is a definitive ruling on the 7D's image quality. Michael Reichmann wasn't comfortable giving us a ruling in his Luminous Landscape article because he was working with a pre-production model. And more broadly speaking, we just don't have enough data from production models. So we'll just have to wait and see.

B&H, Amazon, and Adorama are all accepting orders, but as far as I know, no one is shipping units yet in the US. But as photographers start posting their opinions in real world use, I'll certainly keep you posted here.


twitter.jpg Follow me on Twitter

-


"Colorado Rainbow" - Grab Shot 186

"There's a lot to be said for being in the right place at the right time and having your camera with you," writes Mark Castleman." I saw this striking rainbow in the South Park of Colorado, about 10 miles east of Fairplay. I took it with my K10D and a Sigma 17-70mm lens at ISO 100, 1/350 at f/5.6. Yes, it really was that bright; I'm not that good with Photoshop."

Photo by Mark Castleman. Click on image to zoom to larger size.

If you have a candid you'd like to share, take a look at our Submissions page, then send us your Grab Shot. We'll try to get it published for you on The Digital Story.

And you can view more images from our virtual camera club in the Member Photo Gallery.


twitter.jpg Follow me on Twitter

-


Technorati Tags: , , ,

5d_markii_top.jpg

The Canon 5D Mark II is an excellent tool for creating instructional videos in high definition. We've been using this DSLR to record our Creative Output tutorials featuring Stephanie Scheetz. After publishing the latest episode, Shrink Plastic Jewelry, I thought you might enjoy a peek behind the scenes to see how we manage these filmmaking projects.

On average for a 5-minute movie, we spend a half day planning, another 4 hours shooting, then the better part of a day in post production and publishing. So we figure about 2 days work for me behind the camera and in front of the computer, and 1 day for Stephanie to prepare the project and to be the talent.

Parts List

Our goal is to keep the production process as simple as possible. My feeling is, the easier the movies are to make, the more we will produce. Here's what we use.

  • Stock Canon 5D Mark II with 24-105mm f/4 IS lens
  • Audio Technica lapel mic
  • iMovie '09 for cutting and adding transitions
  • Adobe SoundBooth for cleaning up audio
  • BoinxTV for adding lower thirds and production effects
  • QuickTime Pro for various mini-steps

If you're already dabbling with movie making, you've learned there are many different ways to accomplish the same goals. I'm showing you this method as a point of interest. Take from it what works for you, and adjust accordingly.

Recording with the 5D Mark II

Video capture has become much more manageable since Canon released the Firmware update that allows me to manually set shutter speed, aperture, and ISO. Previously, having to rely on auto exposure settings was a real problem for us. Because when Stephanie would hold up a bright object, the camera would be fooled by its luminosity and dim the overall exposure. Now I can lock-in the settings for the overall scene without worry about exposure shift during recording.

I typically shoot on a tripod or monopod with the Canon 24-105mm L IS zoom lens. If we take the camera off the tripod for handheld shots, as we did for the kitchen scenes in Shrink Plastic Jewelry, the image stabilizer becomes very important. IS is vital for handheld scenes. They are just too shaky without it.

After trying a few different methods, I've settled on using the ExpoDisc for my white balance setting. In part, I like it because I can establish a good custom white balance setting in mixed lighting.

We capture in full HD (1920x1080) even though the published movies are served via YouTube at lower resolution (1280x720). I do this because all of my options are open up the road. For example, if we decided to publish this content on a DVD, I would want full HD resolution for more compelling playback on HDTV screens.

It's very important to record at the best quality possible in terms of exposure, white balance, focus, etc., because as your compress your movies for web publishing, degradation always happens. I'm very careful in post production, and still there's more loss than I like.

Audio Capture

Sound recording has been the most challenging part of this project. The audio input jack for the 5D Mark II isn't high quality, and you can't control audio directly with the camera. We've had the best results using a wireless lapel mic (an affordable Audio Technica model). Even so, I always seem to have hiss as a byproduct. To control this, I've been processing the audio in Adobe SoundBooth to reduce unwanted noise and increase the DB a bit.

Many movie makers record the audio with a separate device then sync it with the video in post production. This is a great way to go if you're using Final Cut Pro of some other high end software. We keep things a bit simpler, so I try to get the best audio possible as part of the original movie file.

iMovie for Initial Production

For ease of use, it's hard to beat iMovie for organizing the scenes, trimming them, and adding transitions. On my Snow Leopard MacBook Pro plugged into a 23" Cinema Display, iMovie can handle the 1920x1080 files from the Canon 5D Mark II. Some folks have had problems with this. We published a good article by Kip Beatty titled, Managing Canon 5D Mark II HD Video in iMovie '09 that should be helpful for those having problems with the large files in iMovie.

Once the initial cuts are made and transitions added, I export a sampled down version of the movie (1280x720) using the Apple Intermediate Codec to retain as much quality as possible for the next step.

Clean the Audio

I usually want to clean up the audio a bit too. iMovie doesn't have very good controls for this, so using QuickTime, I extract the audio track as a .mov file, open it up in Adobe SoundBooth, remove noise, then use QuickTime again to add the audio track back to the video file. Make sure you delete the old audio track before adding the new one. This always works great, and I've never had any syncing problems as a result.

Final Touches Using BoinxTV

I love BoinxTV for final touches because it allows me to create layers for each effect, then turn them on and off while I watch the movie. I feel like the director of a television show as I enable lower third titles and graphics. I could probably do most of this work in iMovie, but it's not "live" the same way BoinxTV allows me to work. This method feels much more dynamic.

Plus, I can save my work as a BoinxTV project, switch out the main video feed, and create a new show without have to set up all the graphics and titles again.

I also use BoinxTV for the final export for YouTube. The dimensions stay the same 1280x720, but I switch to the multipass H.264 codec to keep file size down. For example, the 5-minute Shrink Plastic Jewelry episode file size was originally 1.4 GBs using the Apple Intermediate Codec, but was reduced to 42 MBs using H.264.

Archive All of Your Work

I use a Drobo hard drive array to store my original video files, the iMovie Project, the BoinxTV project, and the output along the way. This allows me to go back to any stage of the project, make changes, then output the best quality possible.

I also recommend keeping detailed notes during every step of the project. I've learned so much each time I make a movie, and I want to retain that knowledge so I can bring it into the next project. Like dreams, you always think you'll remember the details when you wake up. But you won't. So write it down.


twitter.jpg Follow me on Twitter

-


Macintosh Computer Expo Coming on Oct. 3

The Mac Computer Expo is coming to Petaluma, CA on Oct. 3, 2009 featuring 10 speakers and a couple dozen vendors. The free event is celebrating its silver anniversary, entertaining Mac enthusiasts for over two decades.

In addition to Tom Negrino, Dori Smith, Jim Heid, and a host of other Mac luminaries, I'll be presenting two sessions focusing on iPhoto. My afternoon session, How to Set Up an iPhoto Referenced Library, shows you how to establish a library of master images on an external hard drive, then point iPhoto, Aperture, Lightroom, and Bridge to that same set of masters. This eliminates the problem of migrating your iPhoto library to other applications, plus it frees up your Mac's hard drive. You have to see this demo to believe it.

Vendors include Griffin, O'Reilly Media, Ambrosia, Microsoft, Parallels, Intuit, and many more. I'll be signing books at the O'Reilly booth after each of my sessions. So if you want your book signed, bring it along. O'Reilly will also have my latest titles on sale (at a discounted price) in the booth.

If you're within striking distance of the North Bay on Oct. 3, then check out this speaking schedule and make your plans. It's a great way to spend a Saturday, and the price is right (free!).


twitter.jpg Follow me on Twitter

-