This is The Digital Story Podcast #634, May 8, 2018. Today's theme is "What's Your Online Gallery Strategy?" I'm Derrick Story.
Opening Monologue
If you're like me at all, you have your images spread across various sites online. At one time, you may have had a master plan - best shots go here, family stuff there, everyday life somewhere else. And chances are, as good as that plan was, it went out the door long time ago. So maybe it's time to revisit your portfolio site - a place for only your best shots, the ones that you would show to other photographers and potential clients. Creating such a place these days is easy and very satisfying. And that's the focus of today's show.
What's Your Online Gallery Strategy?
My original plan wasn't too bad. Instagram for everyday life, Facebook for news and conversation, Smugmug for client galleries, and Flickr for the photography that I wanted to show off.
The problem was, however, that Flickr is just so darn versatile. I started using its embed feature to publish photos on other sites, and the next thing I knew, it wasn't my best work. It was just my work. That's fine. But it left me without a true portfolio page. I knew it was time to do something.
As I was thinking about this, two other important things happened. First, I was contacted by the folks at Portfoliobox. They asked me if I would take a look at their product. Not long after that, I had a very interesting conversation with an upcoming photographer. I told him he could ask me anything he wanted. His question? "What should I do about an online portfolio?"
I don't believe these three events were coincidence. So I decided to investigate the best lead I had: Portfoliobox. More on that in a bit.
So why do we need an online portfolio?
- We need a place where our images look really good - By now everyone knows that Facebook makes your stuff look like crap. Flickr is better, but cluttered as well. When you open a real portfolio, one with paper and pages, the images are presented in the highest quality possible. So it's an opportunity to display our photography as we see it during creation. And we don't have to apologize for the quality.
- Our portfolio page is dedicated to great photography, and nothing more - Social network sites pull you into to fishing for likes, sharing, and posting everyday. A portfolio page is more like a fine wine that we craft over time. Forget about likes, just put up great images.
- It's a chance to tell a story - Photo essays can be powerful. But we need to be able to craft those stories without clutter and interference. A portfolio site provides the platform to do so.
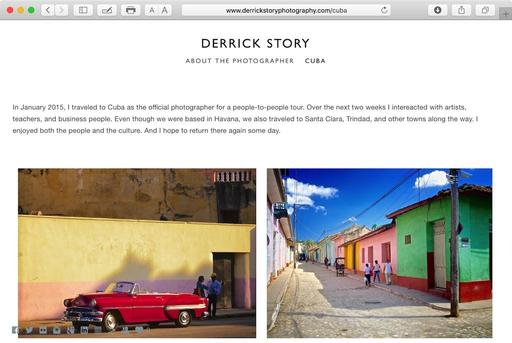
- Custom Domain Name - Nothing fancy here, just www.derrickstoryphotography.com. But using your name or photo business name for your images establishes your credibility when people search for your work.
- Links to your other sites - Once you've established your creditability as a photographer, then people will look at your other sites in a more favorable light. Put those links on your about page.
By way of example, I've begun a portfolio page that you can view - www.derrickstoryphotography.com. I'll be adding to it weekly over the month of May, so together we can watch it grow.
Portfoliobox - A High Quality, Affordable Gallery Site for Photographers
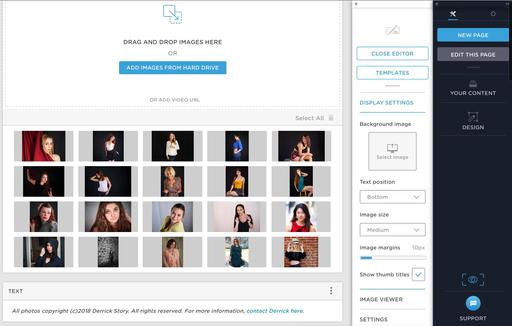
As I mentioned earlier in the show, my quest for a gallery page let me to Portfoliobox, based in Stockholm, Sweden, with over 740K users from around the world. Here's what I love about this service.
- My images look great, both on my computer and on my mobile devices.
- It's easy to use. Without any instruction, I built my first two pages in under an hour. I will be adding a page a week throughout May.
- It's affordable. There's a free plan and a Pro version. The Pro version is only $82.80 per year or $8.90 per month USD, and that's before the 20 percent TDS discount.
Highlights with the Pro Plan
In addition to unlimited pages, you get a personalized domain name, web hosting, and up to 1,000 images.
Get Started Today
Just go to the TDS Landing Page to get started with your free account, or to receive the 20 percent discount on the Pro version. And if you want to see the page that I've begun, visit www.derrickstoryphotography.com.
Pour One Out for Casio: Pioneering Digital Camera Maker Pulls Out of Market
As reported on F-Stoppers:
"Casio, known today for rather pedestrian point-and-shoot compact cameras, wasn't always that way. In the late 1990s, they were at the forefront of digital imaging, but now, that's no more.
A report on Nikkei indicates that the electronics giant will drop its compact cameras and leave the market. A translation of the page pointed to a declining compact camera market as the reason.
Indeed that seems to be the case with Casio in the U.S.A. A quick trip to their website doesn't even show cameras under their "products" menu and B&H Photo doesn't list any of their cameras.
In the 1990s, it was so weird to frame up an image using an LCD screen. It just wasn't a thing. In fact, this was the first consumer digital camera to offer up a screen for composing and viewing photos, a fact that they even tout in the instruction manual. There was room for 96 images on the camera's built-in memory. The terminology wasn't even invented to describe using this whole process. Casio had to tell people to "think of camera memory like a 96-page album of the images you record," which sounds quaint today. The main way the manual suggested to save your images was to hook up to a TV and record the images onto a video tape."
Great Online Training Titles for Efficient Learning
I have some terrific photography titles on both LinkedIn Learning and lynda.com. You may want to visit my lynda.com Author Page or my LinkedIn Learning Author Page. Here's a look at some of the titles waiting for you.
- Capture One Pro 11 Essential Training
- Luminar Essential Training
- Photos for macOS High Sierra Essential Training
- Dropbox for Photographers
- Sharing Photos with Flickr
- A Photographer in Cuba
- High School Seniors Portrait Photography
Signed Print Giveaway - If you watch one chapter for any of my training videos on lynda.com or LinkedIn Training during the month of May, send me a notification after the viewing via the Contact Form on The Nimble Photographer. (You can sign up for a free trial on lynda.com.) Just say, "I watched a chapter on lynda.com or LinkedIn Learning!"
You name will be entered into a drawing for a signed print from the Maui Project. The lucky recipient will be announced on the June 5, 2018 podcast. (Promotion ends on May 31, 2018. Void where prohibited.)
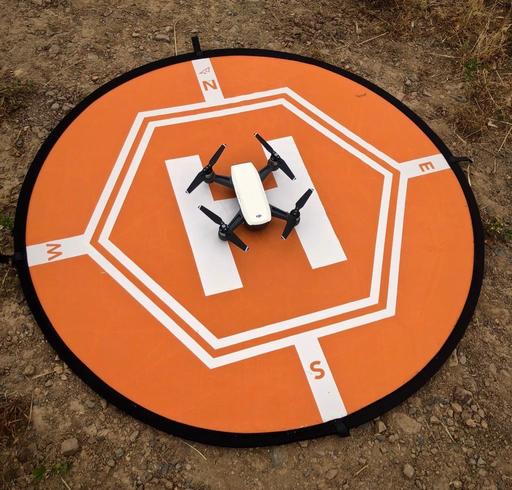
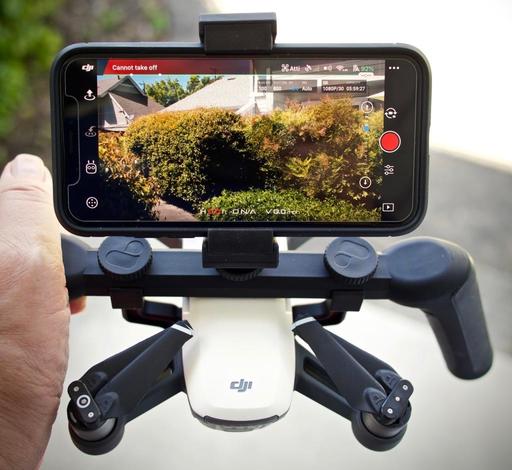
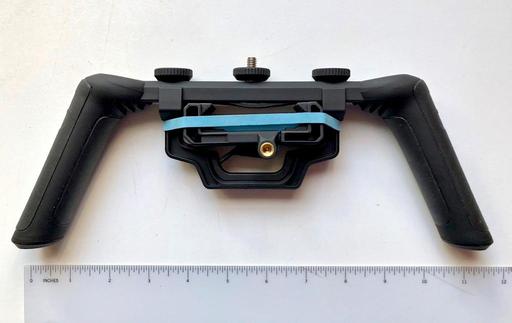
Aerial Photography Workshop
Public registration is now open for the Sonoma Country Hot Air Balloon and Drone Photography Workshop, June 8-10, 2018. We're combining two very fun aerial activities into one workshop. Be sure to get on the Reserve List for this one!
Reservation Forms have been sent for the Burney Falls and Lassen Volcanic National Park Workshop
We have our cabin reservations secured for Sept. 27-29, 2018 for the Burney Falls and Lassen Volcanic National Park Workshop. I sent out reservation forms this last weekend. So if you are on the reserve list, you should have received an invite.
Updates and Such
You can become a member of our Inner Circle by clicking on this link or by clicking on the Patreon tile that's on every page of The Digital Story.
B&H and Amazon tiles on www.thedigitalstory. If you click on them first, you're helping to support this podcast. And speaking of supporting this show, and big thanks to our Patreon Inner Circle members:
And finally, be sure to visit our friends at Red River Paper for all of your inkjet supply needs.
See you next week!
More Ways to Participate
Want to share photos and talk with other members in our virtual camera club? Check out our Flickr Public Group. And from those images, I choose the TDS Member Photo of the Day.
Podcast Sponsors
Red River Paper - Keep up with the world of inkjet printing, and win free paper, by liking Red River Paper on Facebook.
Portfoliobox - Create the site that your best images deserve by visiting Portfoliobox. And get a 20 percent discount by using our landing page!
The Nimbleosity Report
Do you want to keep up with the best content from The Digital Story and The Nimble Photographer? Sign up for The Nimbleosity Report, and receive highlights twice-a-month in a single page newsletter. Be a part of our community!
Want to Comment on this Post?
You can share your thoughts at the TDS Facebook page, where I'll post this story for discussion.
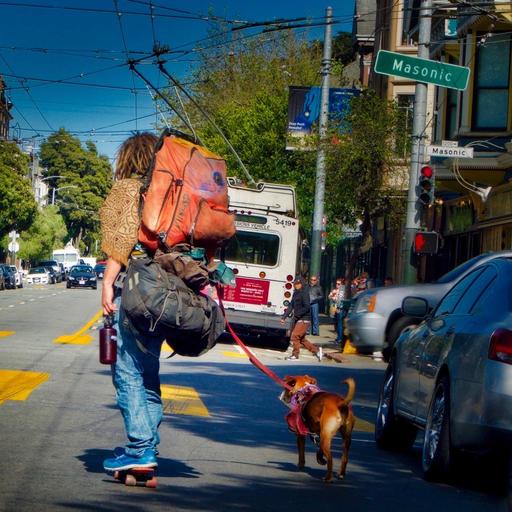
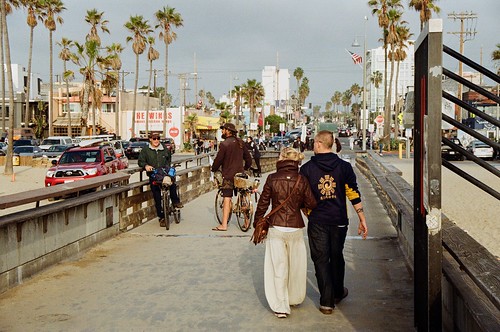 "Out for a Stroll" - Venice Beach, CA. Pentax Program Plus with Kodak 200 film. Photo by Derrick Story.