This is The Digital Story Podcast #522, March 8, 2016. Today's theme is "Time Waits for No One." I'm Derrick Story.
Opening Monologue
We have what we love to do, then we have the things that must be done. I'm coming off a January and February where I had to stay focused on my work every day. The only photo shoots I had were assignments. Otherwise I was sitting at the computer writing or in the recording studio making movies.
On some of those days, I so wanted to wander outside with my camera and just take pictures. Of anything. I didn't care what, as long as it wasn't an assignment. Those two months are the inspiration for today's show. Finding ways to find the time to do the things we love, while still meeting our responsibilities to work and family.
Time Waits for No One
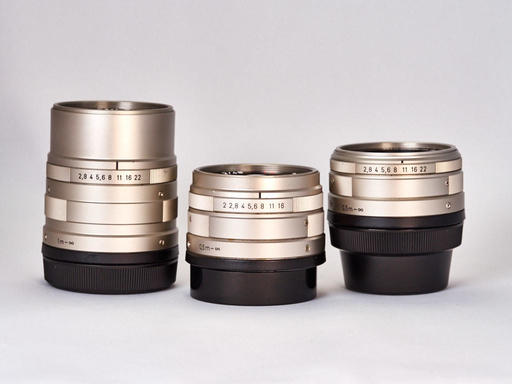
One of the things I do during heavy work periods, is that I bring out one of my favorite cameras, and I sit it on the desk next to my computer. Every now and then, I'll pick it up, focus with it, and maybe even take a picture. Then I'll sit it next to the computer and go back to work.
We can't spend our whole lives waiting for when we have time to do the things we love. We have to make time. And for me, I have to make time to take pictures. Here are a few of the things I do to make room for my personal photography.
- Take daily walks. I need to anyway for my health. I make sure that I have a camera with me.
- Set up an indoor studio. This can be something small in the corner of the room. Maybe just a shooting box with a light and reflector. But having something set up allows me to take a 15 minute break and photograph something.
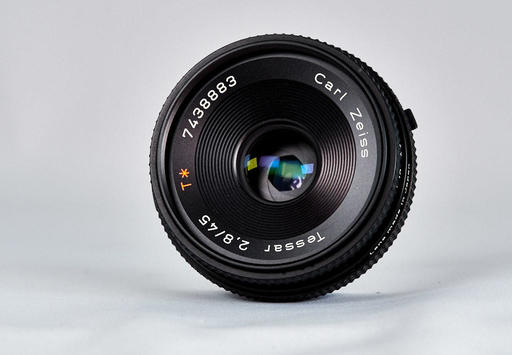
- Use a macro lens. The thing about close up photography, instead of having to go far to get a shot, you get close. This means that you can photograph almost anything, and it will be interesting.
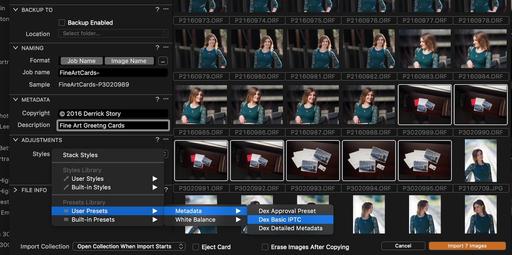
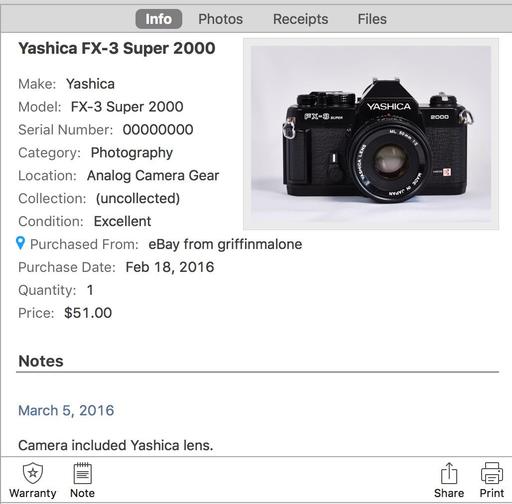
- Have non-shooting projects going. I have an inventory project in progress that I can work on a few minutes here and there. I use the mini-studio for the shooting, and fill out the records using software on my Mac.
- Plant a garden. A simple back porch garden can yield a bounty of images. In addition to the plants themselves, there are the critters they attract. This entire world is waiting for you outside your backdoor. So even lunch breaks can yield great shots.
- Commute Shoot. Figure out how to go back and forth to work without having to drive a car. Riding public transportation or ride sharing gives you the opportunity to take pictures instead of curse traffic.
In the News
DxO ONE Firmware Update 1.3 - covered by DxO
The DxO ONE now features a dramatically enhanced standalone experience including the new OLED Framing Assistant - A monochrome live preview helps you quickly and easily compose your standalone shot in a fun, retro way. Plus, photos and videos are stored on the DxO ONE SD card and transfer to your iPhone with a tap, and recall settings - Use the DxO ONE in standalone mode with custom capture settings established in connected mode. The price has come down too. It's now available for $464.
News from ImageFramer
Version 3.4 of ImageFramer is now available. A few of the highlights include:
- They've added about 60 new celebration frame designs. They can be found in "Holiday and Celebrations" Collection, in "Celebration" Set. They are part of the Standard frames and are available for free to all the customers.
- "Watermarks" were renamed to "Overlays". The origin of the name "watermark" was in the initial intended use for these layers -- adding copyright signs or artist names on the framed images. Over time, though, we've found that the name was confusing because "watermarks" have a more specific meaning, so we decided that "overlays" is a clearer name for these special layers.
- Another addition to the interface is the lock button on the right side of the bottom bar, near the aspect ratio button. When the lock is locked, ImageFramer will apply the minimal crop that will keep the framed result in the target aspect ratio. Here's the blog post explaining how it works.
Get 25 percent off by visiting our landing page at http://www.apparentsoft.com/tds.
Member Quotes of the Week
Intelligent comments culled from The Digital Story Facebook page.
In regard to last week's Facebook Post: "Couples Ditch Wedding Photographers for Amateurs" we had some terrific comments, and I want to share one with you now.
Sean wrote: "I hear photographers complain about this and the $500 Craigslist photographer, but the simple truth is that these people were never their potential clientele in the first place....There will always be people willing to pay for quality."
John wrote: "The weird thing about wedding photography is we provide the memories. The food is forgotten (hopefully) the next day. All that money spend on alcohol, flowers etc etc all of it is transient. The only thing that will last the length of the marriage is the wedding album or the USB of memories you deliver soon after the day. Yet the wedding photographer is the thing where people complain most about the cost."
And Tillie has the last say: "Looks like a good time for UK photographers to up their game (and all of us perhaps) and ask the question, "What exceptional value can I bring to the table as a professional?" I'm trying to figure out how to "wow" the bride and groom at their upcoming wedding that I'm shooting. Maybe I'll take a few IR shots."
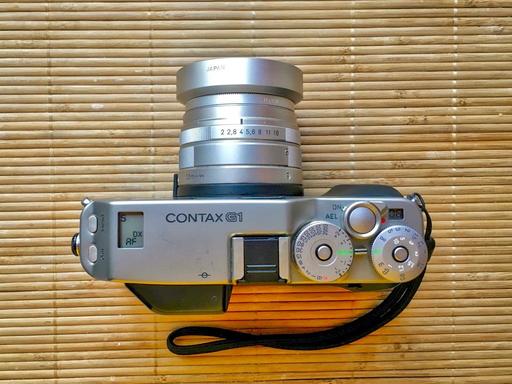
Post your thoughts on our Facebook page. Believe me, I read them. Also, we have a question going on Facebook right now: "If you had to pick one film camera from the past, that you craved, but couldn't afford, what would it be?"
If you had to pick one film camera from the past, that you craved, but couldn't afford, what would it be?
- Leica M4 from 1978 with a Summilux f1.4 50mm
- Pre-war Contax III
- Hasselblad
- Maxxam 9000
- Nikon F2H
- Contax G2
- Rolleiflex SL2000F 35mm
- Fuji 645 wide angle
- The Minolta Maxxam 7
- Canon A1
- Olympus OM-4t
- Nikon FM2n
- Zeiss Ikon Contarex SLR
- PPentax LX
Updates and Such
Pt. Reyes Photography Workshop - We have one room open at the Pt. Reyes Photography Workshop, Aug. 19-21 2016. If you want to hang out with us at Straus Ranch House and explore some of the most beautiful coastline in the world, visit the TDS Workshops page and put yourself on the reserve list.
Out of Chicago Update - The debut of The Nimble Photographer Workshop sold out on Friday, June 24. Because there is a wait list, we've added a second workshop on Thursday June 23. I hope you can join me in Chicago this coming June. There's still time for Early Bird pricing.
And finally, be sure to visit our friends at Red River Paper for all of your inkjet supply needs.
See you next week!
More Ways to Participate
Want to share photos and talk with other members in our virtual camera club? Check out our Flickr Public Group. And from those images, I choose the TDS Member Photo of the Day.
Podcast Sponsors
Red River Paper - Keep up with the world of inkjet printing, and win free paper, by liking Red River Paper on Facebook.
ImageFramer Take your photos to the next level with ImageFramer. Visit www.apparentsoft.com today.
MacPaw Creators of CleanMyMac 3 and other great software for Apple computers. Visit www.macpaw.com today.
The Nimbleosity Report
Do you want to keep up with the best content from The Digital Story and The Nimble Photographer? Sign up for The Nimbleosity Report, and receive highlights twice-a-month in a single page newsletter. Be a part of our community!
Want to Comment on this Post?
You can share your thoughts at the TDS Facebook page, where I'll post this story for discussion.