Compact camera zoom lenses often don't have the "reach" we'd like at the telephoto end. If you shoot at your camera's highest resolution, you can actually extend its reach without compromising quality. Here's how.
This video is from my Lynda.com training titled, Getting Pro Results from a Compact Camera. You may also want to watch these free tutorials.
More Free Photography Tutorials
Compact Camera Scene Modes - A tour of the most important scene modes on a compact camera and how to use them.
Sunglasses Polarizer - How to use your sunglasses as a polarizing filter for your compact camera.
 Follow me on Twitter
-
Follow me on Twitter
-
Recently in Photography
When you first look at the specs for the Canon EOS Rebel T2i / 550D, you might think that Canon can't provide 18 megapixels resolution on an APS-C sensor and control high ISO image noise and price the body at $799 US. And you would be wrong, because that's exactly what they have done.
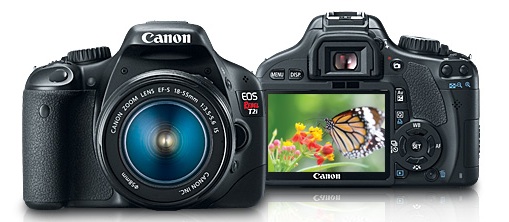
You know it's a serious camera when Digital Photography Review says in their exhaustive report on the T2i/550D, "The unavoidable fact is that to get the most out of the 550D's sensor you really need to pair it with Canon's better lenses, which is a considerable investment." Then go on to say, "That said, the bottom line here is that the EOS 550D offers excellent image quality in a range of different conditions, including exceptionally low light, thanks to its usable ISO 12800 setting. Image quality is equal or better than its predecessor the EOS 500D, and not noticeably inferior to the considerably more expensive EOS 7D. The 550D's video capability is excellent too."
Yes, so the upshot is for enthusiasts photographers with good glass, or pros looking for an affordable back-up camera that delivers high quality results, the new Canon EOS Rebel T2i is a pro tool with a consumer price tag.
-
When you're working in the field for a day or a week, having dependable shelter improves the experience. Photographers need a place to relax for short breaks, work on images, store gear out of the elements, and if necessary, sleep. I've been testing the REI Half Dome 2 tent ($179), and it has become an essential part of my outdoor gear.
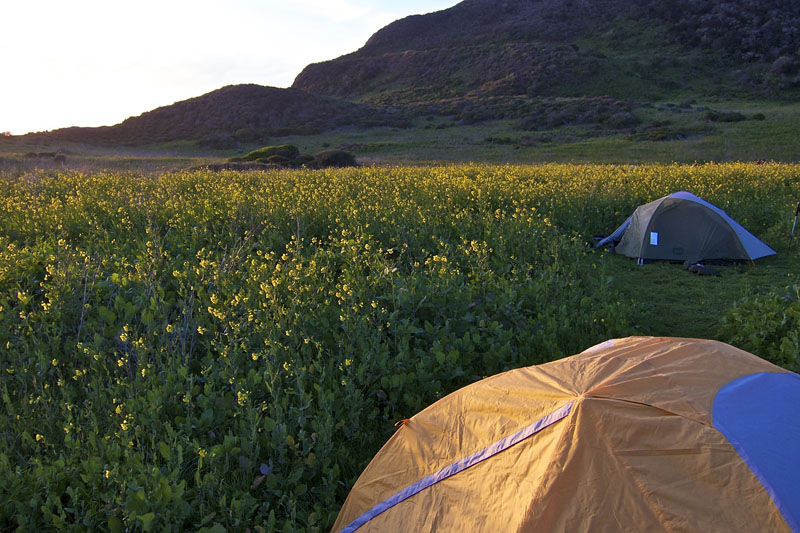
This is a tent that has stirred lots of discussion. It earned a Backpacker 2010 Editor's Choice Award for great value, yet many readers on REI's own site panned its construction for condensation, difficulty to set up, or for just not liking the new design in general -- none of which ever crossed my mind when using it in the field.
I can set up the Half Dome 2 in just a couple minutes. I think the design is terrific for creating shelter in a hurry. I use the tent in two modes: with and without rain cover. When the weather is nice, I prefer without rain cover and let the mesh separate me from the insects. When it's time to add the cover, open the top vents, then pull the rain cover sides out and stake them. By doing so, you increase ventilation, and create two additional storage spaces outside the main cabin of the tent, but still under the rain cover. If rain is in the forcast, you may want to close the top vents.

I also bring a half dozen clothes pins and a few colorful bandanas. I pin a bandana to each tie line on the side of the tent so other campers don't accidentally trip over it. The "patio" created by this configuration is great for keeping your boots out of the elements, yet not having to store them in the main cabin. The Half Done 2 has doors on both sides of the tent, so you can have a "back patio" and still keep the entrance clear.
The floor dimensions in the main cabin are 88" x 52" and very roomy for one, but a little tight for two guys. Since the tent weighs-in at 5 pounds, I usually prefer to carry it just for me, even on backpacking trips. This means I have plenty of room for my long sleeping bag, my pack, and various pieces of gear. There are also four interior side pockets for small items, and two top loft compartments that I use for LED lanterns. This makes it easy to continue working long after the sun goes down.
If you're looking for an affordable, relatively light, practical shelter for outdoor work, I would put the REI Half Dome 2 tent on my short list of considerations.
Previously in Outdoor Gear for Photographers
"The Great Outdoors" - Digital Photography Podcast 218
New Series on Outdoor Gear for Photographers
-
Apple's new iPad may turn out to be an important tool for photographers. In addition to its ability to be a portable portfolio display, it can often substitute for a much heavier laptop and fit in the front pocket of backpacks. Then, as new apps appear for it, it should become a wireless extension of our photo workflow. In this podcast, I discuss the possibilites of this new device.

Listen to the Podcast
You can also download the podcast here (30 minutes). Or better yet, subscribe to the podcast in iTunes. You can support this podcast by purchasing the TDS iPhone App from the Apple App Store.
Monthly Photo Assignment
Flash is the March 2010 Photo Assignment. You can read more about how to submit on our Member Participation page. Deadline for entry is March 31, 2010.
More Ways to Participate
Want to share photos and talk with other members in our virtual camera club? Check out our Flickr Public Group. It's a blast!
-
Podcast Sponsors
Red River Paper -- Try the $7.99 Sample Kit.
Make Your Photos Sizzle with Color! -- SizzlPix is like High Definition TV for your photography.
Technorati Tags: digital photography, podcast, technique, Technology, The Digital Story, tips
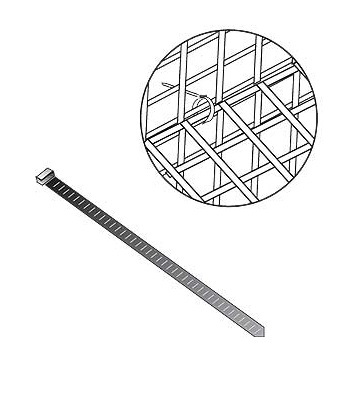
Have you ever been in the situation where you have to check bags with some valuable equipment in them? Sometimes our gear exceeds carry-on limits, and we're forced in to this nerve-racking Plan B. For these moments, keep a handful of plastic security ties on hand.
I got this tip when I was on the TWiP show with Alex Lindsay, and he was describing how he handles trips with lots of photo equipment. Alex's advice was to make sure you have insurance for your gear, then use the plastic security ties on the bags that you have to check. They are actually a better deterrent than cheap locks, and once they have been cut, they can't be reattached -- letting you know right away that your bag has been opened.
No system is perfect under these circumstances. But I like Alex's idea, and I'm going to purchase a bag of security ties for my upcoming travels... just in case.
-
Aperture 3 has a nifty feature that allows you to enable an overlay that shows focus points used by the camera when recording the picture. It also highlights which point was active. Granted, this feature could be viewed as a novelty, but I do find myself checking it.
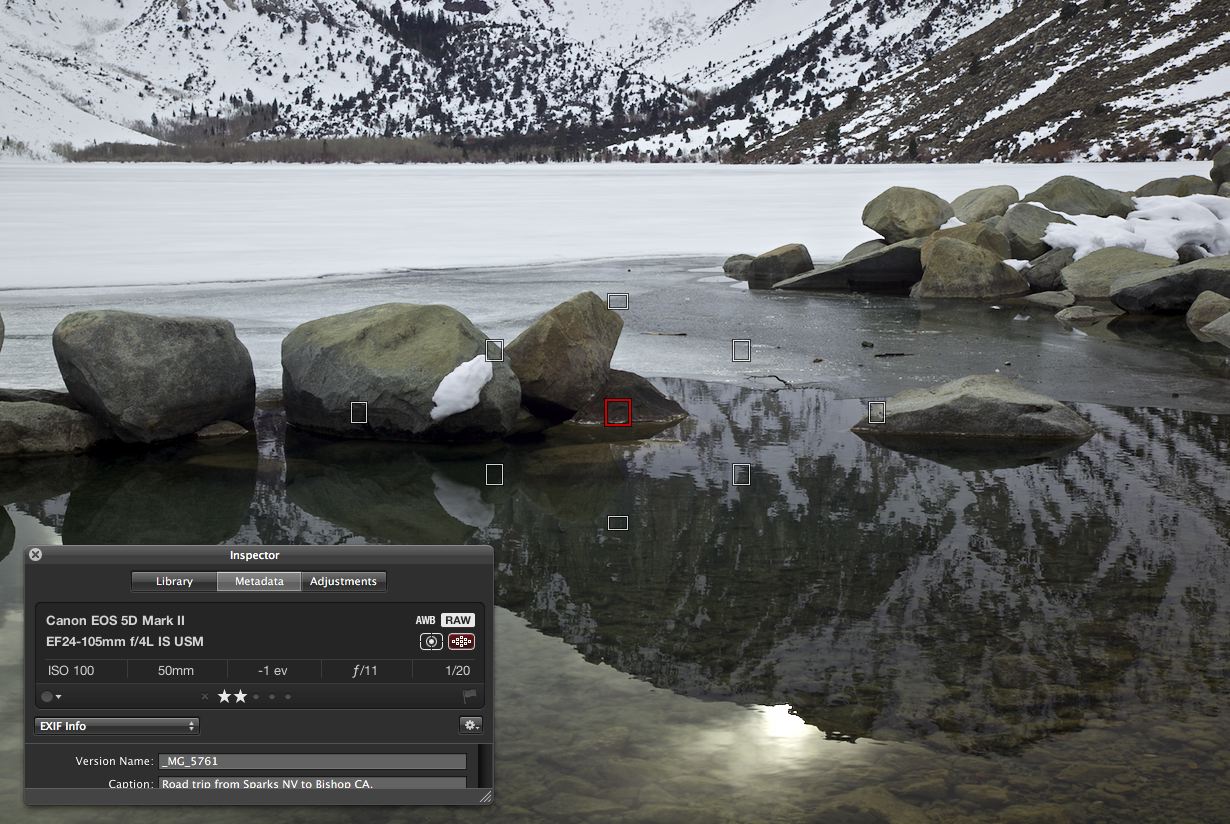
In this shot, for example, I see all the focus points for the Canon 5D Mark II with the center point outlined in red. That was the point that I used for focusing. What you don't see, however, is where I directed that point when I composed the shot. The overlay pattern is always in the same place, as it appears when I look through the camera's viewfinder. Since I often use focus lock, then recompose, the overlay doesn't show me the actual object that I focused on.
In order for this to work at all, your camera needs to save the autofocus metadata to EXIF, and of course, it has to be compatible with Aperture 3. I've also learned through testing, that if you use the referenced file approach for library management, your masters have to be available to activate the focus points overlay.
To enable this feature, just go to View > Show Focus Points, or click on the icon in the metadata inspector (as illustrated in the photo). The keyboard shortcut is Option-F.
I think Show Focus Points is most handy when you're trying to analyze what went wrong in a misfocused shot. If your subject is on the right, and the red focus point is on the left... well, that might be a clue.
More Aperture Tips and Techniques
To learn more about Aperture 3, check out my Aperture 3 Essential Training on Lynda.com. Also, take a look at our Aperture 3 Focus Section. Tons of free content about how to get the most out of Aperture.
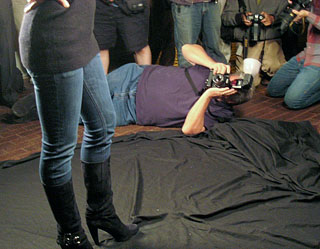
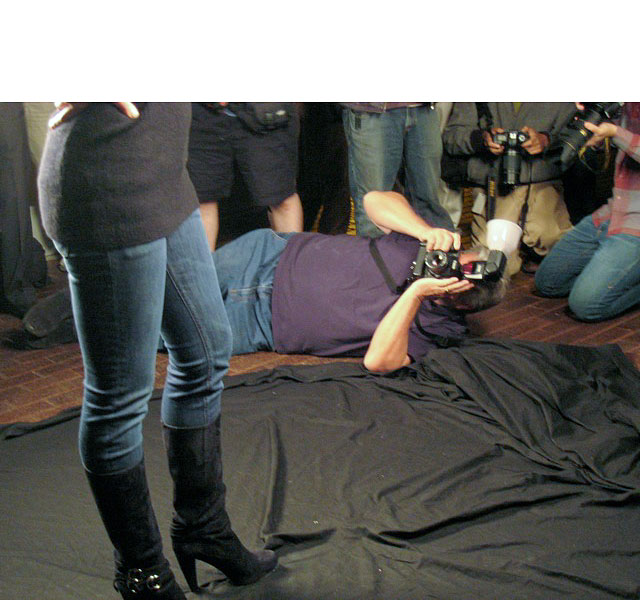
"A local photo group held a 'practice with models' photo shoot," writes Jo-Ann Ash Fairbanks. "I thought the photographers were more interesting than the models, so I spent my evening shooting the shooters."
Photo by Jo-Ann Ash Fairbanks. Click on image to zoom to larger size.
If you have a candid you'd like to share, take a look at our Submissions page, then send us your Grab Shot. We'll try to get it published for you on The Digital Story.
And you can view more images from our virtual camera club in the Member Photo Gallery.
The Digital Story Podcast App is the best way to stream or download weekly TDS podcast episodes. No more syncing your iPhone or iPod Touch just to get a podcast. And there's more! Tap the Extras button for free passes and discounts and the current Grab Shot by our virtual camera club members. Each podcast episode has its own Extras button, too, that contains more goodies such as pro photo tips. And the best part is, The Digital Story Podcast App is your way to help support this show.Download it today!
-
Technorati Tags: candid, digital photography, grab shot, The Digital Story
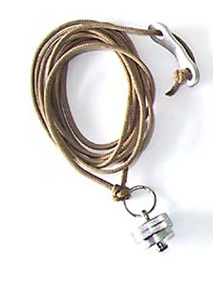
How about a monopod that weighs less than half an ounce? TDS virtual camera club member Brian Reynolds writes:
"I never really liked traditional monopods. What I have found to be very useful is what some people call a string monopod.
Here's how to make one version of this device.You need a 1/4x20 eyebolt, two 1/4x20 nuts, and a length of clothes line (or any line that doesn't stretch). Put both nuts on the eyebolt, and then carefully attach the eyebolt to the camera's tripod mount. If you over tighten the eyebolt you can damage the camera's bottom plate. Gently tighten one of the nuts against the camera's bottom plate, and then tighten the other nut against the first. The nuts will prevent you from over tightening the eyebolt when you re-attach the eyebolt later. Now you tie the rope to the eyebolt.
To use the string monopod attach it to the camera, drop the rope on the floor, step on it, and then pull up to put tension on the rope.
I've had very good luck with this. For last year's Solo Photo Book Month project, I shot on the streets of Manhattan with a handheld Yashica Mat 124G and a string monopod. I was able to use shutter speeds as low as 1/30 second.
So, if you're not the trekking pole type, the string monopod might be just the solution for you on the trail.
Thanks Brian! If you have a great outdoor tip, or favorite piece of equipment, send it along to me. I'll feature reader submitted tips on a regular basis.
Previously in Outdoor Gear for Photographers
"The Great Outdoors" - Digital Photography Podcast 218
Portable Camera Stability - Outdoor Photo Tip #2
Sunset Portraits - Outdoor Photo Tip #1
New Series on Outdoor Gear for Photographers
-

When Apple added the Curves adjustment brick to Aperture 3, they pulled out all of the stops. In addition to the typical "set a point and drag it" curves dialog, there are two Auto adjustments -- Auto Curves Combined (left button) and Auto Curves Separate (right button). "Combined" makes an auto adjustment based on total luminance without affecting color. "Separate," the flavor that interests me more, also corrects color because Aperture individually evaluates and sets curves for each channel: red, green, and blue. You can see a before and after on the images below (click to enlarge).
For my tastes, I get the best results from this useful tool by going to the Advanced tab in Aperture 3 Preferences, and setting the "Auto adjust Black Clip" and "Auto adjust White Clip" to 0%.

This prevents overly contrasty auto adjustments that have to be manually corrected later. I'm not implying that Auto Curves Separate is always the final solution. But for many images, it's the only global exposure and color correction you many need. It's worth a close look.
More Aperture Tips and Techniques
To learn more about Aperture 3, check out my Aperture 3 Essential Training on Lynda.com. Also, take a look at our Aperture 3 Focus Section. Tons of free content about how to get the most out of Aperture.
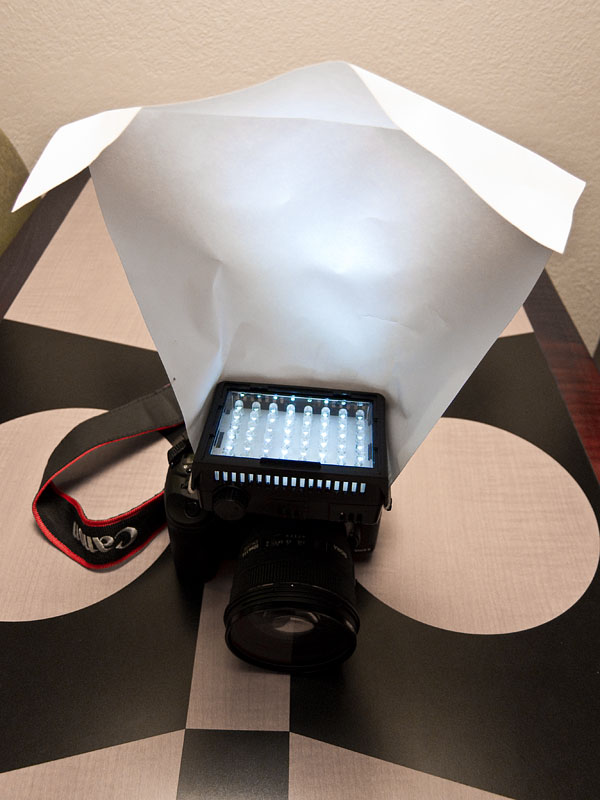
I recently added a Litepanels LP Micro Compact LED Light to my DSLR kit. In part, because I wanted a continuous light for close up photography and for video with the Canon 5D Mark II. I chose the Litepanels Micro because it has good output for a small light, is 5600K daylight balanced, has an adjustable intensity knob, uses 4 AA batteries, and it's virtually heat free.
Even though the panel is over 3" wide, the light sometimes seemed a little harsh for certain subjects. I decided that I wanted to make a diffuser for the Litepanel, so I constructed one using only a letter-sized sheet of paper and a large rubber band.
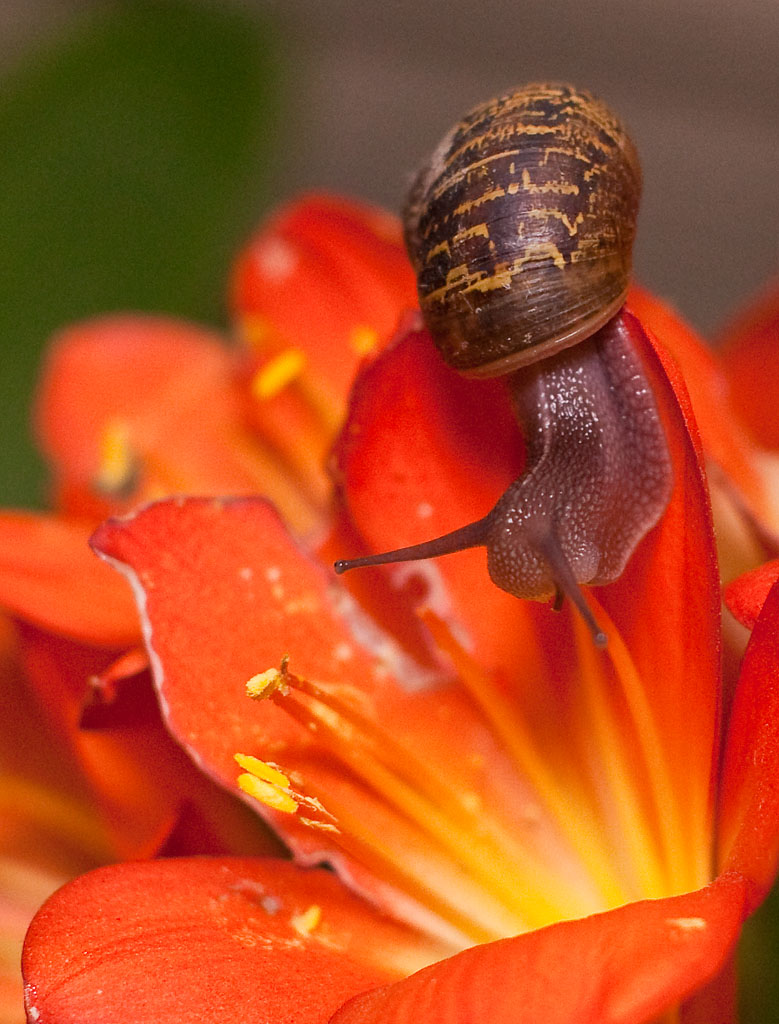
First thing I did was mount the LP Micro backwards in the hot shoe so it sat back on top of the camera. I then folded the paper as shown to create a larger surface area and attached it to the Litepanel with a rubber band. I cranked the power all the way up, mounted my Sigma 50mm f/1.4 lens on the Canon 5D Mark II, and increased the ISO to 1600. I shot in Aperture Priority mode at f/2.8 for this shot of the snail. (Click on the image for an enlarged view.)
With the diffuser, the quality of the light was much softer, yet, there were still nice highlights in the photo. I shot the picture at night when the snails were out having their meals. Even diffused, there was enough output from the Litepanel for me to shoot at 1/30 at f/2.8 in the darkness. Because the light is continuous, I can better compose the shot, and work quickly.
The Litepanels LP Micro Compact LED LightPhotographs by Derrick Story. Click on images to enlarge.
-
<< 1 2 3 4 5 6 7 8 9 10 11 12 13 14 15 16 17 18 19 20 21 22 23 24 25 26 27 28 29 30 31 32 33 34 35 36 37 38 39 40 41 42 43 44 45 46 47 48 49 50 51 52 53 54 55 56 57 58 59 60 61 62 63 64 65 66 67 68 69 70 71 72 73 74 75 76 77 78 79 80 81 82 83 84 85 86 87 88 89 90 91 92 93 94 95 96 97 98 99 100 101 102 103 104 105 106 107 108 109 110 111 112 113 114 115 116 117 118 119 120 121 122 123 124 125 126 127 128 129 130 131 132 133 134 135 136 137 138 139 140 141 142 143 144 145 146 147 148 149 150 151 152 153 154 155 156 157 158 159 160 161 162 163 164 165 166 167 168 169 170 171 172 173 174 175 176 177 178 179 180 181 182 183 184 185 186 187 188 189 190 191 192 193 194 195 196 197 198 199 200 201 202 203 204 205 206 207 208 209 210 211 212 213 214 215 216 217 218 219 220 221 222 223 224 225 226 227 228 229 230 231 232 233 234 235 236 237 238 239 240 241 242 243 244 245 246 247 248 249 250 251 252 253 254 255 256 257 258 259 260 261 262 263 264 265 266 267 268 269 270 271 272 273 274 275 276 277 278 279 280 281 282 283 284 285 286 287 288 289 290 291 292 293 294 295 296 297 298 299 300 301 302 303 304 305 306 307 308 309 310 311 312 313 314 315 316 317 318 319 320 321 322 323 324 325 326 327 328 329 330 331 332 333 334 335 336 337 338 339 340 341 342 343 344 345 346 347 348 349 350 351 352 353 354 355 356 357 358 359 360 361 362 363 364 365 366 367 368 369 370 371 372 373 374 375 376 377 378 379 380 381 382 >>
Main Index |
Monthly Archives |
Category Archives
Promotions


![]()


Subscribe

Products