Recently in Photography

  Page 212 of 381 in Photography  

Fast Photo Rescue with Adobe CS6

There are those images that I suspect have good potential, but require just a bit of work. My rescue tool of choice is Adobe Camera Raw 7.1 and Photoshop CS6. Typically, I can salvage a picture in just a few minutes. Here's a recent example of a 3-step photo rescue.

Step 1 - Open in ACR 7.1 and Apply the Graduated Filter

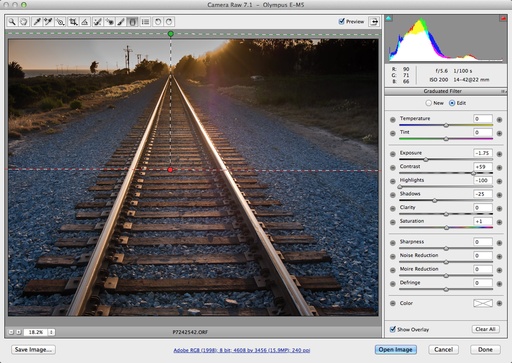
camera_raw_7-1 Using the Graduated Filter tool in Adobe Camera Raw 7.1

The big problem with this shot was that the top of the image was blown out from the setting sun. Since I shot RAW, I figured there was enough image information there, and the graduated filter seemed like the right tool to see what I have.

Step 2 - Open in Photoshop CS6 and Apply HDR Toning

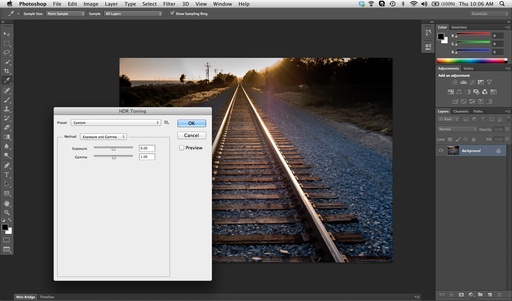
hdr_toning.jpg HDR Toning in Photoshop CS6

After using the Graduated Filter in ACR, I thought I could balance the overall tonality a bit more. I used the HDR Toning tool in Photoshop CS6 (Image > Adjustments > HDR Toning).

Step 3 - Smart Sharpening and Save

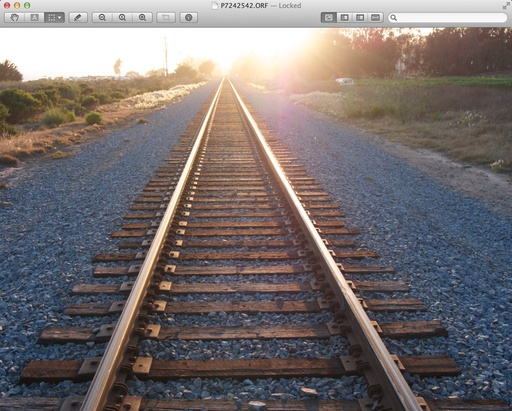
Now all I had to do was apply a Smart Sharpening and save the photograph. By this point you're probably wondering what the original looked like. Here ya go.

original_train_tracks.jpg Original train tracks image before the 3-step rescue.

And here's the final image.

Train Tracks P7242542 Retina.jpg Final image after the 3-step rescue.

The entire process took about 5 minutes.


You can find more photo tips and "photography how tos" on my Pinterest page.

apple_up_to_date.jpg

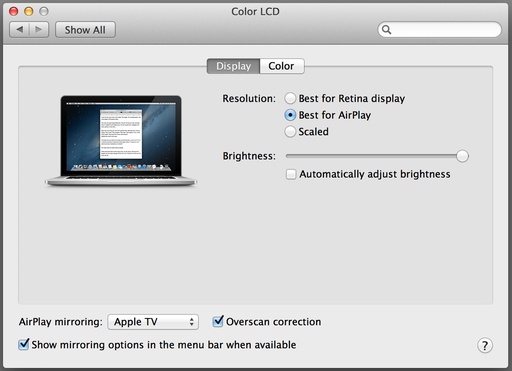
If you recently purchased the MacBook Pro 15" Retina display, or another of Apple's latest offers, you probably qualify for the Up to Date Program.

It takes just a few minutes to complete the registration. Once you've been approved (usually within 24 hours), you'll receive a code that you can use in the Mac App Store to download Mountain Lion. Keep in mind that your order must be entered by August 24, 2012.


The Digital Story on Facebook -- discussion, outstanding images from the TDS community, and inside information. Join our celebration of great photography!


Sunset in Carpinteria, CA

After I finished a day of recording at the lynda.com studio in Carpinteria, CA, I headed out to the beach for a sunset walk. It was very quiet that afternoon, and I had the area to myself.

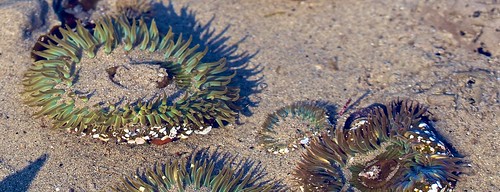
Starfish Starfish. Photos by Derrick Story

I was traveling light. In my messenger bag I had the Olympus OM-D with a couple lenses, a wind breaker, and a hat. That's all I really needed for the next few hours.

Lobster Lobster washed up on shore.

I took off my shoes so I could wade around in the surf zone. The water felt wonderfully refreshing. And by doing so, I could get to the starfish and anemone.

I used the 14-42mm and the 40-150mm Olympus zooms on the OM-D E-M5 micro four thirds body. When I returned to my hotel room, I processed the images in Aperture 3.3.1 on the MacBook Pro (with retina display).

Anemone Family Sea Anemone

I did track a little sand back to the hotel. But even the nimble photographer has to get his feet wet now and then.


The Digital Story on Facebook -- discussion, outstanding images from the TDS community, and inside information. Join our celebration of great photography!


The Canon EOS M mirrorless camera has been officially announced. We've had some discussion on TDS about "is it the next camera for you," and I cover that conversation as the top story this week.

Then we get in to the Burger King Bust. Three employees at the hamburger shack photographed themselves standing in lettuce bins used for preparation. Then published the photo online. They were tracked down via geodata and fired.

And finally, the $25 wireless flash trigger from Cowboy Studio. What a deal! All of this and more on this week's TDS podcast.

Listen to the Podcast

You can also download the podcast here (31 minutes). Or better yet, subscribe to the podcast in iTunes. You can support this podcast by purchasing the TDS iPhone App for only $2.99 from the Apple App Store.

Monthly Photo Assignment

Hot is the July 2012 Photo Assignment. You can read more about how to submit on our Member Participation page. Deadline for entry is July 31, 2012.

More Ways to Participate

Want to share photos and talk with other members in our virtual camera club? Check out our Flickr Public Group. And from those images, I choose the TDS Member Photo of the Day.

Podcast Sponsors

Red River Paper -- The $7.99 Sample Kit is back! And with free shipping.

Make Your Photos Sizzle with Color! -- SizzlPix is like High Definition TV for your photography. Get a 20% discount during July by adding "TDS" in the comment field of your order.

Need a New Photo Bag? Check out the Lowepro Specialty Store on The Digital Story and use discount code LP20 to saven 20% at check out.


Technorati Tags:
, , , , ,


The Micro Four Thirds system supports a variety of lenses by Olympus, Panasonic, and Sigma. But even with that wide selection, there are a few gaps. For example, I needed a fast aperture zoom for a recent assignment. Thanks to the Olympus MMF-3 4/3 Adapter($165), I was able to use one of my favorite Olympus optics, the Olympus Zuiko 12-60mm f/2.8-4.0 zoom(which is the equivalent of 24-120mm).

om-d_adapter.jpg

The MMF-3 is the latest Four Thirds to Micro Four Thirds adapter from Olympus. It's weather sealed, so when used with the 12-60mm zoom and the OM-D EM-5, the entire unit is moisture and dust resistant.

In terms of image quality, the MMF-3 combined with the 12-60mm zoom produces sharp, colorful photographs. And its wide maximum aperture combined with the OM-D's extended ISO performance provided an excellent tandem for existing light photography.

begonia_om-d_12-60.jpg Begonia photographed with the Olympus 12-60mm Four Thirds zoom mounted on an OM-D using the MMF-3 adapter. Photo by Derrick Story

The weakness with this combination is focusing speed. The 12-60mm locks-in much slower than native Micro Four Thirds zooms. Over the course of two days of event shooting, I probably missed a half dozen shots because of focus lag.

For everyday shooting -- landscapes, even portraits -- the focusing speed shouldn't be a problem. But for fast moving subjects and events, it could be frustrating.

Bottom Line

If you have a favorite Four Thirds lens that you'd like to use on the Olympus OM-D or PEN, the weather-sealed MMF-3 adapter will make the connection for you. On the lenses I tested, image quality was excellent across the board.

So if the decrease in auto-focusing speed isn't an issue for you, you can save a bundle of money with the MMF-3. In addition to the 12-60mm zoom, I'm also testing it with the Olympus 9-18mm Four Thirds lens - that's $1,600 of glass that I can mount on the OM-D for only a $165 investment.


You can find more photo tips and "photography how tos" on my Pinterest page.

Is the Canon EOS M for You?

canon_eos_m_front.jpg

At last the other shoe has dropped and now Canon has their entry into the mirrorless camera derby. And it's a good one.

The Canon EOS M is a sophisticated CSC aimed at transition photographers and movie makers. Where other manufacturers included HD movie capture on their still cameras, Canon emphasized it.

With its 18.0-megapixel APS-C CMOS sensor and full HD movie mode with movie servo AF for continuous focus tracking of moving subjects, the EOS M is targeted directly at those for whom video is a priority. It even has an external mic jack.

In October, the body with kit EF-M 22mm f/2 STM lens will be available for $799. Canon will also have a EF-M 18-55mm f/3.5-5.6 IS STM lens for $299 and an adapter for EF-S and EF lenses. For photographers already in the Canon DSLR camp, the adapter is a no-brainer.

Will I place my order for the new EOS M? Probably not. I'm going to wait and see what's released up the road. For the time being, the Olympus OM-D E-M5 is a better fit for me. I shoot stills first and video second. And the OM-D is a fantastic still photography camera.

But don't underestimate what Canon has done here. They have studied the market and targeted a solid camera right at the generation ready to move from point and shoot to something more sophisticated. It's going to be fun to watch how this plays out.


You can find more photo tips and "photography how tos" on my Pinterest page.

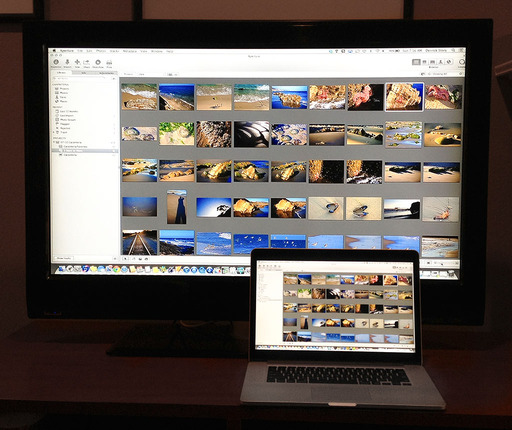
You can stream from iPhoto on your iPad to your HDTV via Apple TV. The trick is to reveal the hidden AirPlay button while working in iPhoto.

apple_tv_streaming.png

First, make sure that "mirroring" is enabled in iPhoto for iOS. You can check by going to the Albums page, clicking on the gear menu in the upper right corner, and sliding the "ON" button for "Mirror on TV."

Then double-tap the home button to reveal all the apps that are currently active in the Dock. If you swipe the dock to the right, it will reveal your media controls, as shown in the illustration above. Tap the AirPlay button, choose "Apple TV," double-tap the Home button again, and iPhoto for iOS will be mirrored on your HDTV.

Now you can share images with friends and play slideshows on your HDTV directly from iPhoto. And since Apple TV is so portable, you can easily pack it in the suitcase when traveling on vacation.


You can find more photo tips and "photography how tos" on my Pinterest page.

When Apple released the new MacBook Pro with retina display, they also updated Aperture and a handful of other applications to take full advantage of the dense pixel LED monitor. No doubt about it. Aperture looks fantastic on the new MBP.

But what about Lightroom 4.1? I've seen comments on the Internet ranging from "My images now look horrible" to "Lightoom looks gorgeous on the new MacBook Pro." Obviously Adobe will update Lightroom for the retina display. But in the meantime? Well, let's take a quick look.

lightroom4_mbp_retina.jpg Lightroom 4.1 on a MacBook Pro retina display. Click on image for larger version. Photo by Derrick Story.

Lightroom's interface and rendering of images look absolutely fine on the new MacBook Pro retina display. The type is clean and the rendering of the images is accurate. The interface icons will have to be updated with more resolution for the next version, but if I didn't point that out, you probably would have never given it a second thought.

By comparison, here is a screenshot of the Aperture 3.3.1 interface on the retina display.

aperture3_3-mbp-retina.jpg Aperture 3.3.1 on a MacBook Pro with retina display. Click on image for larger size.

As you can see, Aperture 3.3.1 looks really good on the new MacBook Pro. Image has wonderful detail, icons and typography are very crisp.

My favorite way to compare these screenshots is to download them, open both in Preview, then toggle back and forth between the images. That will help you see the subtle differences. And keep in mind, the monitor you're viewing these images on will influence your perception of them.

Bottom Line

If you're a Lightroom 4 user, I would not delay getting a new MacBook Pro with retina display. This MBP is the best laptop I've ever used, for photography and otherwise. Lightroom looks great now, and will probably get only better with version 4.2.

And if you're an Aperture user... well, the upgrade is a no-brainer.


Check out The Digital Story on Pinterest.

Have an older flash that you really like, but it just doesn't fit with your new camera gear? For less than $25 you can use that light again with the Cowboy Studio Wireless Hot Shoe Flash Trigger/Receiverkit. It brings wireless flash photography to just about any flash/camera combination.

cowboy_studio_trigger.jpg The NPT-04 Cowboy Studio kit (Canon flash not included!)

In my case, I have a cool little Canon Speedlite 270EX that isn't much bigger than a deck of cards. I hadn't been using it because it doesn't have the wireless capability of the newer Canon Speedlite 270EX IIflash. So in a drawer it sat.

Thanks to the Cowboy Studio radio trigger set, however, I'm now carrying the 270 EX in my "bum around" backpack and using it with the new Olympus OM-D E-M5camera. This rig also works with my Canon 5D Mark II, which doesn't have a flash or a flash trigger built in to the body.

The Cowboy Studio trigger operates on a 433 MHZ radio frequency and has four different channels. You can use shutter speeds up to 1/250th of a second with the kit. The receiver uses 2 AAA batteries and the transmitter includes a 23A, 12V battery. The kit is light and compact. And it works great. There's even a PC socket on the receiver.

What you don't get is ETTL capability. In other words, no dedicated flash. For some, this may be a deal breaker. But I've been using manual flash most of the time anyway. With digital cameras, where you can check your results immediately on the LCD, it really isn't a problem.

For indoor shoots, I usually start with these settings:

  • ISO 400 or 800
  • Manual exposure mode, 1/30th at f/5.6
  • If the subject is too bright, I stop down to f/8 or more
  • If the subject is too dark, I open up to f/4 or more

I'm having a blast with the Cowboy Studio Wireless Hot Shoe Flash Trigger/Receiverkit. It's great knowing that I have off-camera flash capability with just about any camera/flash combination in my bag.


Check out The Digital Story on Pinterest.

Answer to Macro Question

The answer to yesterday's Can You Guess This Shot? is: a spider web with dew.

macro_answer_web.jpg

I noticed this potential shot outside the front door to my studio the other morning. So I put my Canon EF 100mm f/2.8L IS Macro lenson the 60D, and composed as tightly as possible. The closer I got, the more abstract the composition became.

Macro When you get very close, it's sometimes hard to tell exactly what the subject is. Click on the image for a larger version. Photo by Derrick Story.

Now, back to our regularly scheduled programming...


Check out The Digital Story on Pinterest.