This is The Digital Story Podcast #550, Sept 20, 2016. Today's theme is "Mirrorless Photokina." I'm Derrick Story.
Opening Monologue
Photokina truly offers everything under the photographic sun. But the most interesting announcements for me were the new mirrorless cameras and lenses. Panasonic, Olympus, Canon and even a newcomer to the market proudly touted their wares. To help you filter through these new items, I'm going to share my favorites on this week's show.
Mirrorless Photokina
Here are my favorite mirrorless lenses and cameras from Photokina 2016.
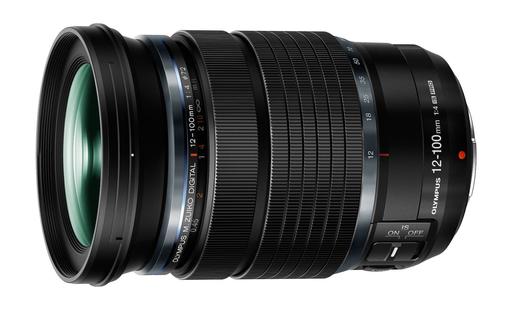
The Olympus 12-100mm f4.0 IS PRO Zoom Lens - You can truly leave the tripod at home for this one. The just-announced Olympus 12-100mm f/4 IS PRO incorporates in-lens image stabilization that works in concert with Olympus in-body 5-Axis IS on compatible OM-D and PEN cameras to create 5-Axis Sync IS, ultra powerful image stabilization with 6.5 shutter speed steps of compensation. That is some serious stuff. Available in November 2016 for an estimated street price of $1299.99 USD and $1599.99 CAD. You can preorder it now.
The Panasonic Lumix DMC-G85 - As DP Review writes: "The Panasonic Lumix DMC-G85 is an SLR-style mid-range interchangeable lens mirrorless camera. It features 4K video capture, 2nd-generation 5-axis image stabilization and a 16MP Four Thirds sensor with no optical low pass filter. A sister model, the G80 will be available in other markets."
I love the sensor-based IS (and am happy to see Panasonic going this way more often), splash-proof weather sealing, and of course, 4K video. This camera is for those who like the SLR look and want great video capture.
The Panasonic G85 will be available by end of October in the US for $899 body only and $999 with 12-60mm F3.5-5.6 Power O.I.S. kit lens.
YI M1 Mirrorless Camera - The part that I though was really cool about this new offering from China-based Young Innovators, was that the bundle included both a zoom and a prime lens - a 42.5mm F1.8 prime and a 12-40mm F3.5-5.6 zoom, plus a camera strap, a USB charging brick and a micro USB cable.
The camera uses a Sony 20MP Four Thirds sensor offering resolution of 5184 x 3888. There's no built-in flash nor electronic viewfinder. And even though it has a Micro Four Thirds mount, I don't know about Panasonic and Olympus lens compatibility.
All of that being said, it is an intriguing little camera. It looks well-built with an excellent menu system and touchscreen LCD. It captures both RAW and 4K video. And the pricing is going to be very competitive.
The new YI M1 will be released September 23rd in China and will cost $329 USD for the kit with the standard zoom lens (12-40mm F3.5-5.6) and $449 USD for the kit that comes with the 12-40mm F3.5-5.6 zoom and the 42.5mm F1.8 prime.
Fujifilm 51MP GFX 50S Medium Format Mirrorless - According to Petapixel: "The GFX 50S features a new Fujifilm G format sensor, one that measures 43.8�32.9mm and offers 51.4MP in resolution. The sensor can be adapted to various aspect ratios. 4:3 is the default, but you can also choose 3:2, 1:1, 4:5, 6:7, and 6:17 -- aspect ratios that were available in traditional large and medium format cameras."
In the film days, I thought Fuji medium formats were some of the best cameras and lenses available. Looks like they're picking up where they left off with this new digital offering.
Compared to traditional medium format cameras, however, the GFX is more compact and lighter. It also follows in the footsteps in the X Series by offering a wide range of physical buttons and dials while maintaining an ergonomic design.
The GFX should hit the shelves in early 2017. Fuji's goal is to price the camera below $10,000 for the body with the 63mm F2.8 lens. We'll know soon enough.
Olympus OM-D E-M1 II - And finally, the camera that many of us have been waiting for. Olympus says the the Mark II has been four years in the making.
Highlights include a new 20-megapixel Live MOS sensor with TruePic VIII image processor. This is not the same sensor that Panasonic is using. The Olympus offering is optimized for low power consumption, much higher-speed data readout, much better noise performance and dynamic range. Noise performance improved by one stop. 50 megapixel High Res Shot mode can compensate for moving subjects (via Imaging-Resource.com).
New high-speed, high-precision autofocus system. 18 fps in full-res raw with continuous autofocus active. (!) 75% vertical and 80% horizontal coverage, all 121 AF points are cross-types. Uses all focus points in every shooting mode, all of the time. Uprated subject tracking can better handle background and subject with similar texture.
Other goodies include: 30p Cinema 4K footage at 237Mbps straight out of the camera, Dual SD card slots, UHS-II compatibility, 50 percent faster startup time, splash-proof seals, and 120 fps EVF with lag of just six milliseconds. Olympus is suggesting some pros who were shown pre-production units thought it was an optical viewfinder, not an EVF (via imaging-resource.com).
No release date or pricing information yet, but I should have more to report by the end of October.
Follow Us on Apple News for iOS Devices
I'm happy to announce that The Digital Story, The Nimble Photographer, and theAnalogstory are all available on the Apple News App for iOS devices. Just click on the following links on your iPhone or iPad, then save us to your Favorites.
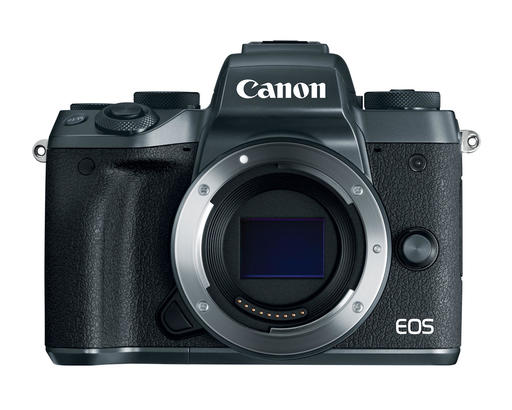
Comments About My Post on the Canon EOS M5 Mirrorless Camera
Tim Covington: At first I seriously considered it. But, when I found out the image stabilization is a software trick that only works for video, I said nevermind. I'm not happy with the cost of lenses on the Sony mirrorless platform, so I'm considering changing back to Canon (I still have a lot of Canon gear, like flashes). If I switch to another mirrorless system, it will probably be an Olympus camera. Otherwise, it will be an 80D.
Sonny Portacio: Totally agree with you Derrick. They (Canon) took too long for me. After I waited long enough, I ended up biting the bullet and selling all of the Canon gear that I've shot professionally with. Now I'm invested "Mirrorlessly" (hey new term!) and I ain't goin' back. This camera looks good though and might be an option for those who can, less painfully, jump in.
Walter Ikehara: Agree. I used to use Canon and so have a bit of a soft spot for them. I switched entirely to Olympus and have no legacy Canon gear anymore. So, despite the lure of this new M5, I have no reason to change. I love my M43 system. Canon's EOS M ecosystem can't even get close. Why would I change?
Scott Stuart: Works for me. I've got lots of Canon lenses. Love the Canon UI and menu systems easily over the Olympus and Panasonic mirrorless cameras I have. I may keep the Olympus, but the GX7 will go.
Thanks to all of our commenters on this post, and to everyone who participates on our TDS Facebook page.
Nimble Photographer Workshop, Portland, Nov. 5
The Nimble Photographer is on the road again, this time making a stop in Portland, Oregon for a 1-day Nimble Photographer Workshop. We're setting up camp at the Pro Photo Supply Event Center on Saturday, November 5, 2016.
Highlights over the course of the day include my sharing the techniques that I've developed during years of nimble photography, participant "What's in Your Bag" sessions, street shooting and portrait tips, hands-on session, post production discussion, gear review, photo sharing, and more. We're even including lunch. You can register here.
Updates and Such
The Drobo Diaries will return next week.
B&H and Amazon tiles on www.thedigitalstory. If you click on them first, you're helping to support this podcast. And speaking of supporting this show, and big thanks to our Patreon Inner Circle members.
And finally, be sure to visit our friends at Red River Paper for all of your inkjet supply needs.
See you next week!
More Ways to Participate
Want to share photos and talk with other members in our virtual camera club? Check out our Flickr Public Group. And from those images, I choose the TDS Member Photo of the Day.
Podcast Sponsors
Red River Paper - Keep up with the world of inkjet printing, and win free paper, by liking Red River Paper on Facebook.
MacPaw Creators of CleanMyMac 3 and other great software for Apple computers. Visit www.macpaw.com today.
Hedge for Mac - The fast solution for moving photos and videos from memory cards to drives, or drives to drives for that matter. Learn more at Hedge for Mac.
The Nimbleosity Report
Do you want to keep up with the best content from The Digital Story and The Nimble Photographer? Sign up for The Nimbleosity Report, and receive highlights twice-a-month in a single page newsletter. Be a part of our community!
Want to Comment on this Post?
You can share your thoughts at the TDS Facebook page, where I'll post this story for discussion.

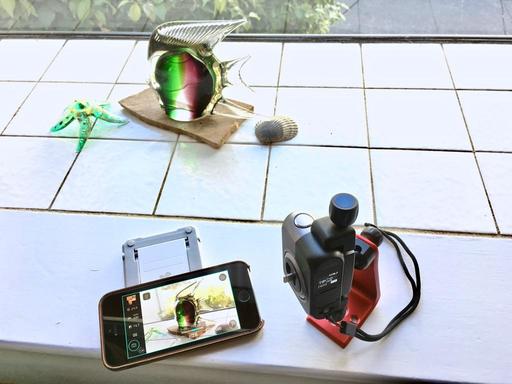 The DxO ONE in WiFi mode stabilized with a MeFOTO SideKick..