Recently in Photos for OS X

  Page 6 of 12 in Photos for OS X  

Sometimes it's the little things that make our Mondays just a bit easier. Like automatically straightening a horizon with just a single click (or tap). Let's start with Photos for macOS
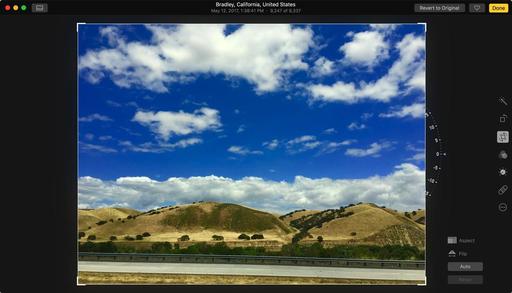
crooked-horizon.jpg Nice grab shot with the iPhone. Unfortunately, the horizon is a bit askew. Photo by Derrick Story.

Open the image in Photos for macOS, and hit the Return key to enter editing mode. Click on the Crop icon, then click on the Auto button. The horizon will automatically level out.
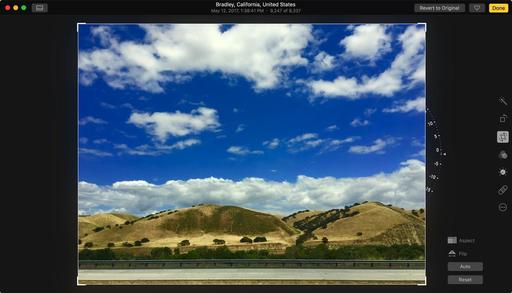
auto-horizon.jpg Click on the Auto button in the Crop tool, and the horizon levels out.

It's even easier if you're using Photos on an iPhone. Just open the crop tool and Photos will automatically fix that horizon without you even asking it to. And in either case, if you don't like what you seen, just tap on Reset. Also, regardless of where your make the correction, the edited image will be saved to all of your devices via iCloud.

Bonus Tip: Polarize the Sky

I also added a little bit of oomph to the sky. I used just three sliders to achieve this. Here's how.

In editing mode for Photos for macOS, click on the Adjust button. In the Light panel, move Brilliance to the right. Then, in the Color panel, move the Saturation and Contrast sliders to the right, as shown below. These sliders are also available on your iPhone in Photos.
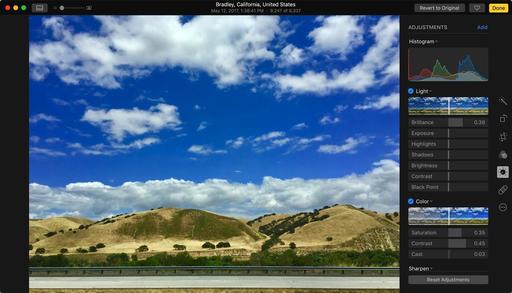
dramatic-sky.jpg Make that sky even prettier.

What a difference just a few seconds of editing makes. You can see the Before and After by pressing the M key on your Mac, or by long-pressing the image with your finger on the iPhone. Now, your picture is ready for sharing.

Book or Videos: Photos for macOS

Explore the world of modern photography with my The Apple Photos Book for Photographers that features insightful text and beautiful illustrations.

And if you'd like to cozy up to a video at the same time, watch my latest lynda title, Photos for macOS Essential Training.

You can share your thoughts at the TDS Facebook page, where I'll post this story for discussion.
Sunday, May 14th is Mother's Day. And I'm guessing that if you're lucky enough to still have Mom in your life, that you want to do something nice for her... maybe create a fine art card to give her?

mothers-day-card.jpg

I use Photos for macOS to create all of my fine art cards. And because I'm a good son, I just mailed this year's version to Mom. Here's how I did it.

  • Open Photos for macOS and choose a picture for the cover of your card.
  • Click on the + icon in the top toolbar and choose "Card."
  • Design your card, starting with one of the Mother's Day templates in the application.
  • Order your card and have it sent directly to her, or print it out yourself.
  • If you're printing it yourself, use the Print command in Photos for macOS, and output one side at a time. (Then turn it over and print the other side.)

I printed mine on Red River Paper 60lb. Polar Matte 7x10 card stock (Item #1958) using my Epson R2000 inkjet printer. The card folds nicely to 5" x 7", with a lovely design inside and out.

I have more detailed printing instructions in my Apple Photos Book for Photographers. It's worth doing. They look great. And if you've never tried your hand at creating your own fine art cards, I can't think of a better time to start.

(Happy Mother's Day, Mom!)

Book or Videos: Photos for macOS

Explore the world of modern photography with my The Apple Photos Book for Photographers that features insightful text and beautiful illustrations.

And if you'd like to cozy up to a video at the same time, watch my latest lynda title, Photos for macOS Essential Training

You can share your thoughts at the TDS Facebook page, where I'll post this story for discussion.

Some shots we can take our time improving in post, and others we have to turn around quickly. For those portraits that need to be posted right away, I have a speedy Luminar workflow that only takes 1-2 minutes.

final-portrait-TDS.jpg "Leah at Railroad Square" - Pentax KP, Pentax 70mm f/2.4 HD lens, speed edit in Luminar. Photo by Derrick Story.

Take a look at my article, Speed edit portraits with Luminar where I outline the steps for this workflow. You can use this technique with the standalone version of the app, the Photos for macOS editing extension, or as an external editor for Lightroom. If you don't need to save your changes and history, feel free to use the editing extension for a one-off. To return to the app for more work later, I would go the standalone route, and follow the instructions in the article.

After you use this approach a few times, you may want to save your favorite filters as a custom Workspace instead of starting with the standard Portrait Workspace. I've been very impressed at how much better my shots look after just a couple minutes in Luminar. Try it for your portraits and see what you think.

Luminar as Your Digital Darkroom

You can learn more about using Luminar as an editing extension in my lynda.com training, Photos for macOS: Advanced Editing Extensions.

And if you'd prefer to cozy up with a book, check out The Apple Photos Book for Photographers that features chapters on basic editing, advanced post processing, and editing extensions.

You can share your thoughts at the TDS Facebook page, where I'll post this story for discussion.

I've been using Photos for macOS for all of my personal work, and I've yet to regret adding another image to the stack. Why is that?

Ready-to-Fall.jpg "Victoria Winning the Game" - Olympus PEN-F, Lumix-G 20mm f/1.7 lens, ISO 1600, f/4, 1/320th, cataloged in Photos for macOS, processing with the Luminar editing extension. Photo by Derrick Story.

There are a number of reasons why Photos is such a good fit for my personal work. Here are five of them.

  • Mindless Backup - Thanks to iCloud, the moment an image enters my Photos library, it is backed up and available to all of my connected devices. I spend a lot of time archiving and organizing my commercial work. But I don't spend a moment thinking about the safety of my personal shots.
  • Face Recognition - If you haven't worked with this technology for a while, it's worth another visit. Much of my personal work features people I love and care about. And using Faces in Photos, I can find all the shots that I have of anyone in just a matter of seconds. Faces is easy to use, and it works really well.
  • Easy Geotagging - My iPhone shots are automatically geotagged. But the other images need location information added in post. This is so easy to do in Photos. I just start typing the place, and my options automatically appear. And just like that, the photo is geotagged. Again, simple.
  • Object Recognition - This technology is still developing. But even in its early stages, I find it useful. More and more, I'm entering search words such as "Vineyard" or "Ocean" to find images in my library. As these algorithms improve, so will my fondness for this feature.
  • Editing Extensions - More and more, I'm using Luminar and other editing extensions for my work. As a result, I truly enjoy working on images in Photos. And the results are top notch.

If you're already a fan of the Mac/iOS ecosystem, and you're not using Photos, then I suggest you give it another chance - not because Apple needs your patronage, but because I think it will bring happiness to your personal work.

Photos for macOS as Your Digital Darkroom

You can learn more about using Luminar as an editing extension in my lynda.com training, Photos for macOS: Advanced Editing Extensions.

And if you'd prefer to cozy up with a book, check out The Apple Photos Book for Photographers that features chapters on basic editing, advanced post processing, and editing extensions.

You can share your thoughts at the TDS Facebook page, where I'll post this story for discussion.

Lens Correction in Photos for macOS

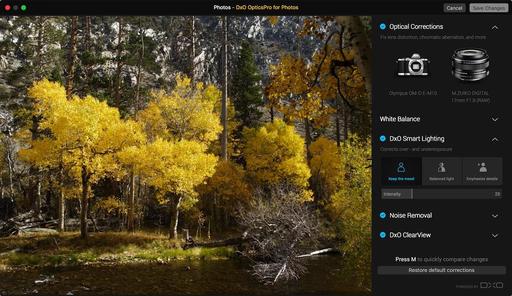
We didn't even have lens correction in Aperture. But thanks to the DxO Optics Pro editing extension, we can apply these adjustments to our images in Photos.

dxo-lens-correction.jpg

If you want to see how easy this is to use, take a look at this free movie on how to use the DxO Optics Pro extension.

This isn't round tripping. You get to work with the original RAW file, and you can revert to original right there in the Photos interface. Plus you get other goodies too, such as Smart Lighting, Noise Removal, and ClearView. These are terrific tools worth a look.

Photos for macOS as Your Digital Darkroom

You can learn more about using DxO Optics Pro as an editing extension in my lynda.com training, Photos for macOS: Advanced Editing Extensions.

And if you'd prefer to cozy up with a book, check out The Apple Photos Book for Photographers that features chapters on basic editing, advanced post processing, and editing extensions.

You can share your thoughts at the TDS Facebook page, where I'll post this story for discussion.

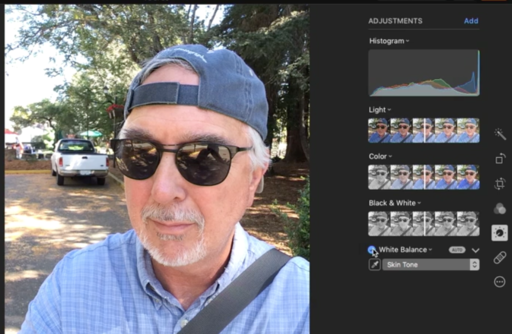
White balance is one of those adjustment tools that we sometimes forget that we need. Then when we use it, we go, "Oh wow, that does look better."

I think in large part this is because digital cameras tend to record portraits a bit on the cool side. In other words, skin tones can be slightly bluish. We typically don't think about this much, that is, until we adjust those tones with the White Balance tool and compare the difference.

white-balance-in-photos.png

In the following 5-minute video, I walk you through the White Balance tool in Photos for macOS. It's not included in the default adjustments panel, so it's often overlooked. I begin by showing how to enable the adjustment by going to Add > White Balance in the Adjustments panel. Once you enable it, I recommend that you keep it in your default set of adjustments by going back to Add, then choosing Save as Default from the popup menu.

Now that White Balance is available, here are some tips on how to use it.

Indeed, a White Balance adjustment can be a subtle improvement for an image. But it's often those subtleties that distinguish a good photographer from just an average one.

Book or Videos: Photos for macOS

Explore the world of modern photography with my The Apple Photos Book for Photographers that features insightful text and beautiful illustrations.

And if you'd like to cozy up to a video at the same time, watch my latest lynda title, Photos for macOS Essential Training

You can share your thoughts at the TDS Facebook page, where I'll post this story for discussion.

Don't Forget About Noise Removal

For many of us, noise removal is one of those forgotten adjustments in our everyday workflow. In part, that's because camera manufacturers have improved the high ISO pictures that appear on our screen. But that doesn't mean we still don't need it at times.

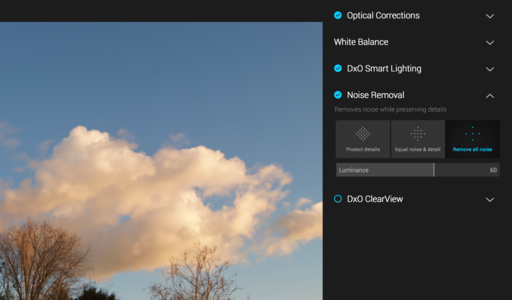
dxo-noise.png Noise Reduction in the DxO OpticsPro for Photos editing extension.

But what I've noticed is, that if "I just play around with noise reduction" on an image, especially one with continuous tones at a higher ISO, I usually like the results. Looking at the screen, I'll say to myself, "Hmm, that looks better." So I try to remember to at least take a look at noise reduction every now and then with these types of shots.

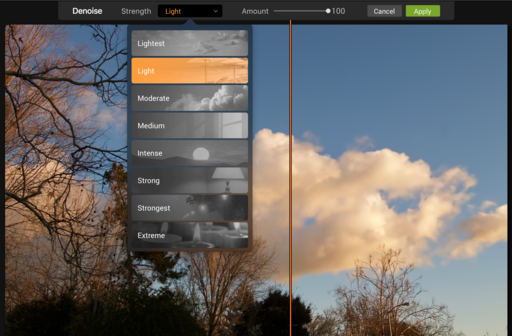
There's a NR slider in most of our image editing apps. Lightroom, Capture One Pro, and Photos for macOS all have this functionality. But I've noticed that their algorithms vary widely.

luminar-noise.png The noise reduction tool in Luminar.

Even though Lightroom and Capture One have good built-in tools, I find myself working with plugins more often for my NR work. For example, I really like the noise reduction tool in Luminar. Typically, I use it as an editing extension for Photos for macOS or as a plugin for Lightroom because it's so convenient and doesn't disrupt the workflow. For one-click convenience that are also effective, I like the DxO OpticsPro for Photos editing extension.

There's a good article on Amateur Photographer titled, What's the best noise reduction software out there?. They survey a number of apps that work on both Mac and Windows machines, and rate them.

Chances are that you have one or more of these on your computer right now. You might want to pay it a visit every now and then. I think you'll be happy with the results.

Photos for macOS as Your Digital Darkroom

You can learn more about using Luminar as an editing extension in my lynda.com training, Photos for macOS: Advanced Editing Extensions.

And if you'd prefer to cozy up with a book, check out The Apple Photos Book for Photographers that features chapters on basic editing, advanced post processing, and editing extensions.

You can share your thoughts at the TDS Facebook page, where I'll post this story for discussion.
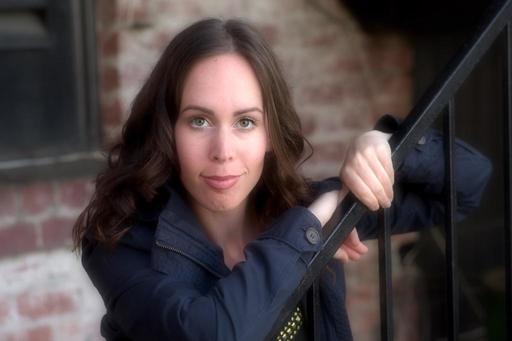
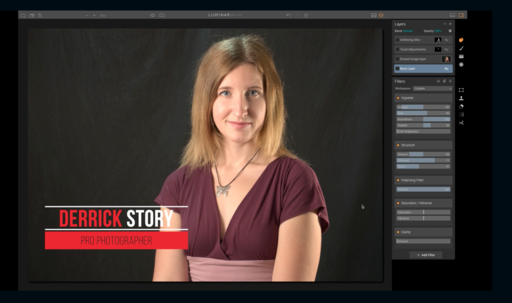
Luminar is an excellent portrait retouching tool thanks to its variety of adjustment filers and easy to use layer control. Here's a free video showing you how to quickly improve a portrait with this application.

luminar-portrait-retouching.png

Notice in the movie how easy it is to work with layers during the editing process. This is one of most outstanding features of Luminar

You can download a free trial of Luminar and see for yourself.

Photos for macOS as Your Digital Darkroom

You can learn more about using Luminar as an editing extension in my lynda.com training, Photos for macOS: Advanced Editing Extensions.

And if you'd prefer to cozy up with a book, check out The Apple Photos Book for Photographers that features chapters on basic editing, advanced post processing, and editing extensions.

You can share your thoughts at the TDS Facebook page, where I'll post this story for discussion.

Working with Layers in Luminar

If you've been frustrated by layers in other image editing apps, maybe it's time to take a look at them in Luminar. It's a whole different ballgame there, and a much more enjoyable one too.

luminar-layers.jpg

The first thing that I noticed when learning about layers in Luminar, is that they work intuitively. In other words, If I guess that I can reposition a layer by clicking and dragging, it actually performs that way. So using these tools evolved from being the "L Word" to something that I truly like. Here's a movie that provides you with a nice overview of their functionality.

If you want to learn more about working with Luminar as an editing extension for Photos for macOS, I have a terrific resource for you: Photos for macOS: Advanced Editing Extensions, on lynda.com. And if you haven't downloaded Luminar yet, you can get it here.

Imagine having powerful layers controls built right into Photos for macOS. Who would of thought? Or, if you wish, you can use Luminar as a plugin for Lightroom, or as a standalone app. It's certainly changed my opinion about this type of editing.

Learn How to Streamline Your Image Editing

You can learn more about using Luminar as an editing extension in my lynda.com training, Photos for macOS: Advanced Editing Extensions.

And if you'd prefer to cozy up with a book, check out The Apple Photos Book for Photographers that features chapters on basic editing, advanced post processing, and editing extensions.

You can share your thoughts at the TDS Facebook page, where I'll post this story for discussion.
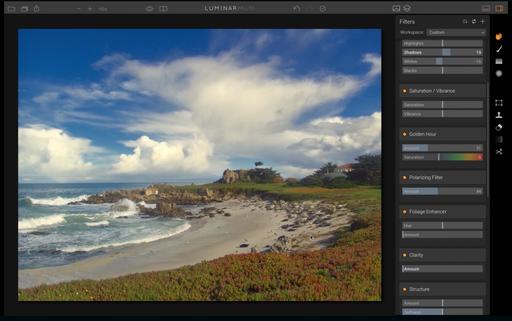
There are two basic ways to tap the power of Luminar. One is to use is as a standalone app (and there are advantages to that). Or you can tap its power as a plugin/editing extension (Lightroom, Photoshop, Photos for macOS). When would you choose one over the other?

The primary reason for going the standalone route would be if you wanted to go back and fine tune a layered document. I explain exactly how this works in the following video.

Most of the time I'm using Luminar as a plugin/editing extension. But for my special projects, I go the standalone route so that I can continue to refine the image without any loss of quality. This is particularly fun for ongoing projects.

Limited Special Offer Plus Coupon

Luminar Hot Deal

If this is a workflow that you're interested in, the timing couldn't be better. Macphun is offering a sweetheart of a deal for Luminar. This offer is valid until Saturday, Feb. 18th. Here are the details. For $69 you'll get:

  • Luminar, super-charged photo software for any Mac photographer (standalone version plus plugins and editing extension).
  • Vivid Wonderland Luminar preset pack.
  • Pose like the Pros: Family Photos - eBook.
  • Top 25 Places to Shoot the Most Romantic Photos - eBook (I think this is the Valentine's day part :-)
  • Creative Sky Overlays (include 166 Color Sky Overlays, 69 Landscape & Ocean overlays).

And a Coupon for an Additional $10 Savings

luminar-feb2017.png

In addition to this special offer of Luminar plus bonuses for only $69 (total value $139 Savings of 50 percent), I can save you another $10 if you use coupon code: THEDIGITALSTORY at checkout. That lowers the price for the entire package to $59.

With this offer, you get the standalone version of the app, and all of its plugins, including for Lightroom, Photoshop, and Photos for macOS. This gives you maximum flexibility in how you use Luminar's powerful editing tools.

I'm having a blast editing my images with Luminar. I hope you give it a try.

Photos for macOS as Your Digital Darkroom

You can learn more about using Luminar as an editing extension in my lynda.com training, Photos for macOS: Advanced Editing Extensions.

And if you'd prefer to cozy up with a book, check out The Apple Photos Book for Photographers that features chapters on basic editing, advanced post processing, and editing extensions.

You can share your thoughts at the TDS Facebook page, where I'll post this story for discussion.