Recently in Photos for OS X

  Page 11 of 12 in Photos for OS X  

Editing Extensions Without the Mess

The list of cool editing extensions for Photos for OS X is growing steadily: Aurora HDR Pro, DxO OpticsPro for Photos, Tonality, Affinity Retouch, and more. Mac users who want to take advantage of these tools without disrupting their existing workflow can do so easily by setting up a referenced library.

01-ava-extensions.jpg You can play with all of these tools without disrupting your workflow.

All you have to do is simply point Photos to the existing home of your master files. In my case, they're on a small flash drive connected to my Mac. Those images are the source files for my Aperture, Capture One, and Exposure X work. But I can also play with them in Photos without changing the masters or interfering with the libraries in my other programs. Here's a movie on how to set up a referenced library.

Once I have the referenced library set up, I can play with tools such as Aurora HDR for Photos. Generally speaking, I've found the editing extension version of these apps easier to use and totally non-destructive. I can still view the original at any time, even after I've left the extension interface.

02-editing-image.jpg Playing with the image in the editing extension Aurora HDR Pro for Photos for OS X. All images by Derrick Story.

If you want to see where your original picture is residing, just right-click on the image and select "Show Referenced File in Finder." There it is, exactly were it was before you had all of this fun.

03-file-location.jpg

My guess is that a lot of Mac-toting photographers are missing out on this experience, just because they haven't looked in to it. I'm telling you, these extensions are cool. Check them out.

And for other hands-on tutorials, be sure to take a look at Photos for OS X Essential Training on lynda.com.

More Help and Insights on Photos for OS X

Don't forget about the Photos for OS X Special Feature Section on The Digital Story. It's a roundup of tutorials, videos, and articles focused on helping you master Apple's latest photo management software. You can also find it under Photography in the top nav bar.

Want to Comment on this Post?

You can share your thoughts at the TDS Facebook page, where I'll post this story for discussion.

My 3 Photo Apps for 2016

After months of research and testing, I've settled on the applications that I'm using for my photography workflow in 2016. I thought you might be interested in my selections and why.

Overall Photo Management: Capture One Pro 9

CaptureOnePro-Screen.jpg

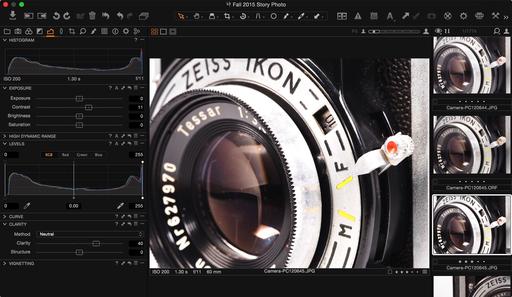
Capture One comes the closest to the robust file management that I liked so much in Aperture. Its system of folders (called Groups), projects, and albums feel right at home.

And the RAW decoding is beautiful. My images look great in this application, and there are tons of editing tools for refining them. Overall, this will be the ultimate home for my RAW files.

Pros: Great library management, excellent RAW decoding, serious editing tools.
Cons: Does not accommodate imported PSD files, very still-photo centric, not cloud connected, a serious investment at $300.

Quick Turnaround: Alien Skin Exposure X

ExposureX-Screen.jpg

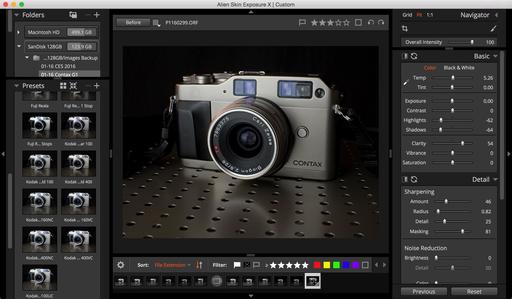
Robust photo management is great, but I have a lot of quick-turnaround jobs that I need to deliver fast. I'm really enjoying Exposure X for these scenarios. It reads the files off my memory card, puts them on my drive, then lets me star rate or add color labels, edit, and export - blazingly fast.

The adjustment sliders are terrific, and the film emulation presets are fun and creative. So not only am I working fast, the images look wonderful afterward.

Pros: Creative, great user interface, fast, lots of goodies.
Cons: Not the full featured photo management app that some photographers want, somewhat expensive at $149

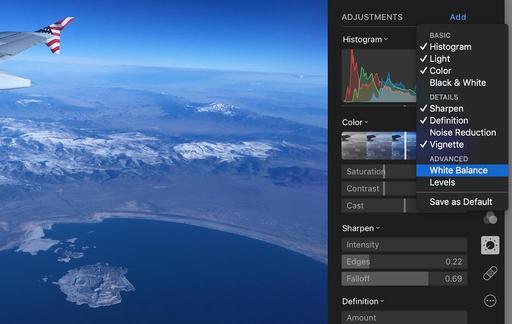
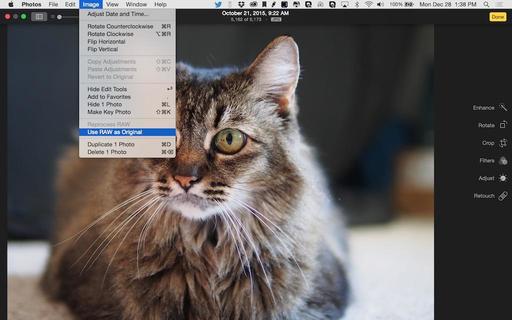
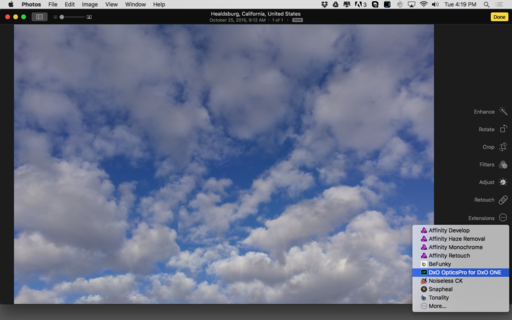
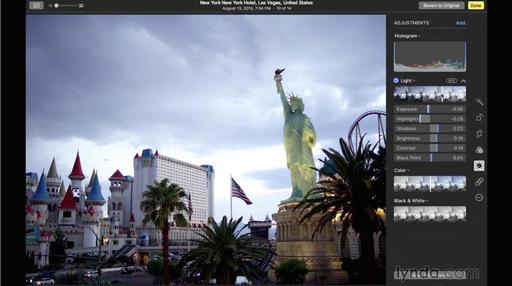
Cloud Connected and Mobile: Photos for OS X

photos-for-osx-screen.jpg

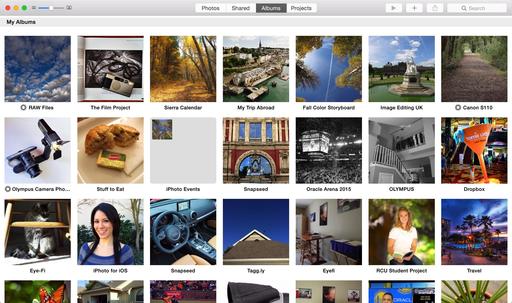
It's not the do-everything imaging app that it replaces (Aperture), but Photos for OS X is great at what it endeavors, which is connect your devices, backup your mobile shots, and provide a fun editing environment.

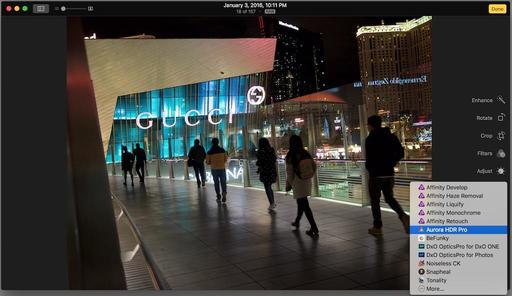
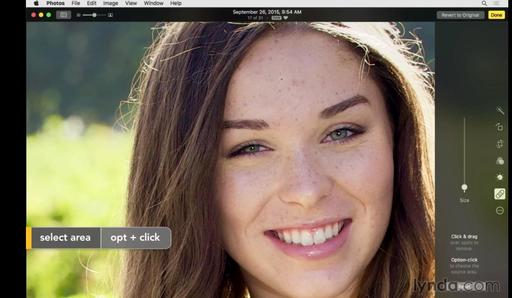
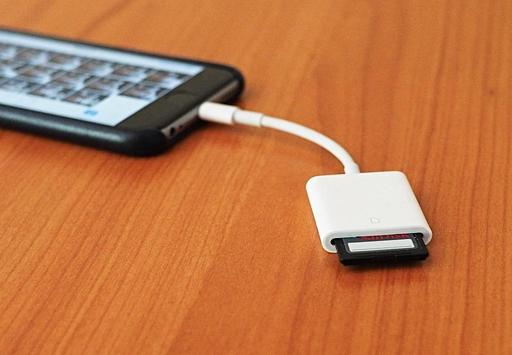
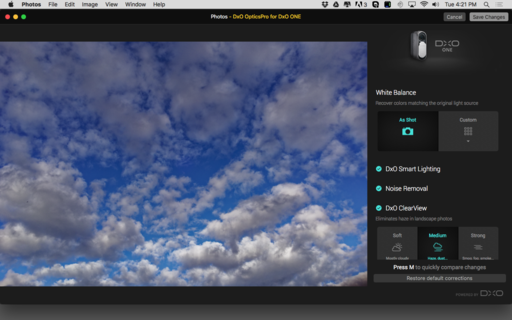
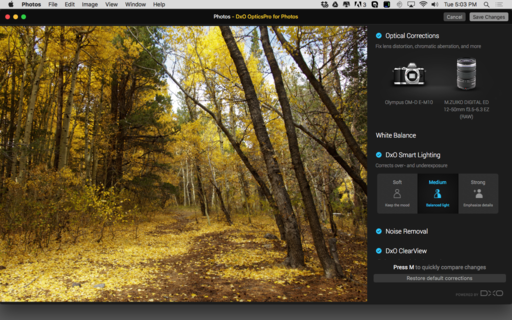
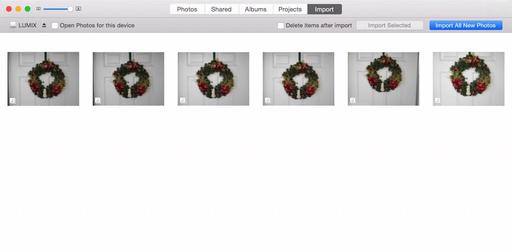
I shoot a lot with my iPhone, and I don't want to have to worry about the preservation or sharing of those pictures. Photos just makes it happen. I love the built-in editing tools, and what it doesn't include natively, is now being addressed by 3rd party plugins. And that implementation is terrific.

My iPhone images are easily adjusted, instantly shared, and always backed up. How could you not take advantage of this great app if you're an iOS shooter?

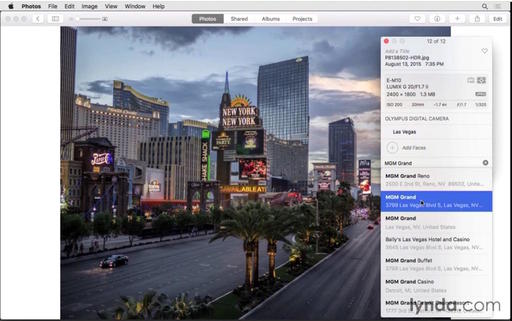
Pros: Easy, fast, mobile, smart, easy geotagging, and free.
Cons: Still no star ratings or color labels (ugh!), weak metadata management, not great for RAW shooters with new cameras (slow updating of RAW profiles).

Bottom Line

I know a lot of folks want just one photo application to handle all of their needs. And depending on how you shoot, that's a reasonable request. But for someone like me who's using an iPhone one moment, Contax film camera the next, Olympus mirrorless after that, then a Cannon DSLR for a commercial shoot, one app just isn't going to cut it. So these are my three for 2016.

Training and Such

For hands-on tutorials to master Photos for OS X, be sure to take a look at Photos for OS X Essential Training on lynda.com.

I have a Capture One Pro Essential Training in the works that should be out soon. Over 100 movies on using that app. Keep an eye out for it.

Don't forget about the Photos for OS X Special Feature Section on The Digital Story. It's a roundup of tutorials, videos, and articles focused on helping you master Apple's latest photo management software. You can also find it under Photography in the top nav bar.

Want to Comment on this Post?

You can share your thoughts at the TDS Facebook page, where I'll post this story for discussion.

I've actually had people say to me, "You mean there's a retouch tool in Photos for OS X?" Yes, there is, and it's actually quite good. Just open the image in Photos on your Mac, and follow the simple steps that I show you in this movie from Photos for OS X Essential Training on lynda.com.

And once you remove those small blemishes and imperfections using Photos on your Mac, the changes are propagated to all versions of that image on your mobile devices thanks to iCloud integration. So fix it once and be done with it.

retouch-tool-photos.jpg

And for other hands-on tutorials, be sure to take a look at Photos for OS X Essential Training on lynda.com.

More Help and Insights on Photos for OS X

Don't forget about the Photos for OS X Special Feature Section on The Digital Story. It's a roundup of tutorials, videos, and articles focused on helping you master Apple's latest photo management software. You can also find it under Photography in the top nav bar.

Want to Comment on this Post?

You can share your thoughts at the TDS Facebook page, where I'll post this story for discussion.

IMG_0502.jpg

With iOS 9.2, Apple opened the door to use a Lightning SD Card Reader for uploading images directly from a memory card to an iPhone. We've had that functionality with an iPad, and now it works for iPhones too.

The process is fairly simple. Attach a Lightning to SD Card Camera Reader to your iPhone, and choose Import All or select the individual shots by tapping on them in Photos for iOS.

By doing so, Photos will put a blue checkmark in the lower right corner of the image designated for import. If you change your mind, tap the thumbnail again to remove the checkmark. (You won't see any checkmarks at all if you use the Import All command until the process has begun.)

Now tap the blue Import or Import All label in the upper right corner. The images will be copied from the memory card into your Photo Stream. If you have RAW+Jpeg pairs, only the Jpegs will be visible on your mobile device. You'll see the message, "Multiple formats imported" reminding you of how this works. But the RAWs will be accessible for editing when you use Photos for OS X on a Mac. Of course you'll need iCloud photo sync enabled for the images to automatically appear on your computer too. And when editing, be sure to choose "Use RAW as Original" from the Image menu while in Editing mode.

choose-raw.jpg

OK, now getting back to your iPhone... if you don't see your recently uploaded files in Collections in Photos for iOS, tap on the Albums tab and view the Last Import album. They should be there. The pictures should also be visible in the All Photos album.

From this point forward, you can mark images as Favorites, share them on social sites, edit them with Photos' adjustments, or work on them in other applications.

PC280517-iphone-sd-card-1024.jpg

This capability is also handy for viewing what's on a particular SD card that you find rattling around in the bottom of your backpack. Either way, with the large screens we now enjoy with the iPhone 6S and 6S Plus, adding the card reader function makes a lot of practical sense.

For more help mastering Photos for OS X, be sure to take a look at Photos for OS X Essential Training on lynda.com.

More Help and Insights on Photos for OS X

Don't forget about the Photos for OS X Special Feature Section on The Digital Story. It's a roundup of tutorials, videos, and articles focused on helping you master Apple's latest photo management software. You can also find it under Photography in the top nav bar.

Want to Comment on this Post?

You can share your thoughts at the TDS Facebook page, where I'll post this story for discussion.

Adding Geotags in Photos for OS X

This is one of the easiest ways to add location information to any photo, captured with any camera. Just open the image in Photos for OS X, and follow the simple steps that I show you in this movie from Photos for OS X Essential Training on lynda.com.

By doing so, not only are you adding geotags to your pictures, but Photos also recognizes this information for search. So, for example, if you add geotags to the MGM Grand Hotel in Las Vegas, you can also search for images using any of those labels.

geotagging-photos.jpg

If you prefer articles to videos, you might want to read my How to Geotag in El Capitan Photos App. And for other hands-on tutorials, be sure to take a look at Photos for OS X Essential Training on lynda.com.

More Help and Insights on Photos for OS X

Don't forget about the Photos for OS X Special Feature Section on The Digital Story. It's a roundup of tutorials, videos, and articles focused on helping you master Apple's latest photo management software. You can also find it under Photography in the top nav bar.

Want to Comment on this Post?

You can share your thoughts at the TDS Facebook page, where I'll post this story for discussion.

The DXO ONE workflow just got a little easier for Mac users. Now there's an Optics Pro editing extension just for the DxO ONE camera and Photos for OS X. And it works pretty well.

dxo-one-photos-os-x.png

Instead of having to use a completely separate app, previously DxO Connect, ONE shooters can now import their RAW/Jpeg pairs directly into Photos for OS X. Then, simply select the image for adjustment, go to Edit mode (make sure you're working on the RAW file), and choose DxO Optics Pro for the DxO ONE from the list of editing extensions.

dxo-editing-extension.png

This gives you access to lens corrections, Smart Lighting, white balance, and DxO ClearView. There are presets within the adjustments to help you get the look you want. After doing so, click on Save Changes, and you're returned to the standard Photos for OS X editing environment. Here, you can continue to work on your picture if necessary using Photos' standard toolset.

The adjustments are quite powerful. Compare the top image, processed with the Optics Pro editing extension, with the middle photo that's straight out of the camera. Both Smart Lighting and ClearView can add a lot of pop to a picture.

The editing extension is free, but of course you have to have a DxO ONE camera to use it. If you don't have the ONE, there's also DxO Optics Pro for Photos that uses modules for many of the common camera/lens combinations.

optics-pro-olympus.png

When DxO loads modules for both camera and lens, the corrections are quite impressive. And even when a lens module does not load, such as with my Olympus 17mm f/1.8 prime, the Smart Lighting and ClearView still provided lots of pop to the image. (I was disappointed, however, when a lens module would not load for editing a photo. I suspect this process will be smoothed out in future updates.)

DxO Optics Pro for Photos is currently on sale for $9.99 in the Mac App Store. You'll need Mac OS X El Capitan and a 64-bit processor to run either app.

More Help and Insights on Photos for OS X

To learn all the ins and outs of the latest version of Photos, take a look at Photos for OS X Essential Training on lynda.com. And don't forget about the Photos for OS X Special Feature Section on The Digital Story. It's a roundup of tutorials, videos, and articles focused on helping you master Apple's latest photo management software. You can also find it under Photography in the top nav bar.

DXO_0394.jpg Here's an image captured with the DxO ONE camera and processed with the Optics Pro editing extension in Photos for OS X.

Want to Comment on this Post?

You can share your thoughts at the TDS Facebook page, where I'll post this story for discussion.

Turn Off Photos for OS X Auto Launching

It's an aggravation that many photographers just don't want: having to manually quit Photos for OS X every time a memory card is connected to the computer. But it doesn't have to be that way.

photos-import-web.jpg

The scenario goes like this: you insert a memory card or connect your camera to a Mac running El Capitan, and the import dialog for Photos for OS X pops up begging for attention. This is great if your intention is to import into Photos. But if not, that's annoying.

If you use the same image capture device all the time, the fix is easy. Just uncheck the box next to "Open Photos for this Device." The problem is, depending on how your memory cards are formatted, or if you use a variety of cameras, you'll still experience the unwanted import dialog.

Fortunately Melbourne-based photographer Ben Fon published an easy fix on Petapixel that uses the following command applied in the Terminal app:

defaults -currentHost write com.apple.ImageCapture disableHotPlug -bool YES

The Terminal app is located in your Utilities folder, and the process is as simple as opening the app, pasting this command in there, pressing Enter (the return key), and closing the app. I tested it, and it seems to work just great (Thanks Ben!).

I suspect that Apple may provide us with a user friendly fix up the road. If they do indeed, then you can turn off this action by going back to the Terminal app and typing:

defaults -currentHost write com.apple.ImageCapture disableHotPlug -bool NO

Of course, if you use Photos for OS X as your primary picture management application, then you probably don't care about any of this. But you may be interested in learning more about using Photos. If that's the case, be sure to take a look at Photos for OS X Essential Training on lynda.com.

More Help and Insights on Photos for OS X

And don't forget about the Photos for OS X Special Feature Section on The Digital Story. It's a roundup of tutorials, videos, and articles focused on helping you master Apple's latest photo management software. You can also find it under Photography in the top nav bar.

Want to Comment on this Post?

You can share your thoughts at the TDS Facebook page, where I'll post this story for discussion.

The one thing I learned while working on Photos for OS X Essential Training is that there's more to this application than I realized... especially after the new El Capitan release.

In this title I show you the ins and outs of this maturing application from a photographer's point of view. I explain how to use the sophisticated geotagging function. And I demonstrate the editing extensions, which provide an open door to Photos allowing third party developers to add powerful new features.

Take a look at the overview movie and table of contents. Then you might want to revisit this intelligent photo app that's right under your nose.

photos-esst.jpg

More Help and Insights on Photos for OS X

And don't forget about the Photos for OS X Special Feature Section on The Digital Story. It's a roundup of tutorials, videos, and articles focused on helping you master Apple's latest photo management software. You can also find it under Photography in the top nav bar.

Want to Comment on this Post?

You can share your thoughts at the TDS Facebook page, where I'll post this story for discussion.

Pixelmator 3.4 was rewritten for Mac OS X El Capitan and includes support for multitasking via Split View and a Photos Extension with powerful Distort tools. This is the fifth editing extension for Photos for OS X.

pixelmator-el-capitan.png

Additional highlights of version 3.4 include Enhanced Force Touch support that makes painting with Force Touch trackpad even smoother and a new interface font, San Francisco.

Pixelmator 3.4 is available in the Mac App Store for $29.99 and is compatible with OS X 10.9.5 or later and a 64-bit processor.


Get Up and Running with Photos for OS X

Want to get up to speed with Apple's latest photo management application? Then take a look at my latest online video training, Up and Running with Photos for OS X. Soon, both you, and your pictures, will be comfortable in their new home.

And don't forget about the Photos for OS X Special Feature Section on The Digital Story. It's a roundup of tutorials, videos, and articles focused on helping you master Apple's latest photo management software. You can also find it under Photography in the top nav bar.

Want to Comment on this Post?

You can share your thoughts at the TDS Facebook page, where I'll post this story for discussion.

Previously, you could view location data in the Info box, but that was about it. Great for iPhone pictures that already had geotags. But what about the other shots captured with regular digital cameras?

look-up-location.jpg In Photos for OS X 1.1, you can look up location data for any image and apply it to previously non-geotagged pictures.

In the version of Photos that ships with El Capitan, this all changes, giving you much more control. Here's how it works.

First, open an image in the viewer and enable the Info box (CMD-I). At the bottom of the box, you'll see text that reads, Assign a Location. Start typing the place where the picture was captured. Photos will offer locations matching your entry (see top picture). Pick one that works.

location-found.jpg Location found for this image.

In the case of this blue jay image, the photograph wasn't actually recorded at the club house as initially indicated. I saw the bird alongside a fairway quite a distance from the offices. So I clicked and dragged the pin to the actual location of the capture. It's easier to do this precisely if you use the zooming tools in the lower right corner of the location box. Pinching outward and inward works too.

adjust-location-new.jpg I dragged the pin to the proper location for this image.

If I decided that I wanted to remove the location at a later date, I can choose Remove Location from under the Image menu (Image > Location > Remove Location). I can also revert to the original location here.

There doesn't appear to be any batch processing for geotagging. But you can copy the location text and paste it in a subsequent picture. it's not super elegant, but it does save a little time.

When you export images out of your Photos library, you may want to do so without the location data. You'll find that control under the General tab in Preferences.


Get Up and Running with Photos for OS X

Want to get up to speed with Apple's latest photo management application? Then take a look at my latest online video training, Up and Running with Photos for OS X. Soon, both you, and your pictures, will be comfortable in their new home.

And don't forget about the Photos for OS X Special Feature Section on The Digital Story. It's a roundup of tutorials, videos, and articles focused on helping you master Apple's latest photo management software. You can also find it under Photography in the top nav bar.

Want to Comment on this Post?

You can share your thoughts at the TDS Facebook page, where I'll post this story for discussion.