Recently in DIY

  Page 3 of 4 in DIY  

Rear Lens Cap Pad for Stacking

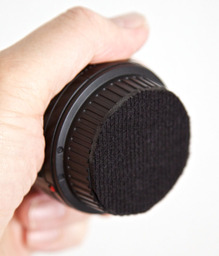
For those times when you need to stack lenses in a camera bag, but don't want them banging against each other possibly marring their surfaces, use a Rear Lens Cap Pad. You can make your own by getting an adhesive-back pad, cutting it to the diameter of your rear cap, and applying. (Click on image for an enlarged view.)

I use this technique for packing my Lowepro Fastpack 250. The 70-200mm zoom lens lays horzontally in the camera compartment, then my 50mm sits on top of the barrel with the Cap Pad so as not to scratch it. This method takes up less room than individual lens pouches, and it provides faster access too.
For more Do It Yourself projects, check out our DIY Projects page


twitter.jpg Follow me on Twitter

-


The $2 iPad Stand

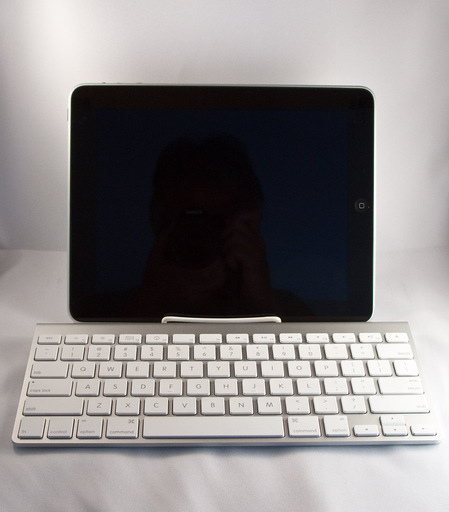
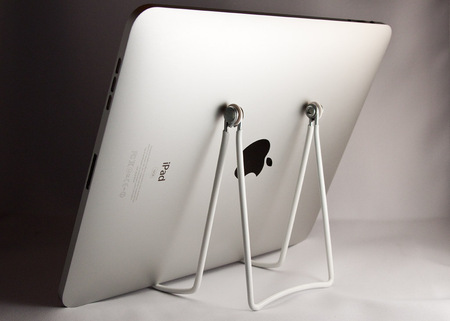
The iPad belongs on a stand. Whether you're using it as a digital photo frame, or have it propped up while typing with a Bluetooth keyboard, a portable stand improves the situation. I've been using this simple wire display stand that costs around $2, folds up for easy transport, and is feather light.

Wire Book Stand for iPad

An Apple iPad on a $2 wire display stand. Click on image to enlarge.

The steel wire is vinyl coated and the hinge washers are plastic so the stand will not scratch your brand new iPad. When you're on the go, this trio weighs in less than 3 pounds: iPad (1.5 pounds), keyboard (11.5 ounces), and stand (1 ounce).

iPad on Stand with Keyboard

Traveling Light! iPad, keyboard, and stand weigh less than 3 pounds. Click on image to enlarge.

More iPad Articles

Bluetooth Keyboard and iPad - A Powerful Combination

Turn Your iPad into a Live Camera

Lowepro Classified 160 AW is Perfect Bag for iPad Toting Photographers

Coolest iPad Apps for Photogs? Keynote and CameraBag

"iPad for Photographers" - Digital Photography Podcast 219


twitter.jpg Follow me on Twitter

-


String Monopod

How about a monopod that weighs less than half an ounce? TDS virtual camera club member Brian Reynolds writes:

"I never really liked traditional monopods. What I have found to be very useful is what some people call a string monopod.

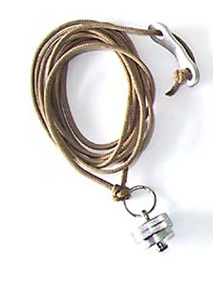
Here's how to make one version of this device.You need a 1/4x20 eyebolt, two 1/4x20 nuts, and a length of clothes line (or any line that doesn't stretch). Put both nuts on the eyebolt, and then carefully attach the eyebolt to the camera's tripod mount. If you over tighten the eyebolt you can damage the camera's bottom plate. Gently tighten one of the nuts against the camera's bottom plate, and then tighten the other nut against the first. The nuts will prevent you from over tightening the eyebolt when you re-attach the eyebolt later. Now you tie the rope to the eyebolt.

To use the string monopod attach it to the camera, drop the rope on the floor, step on it, and then pull up to put tension on the rope.

I've had very good luck with this. For last year's Solo Photo Book Month project, I shot on the streets of Manhattan with a handheld Yashica Mat 124G and a string monopod. I was able to use shutter speeds as low as 1/30 second.

So, if you're not the trekking pole type, the string monopod might be just the solution for you on the trail.

Thanks Brian! If you have a great outdoor tip, or favorite piece of equipment, send it along to me. I'll feature reader submitted tips on a regular basis.

Previously in Outdoor Gear for Photographers

"The Great Outdoors" - Digital Photography Podcast 218

Portable Camera Stability - Outdoor Photo Tip #2

Sunset Portraits - Outdoor Photo Tip #1

New Series on Outdoor Gear for Photographers


twitter.jpg Follow me on Twitter

-


Snail Close Up with LP-Micro Litepanel

I recently added a Litepanels LP Micro Compact LED Light to my DSLR kit. In part, because I wanted a continuous light for close up photography and for video with the Canon 5D Mark II. I chose the Litepanels Micro because it has good output for a small light, is 5600K daylight balanced, has an adjustable intensity knob, uses 4 AA batteries, and it's virtually heat free.

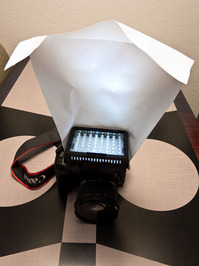
Even though the panel is over 3" wide, the light sometimes seemed a little harsh for certain subjects. I decided that I wanted to make a diffuser for the Litepanel, so I constructed one using only a letter-sized sheet of paper and a large rubber band.

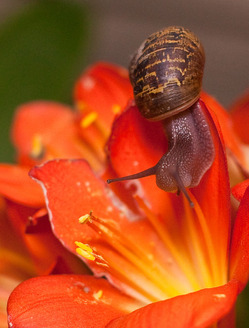
First thing I did was mount the LP Micro backwards in the hot shoe so it sat back on top of the camera. I then folded the paper as shown to create a larger surface area and attached it to the Litepanel with a rubber band. I cranked the power all the way up, mounted my Sigma 50mm f/1.4 lens on the Canon 5D Mark II, and increased the ISO to 1600. I shot in Aperture Priority mode at f/2.8 for this shot of the snail. (Click on the image for an enlarged view.)

LP-Micro DIY Diffuser

With the diffuser, the quality of the light was much softer, yet, there were still nice highlights in the photo. I shot the picture at night when the snails were out having their meals. Even diffused, there was enough output from the Litepanel for me to shoot at 1/30 at f/2.8 in the darkness. Because the light is continuous, I can better compose the shot, and work quickly.

The Litepanels LP Micro Compact LED Light is not cheap: about $275. But I like having it in my kit along with a regular flash for these types of subjects.

Photographs by Derrick Story. Click on images to enlarge.


twitter.jpg Follow me on Twitter

-


DIY nano Stand for iPod Video Recording

The 5th generation iPod nano has terrific new functions such as an intelligent FM radio receiver and a video camera that can record hours of SD movie capture. One challenge that I encountered while recording video, however, was finding an easy way to steady the camera for scenes where the subjects were stationary, such as during a speech or a musical recital.

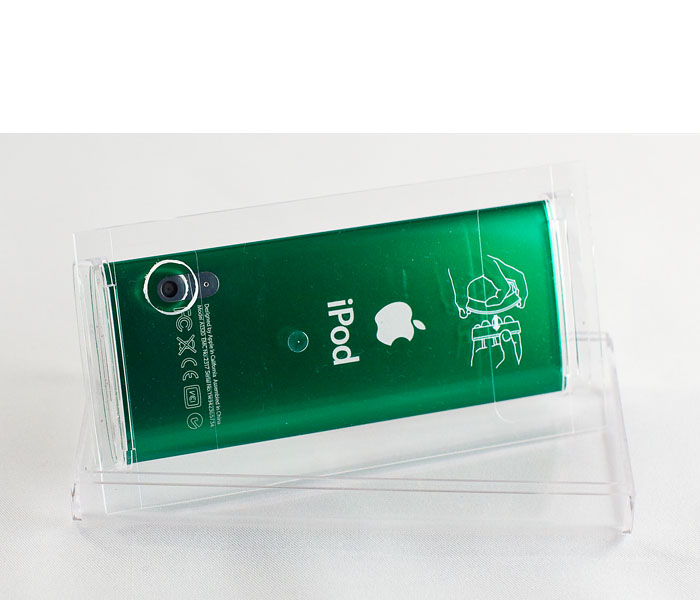
By modifying two parts of the packaging for the nano, you can quickly create a stand that works on any horizontal surface, allowing you to record super-steady movies. When not in use, the stand folds up so it's nearly as compact as the nano itself.

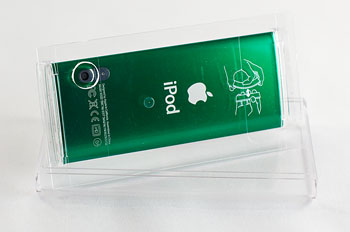
All you have to do is drill a hole in the flexible holder that your iPod ships in. I simply put the nano in the holder, marked on the clear plastic where the camera lens is with a Sharpie, removed the nano, drilled the hole, then reattached the iPod. When you're ready to record, stand it up in the open lid. You'll find that you have a number of adjustments that you can make just by moving the iPod around in the open lid. This allows you to get just the right recording angle.

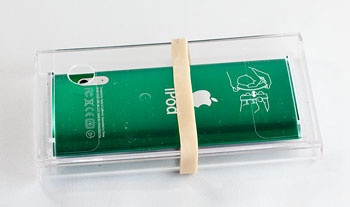
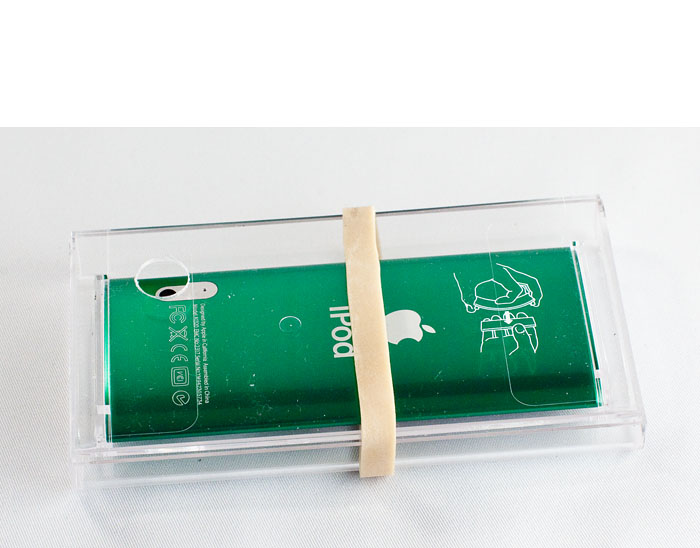
When you're done recording, place the holder in the lid and secure with a rubber band. You can leave the nano in the holder if you know you're going to record more video soon, or put it back in its regular case.

A couple of additional tips: 1) drill a largish hole because the microphone is next to the lens and you'll get better audio pickup. 2) if you drill a second hole on the side of your stand, you can plug in the headphones also and use the stand for hands-free movie viewing.

One thing that I always mention to people who purchase Apple devices is to hang on to the packaging. There are always components that they can repurpose later for accessories such as this DIY nano stand.

More DIY Projects

You can find more do it yourself projects in the DIY section of The Digital Story, including:

DIY Copy Stand for the iPhone 3GS

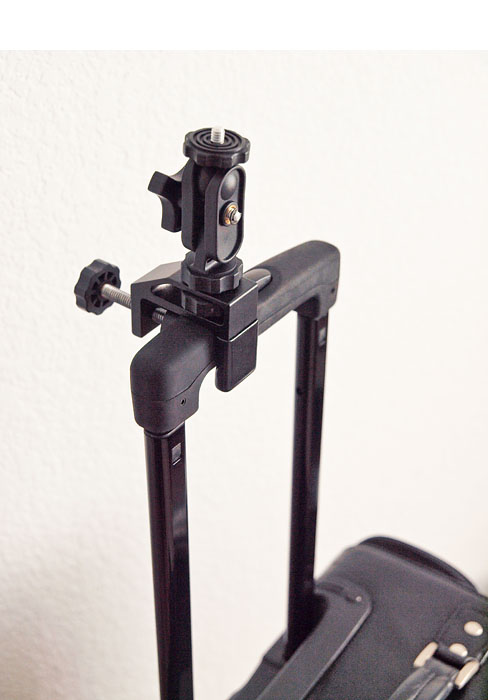
Convert Your Roller Suitcase into a Tripod or Mic Stand

DigiScoping with a Compact Camera


twitter.jpg Follow me on Twitter

-


Digiscoping is the art of using a spotting scope to increase the lens magnification of a compact camera. I first heard about the practice when birders with expensive monoculars would try to get photos of their subjects by holding their digicams up the eyepieces of their scopes and taking pictures.

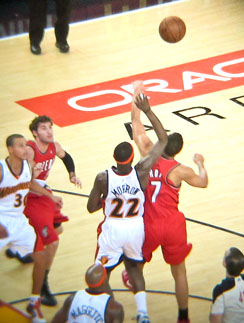
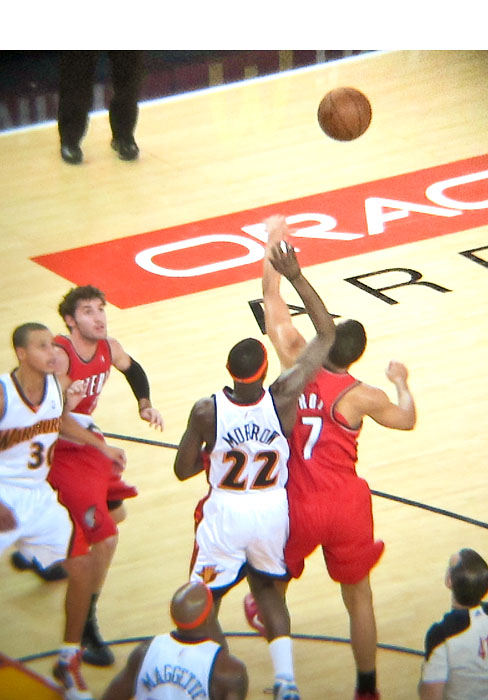
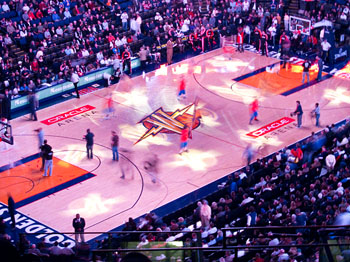
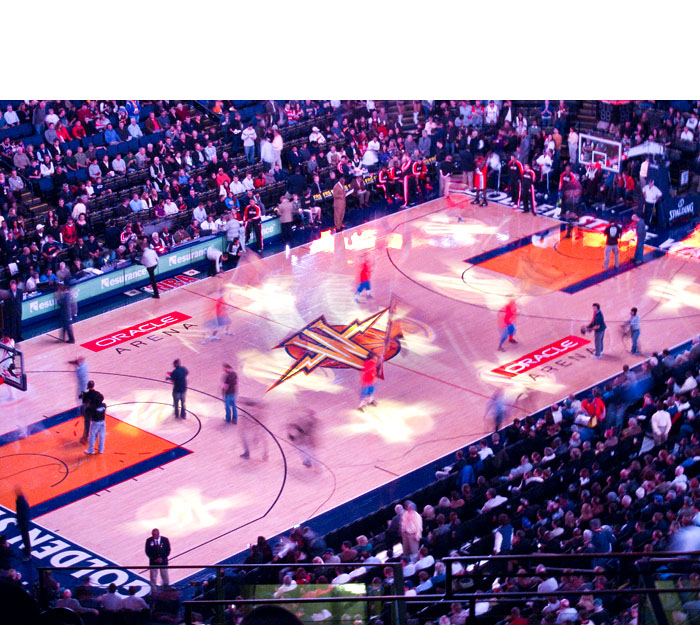
When I was at the very top of Oracle Arena Friday night for a Warriors game, I had the Canon PowerShot S90 in my pocket and an Orion EagleEye 8x32 Wide-Angle Monocular around my neck.


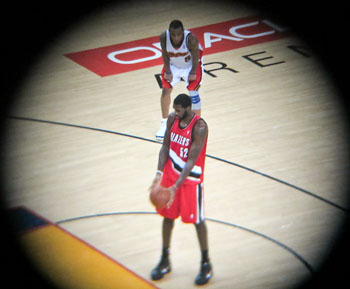
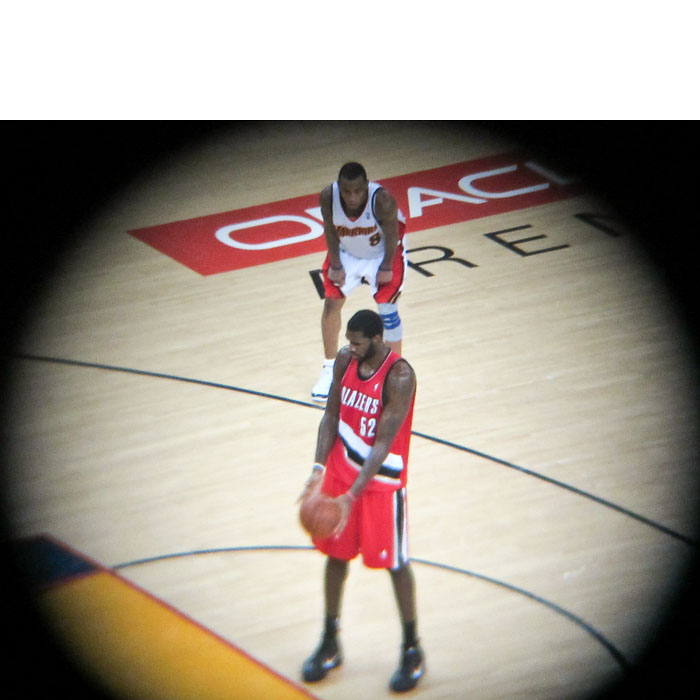
Both of these images are from the upper part of the second deck at Oracle Arena in Oakland, CA. The top shot was digiscopped while the bottom image was captured with the Canon S90 at 105mm. (Click to enlarge.)


Right before tip-off, I had what I call a Reese's moment: what if I did my own brand of digiscoping using the monocular as a tele-extender for the S90? After all, the S90 can handle high ISOs and the zoom lens seemed like it would fit OK with the eye piece for the Orion. And did I mention that I was way up there in the cheap seats?

My first digiscoping inclination was to zoom the S90 all the way out to 105mm so the image filled the frame while I held the monocular in front of the lens. But I had a hard time getting a sharp image with this configuration. So I then back it off to 85mm, and finally got the best results at 50mm. The only downside to this approach was that I had an image circle in the middle of the frame with black all around it. But it was worth it to get the sharper picture. You can see this effect with the Greg Oden photo. For the shot of the jump ball (top of the article), I cropped out the black area.


Here's Greg Oden of the Portland Trailblazers preparing to shoot a free throw. The scoping effect will be cropped out later. (Click to enlarge.)


I played with a lot of settings on the S90, and most of them worked OK. I had to keep the ISO at 800 or above to deal with the lighting and the optics. At one point, I switched to the Low Light setting on the mode dial, and just left it there. Even though I lost some resolution doing so, it was just so easy, and the images looked better than at many of the other settings.

Obviously this kind of DIY rig isn't for serious work. If I were covering this game as a shooter, I'd be down on the floor with my DSLR and fast glass. But on this night, I was just a spectator in the cheap seats with a little time on my hands. And this is yet another example of: the best camera is the one you have with you.

More Articles About the Canon S90

Five Lesser Know (but very cool) Features on the Canon S90

Canon S90 Raw Processing Comparison: DPP vs ACR 5.6 RC

Did Canon Really Improve Image Noise with the PowerShot S90?

"Compacts for Serious Shooters" - Digital Photography Podcast 201

Is the Canon S90 the New G11?


twitter.jpg Follow me on Twitter

-


Of all the DIY projects we write about, light modifiers are still my favorite. I have a nifty collection of flash diffusers and unusual lighting tricks that I think you'll want to keep in your back pocket.

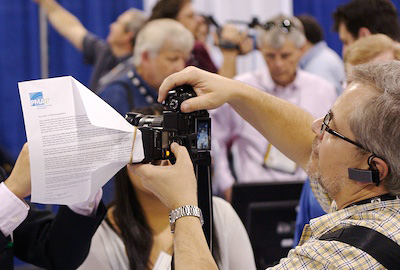
The DIY Flash Diffuser with Paper and Rubber Band is one of the coolest and simplest devices to date. All you need is an old press release and a rubber band.

paper_flash_diffuser.jpg

And don't forget about this Ring Flash Diffuser for a compact camera. Finally, a legitimate use for styrofoam.

Here's a collection of Five Poorman's Lighting Mods from DIYPhotography.net. I think the barf bag flash diffuser might be my favorite from this list.

And finally, one of the all time classics is to use a windshield reflector from your car as a fill light for outdoor portraits. My favorite of these reflectors (designed to keep your car cool on hot days) has white on the inside and silver on the out. This gives you two surfaces to choose from depending on how intense your fill light needs to be. Give it a try!


twitter.jpg Follow me on Twitter

-


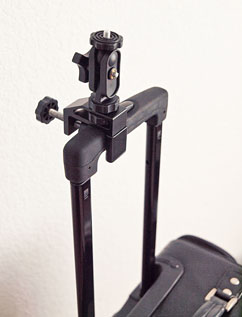
If you travel with a roller suitcase, then you can easily convert it into a tripod for long exposures through the hotel window and for general photography work around the room. And the best part is, this conversion only adds another 6 ounces to your travel load.

All you have to do is position the suitcase where you need your "tripod," extend the handle, then attach the Pedco UltraClamp Assembly ($23.25) and mount your camera. The UltraClamp can support any compact camera, and most light DSLRs such as the Canon Rebel T1i with kit lens. I've used this rig for years, and the UltraClamp works as well today as it did when I first bought it. Plus, you can mount it to chairs, tables, or anywhere else the clamp will tighten. Unlike other rigs of this ilk, the UltraClamp includes a ball head, so chances are you'll be able to position the camera exactly as you need.

When I'm in big cities, I love taking night shots through hotel windows. I'm usually up fairly high and have a good perspective on the hustle and bustle below me. Be sure to turn off room lights if you're shooting through glass, and get the camera lens as close to the window as possible. I also recommend using the self-timer to ensure you don't jar the camera when you press the shutter button.

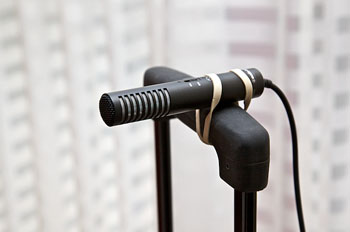
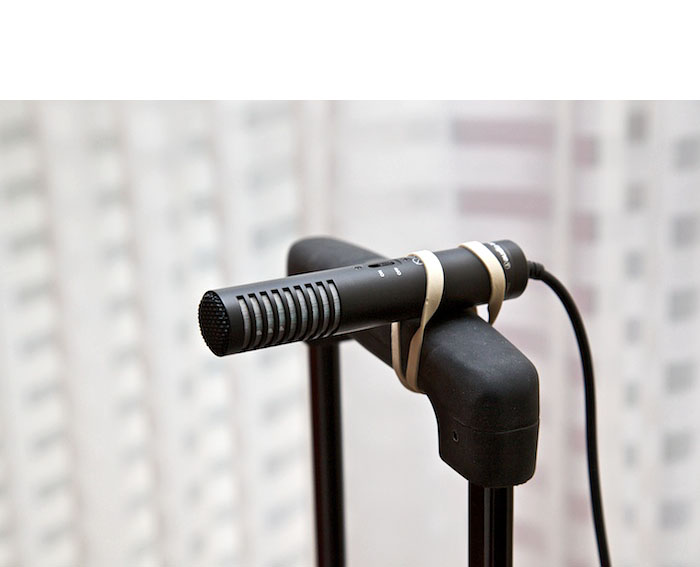
But wait... there's more! I also make sure I have a few heavy duty rubber bands packed when I travel. They come in handy for all sorts of tasks, including making this portable mic stand from the extended suitcase handle. The one thing I don't want to do is hold the mic when I record TDS podcasts on the road. Those rustling sounds are quite annoying. So I mount the microphone on the suitcase handle and sit on the edge of the bed to record the show. It works great.

Roller suitcases are definitely handy in the airport as you travel from one terminal to the other. But they're also useful once you reach your destination... that is, if you've packed a few key accessories to transform them into creative tools.


twitter.jpg Follow me on Twitter

-


Editor's Note -- Recently I was corresponding with TDS member Brian F Wilkie about a project he was working on. Brian had figured out how to create a unique type of photo album where he output pages with snapshots printed on them, then bound these pages together in a binder. I loved this idea and asked Brian to write a short article for us, which he kindly did. So, in his own words, here's how Brian Wilkie creates his unique output, complete with Lightroom templates so you can do the same. Thanks Brian!

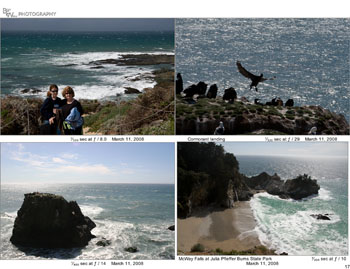
Using Lightroom 2.4, a Canon Pixma Pro 9000 printer, and Red River Paper's excellent Premium Gloss DUO 8.5" by 11" letter-sized stock, I'm able to  create a handsome looseleaf bound album quickly, and fairly easily.

In Lightroom, I start with a  grid filter which gathers all images taken in a  particular year with a rating of 1 star or above. The choice of rating will vary with how hard you are on yourself and whether you want to include family snapshots as well as fine art images.  Select all of the pictures (command A), then create a collection called Album 20XX (filling in the appropriate year). Now, you can use delete to remove any images which are repetitive, virtual copies you made for different print sizes, or black and white versions. By the end of the process you will have a good idea of how big a printing task you have undertaken.

Printing

You can download a pair of print templates that make good use of the real estate on a US letter page, as long as you have a printer that can handle borderless printing. These templates provide 4 prints up at 5.5" inches by 3.67" inches on a page. I use the "rotate to fit" option so that portrait mode images are printed as large as possible, although this means that on some pages viewers will need to turn the binder on its side to see the pictures oriented correctly. I also enable Page Number under Page Options to help keep track during printing, and the Identity Plate option for my Logo. Finally, the Photo Info option is enabled using Capture Exposure Date as a template. Be careful not to be too wordy in captions or the text will wrap around and the photo size may be restricted.

Printing is done using the appropriate ICC profile downloaded from Red River Paper with Print Sharpening set to "High" and Media type to "Glossy".

The printing itself is completed in two passes. First, the User Template "4up letter+data Odd" is selected, then Print is clicked. At this point, settings options become printer and computer operating system specific. As I mentioned before, I use a Canon Pro9000 on a Mac running OS 10.5. In the print dialog box under Paper Handling, I select Pages to Print - Odd Only. I also select Page Order - Normal. Under Quality and Media I select Media Type - Glossy Photo Paper and Print Quality - High. Under Borderless Printing, I select Amount of Extension - Min. This allows the page number to be visible on the final print since Lightroom puts this in the extreme lower right corner of the page.

After the first pass, carefully flip over the set of odd pages and put them into the paper feed. The top sheet should now be the back side of page one, but careful experimentation is called for here. Select the user template "4up letter+data Even" and click Print. Now under Paper Handling change  to Pages to Print - Even Only.

All you need now is a good quality 3-hole punch. Remember, this is heavy paper stock. Then put the pages in to a quality 3-hole binder.  I use a nice leather one from the local office supply store. The end result is a good looking, well printed, and durable album. By my calculation the cost is around 28¢ per image, less if you shop around for discounted Canon ink.

Using Old Lenses on New Cameras

Of all the cameras I had in the past, my favorites were made by Contax. The first model I bought (when I had absolutely no money) was the Contax 139 with the Zeiss 50mm f/1.7. I later added the Zeiss 35mm f/2.8 and 135mm f/2.8 lenses. It was thrilling every time I picked up the camera. Over the years, I had other favorite bodies too, including the 167MT and RX.

After I made the transition to digital photography, I sold much of my film equipment. I did keep, however, my absolute favorites. I wasn't quite sure why at the time; I just didn't want to part with everything from the past. So I still have the Contax RX body, 5 prime lenses, and the pocketable Contax T. I also kept the Hasselblad 500C with both the 80mm and 150mm lenses.


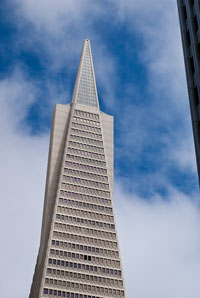
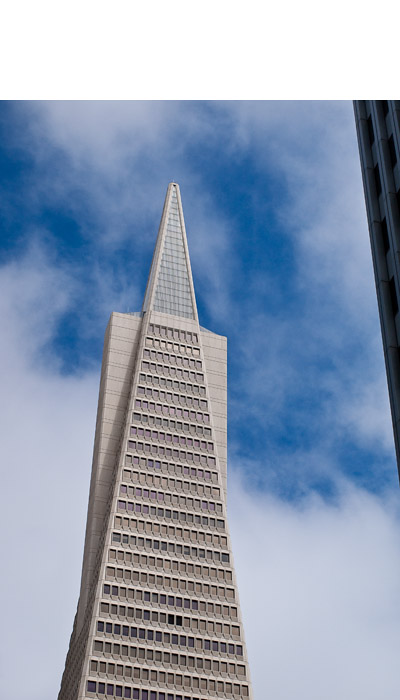
The Transamerica building in San Francisco. Shot with an Olympus E-P1 with a Zeiss Distagon 35mm lens mounted. Photo by Derrick Story. Click to enlarge image. See more images with this rig on the TDS Flickr page.


I didn't use any of this equipment for a long time. Then, when I started shooting with the retro-looking Olympus PEN E-P1 camera, I got a hankering to try the collection of Zeiss lenses on that body using the Rayqual Micro Four Thirds adapter for Contax M lenses. I wrote about the experiment in the article Zeiss Lens on Olympus E-P1? Oh Yeah!. There are some good reader comments there too.

When I wrote the article, I promised to publish shots using a Zeiss lens on the E-P1. My opportunity appeared this week when I had meetings in San Francisco. I packed the Olympus with the 35mm Zeiss Distagon lens, and clicked photos as I walked from one appointment to the next. You can look at the set of images on the TDS Flickr page. These are Raw files processed in Adobe Camera Raw.

I had a great time shooting these images. I was manually focusing with the well-damped focusing ring in the Zeiss Distagon. I set the E-P1 in Aperture Priority mode and used the click-stop aperture ring on the Zeiss lens to set the f/stop. In all honesty, I felt more like an artist than a snapper using this rig.

Now that I have the bug, I'm going to see about mounting these lenses on my Canon 5D Mark II. Since it's a full frame sensor, everything should look as it did when they were mounted on my Contax bodies. I'll keep you posted. In the meantime, I'm going to continue to shoot with the Olympus E-P1 and my collection of Zeiss glass.


twitter.jpg Follow me on Twitter

-