 The cooler inside the rear boot of my SUV with the luggage cover on.
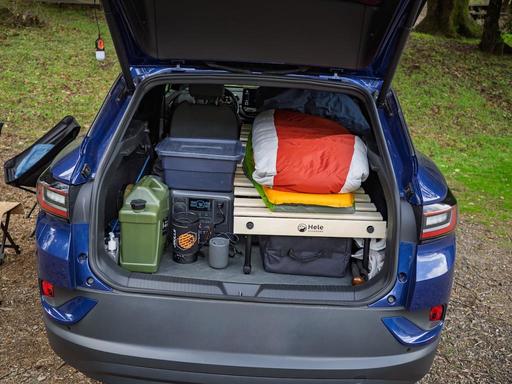
Storage space is precious when car camping. Balancing the luxuries we want onsite with efficient packing is an ongoing challenge. I've discovered this is particularly true with portable refrigerators.
The BODEGACOOLER 36L single zone fridge is the perfect balance of ample internal storage space and portability for SUV camping. It's big enough to preserve food for a 5-day trip (or more depending on your needs), but fits snugly in the boot of my VW ID.4 leaving plenty of room for other gear.
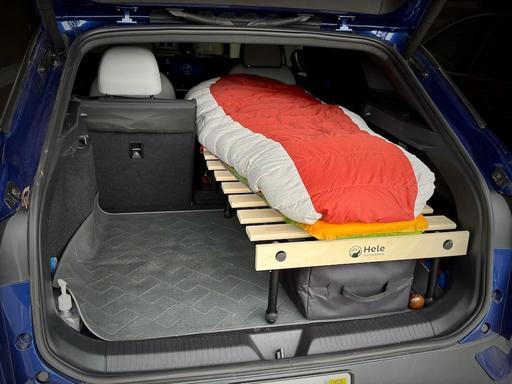
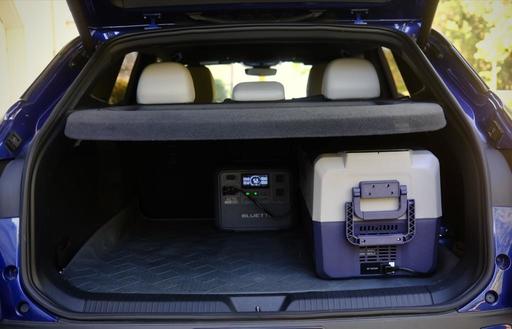 The low-profile design of the cooler fits under the luggage cover in the rear boot.
The low profile design (only 15" high) allows me to keep the car luggage cover intact so all of my gear, including the cooler, is out of sight from prying eyes. At 27.5" long, I can position the unit longways in the boot, up against the inner sidewall maximizing its efficient footprint.
The upshot is that I can pack my meals and drinks for the entire trip, yet still have lots of room in the back for my cook kit, power stations, water reservoir, and folding furniture. When I lower the rear hatch, no one can tell that any of that is in there because the luggage cover hides all of it.
Cooling Efficiency
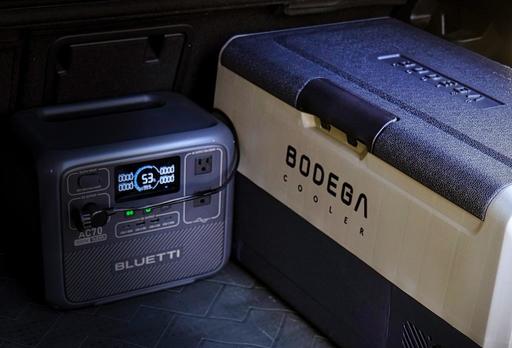
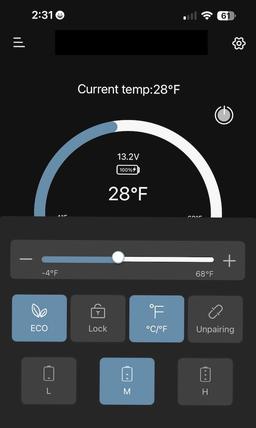
The BODEGACOOLER 36L is very easy on my BLUETTI Power Station AC70. When running in Eco Mode, which is all I ever need, it draws 26 watts. Once it reaches the set temperature, the unit kicks on a few times an hour, then shuts off.
I keep the temp at 28 degrees F. I've found that setting provides me with wonderfully chilled drinks but doesn't freeze them. I store the food on top of the beverages and those items also remain in perfect shape. There's a little shelf on the right side of the cooler's interior (the cooling unit is below it), and I've found that's the prefect area for fruit and produce.
Over a 1-week test, I ran the 36L 24 hours a day plugged into the BLUETTI AC70, which was refueled by a 100 watt Jackery solar panel. The panel was in direct sun for 5 hours daily. At the end of the week, I still had energy in the Bluetti even though it had powered the fridge round the clock.
If you're living off the grid for an extended period of time, a dedicated 100 watt solar panel and a 768 watt power station could maintain your refrigeration continuously as long as you have sun during the day.
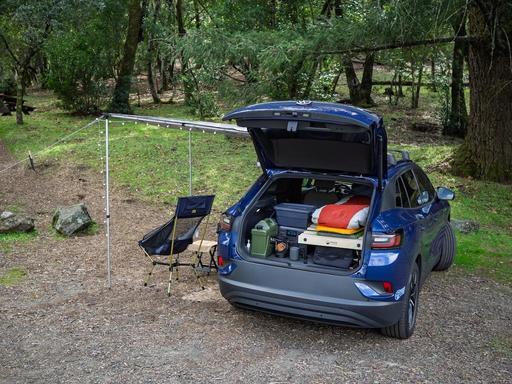
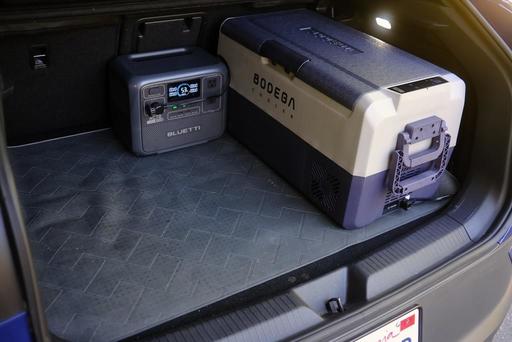 A portable power station can run the Bodega for more than a day.
If you aren't using a solar panel, and just a power station, then you will have to pack additional electrical storage or find a campsite with hookups.
In my case, I bring two BLUETTI AC70s for a 3-day trip when no hookups are available. That gives me enough juice to power the fridge and top off my mobile devices. On average, the 38L draws about 70 percent of the battery over a 24-hour cycle.
There are other modes for this BODEGACOOLER. But I've found that ECO with the Medium battery setting is a sweet spot for most situations.
How Quiet is the BODEGACOOLER?
When the motor is running, the cooler emits about 45 decibels of noise. Whether or not that's too loud depends on your situation.
I sleep in a rooftop tent, (TentBox Go) and the fridge is in the back of the car below me. So I don't hear it at all.
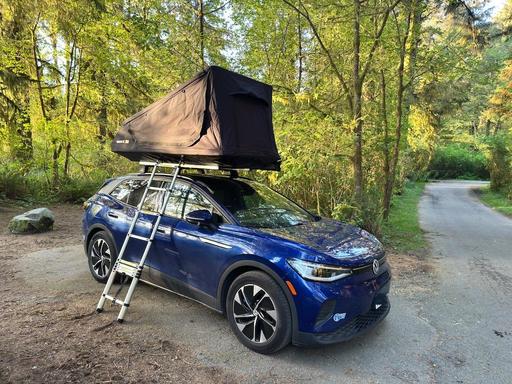 I sleep in a Rooftop Tent with the cooler stashed below in the boot. So in this situation, refrigerator noise isn't an issue.
On motel days, I haul the BODEGACOOLER inside the room and keep it running via the AC outlet. In that situation, I do hear it at night, but it isn't too loud, because of the size of the room.
But, if I were in confined quarters, such as sleeping in a truck camper, the cooler would most likely would be noticeable when it kicked on in the middle of the night. Whether this would be a problem or not depends on how light of a sleeper you are. But it's definitely something to consider when deciding where the cooler is going to reside at night.
Nice Design Touches
The BODEGACOOLER 36L has many helpful features that make camping just a bit more enjoyable.
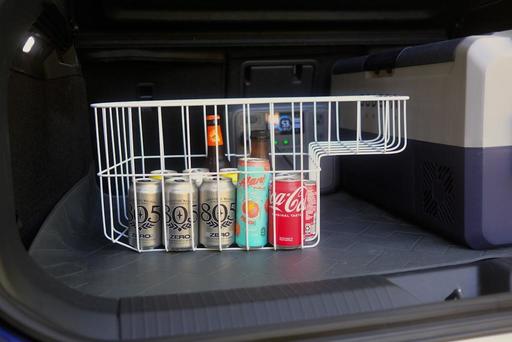 The internal basket makes it easy to load the cooler without having to lug the entire unit around.
I love the internal removable basket. I can leave the cooler in the back of the car, bring the basket to the kitchen, fill it up, then carry the goods back to the car and drop the basket in the cooler. It's really nice not having to lug the cooler inside the house to load it.
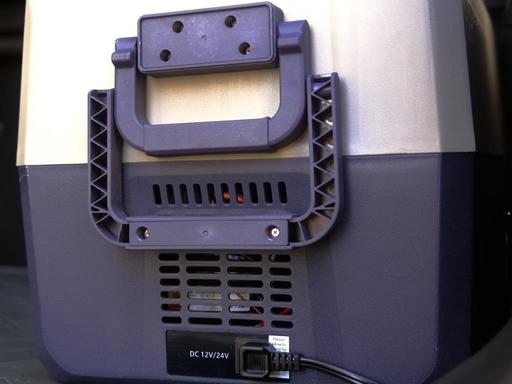 Clever handle system works for both carrying the unit and rolling it.
When I do have to move the entire unit, the wheels and pull handle make that trip much easier on my back. I pull it along like a wagon and don't have to lift it until it's ready to go in the car or on a picnic table.
An internal LED light switches on when the lid is opened. So regardless of the ambient lighting, I can always find what I'm looking for inside.
There's a USB-A outlet beneath the LCD control panel. This is handy for topping off small devices or powering string LEDs for the campsite.
And speaking of the control panel, it's easy to use! I can change temperature, cooling mode, and check Bluetooth status with a glance. Most of the time, I'm using the iOS app on my iPhone to adjust settings or check temperature. (There's an android version too.) This is particularly handy while I'm on the road because I don't have to get out of the car and open the boot to check on the fridge. All the information I need is on my phone.
Specifications and Features
- Number of Doors: 1
- Defrost System Type: Automatic
- Voltage: 12 Volts
- Form Factor: Compact
- Cooling Method: Compressor
- Adjustable Temperature Control: Yes
- Has Convertible Freezer: Yes
- Temperature Range: -4F to 68F
- Capacity: 38 Quarts
- Item Weight: 15 Kilograms (33 pounds)
- Refrigerator Net Capacity: 36.36 Liters
- Real World Capacity: 41 cans soda, or 21 bottles water, or 13 wine bottles
- Anti-Shaking Protection: Yes - When car is climbing at an inclination angle of 30 degrees, the portable freezer can still run stably.
- Bottom Drain Hole: Yes
- Accessories Included: 1 12V cigarette lighter connector,1 AC wall plug, 1 AC wall plug adapter and user manual.
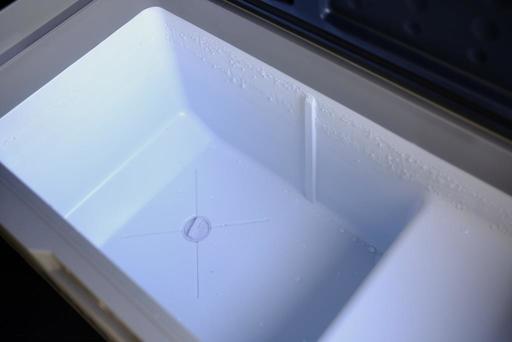 If something does spill... a handy drain plug in the bottom.
Bottom Line
The BODEGACOOLER 36L single zone fridge is currently available on Amazon for $189. That is a great value for a well-designed, eco-friendly fridge that can also operate as a freezer.
But the thing I like best about the BODEGACOOLER 36L is that it fits wonderfully in the back of my SUV, and its low profile allows me to use the luggage cover. Yet, I have enough capacity for a multiple-day camping trip or tailgate party with friends.
(This low profile design does come in different capacities. You can check out all the models at the BODEGACOOLER web site.)
Its 12-volt system is versatile. While on the road, I plug it into the 12-volt outlet in the boot of my car. Once I'm in camp, I switch over to the BLUETTI Solar Generator AC70 that is refreshed by a 100 watt solar panel. In motel rooms, the AC adapter makes it easy to plug in the wall.
And the absolute best part? I'll never have to buy another 10 lb. bag of ice.
Highly recommended.
Other Articles in This Series
The Bluetti AC70 Power Station Review - Off-the-Grid Freedom.
The Jackery Explorer 300 Plus Review - Power Your Roadtrips.
Jackery 40W Mini Solar Panel for Your Cameras and Devices.
Roadtripping with the BODEGAcooler Mini 12V Portable Fridge/Freezer - A Review.
Hot Coffee, Soup, on the Road with this Portable Electric Kettle.
A Hands-On Review of the TentBox Go Roof Top Tent.
The BodegaCooler Dual-Door 48-Quart Review.
The Hele Box Car Camping Platform Review.
Perfect for SUV Camping - The Bodegacooler 36L Car Refrigerator Review.