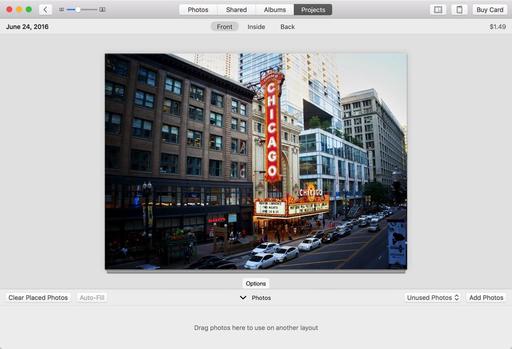
I've been printing fine art greeting cards for years. But the process has never been easier than lately using Apple's Photos app.
In addition to integrating these projects with my overall Photos library, I have dozens of stylish templates to choose from. And since Photos saves each card that I make as a project, I can easily reopen it, reprint it, or change the photo all together.
I write about this process in my latest book, The Apple Photos Book for Photographers, which you can download right now. But I'll also share the basic steps right here so you can create your own works of art at home with an inkjet printer.
Creating a Fine Art Greeting Card with Apple Photos
I use Red River Paper because it offers a wide selection of card stock at very affordable prices. (Plus you can get envelopes and ink there too.)
For this project I'm using one of my favorites, 60 lb. Polar Matte double-sided 7" × 10" (catalog #1958). It's a bright paper with a nice tooth that feels good in the hands. Your cards will look and feel like works of art.
The reason why you want to go with 7" × 10" paper is because it folds down to a standard 5" × 7" card - the same dimensions that Apple uses for its folded pieces. In a pinch, you could cut down a larger sheet if necessary. But the Red River cards are also scored in the middle, which makes folding so much easier and professional looking.
As for printing instructions, I'll remind you that what appears in the dialog box is based on the print driver. So what you see on your computer might look different than what I'm showing here. Hopefully, you'll be able to take this information and adjust accordingly.
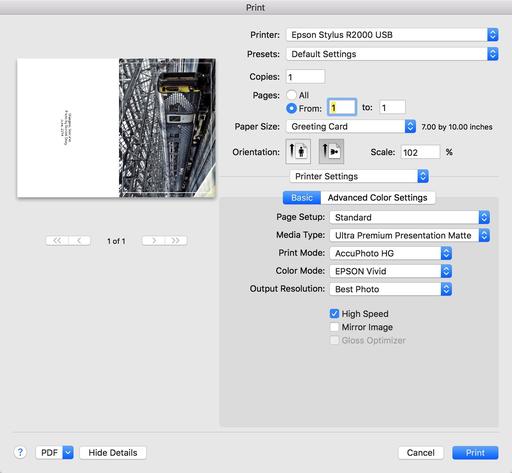
Instead of clicking on the Buy Card button, go to File > Print. You should see something like in the figure above. If you're seeing far less information on your computer, click on the Show Details button at the bottom of the dialog. That should expand the dialog box.
Since I'm only printing the outside of the card (I like to leave the inside blank for a personal message), I choose "Print from 1 to 1." Then we get to paper size. Chances are very good that you're not going to have a 7" × 10" option in this popup menu. But what you will have there is a Manage Custom Sizes option at the bottom. Choose that, and make your own preset. I named mine Greeting Card. The computer will remember the 7" × 10" preset you just created. So you only have to do this the first time.
After you have the paper size right, the card should look pretty good in the preview window. Mine came up just a tad short on the edges. So I set scale for 102 percent. That fixed the problem perfectly.
Now all that's left are the printer settings. You can add those in the popup that's labeled Layout. Click on it, and choose Printer Settings from the list. The most important part is having Media Type set correctly. In my case, the printer needs to know that I'm using matte paper. Check your settings one more time, then print!
Watching the card slowly emerge from the printer is the closest thing we have in digital photography to seeing an image magically appear in a tray of developer. Both are exciting. Let the card cure for an hour or so at room temperature before folding - that is, unless it's one of those emergency jobs you're making as you head out the door to an anniversary party. Then fold and go!
As you're sitting there in the car with the card in your hand, you might feel a little something. Let it wash over you and enjoy it. That's the feeling of being an artist.
The Apple Photos Book for Photographers
For photographers who are more than just casual snapshooters, or who are making the transition from Aperture or iPhoto, The Apple Photos Book for Photographers shines a light on the sophistication of this app and the ecosystem it taps into. Available as an eBook now, and coming to print later this year.
Get it for $15 using checkout code APPLE15!
Want to Comment on this Post?
You can share your thoughts at the TDS Facebook page, where I'll post this story for discussion.


